This is a guest post by Scott Kelby, author of The iPhone Photography Book.
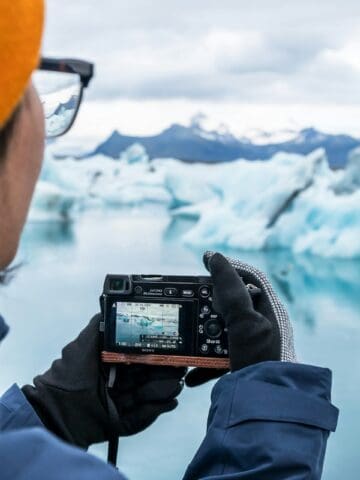
One of the most impressive features of the iPhone is its ability to shoot super-wide panorama images that capture way more of the scene we're standing in front of than a standard iPhone picture would give.
Since you see more of the scene, it gives the viewer a sense of being there. That's a massive advantage for the outdoor photographer.
Not only does it capture more of the scene, but the fact alone that it's a long, thin panoramic image-and not the standard-sized iPhone photo we see day in and day out-makes it more interesting to the viewer.
Besides giving us a more expansive view of the scene, shooting a "pano" gives us a much higher-resolution image because it's a bunch of photos all stitched together to make one big image.
This is helpful if you decide to print your pano (more on this in a moment) because you'll have more than enough resolution to make a giant print.
By the way, if you've ever seen an Apple billboard on the side of a building, 20-stories high, and it says, "Shot on the iPhone," and you thought, "Oh, come on now, how can that be?" it's because they got the resolution to put up that massive image by shooting in Pano mode.
You're not looking at just one iPhone image on the building-that's a whole bunch of photos stitched together to make one giant image.
Pro Tip: Use an iPhone case to help protect your phone from accidental drops and damage while shooting outdoors.
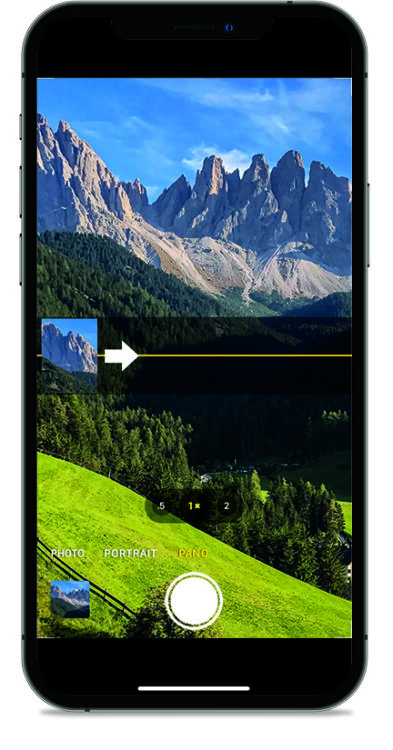
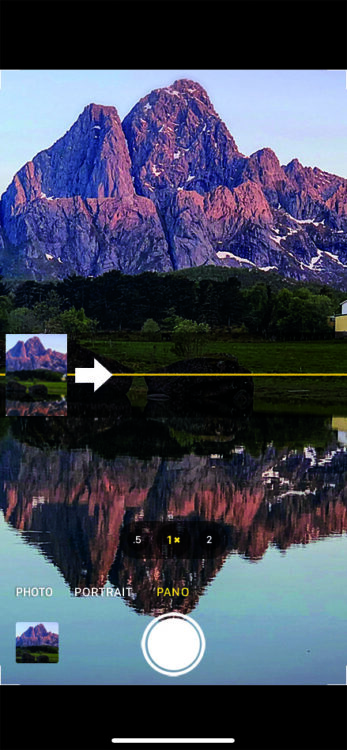
Plus, shooting a pano is easy: You open the Camera app on your iPhone, and right above the round shutter button, you'll see a list of the Camera app's shooting options.
The default is Photo, so swipe to the left on that list until Pano is selected and appears right above the shutter button.
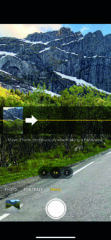
You'll now see a large, white arrow on a thin, yellow line appear in the center of your screen.
Press the shutter button to start taking your pano, and as you start panning across the scene from left to right, you will want to keep that white arrow as centered on that thin, yellow line as possible so you get the best results.
This is much easier to do if you pan slowly through the scene (and, if you go too fast, it will tell you, right onscreen, to "Slow Down").
When you're done, tap the shutter button again, or it will automatically stop when you get to the end of the yellow line.
That's all there is to it: open the Camera app, choose Pano mode, and keep that white arrow centered along that yellow line as you pan, and your iPhone will do the rest.
So, now that you know how to make a panorama on iPhone, I want to share five of my favorite tips for shooting them to help you capture your best outdoor pano images. Here we go!
Table of Contents
Shooting iPhone Panoramas
1. You Don't Have to Only Shoot Wide Panos
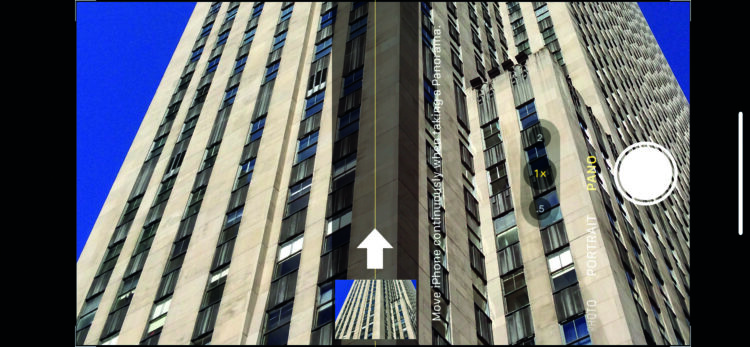
Although we consider panoramic images wide, your iPhone's pano feature works just as well for shooting tall panos.
So, the next time you're standing in front of a waterfall, a soaring sequoia tree, or a fantastic tall building, turn your iPhone sideways (so that the white arrow and yellow line are pointing straight up).
Start at the waterfall's base (tree, building, etc.) and pan up to its top. It will stitch this tall image together perfectly, just as it does with the wide panos.
2. Don't Shoot "Too Wide"
If you are thinking of sharing your image on Instagram or Facebook, don't make your pano too wide because it has to fit in a horizontal space in the app, and if you make a very wide pano, it's going to be tiny when you post it.
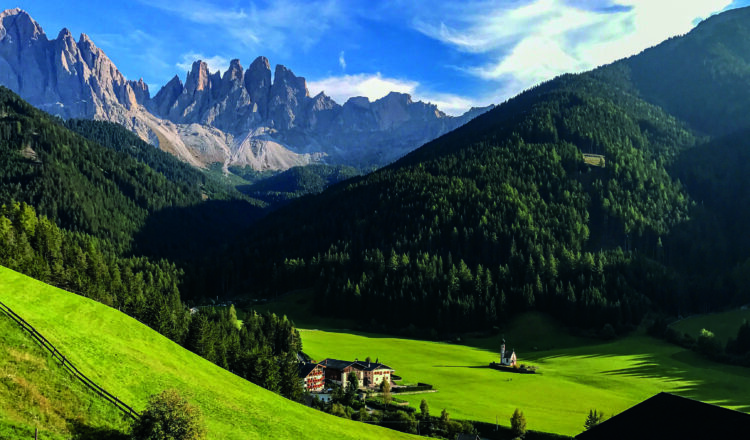
But, beyond that, panos tend to look their best when you don't go too wide-I try to go around twice or three times as wide as a regular photo when I'm panning, and you'll usually wind up with better-looking panos.
3. Don't Let the Arrow and Line Distract You
When we shoot in Panorama mode on iPhone, that white arrow and the yellow line on your screen can take over your composition.
By that, I mean it's easy to focus on putting the yellow line where it's easy to see that you're more focused on that line than composing a great shot.
Your pano might look better if your camera is aiming a bit upward, or downward, or at some angle, and that's the most important thing-making an interesting composition-not centering the already centered line and arrow.
So, try to ignore where that white arrow and yellow line are while you're composing the shot and instead, mentally focus on what would make the most interesting pano of the scene you're standing in front of.
Only start paying attention to the arrow once you press the shutter button (and keep it centered on the yellow line) and ignore it the rest of the time. You'll come away with better-looking, more intentional panos.
Also, try not to put that yellow horizontal line centered right along the horizon. That makes for some boring panos.
Either put the horizontal line in the bottom third of your scene (if the sky is fascinating, so your pano shows more sky), or at the top third (if the sky is dull and you want to show less of it), and you'll make more dynamic panos.
4. How to Shoot a Backward Pano
We generally shoot our panos from left to right (the same way we read), but if you want to shoot your pano from right to left, it's easy: tap once directly on the white arrow near the left side of your screen, and it flips over to the right side, facing back toward the left.
Now you can shoot your pano from right to left.


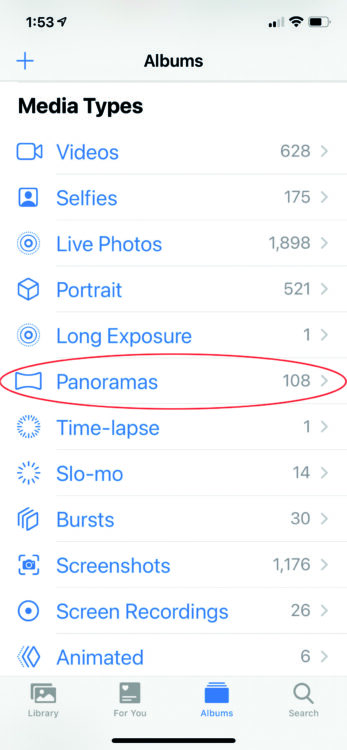
By the way, when you shoot panos, it's easy to find them later because Apple's Photos app automatically separates all your panos into a separate album.
To find all of your panos fast, launch the Photos app, tap on Albums at the bottom of the screen, and then scroll down (keep scrolling-it's down there) until you come to Media Types, and you'll see an album already there called "Panoramas."
Tap on it to see all your panos sorted by the time and date you took them.
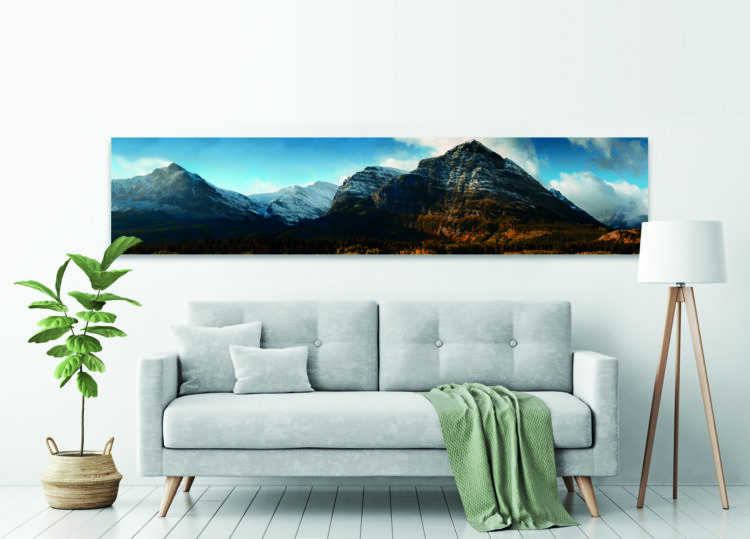
5. Printing Panos
Panoramic images look fantastic on your home or office walls, and a great way to print them is to print them on canvas.
Because canvas, by its very nature, is so porous, it's also very forgiving on things like sharpness or resolution, so your iPhone panos look great when printed on canvas.
The source I use to print them is canvasdiscount.com, and if you sign up for their newsletter, about every two weeks, they will send you an email with deals that are so cheap you can't believe they're legit.
Literally, like 90 percent off on these- or two-day-only discounts, and I wait until those deals come around to make my canvas prints.
I just looked on their site, and their 16x30" cinema-format canvas with a standard frame is only $39, which is incredible. And, that's not even the newsletter special-that's just listed on their site for anybody.
Related: Create Custom Maps with Visited Travel App
Well, there you have it-five of my favorite tips for making (and printing) your best iPhone panorama images ever!
______
ALL IMAGES BY SCOTT KELBY UNLESS OTHERWISE NOTED.