Go Backpacking

  • About
  • Travel Tips
    • Accommodations
    • Budgeting & Money
    • Adventure Travel
    • Food & Drink
    • Gear & Gadgets
    • Packing Tips
    • Travel Blogging
    • Travel Insurance
    • Trip Planning
    • UNESCO Sites
  • Destinations
    • Africa
      • Botswana
      • Egypt
      • Ethiopia
      • Morocco
      • Rwanda
      • South Africa
      • Tanzania
    • Asia
      • Cambodia
      • China
      • Hong Kong
      • India
      • Indonesia
      • Japan
      • Laos
      • Malaysia
      • Nepal
      • Philippines
      • Thailand
      • United Arab Emirates
      • Vietnam
    • Europe
      • England
      • France
      • Germany
      • Greece
      • Iceland
      • Ireland
      • Italy
      • Portugal
      • Spain
      • Switzerland
      • Turkey
    • North America
      • Canada
      • Costa Rica
      • Cuba
      • Guatemala
      • Mexico
      • Nicaragua
      • Panama
      • United States
    • Oceania
      • Australia
      • French Polynesia
      • New Zealand
    • South America
      • Argentina
      • Bolivia
      • Brazil
      • Chile
      • Colombia
      • Ecuador
      • Peru
  • Advertise
menu icon
go to homepage
  • About
  • Travel Tips
    • Accommodations
    • Budgeting & Money
    • Adventure Travel
    • Food & Drink
    • Gear & Gadgets
    • Packing Tips
    • Travel Blogging
    • Travel Insurance
    • Trip Planning
    • UNESCO Sites
  • Destinations
    • Africa
      • Botswana
      • Egypt
      • Ethiopia
      • Morocco
      • Rwanda
      • South Africa
      • Tanzania
    • Asia
      • Cambodia
      • China
      • Hong Kong
      • India
      • Indonesia
      • Japan
      • Laos
      • Malaysia
      • Nepal
      • Philippines
      • Thailand
      • United Arab Emirates
      • Vietnam
    • Europe
      • England
      • France
      • Germany
      • Greece
      • Iceland
      • Ireland
      • Italy
      • Portugal
      • Spain
      • Switzerland
      • Turkey
    • North America
      • Canada
      • Costa Rica
      • Cuba
      • Guatemala
      • Mexico
      • Nicaragua
      • Panama
      • United States
    • Oceania
      • Australia
      • French Polynesia
      • New Zealand
    • South America
      • Argentina
      • Bolivia
      • Brazil
      • Chile
      • Colombia
      • Ecuador
      • Peru
  • Advertise
search icon
Homepage link
  • About
  • Travel Tips
    • Accommodations
    • Budgeting & Money
    • Adventure Travel
    • Food & Drink
    • Gear & Gadgets
    • Packing Tips
    • Travel Blogging
    • Travel Insurance
    • Trip Planning
    • UNESCO Sites
  • Destinations
    • Africa
      • Botswana
      • Egypt
      • Ethiopia
      • Morocco
      • Rwanda
      • South Africa
      • Tanzania
    • Asia
      • Cambodia
      • China
      • Hong Kong
      • India
      • Indonesia
      • Japan
      • Laos
      • Malaysia
      • Nepal
      • Philippines
      • Thailand
      • United Arab Emirates
      • Vietnam
    • Europe
      • England
      • France
      • Germany
      • Greece
      • Iceland
      • Ireland
      • Italy
      • Portugal
      • Spain
      • Switzerland
      • Turkey
    • North America
      • Canada
      • Costa Rica
      • Cuba
      • Guatemala
      • Mexico
      • Nicaragua
      • Panama
      • United States
    • Oceania
      • Australia
      • French Polynesia
      • New Zealand
    • South America
      • Argentina
      • Bolivia
      • Brazil
      • Chile
      • Colombia
      • Ecuador
      • Peru
  • Advertise
×
Home

Asia Tour Advisor: Vietnam and Cambodia Tours for First-Time Travelers

Planning a first trip to Southeast Asia often comes down to one key decision: go independent or book a guided tour. Asia Tour Advisor operates as a middle ground, delivering flexible Vietnam and Cambodia tours designed for travelers who want structure without feeling boxed in.

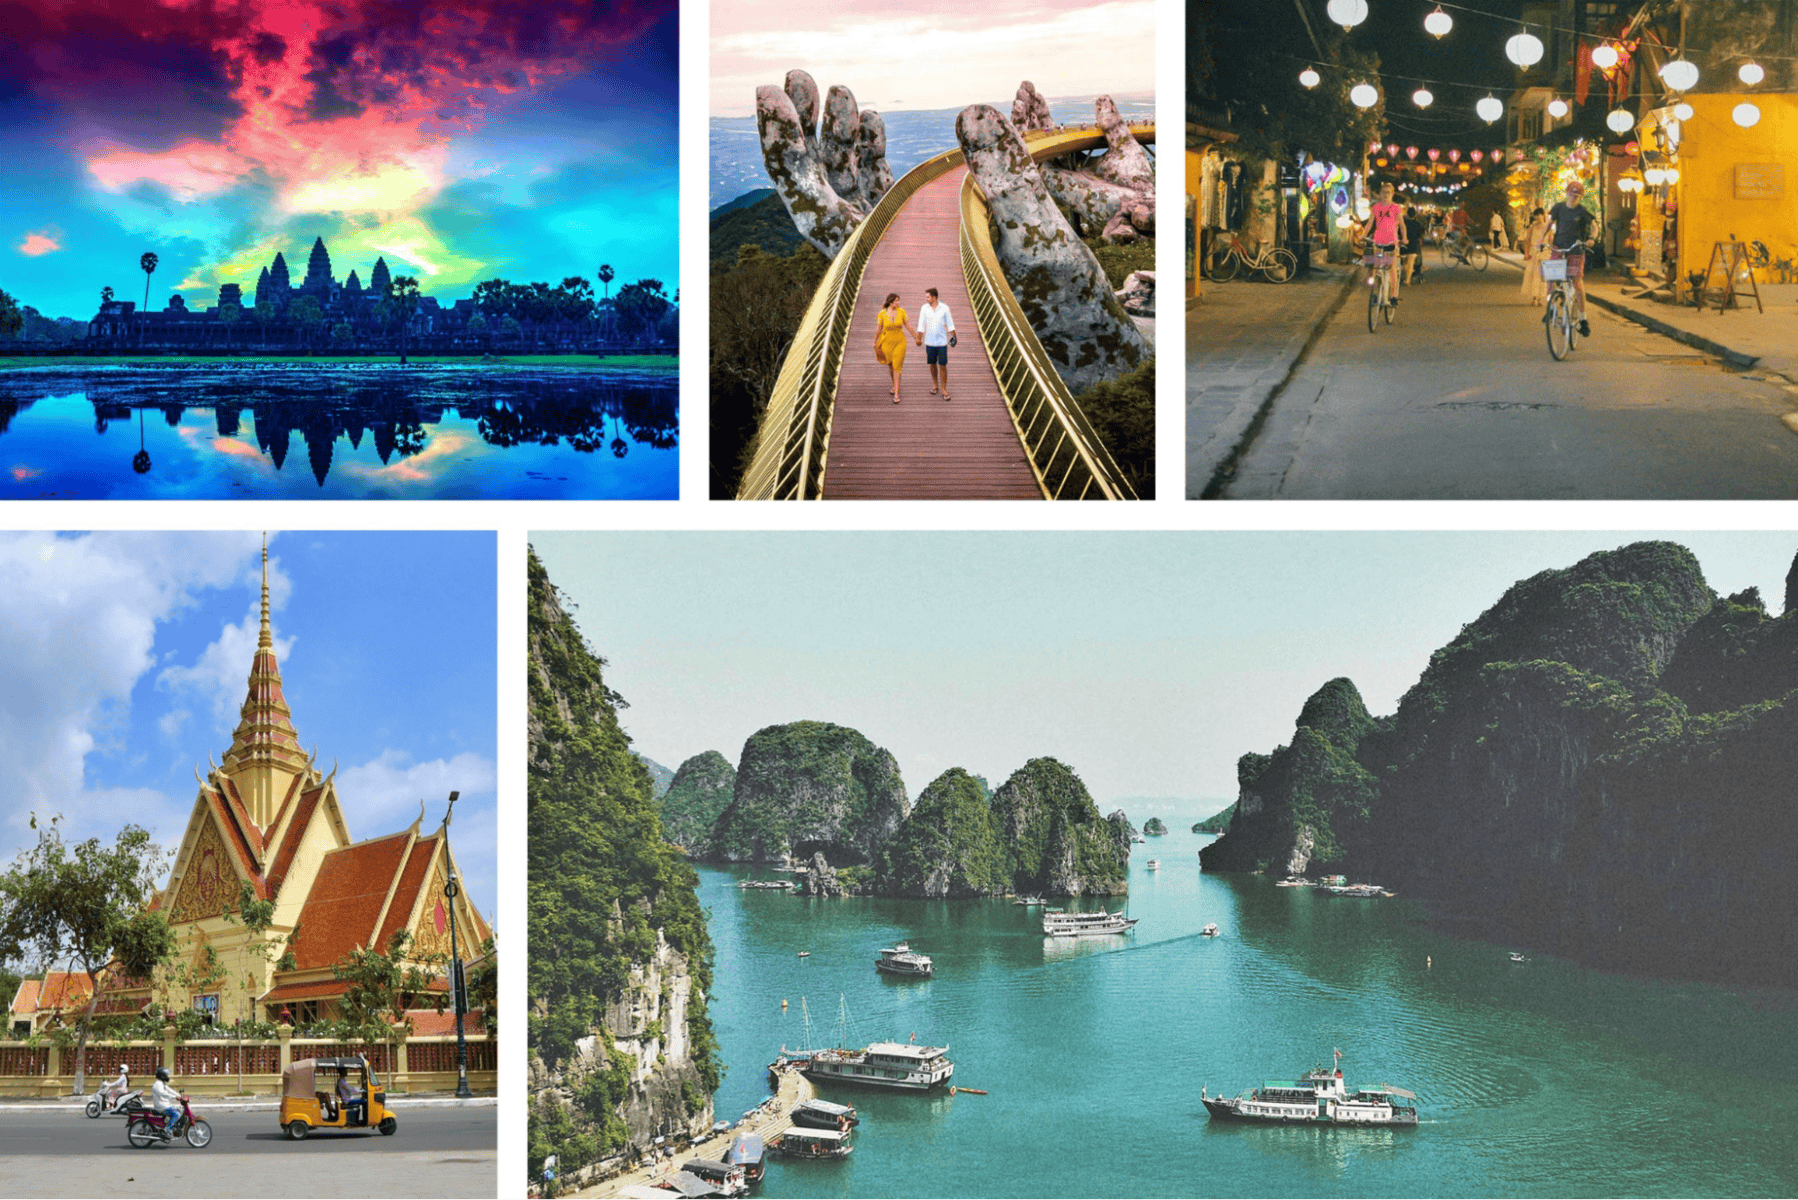
Cambodia and Vietnam photo collage
Thoughtful service and diverse journeys come together to create travel experiences that truly matter.

Whether you're short on time, navigating multiple countries, or want help with logistics, Asia Tour Advisor aims to make the trip smoother while making space for meaningful, on-the-ground discovery.

Thoughtful Service as the Foundation of Every Trip

At the core of Asia Tour Advisor's philosophy is a strong commitment to customer experience. The company understands that travelers have different expectations, interests, and emotional motivations.

Some seek discovery and cultural enrichment, while others prioritize relaxation, comfort, or quality time with loved ones. For this reason, Asia Tour Advisor begins every journey with attentive listening.

Its expert consulting team understands each traveler's preferences, travel style, pace, and priorities before proposing an itinerary. This approach assures every journey feels intentional rather than generic.

Throughout the planning process, travelers receive clear guidance, honest recommendations, and detailed information that helps them feel confident in their decisions.

The commitment to service does not end once the itinerary is confirmed. Asia Tour Advisor provides continuous support before, during, and after the trip.

Travelers benefit from responsive assistance throughout their journey, letting them enjoy their experience without worrying about logistics or unexpected changes. This reassurance fulfills a key role in creating a smooth and satisfying travel experience.

A Diverse and Flexible Tour System

Complementing its strong service culture, Asia Tour Advisor has developed a comprehensive tour system to accommodate diverse travel styles and expectations.

The company offers structured itineraries ranging from cultural explorations and nature-based journeys to premium travel experiences focused on comfort and relaxation.

Each tour is purposefully designed to balance structure and flexibility. Rather than following strict schedules, itineraries are planned to allow travelers enough time to absorb each destination at a comfortable pace.

Such flexibility makes Asia Tour Advisor's tours suitable for travelers of all types, including families, couples, solo explorers, and senior guests.

The diverse tour portfolio reflects a deep understanding of destination storytelling. Instead of focusing solely on famous landmarks, Asia Tour Advisor integrates authentic local experiences that reveal everyday life, traditions, and values. This approach transforms travel from sightseeing into meaningful cultural engagement.

Experiencing Vietnam Through Personal Connection

Family on boat tour in Asia
Designed for different travel styles, flexible enough to feel truly personal.

Vietnam holds a special place in Asia Tour Advisor's portfolio, and the company's Vietnam tours are designed to showcase the country beyond its surface attractions. Each journey provides travelers the opportunity to experience Vietnam as a living, evolving destination full of contrast and character.

From the vital energy of major cities to the calm rhythm of rural life, travelers experience a wide spectrum of activities. Cultural heritage sites, traditional villages, beautiful landscapes, and local cuisine make an excursion feel immersive and deeply engaging.

Asia Tour Advisor helps travelers connect with Vietnam through its people, stories, and daily moments, cultivating a deeper appreciation.

Travelers interested in these experiences can explore Asia Tour Advisor's carefully selected Vietnam tours, crafted to different interests and travel goals while maintaining a consistent standard of quality and comfort.

Connecting Vietnam and Cambodia in One Seamless Journey

For travelers who wish to expand their horizons, Asia Tour Advisor offers multi-country itineraries that bring together the cultural richness of Southeast Asia.

Among these, the Vietnam and Cambodia tours stand out as a compelling option for those seeking a deeper understanding of the region.

These journeys highlight both contrasts and connections between Vietnam and Cambodia. Travelers encounter vibrant modern life in Vietnamese cities alongside the historical background and spiritual atmosphere of Cambodia's iconic heritage sites. Careful planning ensures smooth transitions, allowing travelers to focus on discovery rather than logistics.

By combining two culturally significant countries into a single itinerary, Asia Tour Advisor creates a travel experience that feels unified, enriching, and efficient.

Those interested in a deeper regional journey can learn more about the carefully designed Vietnam and Cambodia tours that showcase the company's expertise in cross-border travel planning.

Creating Value Through Balance and Consistency

What really differentiates Asia Tour Advisor is the balance it achieves between service quality and tour diversity.

Providing a wide range of travel options can easily lead to inconsistency, yet Asia Tour Advisor maintains a strong focus on quality across all its itineraries. This is achieved through close collaboration with trusted local partners, experienced guides, and carefully selected service providers.

Every journey embodies the same core values: professionalism, attention to detail, and customer care. Such consistency builds trust and allows travelers to visit different destinations and adopt different travel styles with confidence.

Over time, these values have helped Asia Tour Advisor establish long-term relationships with travelers who return for new journeys and recommend the brand to others.

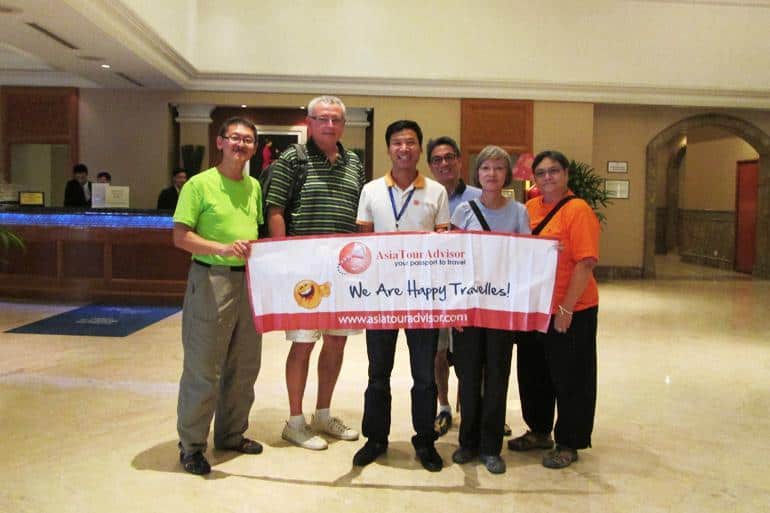
Asia Tour Advisor
Asia Tour Advisor

A Travel Brand Built on Meaningful Experiences

Asia Tour Advisor does more than organize travel itineraries. It creates experiences shaped by understanding, flexibility, and sincere care for the traveler's journey.

By combining thoughtful service with a diverse and adaptable tour system, the company delivers travel experiences that are not only well-organized but also emotionally moving.

In an industry where travelers have endless choices, Asia Tour Advisor sets itself apart by offering something truly valuable: journeys that feel personal, balanced, and memorable.

This devotion to quality and diversity continues to define the brand as a trusted travel partner for people seeking meaningful experiences across Vietnam and Southeast Asia.


This story was published in collaboration with Asia Tour Advisor and lightly edited by the Go Backpacking team for clarity.

What Travelers Should Know About Food Safety While Abroad

Visiting new destinations often goes hand in hand with finding new flavors. From street food markets to local restaurants, cuisine is a gateway into culture and tradition. While food can enrich your vacation experience, staying mindful of food safety is essential. A little preparation and awareness can help you avoid unnecessary illness and keep your trip enjoyable from start to finish.

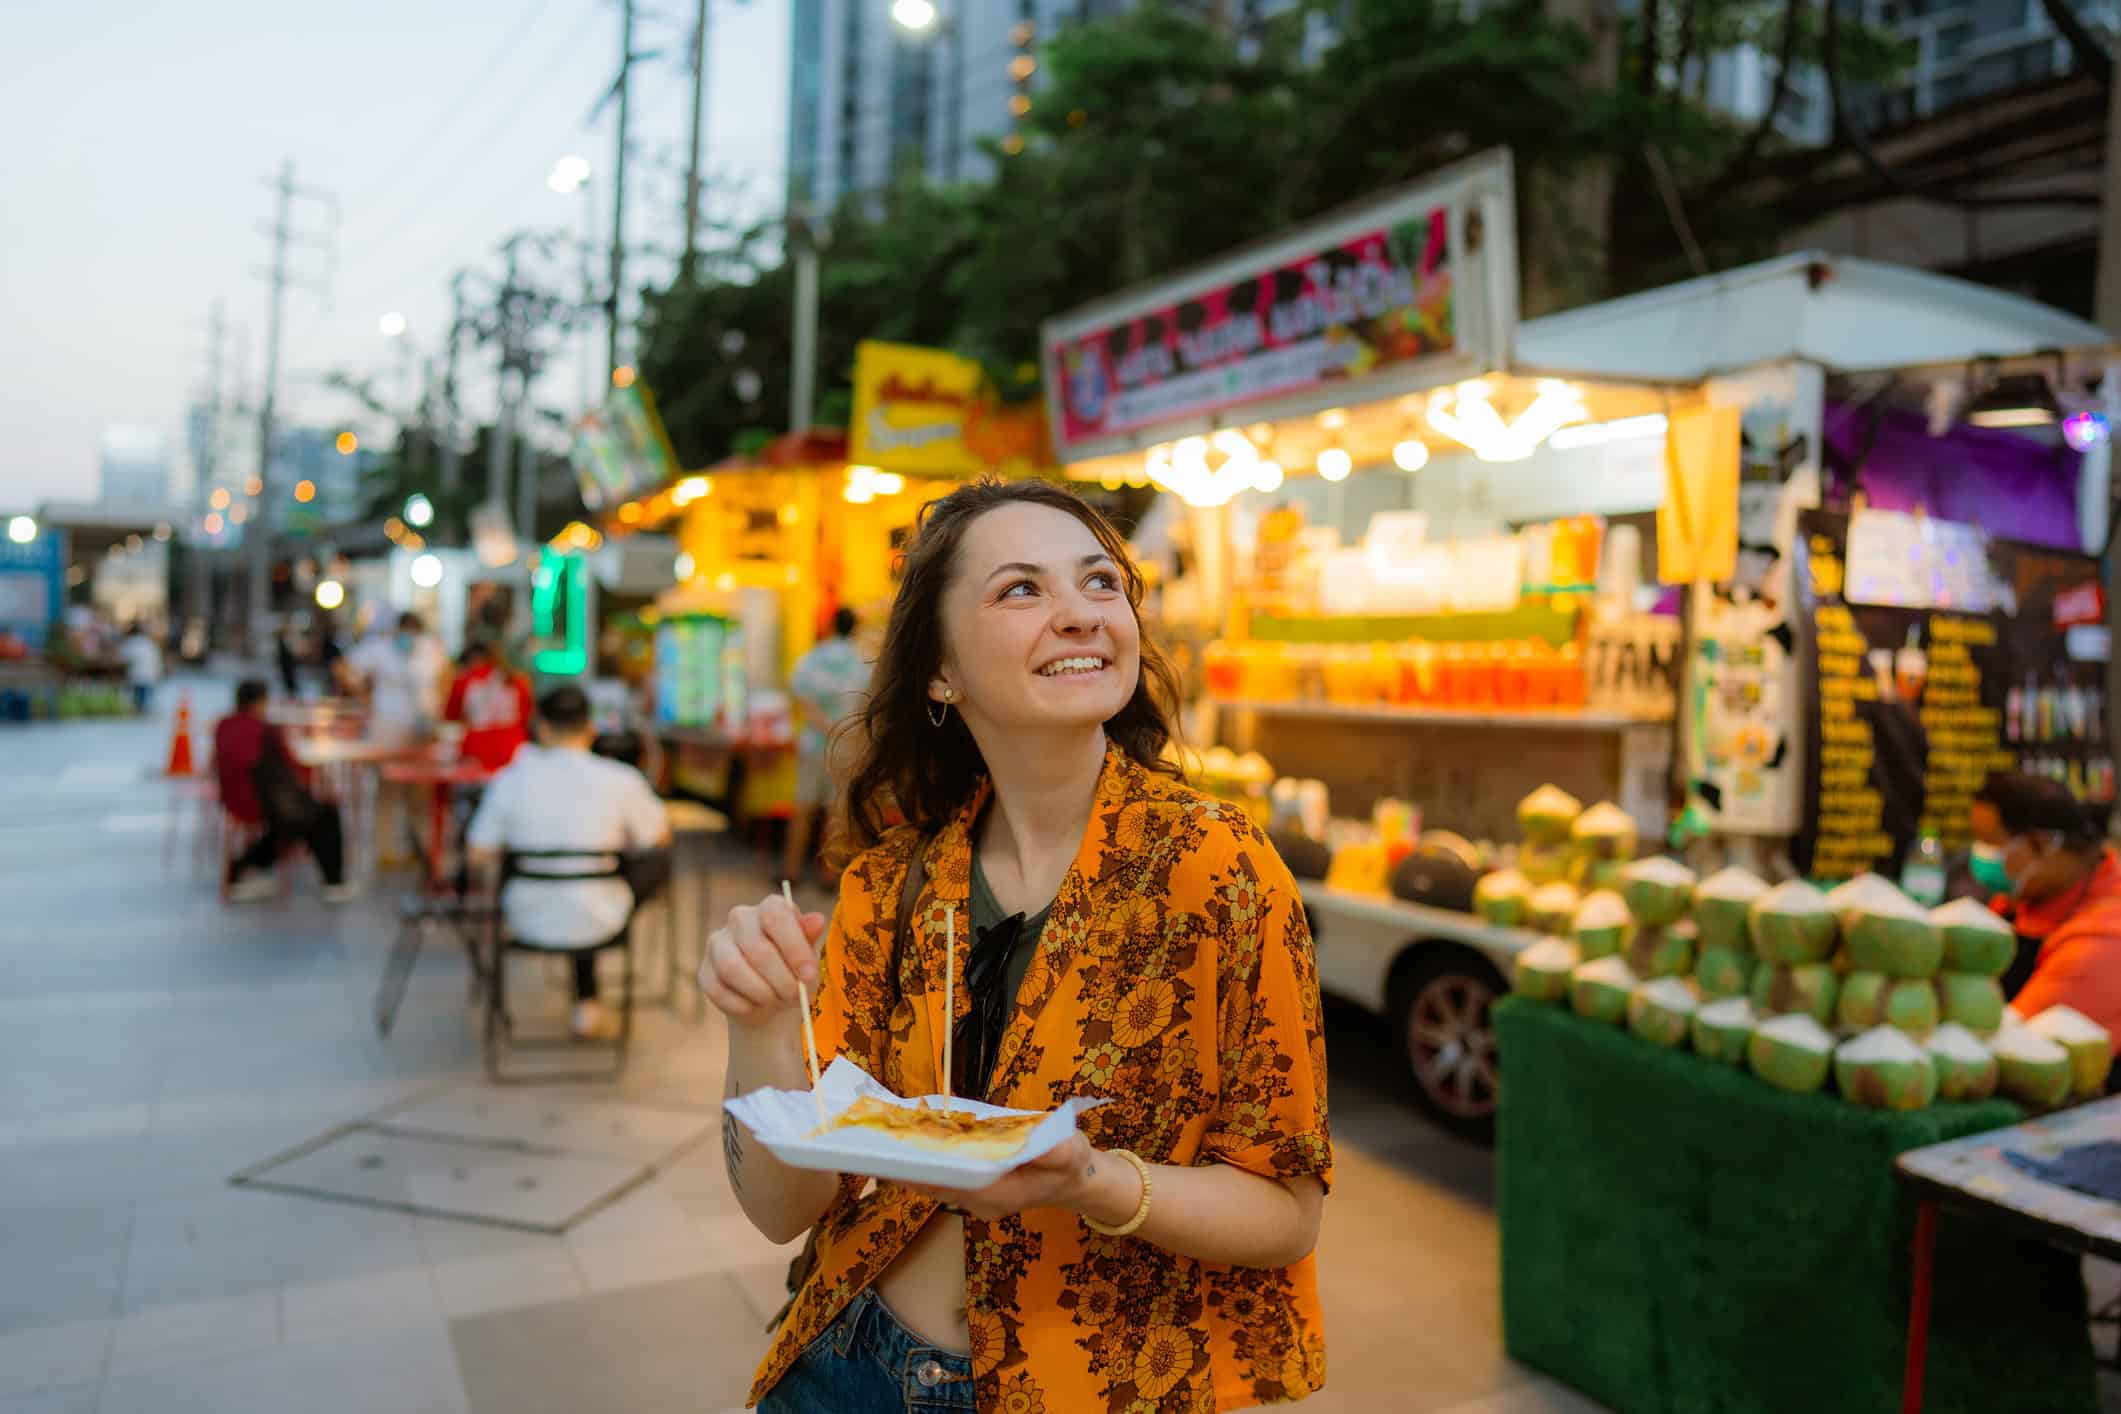
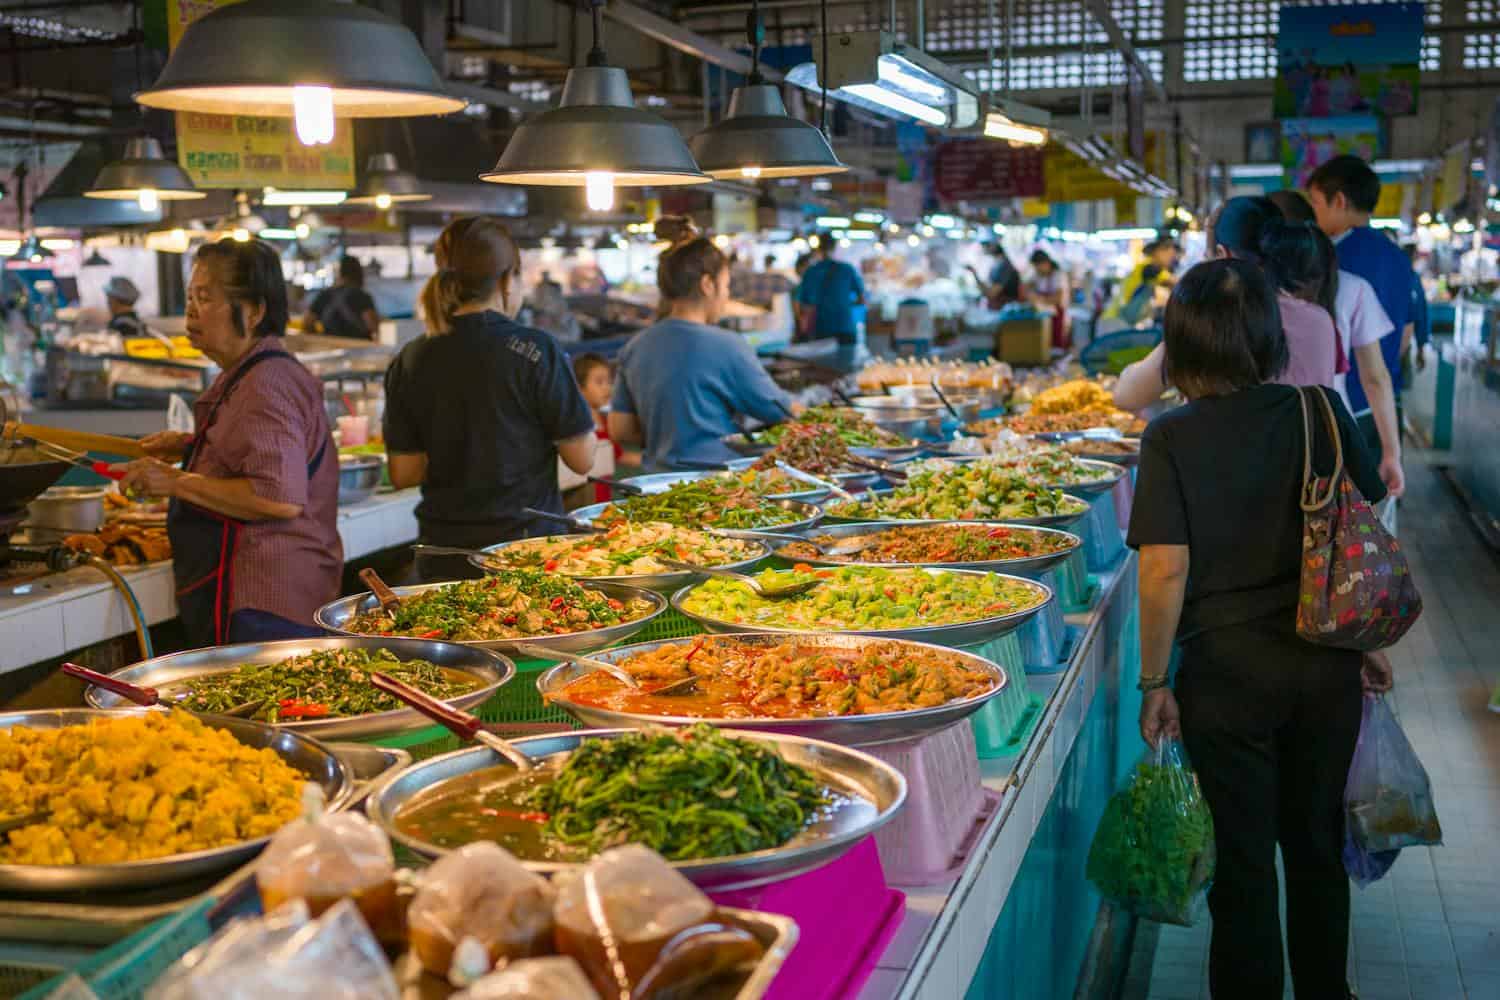
Thai food market Bangkok
Thai food at a market in Bangkok. Photo: Mineaia Martins

Food Safety

Knowing the Risks

Food safety standards may differ greatly from one country to another. What's routine handling in one place may fall short of expectations elsewhere. For comparison, many large-scale producers, such as Taylor Farms, operate under strict hygiene and quality controls. These standards may not always be consistent worldwide.

This variation means travelers can be exposed to contaminated food or water without realizing it. Common symptoms of foodborne illness include nausea, stomach cramps, diarrhea, and fever, which can quickly derail travel plans. In serious cases, medical attention may be required, stressing the importance of prevention.

Do Research Before You Go

Before traveling, take time to understand the food safety landscape of your destination. Look into common foodborne illnesses in the region and identify specific risks tied to local dishes or preparation methods.

Reliable sources, such as the World Health Organization (WHO) and the Centers for Disease Control and Prevention (CDC), provide up-to-date guidance for travelers. You can also read recent reviews of restaurants and eateries to get a sense of hygiene standards and customer experiences.

Practice Safe Eating Habits

When it comes to food abroad, simple choices make a big difference. Opt for meals that are freshly cooked and served hot, especially meat, seafood, or eggs. High temperatures help eliminate harmful bacteria.

Be cautious with raw foods, including salads or pre-cut fruit, as they may have been washed in unsafe water or handled improperly. Instead, choose fruits you can peel yourself, such as bananas or oranges.

Busy restaurants with a steady flow of customers are often safer, as high turnover means fresher ingredients. Street food can also be safe if cooked to order and served piping hot. Just take a moment to examine cleanliness before ordering.

Stay Smart About Water

Water safety is a major concern for travelers. In many destinations, tap water may not be safe to drink. Stick to sealed bottled water whenever possible and check that the seal hasn't been tampered with.

Avoid ice unless you're confident it's made from purified water. Use bottled or treated water for brushing your teeth. If bottled water isn't available, consider purification tablets, filters, or portable UV devices as a backup.

Prepare with Vaccinations and Insurance

Before your trip, check if any vaccinations are recommended for your destination. Illnesses such as hepatitis A and typhoid are linked to contaminated food and water and can often be prevented with immunization.

Travel insurance is an essential safeguard. A policy covering medical services abroad ensures you can access care quickly if needed, free of unexpected costs.

Managing Food Allergies Abroad

If you have food allergies, extra preparation is key. Carry necessary medication, such as antihistamines or an EpiPen, and keep it easily accessible at all times.

Have your allergy information translated into the local language, either on your phone or as a printed card. This makes communication with restaurant staff clearer and reduces the risk of misunderstandings.

Final Thoughts

Trying new foods is one of the highlights of traveling, but it shouldn't come at the expense of your health. By keeping informed, making careful choices, and preparing in advance, you can enjoy local cuisine with confidence.

A mindful approach to food safety doesn't limit your experience-it improves it. With the right precautions, you can focus on what really matters: enjoying your journey, discovering new cultures, and making lasting memories.


This story was published in collaboration with Taylor Farms and lightly edited by the Go Backpacking team for clarity.

Rhodes, Greece Travel Tips for First-Time Visitors

Traveling to Rhodes soon? Well, you're in for a sweet treat. Boasting fascinating medieval history, golden-sand beaches, and a lively nightlife, Rhodes is an incredible Greek escape.

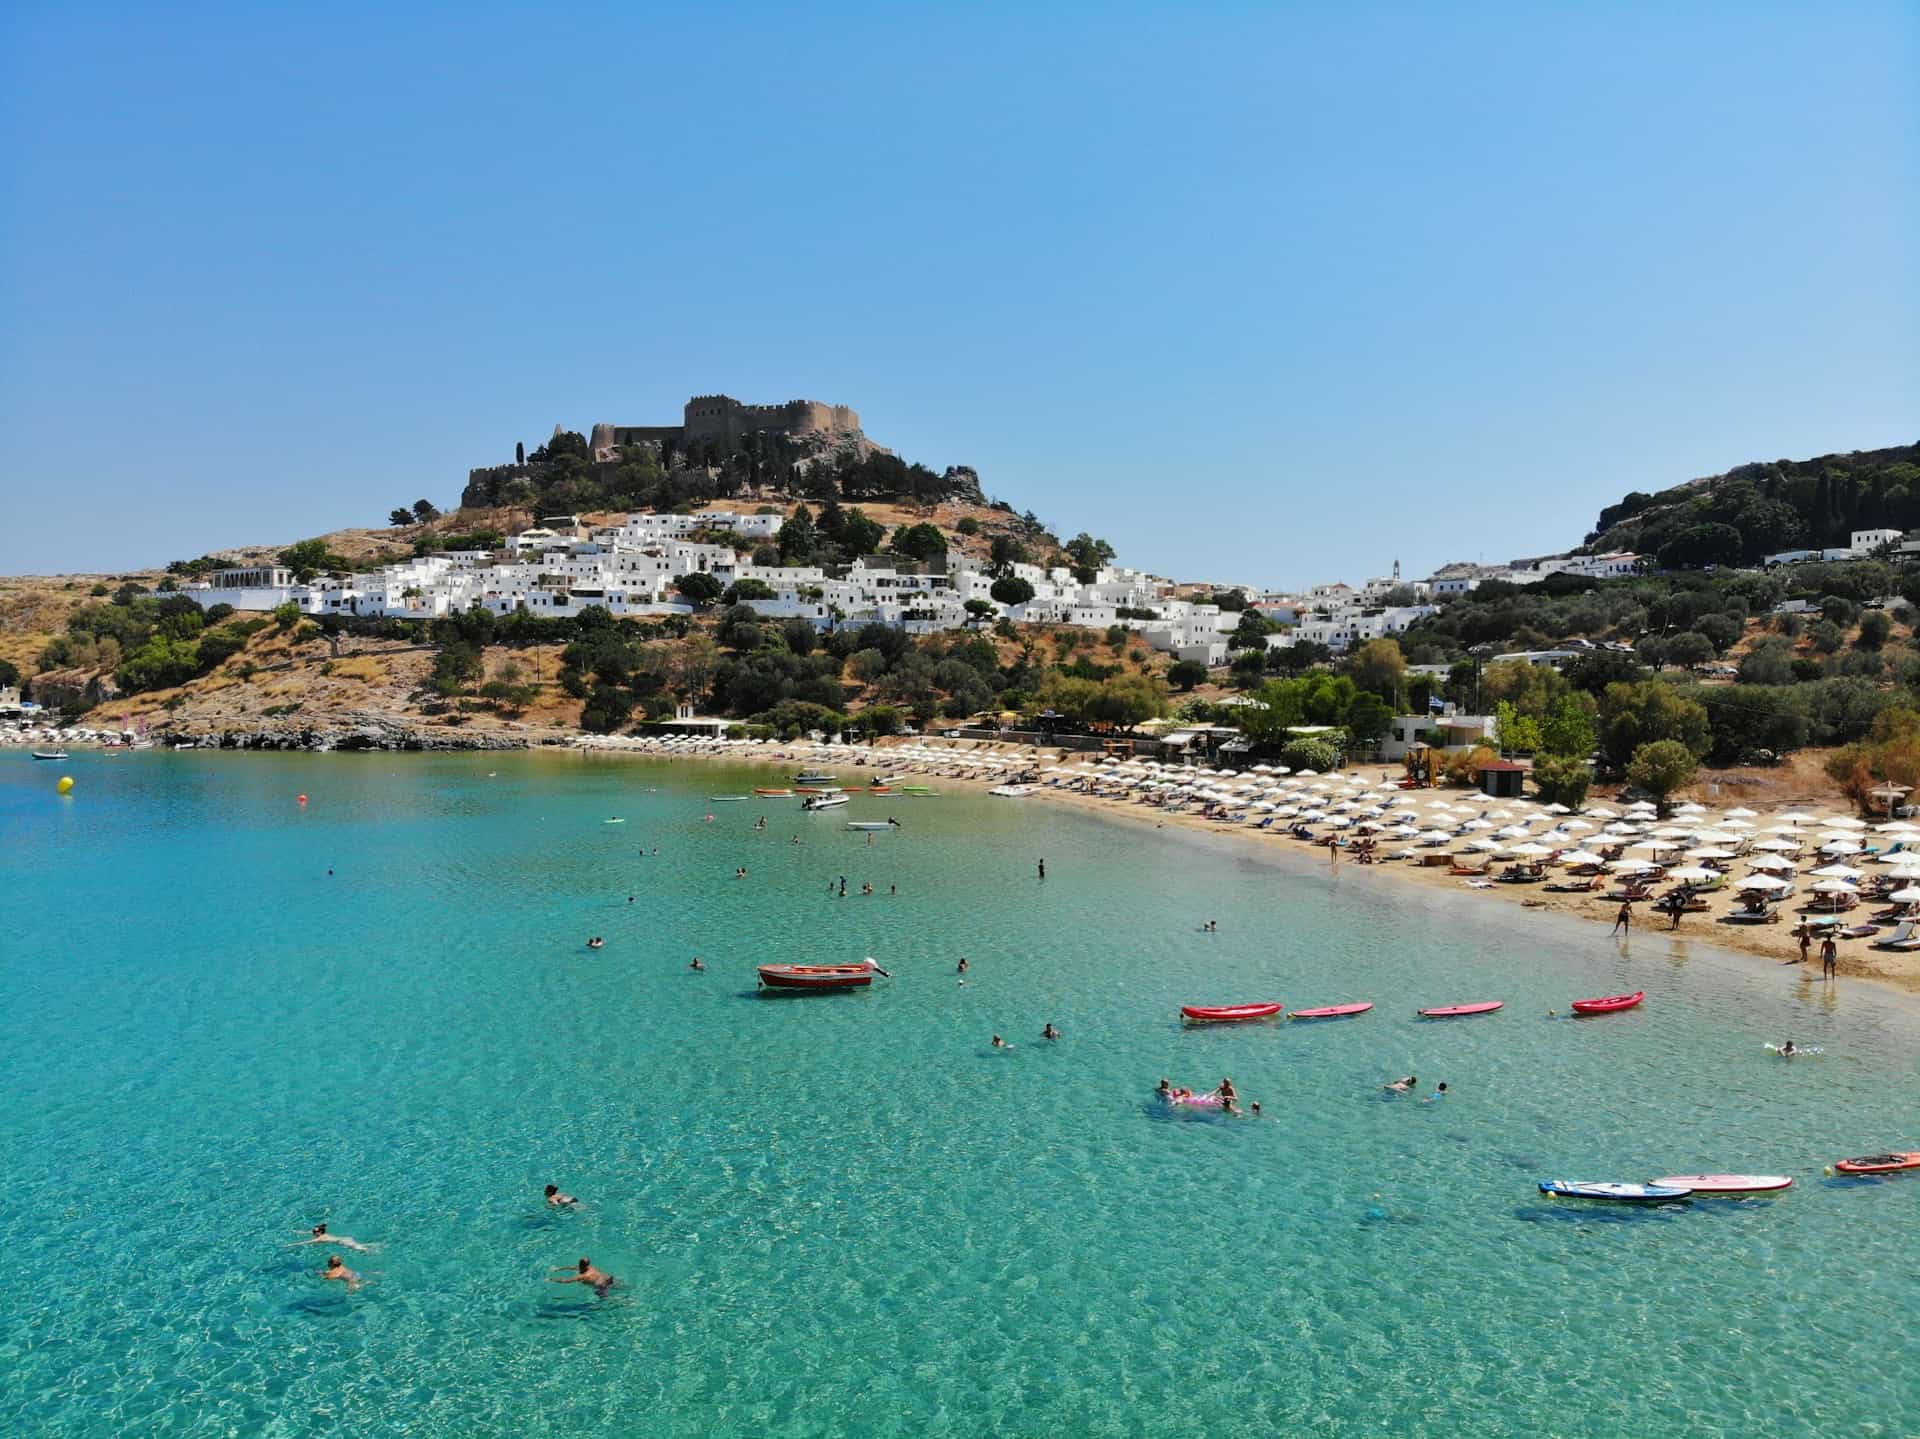
Lindos town and beach on Rhodes in Greece
The beautiful town of Lindos on Rhodes. Photo: Dimitris Kiriakakis

In addition to being a great base for a Greek island-hopping spree, Rhodes offers a beautiful balance between slow travel and cultural immersion. To help you make the most of your trip, this insightful guide covers all you need to know about visiting Rhodes, with top travel tips.

Getting Around Rhodes

The best way to get around Rhodes depends on your preference. For flexibility, rent a car or scooter. Budget travelers can use public buses, KTEL for the east coast, and RODA for the west coast. Ferries are also useful for visiting nearby islands.

Best Time to Visit Rhodes & How Many Days to Stay

Rhodes has a Mediterranean climate, with mild winters and dry, hot summers. The best time to visit is during the shoulder months of May to June and September to October. These seasons offer pleasant weather, swimmable seas, lower prices, and fewer crowds.

Five to seven days is enough to explore Rhodes, from visiting historical sites to enjoying relaxing beach days. You can also add day trips to nearby islands without feeling hurried.

Get an eSIM Before You Arrive

Connectivity is essential when traveling. Whether booking an e-hailing taxi, downloading an offline map of Rhodes, or communicating with friends and family, you'll need internet access.

Get a WonderConnect Digital SIM card for instant mobile connectivity upon arrival. You'll avoid high roaming fees from your home carrier, skip the expensive airport SIM kiosks, and keep your original number. Download the app at home, and activate the eSIM when you arrive.

Where To Stay in Rhodes

Rhodes has something for everyone. Where you choose to stay depends on your preferences.

  • Rhodes Old Town: For history buffs, this UNESCO World Heritage site offers medieval stone-paved streets, knight castles, stone fortresses, and charming street-side cafés.
  • Lindos: This seaside gem mixes history with pretty beaches, from the ancient clifftop Acropolis and whitewashed houses to a stunning bay lined by sunbeds and beach bars.
  • Faliraki: Fun and entertainment play a leading role, from a 3-mile sandy beach and an energetic nightlife along the town's streets, to a massive waterpark with thrilling slides.
  • Ialyssos: Perfect for families, affording a relaxed, coastal vibe. This northwest coastal escape offers windsurfing and water sports, archeological sites, bars, and tavernas.
  • Pefkos: Laid-back and quieter than Lindos, Pefkos offers a traditional village feel, with a lively main street, picturesque beaches, and self-catering villas suitable for couples.

Things To Do in Rhodes Besides the Tourist Attractions

You'll find plenty of things to do in Rhodes, from discovering historical ruins and walking narrow old streets, to sunbathing or jetskiing on the beach. Here's some of what you can do.

Top Historical and Cultural Sites

  • Old Town of Rhodes: Wander through the well-preserved, medieval Street of the Knights, marvel at the Palace of the Grand Master, and visit the Archaeological Museum.
  • Acropolis of Lindos: Walk up to the clifftop Acropolis. These ruins give a glimpse into ancient history and stunning views of the coastline below.
  • Kamiros: Explore the ancient state city of Rhodes and discover its incredible ruins, including an acropolis, temples, and a Doric fountain house from the Hellenistic era.
  • Colossus of Rhodes: Although it no longer exists, this massive bronze statue of the Greek sun god Helios once stood near the Mandraki Harbor. It fell due to an earthquake in 226 BCE, but you can walk to the columns and watch as boats sail past.

Top Beaches and Natural Attractions

  • Anthony Quinn Bay: Enjoy swimming in emerald-green waters, snorkeling around the cove, or simply hanging out with a refreshing drink in hand along the rocky shores.
  • Tsambika Beach: Rent a beach umbrella or lie out on the golden sands. After swimming or other water sports, head to a beach bar for quick bites and drinks.
  • Elli Beach: Go paddleboarding, parasailing, diving from the platform at sea, or stroll to Rhodes' northernmost tip (where east meets west); on clear days, you may even catch distant views of Turkey.
  • Valley of the Butterflies: Stroll through this natural, lush habitat between June and September for a chance to see majestic butterflies in their natural habitat.

Other Must-Do Activities

  • Boat Trips: Hop on a ferry or luxury catamaran to the nearby island of Symi. It boasts colorful neoclassical harbor homes, top snorkeling spots, and beautiful beaches.
  • Lindos Village: Take a slow walk through the narrow streets of this pedestrian-only village, enjoying its white-washed houses, and visiting local shops and boutiques.
  • Kallithea Springs: Enjoy scenic swimming and snorkeling at this restored Italian-era spa. Walk around, marvel at the pebble mosaic floors, and grab a drink at a cafe-bar.
  • Rhodes Cuisine: Indulge in Dodecanese, Mediterranean, Italian, and Asia Minor dishes featuring cumin, hearty meats, and legumes. Sample local favorites like pitaroudia (chickpea fritters) and lakani (slow-cooked goat with chickpeas).

Pack Smart, Eat Local, and Respect the Culture

These tips will make your trip smoother, whether you're planning a Rhodes weekend getaway or a seven-day itinerary. Planning and paying attention to detail can improve your trip.

  • Pack for heat and walking: Rhodes has long, sunny seasons, so bring lightweight clothing, comfortable walking shoes, and sun protection.
  • Eat where locals eat: Some of the best meals in Rhodes are away from the main squares and waterfront. Look for small tavernas with simple menus for authentic dishes.
  • Carry some cash: Cards are widely accepted, but smaller tavernas, beach bars, and local shops may prefer cash, especially in quieter areas.
  • Learn a few basic Greek phrases: A simple "hello" or "thank you" in Greek goes a long way. It's not expected but appreciated and often leads to warmer interactions.
  • Be mindful in religious and historic spaces: In churches or historic sites, modest dress and respect are expected. That extra layer you packed can come in handy.

Making the Most of Your Rhodes Experience

Rhodes is best enjoyed at a slower pace, where spontaneous moments often become the highlight of your trip. Balance sightseeing with beach time, explore beyond the main attractions, and stay open to local experiences.

With a bit of planning and plenty of flexibility, you'll uncover the island's true charm, one relaxed, sun-soaked day at a time.


This story was published in collaboration with WonderConnect and lightly edited by the Go Backpacking team for clarity.

The Minimalist Backpacker's Skincare Kit: Lessons From 60+ Countries

The first time I backpacked long-term, I brought a full skincare routine. Cleanser, toner, two serums, day cream, night cream, eye cream, sunscreen. Half of it leaked in transit. The other half didn't survive the first month.

By country 10, the entire bag fits in one small zippered pouch. By country 30, I'd figured out which three or four products actually earned their weight across deserts, jungles, high altitudes, and humid coastal towns.

Packing a minimalist travel skincare kit into a small toiletry bag
Packing a minimalist travel kit before a trip

After 60-plus countries - Colombia to Iceland, Morocco to Nepal, the U.S. Southwest to the Galapagos - the kit is basically bulletproof, and small enough to fit in a liter bag.

Here's what works when you're moving between climates every few weeks, and what you can safely leave at home. Including one underrated hero of my kit: a moisturizing body oil that replaced about five other products and earned its spot across every climate I've tested it in.

The Climate Problem

The first thing long-term travel teaches you is that your skin is not the same everywhere. The stuff that worked at home becomes useless in Cusco. The products that saved you in the Sahara are overkill in Bali.

Your face changes weekly - sometimes daily - depending on altitude, humidity, water hardness, sun exposure, and how much sleep you've been getting in hostel bunks.

The traveler's mistake is packing for home conditions and hoping they translate. It doesn't. A kit built for Boston winters does nothing for Cartagena's humidity, and vice versa.

The better strategy: pack ingredients and formulations that work across conditions, and adjust frequency rather than products.

A solid base of barrier-supporting staples handles 80 percent of what any climate throws at you. The other 20 percent gets solved with local purchases (aloe in hot countries, a heavier cream at altitude, a good sunscreen wherever you find one).

The Weight Problem

Backpackers know this one. Every gram counts when the bag lives on your back for 9 hours at a time on Andean bus routes with no suspension.

Full-size bottles are the enemy. So are single-use products. The more jobs a product can do, the more it earns its place.

My rule after years of trimming: if a product can't do at least two things, it doesn't come. A cleanser that only cleanses loses out to one that also removes sunscreen. A moisturizer that only moisturizes loses to an oil that moisturizes, heals cuts, tames frizzy hair, and doubles as cuticle oil, which brings me to the kit.

Five Travel Skincare Essentials

1. A solid cleanser bar. No liquid limits at airports. Doesn't leak. Lasts 2-3 months. Works in hard water, where most liquid cleansers form a sticky residue. One bar = zero drama at security.

2. A thick occlusive balm. Aquaphor, a good shea butter, or any oil-dense balm. Doubles as lip balm, cuticle balm, cracked-heel balm, post-sunburn balm, and chafing prevention on long hiking days. Anti-chafe alone has saved me on 15-mile trekking days in Nepal.

3. A multi-purpose body oil. This is the hero of my kit. After years of testing, I landed on an oil-based formula that works on post-shower damp skin, post-sun skin, chapped hands at altitude, and as a tame-the-frizz product on hair.

Prima's Beyond Body Oil earned its spot because its blend of prickly pear, marula, and jojoba oils addresses the three hardest climate conditions: dry mountain air, post-sun recovery in the tropics, and skin-barrier damage from constant water changes. Plus, one 3.4 oz bottle lasts almost two months of daily use, and the formula clears the TSA liquid limit with room to spare.

4. A mineral sunscreen. Non-negotiable at any altitude or latitude. Mineral over chemical because it's reef-safe (critical in beach countries with coral ecosystems), less likely to cause reactions after flights, and doesn't require the 20-minute wait time chemical sunscreens do. The SPF range is 30-50. Anything higher is marketing.

5. One active treatment. This is the personal one. For me, a small retinol serum I use sparingly on longer stops. Others pack niacinamide, vitamin C, or a salicylic acid spot treatment. Pick one, pack a small amount, know when to skip it (at altitude and for the first few days of a climate change, the answer is often "skip").

That's the kit. Five products, weighing under 400 grams, fit in a standard liquids bag, leaving room for toothpaste and deodorant.

Adjusting By Climate

The kit stays the same. How you use it changes.

Dry cold climates (high altitudes, winter travel): Heavier layering. Oil twice daily on the face and hands. Balm on lips every few hours. Cleanser every other day, not daily - the cold, dry air doesn't generate enough oil to warrant daily stripping.

Hot, humid climates (jungle, tropical coast): Oil once a day, only at night. Cleanser daily or twice daily if sweating heavily. Sunscreen is reapplied religiously, especially near water, where reflection doubles exposure.

Hot, dry climates (deserts, Mediterranean summers): Oil in the morning and at night. Aggressive sunscreen reapplication. Extra water internally - external hydration without internal hydration accomplishes nothing.

Transitioning between climates: This is where most travelers get into trouble. Give your skin 3-4 days before ramping up activities again. Flights themselves compromise barrier function, so the first few days in any new climate should be barrier-support mode rather than "let's attack this pimple" mode.

The Water Problem

One thing nobody warns long-term travelers about: water hardness varies dramatically between destinations, and it affects skin more than anything else on the list.

Some cities have brutally hard water (high mineral content that leaves your skin feeling filmy and tight after showers). Others have soft water that your skin will initially love, but then break out from. Your kit has to flex for this.

The body oil applied to damp skin right after the shower is the single best counter to hard water I've found on the road. It creates a barrier between the mineral residue and your skin, seals moisture in while it's still accessible, and works in conditions where regular lotions bead up on the surface.


This story was published in collaboration with Prima and lightly edited by the Go Backpacking team for clarity.

The Evolution of Modern Balinese Hospitality

Bali has long been a popular destination for travelers seeking culture, nature, and affordability. In recent years, the island's tourism landscape has changed.

What was once known mainly for budget guesthouses, surf camps, and spiritual retreats is now also defined by a growing wave of high-end, sustainability-focused hospitality.

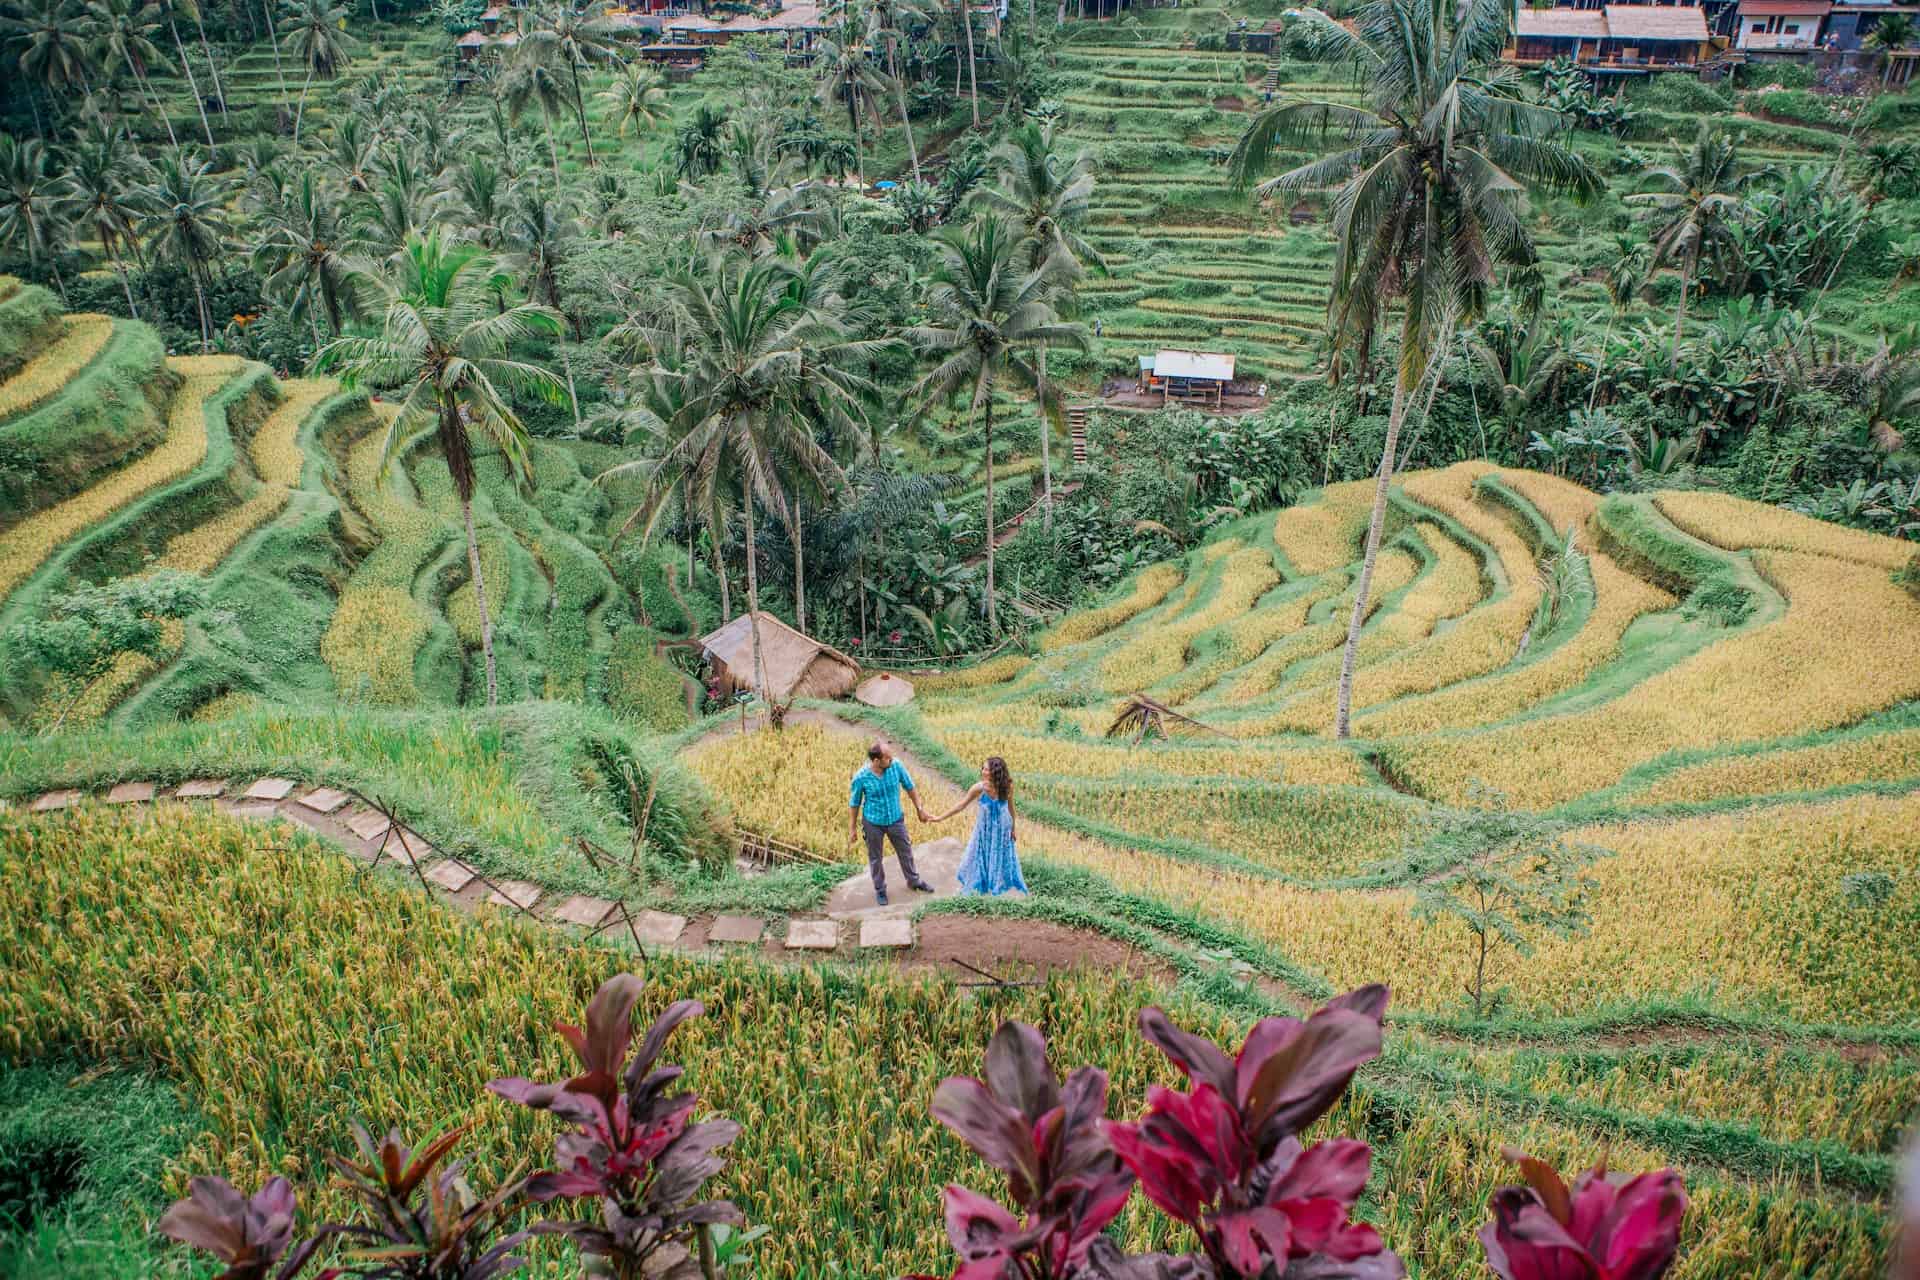
Bali's rice terraces reflect the shift toward sustainable tourism and responsible travel
Rice terraces in Bali highlight the island's balance between tourism, agriculture, and cultural tradition. Photo: Theo Widharto

For backpackers and independent travelers, this shift raises an important question: how does the rise of "conscious luxury" in Bali affect the travel experience?

The answer is slightly more subtle than it might seem.

A Shift Toward "Conscious Luxury"

Modern hospitality in Bali is no longer just infinity pools and private villas. Many new developments are built around the concept of "conscious luxury," in which environmental accountability and cultural conservation are integral to the experience.

This approach is typically rooted in the Balinese philosophy of Tri Hita Karana, which emphasizes harmony between people, nature, and the spiritual world. While this concept has always existed locally, it's now being actively integrated into how resorts operate, from energy use to guest experiences.

For travelers not staying in luxury properties, this shift is becoming more visible. Restaurants, cafés, and accommodations across price ranges are adopting eco-friendly practices, from minimizing plastic waste to sourcing local ingredients.

What the Bali Tourist Levy Means for Travelers

One of the most noticeable changes is the introduction of the Bali Tourist Levy for international travelers. This required fee is designed to support environmental protection efforts, including coral reef restoration, waste management, and cultural conservation.

While it is a small additional cost, it reflects a more general trend: Bali is balancing tourism growth with long-term sustainability.

For backpackers, it is a reminder that even budget travel contributes to the island's ecosystem, and that mindful decisions, such as supporting local businesses or reducing waste, matter.

Growth at the Top, Impact Across the Island

Data from the Indonesia Ministry of Tourism and Creative Economy shows a rise in international arrivals, particularly among higher-spending travelers.

This has led to an increase in luxury developments, from boutique eco-resorts in North Bali to large wellness-focused properties in Ubud.

At first glance, this might seem disconnected from the typical Go Backpacking reader. The reality is these changes expand outward.

  • Infrastructure improvements benefit all travelers, not just those staying at high-end resorts.
  • Increased demand for sustainability raises expectations across the entire hospitality industry.
  • Local economies see greater investment, particularly in rural areas.

In short, even if you're staying in a $20 guesthouse, you're still experiencing the effects of these larger shifts.

A Changing Food Scene

Bali's culinary landscape has progressed. While local warungs and street food remain core to the experience, the island has become a hub for plant-based dining and farm-to-table restaurants.

Some of this growth is driven by high-end tourism, but it has also created more variety across all price points. Travelers can move between traditional Balinese dishes and modern interpretations emphasizing locally sourced ingredients.

Many chefs and restaurants are working directly with local farmers, helping preserve traditional agricultural practices while also creating new economic opportunities.

For visitors, this means better access to fresh, regional food-whether dining at a high-end restaurant or a laid-back café.

Cultural Access: What's Real and What's Curated

One of the more interesting developments in Bali's evolving hospitality scene is the way cultural experiences are being packaged.

High-end properties now offer curated access to temple ceremonies, artisan workshops, and village life, often in partnership with local communities. These experiences can be meaningful, but they are also structured and designed for visitors.

Independent travelers can often find similar experiences organically, simply by spending time in local communities, attending public ceremonies, or connecting with guides and residents. The difference is less about access and more about how the experience is framed.

For backpackers, the takeaway is simple: meaningful cultural experiences in Bali don't require a luxury price tag-but awareness and respect are essential.

Infrastructure, Digital Nomads, and Longer Stays

Bali has also become a hub for remote workers and digital nomads. Improvements in internet connectivity, transportation, and co-working spaces have made it easier to stay longer and work while traveling.

This shift overlaps with the luxury travel boom and also supports a wider range of travelers. Areas like Canggu and Ubud now provide for backpackers, freelancers, and long-term visitors.

As Indonesia continues developing other destinations through its "10 New Balis" initiative, Bali remains the focal point-but with a more diverse traveler base than ever before.

What This Means for Independent Travelers

The evolution of modern Balinese hospitality isn't just about luxury resorts-it's about how the entire travel ecosystem is changing.

For independent travelers, a few key takeaways stand out:

  • Bali is becoming more sustainability-focused, and travelers are expected to be part of that shift.
  • Prices may rise in certain areas, but budget options still exist with a bit of research.
  • Cultural experiences are still accessible without booking curated packages.
  • Infrastructure improvements make travel easier, especially for longer stays.

Ultimately, Bali is adapting to meet global travel trends while protecting what makes it unique.

A Destination in Transition

Bali's ability to manage growth while preserving its cultural identity will shape its future as a destination. The combination of sustainability, local partnerships, and evolving traveler expectations reflects a broader shift across global tourism.

For travelers, the opportunity is to engage with Bali in ways that go beyond surface-level experiences-whether that means choosing locally owned accommodations, paying attention to environmental impact, or simply slowing down and immersing themselves in the surrounding culture.

The island is changing, but the core appeal remains: a place where natural beauty, tradition, and travel intersect in a way that still feels accessible to those ready to explore it thoughtfully.


This story was published in collaboration with Bali Tourist Tax Go and edited by the Go Backpacking editorial team for clarity as well as fit.

Adventure Travel and Outdoor Action Activities

Adventure travel isn't just about hiking trails or checking off landmarks anymore. More backpackers are building trips around high-energy travel activities that get them moving - from mountain biking and kayaking to competitive action sports like paintball. It's a shift toward experiences that are interactive, social, and slightly unpredictable.

Travelers in protective gear smiling after a paintball game at an outdoor adventure park
A group of travelers celebrates after a paintball match, one of many high-energy adventure travel activities. Photo: Jacob Wackerhausen

Paintball might not be the first thing that comes to mind when planning an outdoor adventure, but it's appearing in more destinations as part of organized group experiences. Whether it's a backpacker hub offering weekend tournaments or an outdoor park near a major city, adding a fast-paced action-sports session can break up a trip in a fun way.

One reason for that growth is the equipment's increased accessibility. Modern setups like the electric paintball gun make it easier for beginners to jump in without a steep learning curve, turning a casual afternoon into a memorable travel activity.

Where Paintball Fits Into an Adventure Itinerary

For most travelers, paintball works best as a one-day or half-day activity layered into a broader outdoor-adventure itinerary. Think of it as something you do between longer excursions, similar to how you might mix in a food tour or a bike ride.

In destinations known for action sports, it's common to find activity centers that bundle options together. You might spend the morning hiking, join a paintball match in the afternoon with an electric paintball gun, and wrap up the day with a kayak session at sunset. That variety keeps trips from feeling repetitive and adds a social element, especially if you're traveling solo and looking to meet people.

Hostels and local tour operators sometimes organize these kinds of group-based travel activities, which lowers the barrier to entry. You don't need to bring your own paintball gear or coordinate a full team - you just show up and play.

Essential Gear for Multi-Activity Trips

Packing for a trip that mixes multiple action sports comes down to versatility. You want gear that works across different environments without weighing you down.

For general outdoor adventure travel, that usually means:

  • Lightweight backpacks
  • Quick-dry clothing
  • Durable shoes that can handle varied terrain

If you plan to try paintball more than once, having a basic understanding of paintball gear helps. Most venues provide rentals, but knowing what to expect-masks, markers, and protective layers-makes the experience easier. Equipment like an electric paintball gun is usually available on-site and designed for ease of use, especially for beginners.

Space is always a consideration, so smart packing matters. Compression bags can help keep clothing and smaller essentials organized, leaving room for the gear you'll need for different travel activities.

Making It Work Logistically

The biggest challenge with combining multiple action sports is managing your time and energy. It's easy to overpack your itinerary and end up exhausted halfway through your trip.

A better approach is to alternate intensity. Pair something physically demanding - like a paintball match using an electric paintball gun - with lower-impact travel activities such as walking tours or casual exploration. That balance helps you stay energized without burning out.

It's also worth thinking about location. Many outdoor adventure destinations have centralized activity hubs, making it easier to move between experiences without long travel times. Booking through local operators can simplify logistics, especially if they provide transportation and all necessary paintball gear.

Finding Paintball While Traveling

One of the easiest ways to add paintball to your trip is by searching for local fields near major cities or popular backpacker routes. Many destinations that promote action sports, especially in Southeast Asia, Eastern Europe, and Central America, have dedicated parks or multi-activity centers that include paintball as part of a wider outdoor-adventure offering.

If you're traveling without a plan, ask at your hostel or check local tour boards. These travel activities are often organized in small groups, making it easy to join without previous experience or your own paintball gear. Most locations provide everything you need so that you can focus on the experience rather than the logistics.

Tips for Getting the Most Out of It

If you're new to paintball, keep expectations simple. You don't need advanced skills or specialized equipment to enjoy it. Focus on the experience - teamwork, rapid decision-making, and the novelty of trying something different.

A few useful tips:

  • Wear comfortable, flexible clothing you don't mind getting dirty.
  • Double-check what paintball gear is included before booking.
  • Stay hydrated, especially when combining multiple action sports in one day.

For travelers who want to go deeper, options like paintball marker upgrades exist, but they're not necessary for casual play. Most people will be perfectly happy using standard rental setups, including an electric paintball gun, for occasional sessions.

A Different Kind of Travel Experience

At its core, modern outdoor adventure travel is about participation. Instead of just seeing a destination, you're interacting with it - physically, socially, and sometimes competitively.

Adding something like paintball to your itinerary won't define your trip, but it can easily become one of those remarkable moments you didn't expect. And when it's paired with other travel activities, it helps create a more dynamic, memorable experience that goes beyond the usual sightseeing routine.


This story was published in collaboration with Maddog Sports and edited by the Go Backpacking team for clarity as well as fit.

Visa Planning Isn't Hard, Until You're the One Stuck Rebooking Flights

Visa preparation isn't something to leave until the last minute. It can mean the difference between a smooth check-in and being pulled aside because a rule changed, a document is missing, or travel dates don't align.

For backpackers and long-term travelers, problems rarely come from a single major mistake. More often, they stem from a series of small assumptions adding up.

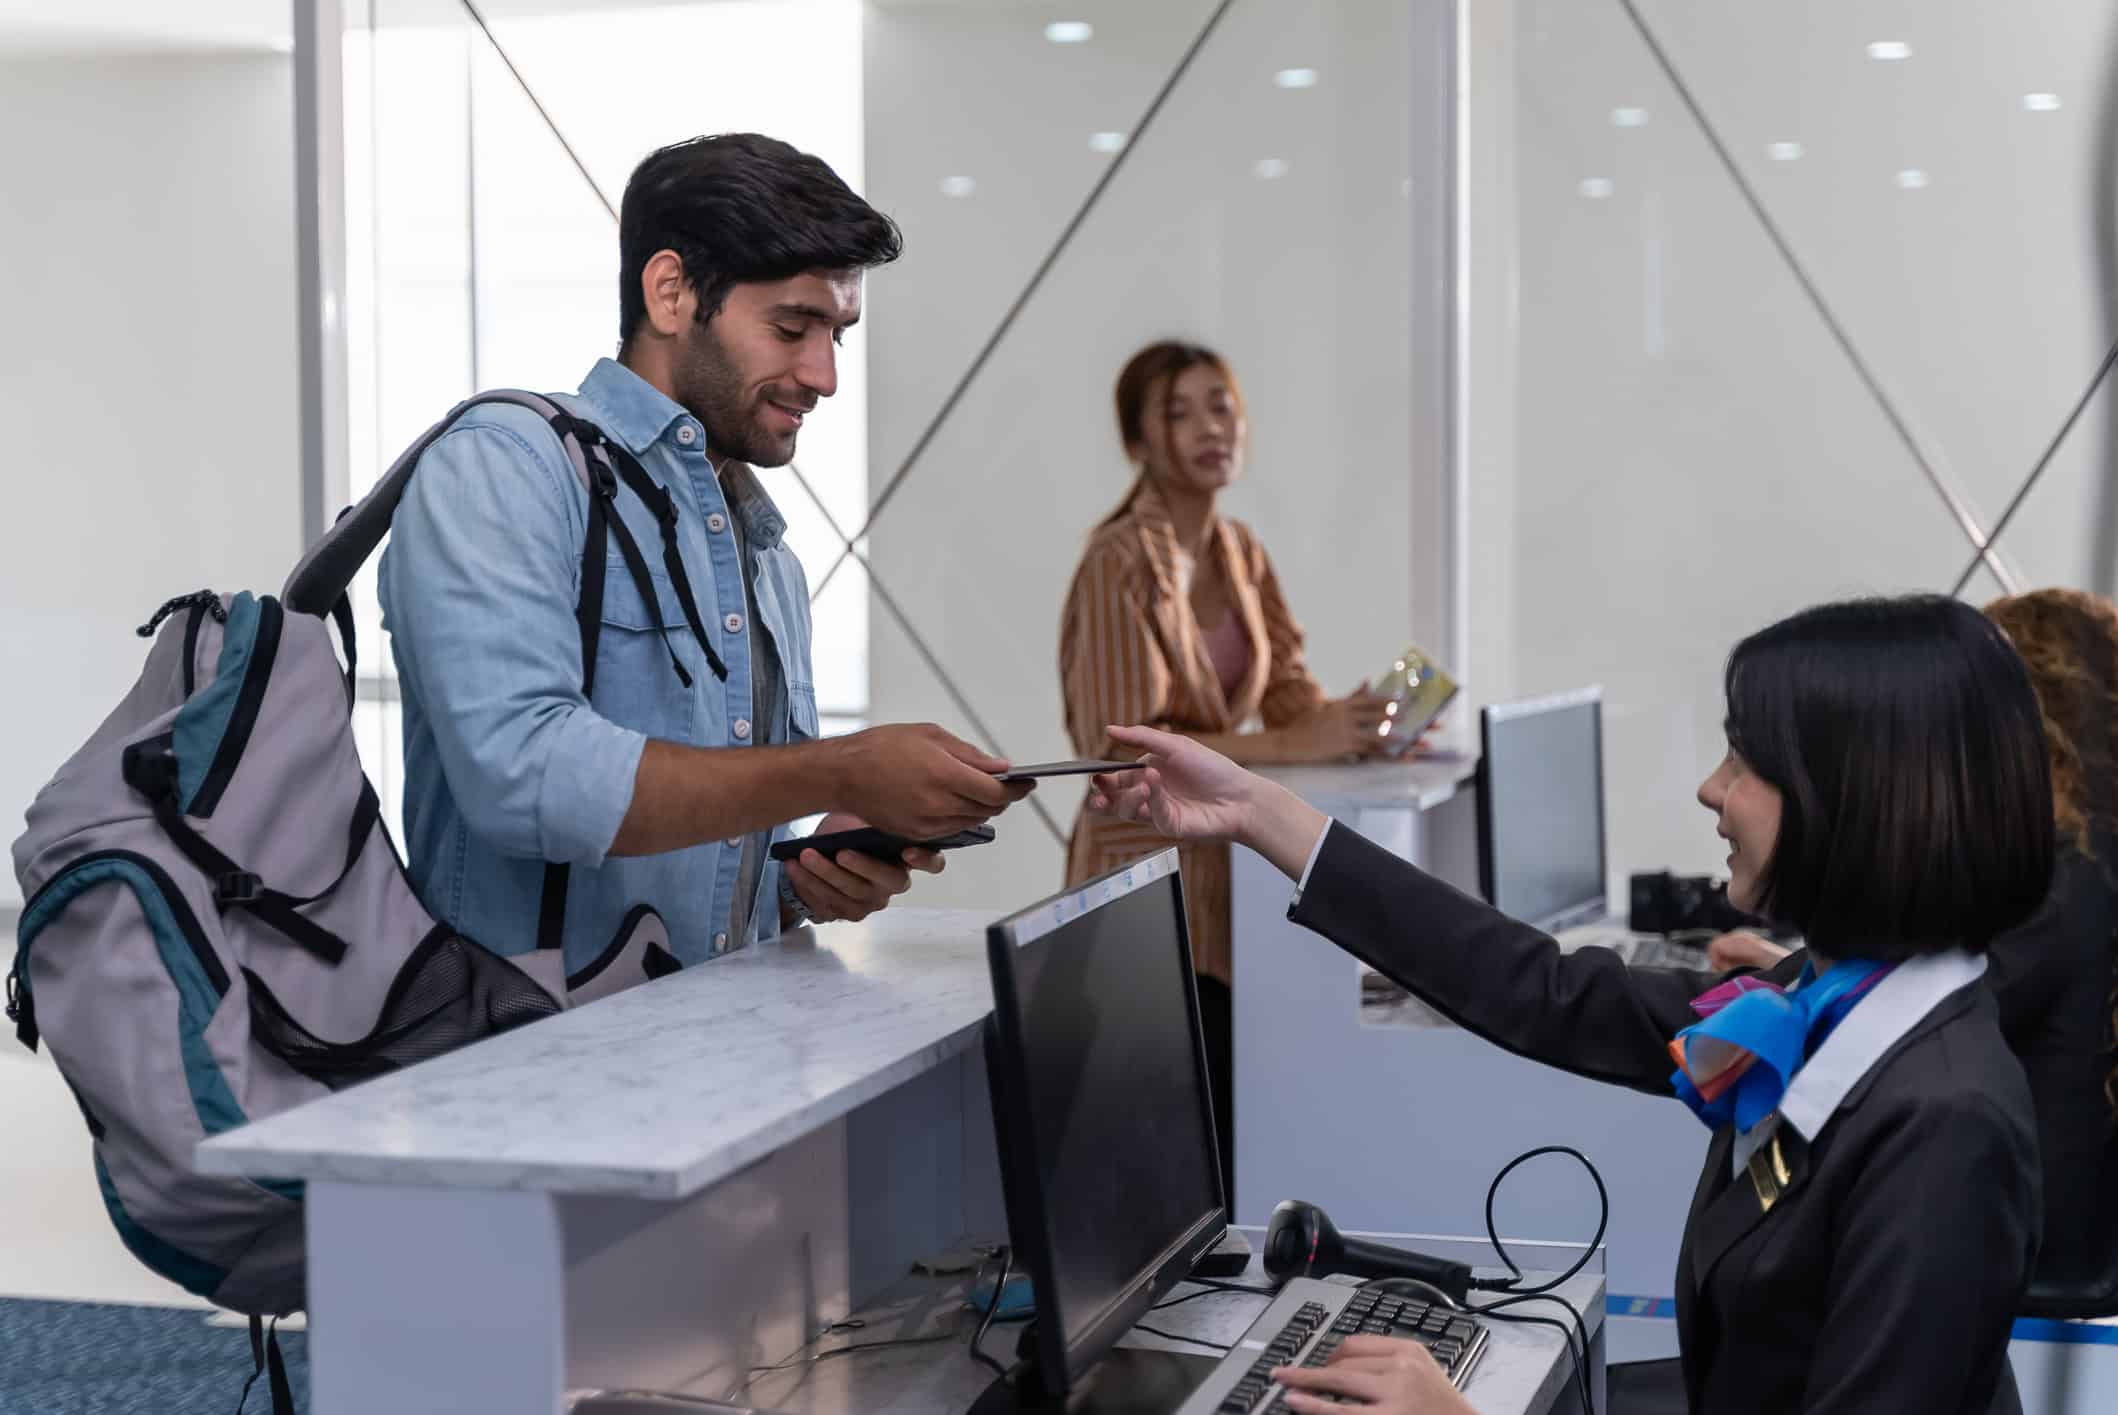
Traveler with backpack presenting passport at airport check-in counter for international travel
Having the right documents ready can make the difference between a smooth check-in and a costly delay.

For travelers putting together overland routes, mixing flights with land border crossings, or keeping plans flexible, visas can feel like the least enjoyable part of the process. They become much more manageable once the key details are understood and approached methodically.

Start With One Question: What Does "Entry" Mean for Your Exact Itinerary?

Much of the confusion around visas comes from treating entry requirements as a simple yes-or-no question.

In practice, requirements vary depending on how a traveler arrives, how long they stay, and even where they've traveled previously. Travel history often plays a larger role than expected.

If Jordan is part of the itinerary, it's worth understanding the pass-and-entry bundle many travelers use, including the Jordan Pass Visa option and how it fits into both entry procedures and sightseeing plans.

Three details that trip up even experienced travelers

  • Port of entry rules: A visa-on-arrival policy can depend on whether you fly in or cross a land border, and which border you use.
  • Length of stay vs. ticket dates: Your accommodation plans may be flexible, but immigration often isn't. Even "proof of onward travel" can be interpreted differently.
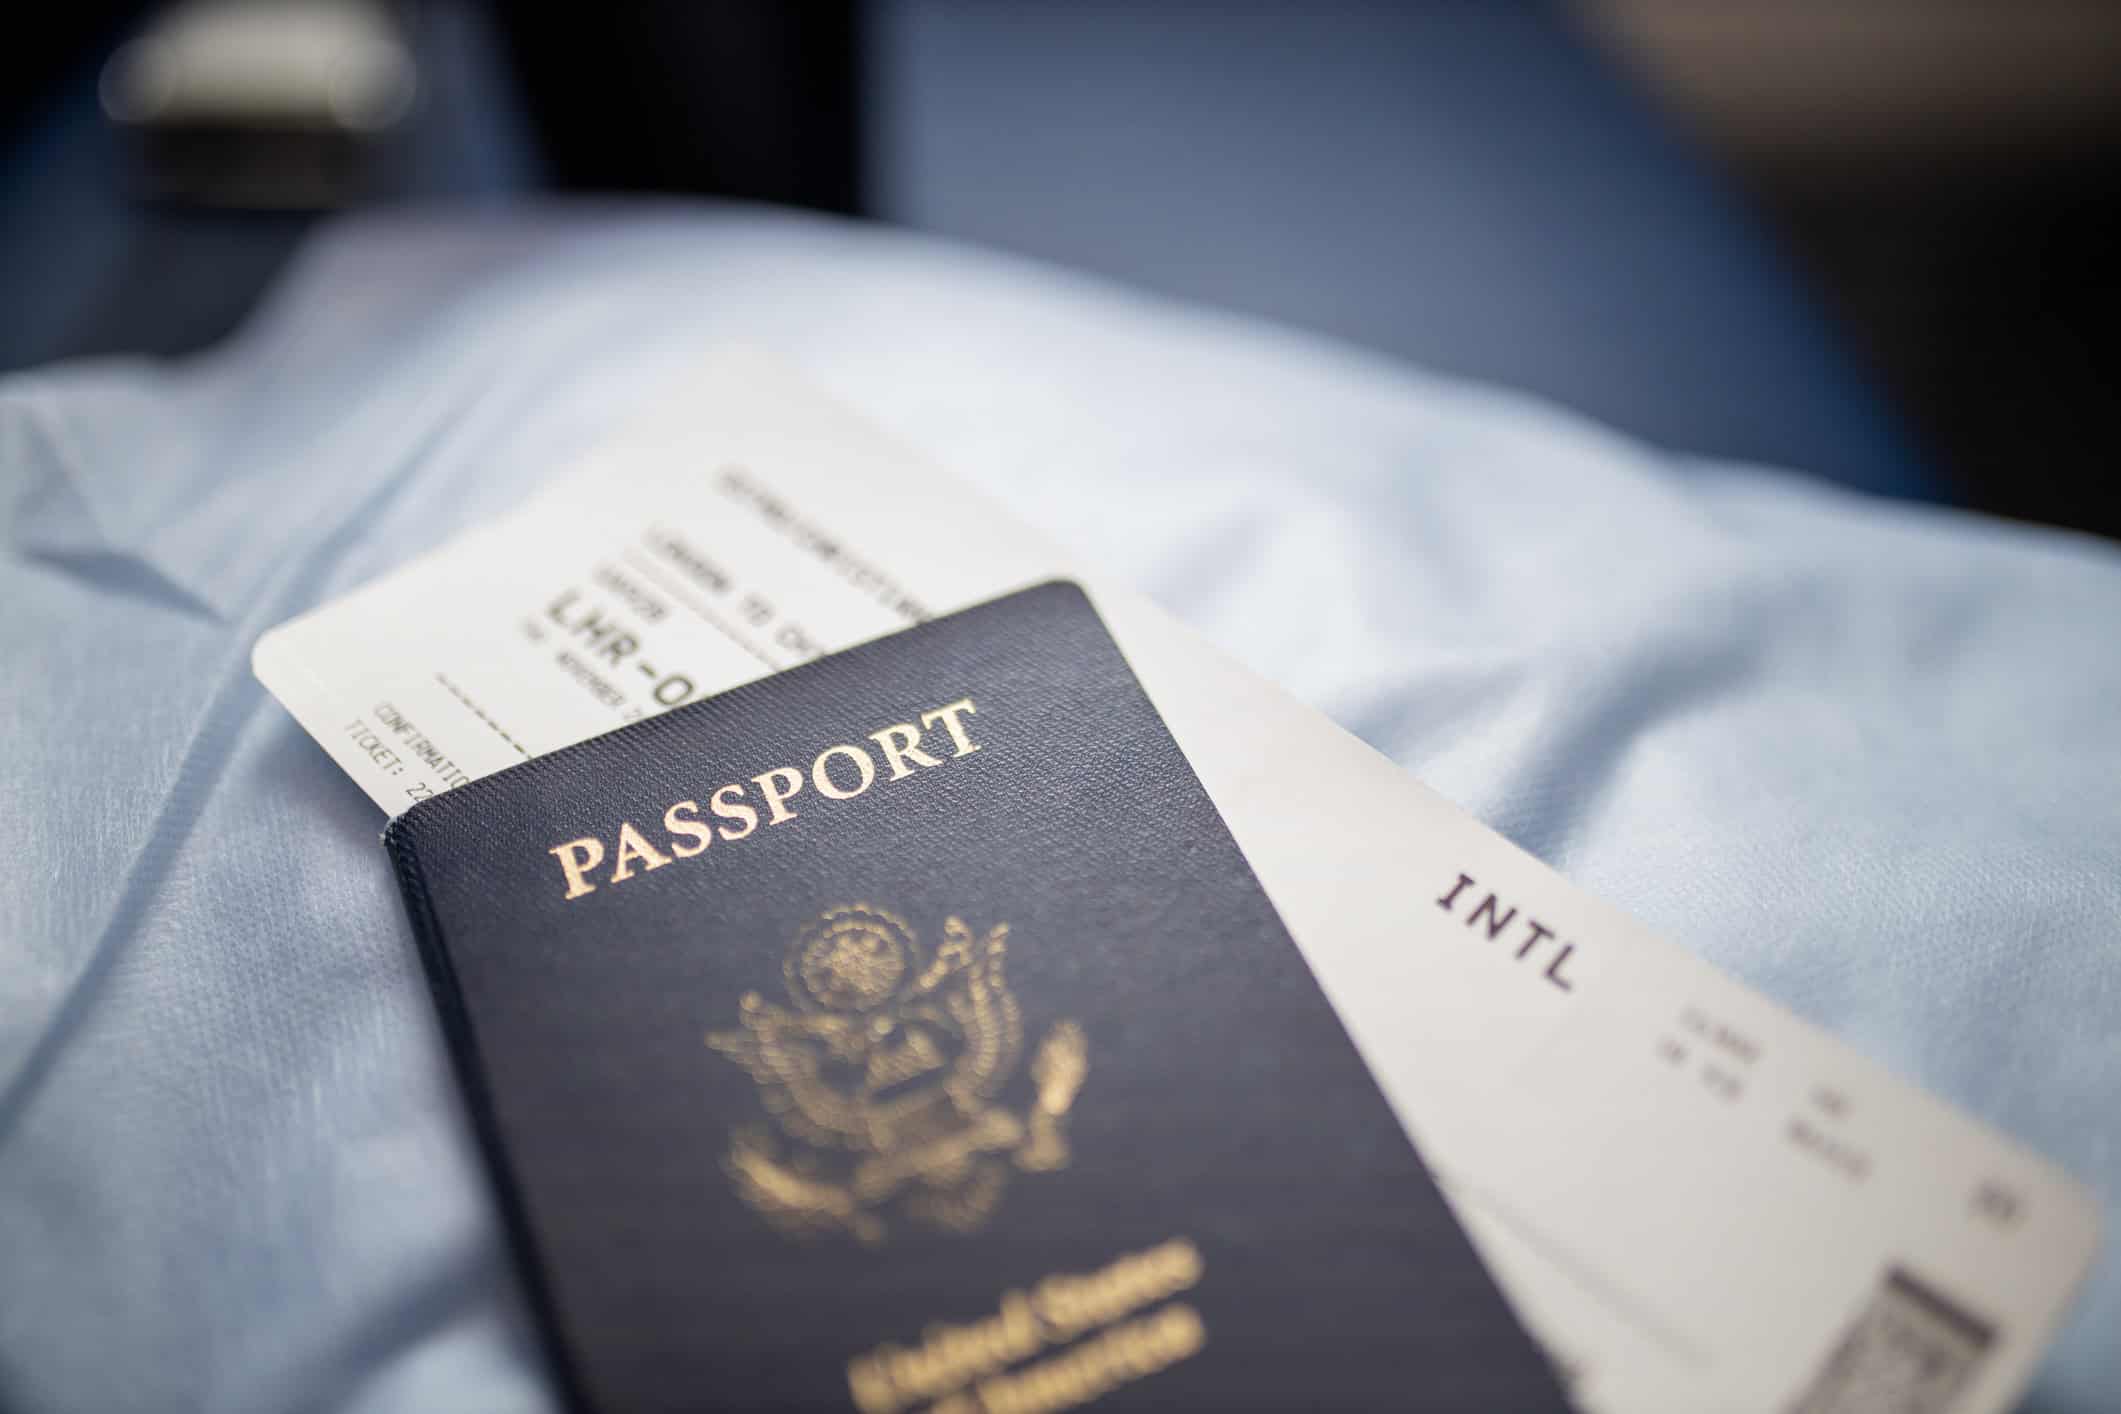
  • Passport validity and blank pages: Many countries require 6 months' validity beyond the date of arrival and at least 1 or 2 blank pages. It's basic-and still a common fail.

How To Keep Visa Research Organized

When planning travel through multiple countries, the challenge is rarely finding information. It's identifying reliable sources and keeping everything well-organized.

A simple "entry checklist" for each country can have a major effect, especially when booking transportation or finalizing plans.

Official government sources should be the starting point. Although often dense, they provide the most reliable and current information available.

Reliable Sources To Use

  • U.S. Department of State - International Travel for complete entry guidance and travel advisories.
  • IATA Timatic to double-check airline-facing entry rules (helpful because airlines enforce requirements at check-in).
  • UN Tourism (UNWTO) for context on travel trends and how policy modifications affect mobility.

Keeping a dated record of when information was checked also helps. Entry requirements can change quickly, and timestamps make it easier to know when a re-check is necessary before departure.

Where Third-Party Visa Agencies Can Help

Some travelers choose to manage every detail themselves, while others balance tight schedules, complex itineraries, or fixed travel dates.

In those situations, independent third-party visa agencies provide value not as shortcuts but as process managers, helping keep everything organized and compliant.

These agencies are not government services, but they can assist with documentation, timelines, and identifying small issues before they become costly problems.

A realistic way to think about agency support

  • Helpful for: complicated itineraries, tight timelines, business travel with fixed meeting dates, or travelers who want a second set of eyes on document readiness.
  • Not a substitute for: reading official entry rules, confirming eligibility, or making sure your personal details match exactly throughout documents.
  • Still on you: honesty and consistency. If your itinerary, employment status, or travel history is complicated, you need to be clear-because immigration forms are not the place for improvisation.
"Most visa problems aren't dramatic—they're administrative. A missing document, an unclear scan, a date mismatch. The fix is usually planning, not panic."

Backpacker-Specific Realities: Flexibility Is Great, but Border Officers Like Clarity

Backpacking culture rewards spontaneity: stay longer if you like a place, change your route when you meet people, and take the cheap bus instead of a flight.

Visa systems don't always like that. The trick is building flexibility with options that look coherent on paper.

Practical ways to stay flexible without looking unprepared

  1. Book cancellable onward travel when proof is likely to be checked, especially for first-time entries.
  2. Keep a simple itinerary snapshot (one page) with dates, cities, and accommodations-even if some are just placeholders.
  3. Store documents offline (PDF copies on your phone and in the cloud). Border crossings are notorious for unreliable Wi?Fi.
  4. Match your story to your stamps: if you've been hopping regions frequently, expect a few extra questions.

What "Good Visa Prep" Looks Like in 20 Minutes

A simple pre-booking routine can prevent the most common and costly mistakes. It doesn't need to be perfect; it just needs to cover the essentials before committing to non-refundable plans.

A quick pre-booking checklist

  • Check official entry requirements for your nationality and route (air vs land).
  • Confirm that your passport is valid and has enough blank pages.
  • Note any fees, photos, or proof you might need (onward ticket, address, funds).
  • Look up processing times and the earliest dates you can apply for a visa.
  • Re-check requirements again 72 hours before departure.

Closing: Make Visas Boring on Purpose

The goal isn't to become a visa expert. It's to make the process boring enough that it never derails your trip. Start with reliable sources, build a simple checklist for each country, and treat entry rules as part of route planning rather than paperwork handled at the airport.

If your itinerary is layered or time-sensitive, independent agencies like VisaSyst and HandleVisa can help keep the details straight-as long as you still verify the official requirements yourself. The win is arriving calm, prepared, and free to focus on the part of travel that actually matters: being there.


This story was published in collaboration with Jordan Pass and edited by the Go Backpacking team for clarity as well as fit.

How To Prepare Your Vehicle for a Long Road Trip (And What To Do After)

Setting up for a long road trip means more than just changing your oil or checking tires. Choosing what to take can be a big deal when every bit of space matters. Finding somewhere to store your RV and gear between trips can also be a hassle.

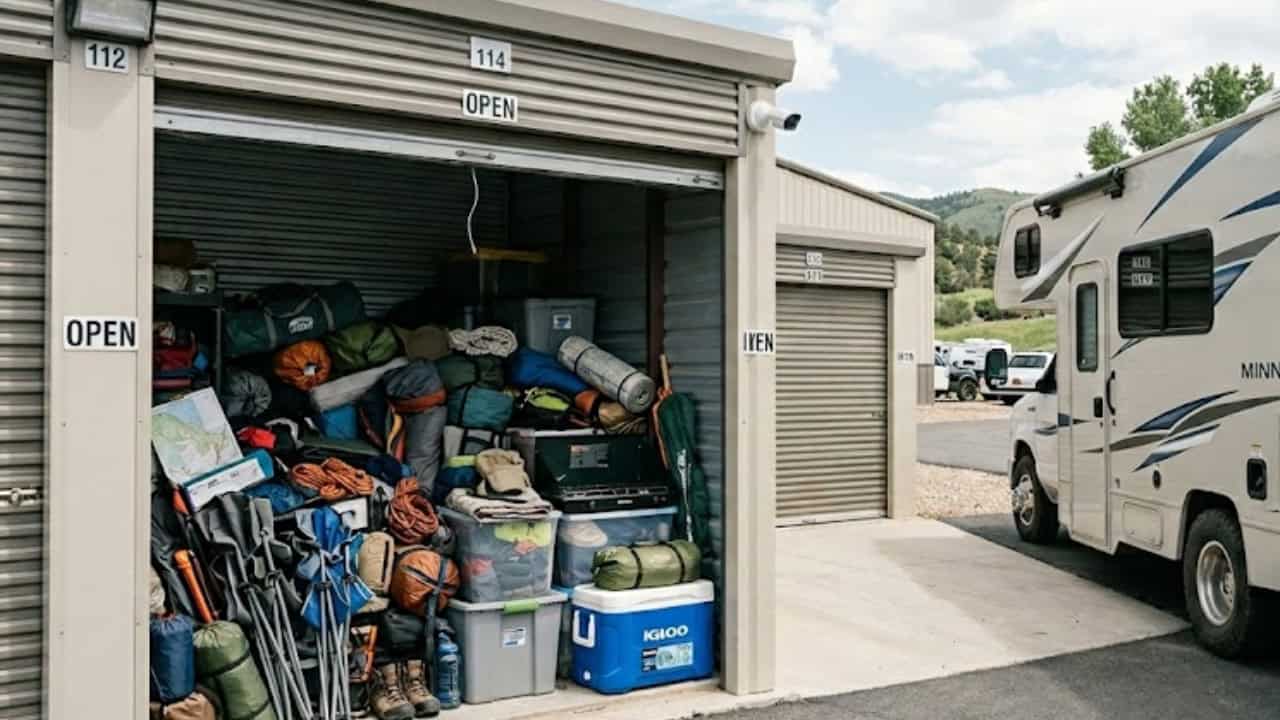
RV storage unit packed with camping and road trip gear

Planning where your gear will go before, during, and after your trip makes everything go more smoothly.

Getting Your Vehicle and Gear Road-Trip Ready

Preparing an RV Entails Picking What To Take With You

Road trip preparation, at least on the vehicle side, has two main parts. After doing standard maintenance checks to ensure your RV drives safely, organizing the inside for extended use should be your next top priority.

Mechanically, you should check that the battery is fully charged, the tires are properly inflated, the brake and radiator fluid levels are correct, all lights are functioning, and the engine oil is changed.

Inspect belts and hoses for wear and tear, and ensure windshield wipers are in good condition. Once these checks are complete, move inside the vehicle.

Securing loose items is important, especially if you'll be driving on dirt or rural roads. Testing appliances beforehand is also wise to avoid discovering problems on the road. RV living can be cramped, especially on longer trips, so packing light and being selective is vital.

If you're a regular road tripper, having a stash of items you bring on trips could be useful. Or at least, somewhere to store gear that you're not bringing on any one particular trip.

Booking RV storage in New York, for example, puts everything you need in one place. Spaces can be booked online, with storage units also available in most locations. Booking and access are simple and convenient, with 24/7 on-site security monitoring to keep your vehicle and equipment safe.

Some things you'll need on an RV journey but probably won't need in your house year-round include leveling blocks, a sewer hose, non-perishable food, travel toiletries, extra blankets or portable fans, camp chairs and folding tables, jumper cables, fire extinguishers, and portable cooking equipment...

Basically, there's a lot of stuff you might want for a road trip that will end up as clutter if you leave it lying around your home.

Storing Vehicles - While You're Away or Between Trips

Regular travelers might switch between domestic U.S. trips and international backpacking travel. This is where vehicle storage between trips is an excellent option.

Sure, many U.S. homes have garages. But if you don't, or you also have one or more other cars in the household, then keeping an RV in the driveway for long periods between journeys could be a problem.

Vehicles left unused for a long time, especially when exposed to the elements, can become worn down and damaged. Keeping your RV or road trip vehicle stored in a controlled environment, such as RV storage, ensures it is in top condition whenever you need it.

Plus, these spaces serve as a convenient way to keep all your road trip gear close to the vehicle without cluttering your house or garage. This reduces stress when coming back home after a trip. Instead of having to leave stuff in the RV or figure out where it goes in your home, you leave it all in the same external space.

Even if you don't end up storing it there for long, having that space to mentally reorganize when you return from a trip will always be beneficial. Once you've started planning your next trip, you can assess what you need to keep or what you can bring home.

Flexibility Permits for Unpredictable Plans

Leading on from the above, month-to-month storage unit options are great for backpackers and road trippers.

You might not be sure how long you'll be using an RV each year or how long you'll be out of the country. Therefore, you'll want to store your vehicle somewhere you can easily cancel and/or pick up again without worrying about paying for long-term fixed contracts.

Imagine you have a personal emergency and need to cancel your trip. Having somewhere to keep your RV while you figure out what you're doing can be highly valuable.

On the other side, treating storage as part of an orderly routine can help prevent last-minute rushes and decisions. If you're going on multiple trips a year throughout different seasons, it is a good idea to keep all your gear stored near your vehicle and home base, without cluttering your day-to-day life.

This simplifies every step of preparing for a road trip, from vehicle maintenance to planning to pre-trip packing to post-trip decompress.

Taking a road trip, as opposed to just driving somewhere, is just as much about the experience as it is about any destination, especially when you're planning a scenic road trip route that's worth slowing down for.

To that end, carefully preparing your vehicle and gear before you set off will ensure you can concentrate on the journey.


This story was published in collaboration with Bolt Storage and edited by the Go Backpacking team for clarity and fit.

How TEFL Can Turn a Backpacking Trip Into a Life Abroad

The night before a first long-haul flight, a backpack often looks more like a mess than a plan: half-rolled clothes, too many shoes, and a guidebook marked up across Southeast Asia. Usually, there's a loose itinerary, a modest savings buffer, and one lingering question: how do you make the trip last longer than your bank account?

TEFL teacher helping a student with an English lesson in Thailand
A TEFL teacher works one-on-one with a student during a lesson in Thailand. Photo: Nalinee Supapornpasupad

That moment is familiar to many travelers. Whether reading this from a coworking space in Medellín or a dorm bed in Lisbon, there comes a point on almost every backpacking trip when "going home when the money runs out" stops sounding romantic and starts feeling like wasted momentum.

For a growing number of travelers, the answer is teaching English and specifically, getting TEFL-qualified with The TEFL Institute and turning a backpacking route into paid teaching opportunities that extend travel from months to years.

This article explores how that works in practice-how backpackers and digital nomads can use TEFL to stay on the road longer, build a transferable skill set, and create a lifestyle that feels closer to slow travel than a short-term trip.

Why Backpackers and Digital Nomads Keep Coming Back to TEFL

Spend enough time in hostel common rooms or long-stay coliving spaces, and a pattern starts to emerge. Someone arrives with a backpack and a return ticket, and a year later they're still there-now with a small teaching schedule, a routine, and a life.

TEFL (Teaching English as a Foreign Language) has become one of the most flexible ways to support long-term travel because it sits in a sweet spot between "career" and "adventure."

For backpackers, TEFL offers:

  • A way to earn locally or online while staying long enough to experience a place beyond the tourist layer.
  • Work that is inherently social, from kids' classes to adult conversation groups.
  • A skill set that improves with experience, usually leading to better opportunities over time.

For digital nomads already earning online, TEFL adds:

  • A more stable baseline income to offset freelance volatility.
  • A location-independent skill that doesn't rely on a single client or platform.
  • A hybrid lifestyle that mediates screen time with in-person interaction.

That said, the reality is more subtle than hostel conversations suggest. Entry-level salaries can be modest, especially in Southeast Asia.

Visa requirements vary widely by country. Not all TEFL certificates carry the same weight, and choosing the wrong provider can limit job options early on.

Why The TEFL Institute Stands Out When You're On the Road

For travelers who want a legitimate pathway into teaching-not just a quick certificate-the quality of training matters.

The TEFL Institute is an accredited, internationally recognized provider offering Ofqual-regulated qualifications. Its Level 5 diploma is widely regarded as a benchmark for teaching in competitive markets across East Asia and Europe.

In practical terms, this means:

  • Courses are regulated by the UK government, rather than being informal or unverified certifications.
  • Schools and recruiters in destinations like Thailand, Vietnam, South Korea, Japan, and Spain recognize and value this level of training.
  • The curriculum incorporates essential teaching skills, including lesson planning, classroom management, grammar instruction, and working with different age groups.

For travelers specifically, a few features stand out:

  • Fully online, self-paced study that can be completed before or during a trip.
  • Access to real tutors who can answer questions on lesson planning and teaching techniques.
  • Ongoing job support, helping graduates find teaching roles abroad or online.

This combination makes it easier to move from idea to action. It helps you go from researching TEFL to entering a classroom with confidence.

A Backpacker Story: When "Just One More Month" Becomes a Year

Consider a common scenario: a traveler arrives in Chiang Mai planning to stay for a few weeks, with just enough savings for accommodation, street food, and a handful of day trips.

By the second week, the same questions start coming up:

"How are you still here?"
"How are you paying for it?"

Often, the answer is TEFL.

In one example, a fellow traveler completed a Level 5 diploma through The TEFL Institute and secured a teaching role at a local language center. The job covered living costs, allowed for savings, and provided structure without sacrificing flexibility.

Stories like this are common, but rarely note the effort involved. Completing a TEFL course takes time and discipline. Landing a first role may require patience, applications, and interviews. Still, for many travelers, that initial investment pays off quickly.

Within a few months, what began as a short-term trip can evolve into something more stable. It becomes a routine, a local community, and the freedom to decide whether to stay longer or move on.

How To Make TEFL Work for Backpackers and Nomads

For those pondering a similar path, here's a practical roadmap:

1. Start Before You Run Out of Savings

The best time to begin a TEFL course is either:

  • A few months before departure, or
  • Early in the trip, while savings still act as a buffer

With the TEFL Institute's online format, you can study during downtime without missing travel experiences.

2. Choose a Course Based on Goals, Not Just Price

If the goal is to teach in countries with stricter requirements, such as Japan, South Korea, or parts of Europe, a 180-hour Ofqual Level 5 TEFL diploma is a strong long-term investment.

For those primarily interested in online teaching, a 120-hour accredited course can be a practical starting point, with the option to upgrade later.

3. Use Travel Communities to Find Opportunities

Long-standing travel resources like Go Backpacking can be valuable when evaluating:

  • Which cities are affordable and welcoming for new teachers
  • Realistic cost-of-living expectations
  • Which schools and regions have well-established reputations

Cross-check job offers and visa requirements against trusted sources to prevent common pitfalls.

4. Combine TEFL with Existing Skills

Many travelers don't rely solely on TEFL. Instead, they combine it with freelance or remote work.

A typical hybrid schedule might look like:

  • Mornings: Teaching English online
  • Afternoons: Freelance work or personal projects
  • Evenings: Exploring the city and preparing lessons

Such a balance provides both economic security and continued travel.

What About Visas, Stability, and Burnout?

Long-term travel isn't always as effortless as it seems. Visas expire, contracts end, and constant movement can become exhausting.

TEFL doesn't eliminate these challenges, but it can make them more manageable:

  • Visas: Many countries require a recognized TEFL qualification for legal work permits
  • Stability: Teaching provides structure without locking travelers within strict schedules
  • Burnout: Longer stays and deeper local connections can reduce travel fatigue

The result is a more sustainable pace that supports both income and well-being.

Why Quality TEFL Matters More Than Ever

Over time, expectations in the TEFL industry have shifted. Schools and students are increasingly prioritizing accredited training, practical teaching skills, and reliable support.

A basic, unregulated certificate might lead to short-term or lower-paying roles. A recognized qualification, such as the Ofqual Level 5 diploma from The TEFL Institute, can unlock access to better opportunities and more consistent work.

For backpackers and digital nomads, that difference can determine whether TEFL becomes a temporary fix or a long-term option.

Your Next Step

For travelers feeling that pull to stay on the road a little longer, here's a simple way forward:

  1. Explore teaching-abroad stories and destination guides on Go Backpacking to see where TEFL fits into your travel plans.
  2. Review accredited courses from The TEFL Institute, with particular attention to the Level 5 diploma if competitive markets are the goal.
  3. Define a realistic timeline-choose when to start the course and when to begin applying for roles.

There's no need for a perfect plan. A single portable qualification and willingness to take the first opportunity can shift the trajectory of a trip.

The backpack may still be messy. The itinerary may still change. But with a TEFL certification in hand and a first class on the schedule, something changes: travel becomes more than passing through-it becomes a way of life.


This story was published in collaboration with The TEFL Institute and edited by the Go Backpacking team for clarity and fit.

Backpacking Japan on a Budget: What I Wish I'd Known Before My First Trip

Landing at Narita, I grabbed my luggage and did what every Japan travel guide warns against: panicked about money.

Japan is known for being expensive, and it can be if you travel like most tourists. But after three weeks backpacking through Tokyo, Kyoto, Osaka, and Hiroshima, I spent less per day than during the two weeks in Western Europe. Japan is affordable if you know how to make the most of the system.

Crowds crossing Shibuya Crossing in Tokyo, Japan during the day
Crossing Shibuya in Tokyo - one of the busiest intersections in the world and a daily reminder of how efficiently Japan moves. Photo: Martijn Baudoin

Here's what I learned about traveling in Japan on a budget, much of it from personal trial and error.

Getting Around Japan: The Japan Rail Pass Question

The first thing to figure out is whether the Japan Rail Pass is actually worth buying.

The JR Pass gives you unlimited travel on most JR trains, including the bullet train (shinkansen), for a set number of days. A 7-day pass runs about ¥50,000 (roughly $330).

Sounds like a lot until you realize that a single Tokyo-to-Kyoto bullet train ticket costs ¥14,000 one-way. If you're hitting Tokyo, Kyoto, Osaka, and Hiroshima in a week, the pass pays for itself in two rides.

But here's what most guides don't mention: if you stay in one city for more than a few days, the JR Pass is a waste. I spent five days in Tokyo and didn't need it once because the metro runs on a separate system.

Buy an IC card (Suica, Pasmo, or ICOCA) instead. Load it with a few thousand yen and tap on and off trains, buses, and even vending machines. The IC card is your best friend for getting around major cities.

An ICOCA IC card - one of several rechargeable transit cards you can use to tap on and off trains, buses, and even pay at convenience stores across Japan. Photo: Note Thanun

For longer trips between cities, highway and overnight buses are the backpacker move. A night bus from Tokyo to Osaka costs about ¥3,000 to ¥5,000, a fraction of the bullet train price, and you save a night of accommodation.

The buses are clean, quiet, and more comfortable than they have any right to be. Japan does public transport better than anywhere I've been.

Where To Sleep: Hostels, Capsule Hotels, and the Cheapest Tatami in Town

Japan's hostel scene is excellent. In Tokyo and Osaka, expect to pay ¥2,500 to ¥4,000 per night for a dorm bed, about $17 to $27. Most hostels are spotless (this is Japan, after all), and many have common areas that are better than some hotel lobbies I've seen.

Capsule hotels look wild in photos, but are just comfortable pods with a curtain, a light, and a power outlet. Prices hover around ¥3,000 to ¥4,500 per night. I slept three nights and did better than expected. If you're tall (I'm 6'1"), you'll fit but just barely.

For something more traditional, look into budget ryokan or guesthouses with tatami mat floors. Sleeping on a futon on tatami mats is one of those experiences that sounds uncomfortable but is actually great for your back. Budget options start around ¥4,000 in smaller cities like Takayama or around Hiroshima.

Key takeaways: book ahead during cherry blossom season (late March through mid-April). Hotel rooms and hostels fill weeks in advance, and prices spike. If you can travel in May, October, or November, you'll get better weather, fewer tourists, and lower prices.

Eating Well Without Destroying Your Budget

This is where Japan broke my brain a little. Japanese food is world-class AND cheap, if you eat where Japanese people eat.

Convenience stores (konbini) are not the sad airport shops you're picturing. 7-Eleven, Lawson, and FamilyMart sell fresh onigiri for ¥120, bento boxes for ¥400 to ¥600, and hot meals that are surprisingly good.

I ate konbini breakfasts almost every morning and looked forward to them. The egg sandwiches alone are worth the trip. I don't know what they do to them, but they're unreasonably good.

Japanese egg sandwiches (tamago sando) in a convenience store in Japan
Japanese egg sandwiches (tamago sando) are a convenience store staple - cheap, simple, and surprisingly good. Photo: Yosuke Ota

For lunch and dinner, follow the lunchtime office workers. Ramen shops charge ¥700 to ¥1,000 for a full bowl. Gyudon (beef bowl) chains like Yoshinoya or Matsuya serve filling meals for ¥400 to ¥500.

Conveyor-belt sushi (kaiten-zushi) costs ¥100 to ¥200 per plate, and the quality is better than at most sit-down sushi restaurants back home.

Street food varies by city. Osaka is the undisputed street food capital - takoyaki (octopus balls) for ¥500, okonomiyaki for ¥600 to ¥800. In Kyoto, hit Nishiki Market early before the tourist crowds make it impossible to move. In Tokyo, Ameyoko Market near Ueno Station is where locals actually shop.

Department store basements (depachika) do something magical around 6-7 p.m.: they discount everything that must sell that day. High-end sushi, wagyu bento, fancy desserts - all marked down 30-50%. Show up at closing time and eat like royalty for backpacker prices.

Japan Travel Tips That Actually Matter

Cash is still king. Japan is more cash-dependent than you'd expect for a technologically advanced country. Many smaller restaurants, temples, and local shops don't take cards. Withdraw yen from 7-Eleven ATMs (they accept foreign cards reliably) and keep ¥10,000 to ¥20,000 on you.
Learn five basic Japanese phrases. Most Japanese people in bigger cities understand some English, but the effort matters.

"Sumimasen" (excuse me), "arigatou gozaimasu" (thank you very much), and "eigo no menu wa arimasu ka" (do you have an English menu?) will get you through 90% of restaurant interactions.

Google Translate with the camera function handles the rest. Point it at any menu, and it translates in real time.

Shoes off. Always check. Temples, restaurants, hostels, and fitting rooms. If you see shoes lined up at an entrance, take yours off too. Wear socks without holes.

Get a pocket Wi-Fi or an eSIM before you land. Free Wi-Fi in Japan is patchy outside train stations and konbini. Google Maps is key to navigating the train system. You will not figure out Shinjuku Station without it.

You'll want data for Google Translate when the language barrier hits. I used Roambit eSIM on my last trip. I installed the profile before boarding and had data the instant I landed at Narita, no SIM card swapping needed.

Whatever you choose, don't arrive in Japan without a connectivity plan. You'll regret it within the first hour.

Trains stop running around midnight. Plan to arrive at your accommodation by 11:30 p.m. or budget for a taxi. Missing the last train in Tokyo costs ¥3,000 to ¥5,000.

A Suggested Route for First-Time Travelers

If you have two weeks, here's the route that gives you the best mix without rushing:

Tokyo (4-5 days): Shibuya, Shinjuku, Harajuku, Asakusa's Senso-ji temple, Akihabara, Tsukiji Outer Market, and a day trip to Kamakura or Nikko. Tokyo alone could fill a month, but five days hit the highlights without burning you out.

Hakone or the Mount Fuji area (1-2 days): Hot springs, lake views, and on a clear day, Mount Fuji framed against everything. The Hakone Free Pass covers transport and is worth it.

Kyoto (3-4 days): Fushimi Inari early morning (go at 6 a.m. to beat the crowds), the bamboo grove in Arashiyama, Kinkaku-ji, and wandering the Higashiyama district. Rent a bike. Biking around Kyoto was one of the best things I did on my trip.

Osaka (2-3 days): Dotonbori for the food, Osaka Castle for history, Shinsekai for atmosphere. Osaka is louder, messier, and more fun than Kyoto. If you're into backpacking, Osaka's hostels tend to be more social than Tokyo's.

Hiroshima + Miyajima Island (1-2 days): The Peace Memorial Museum is heavy but important. Miyajima Island and its floating torii gate are a short ferry ride away and feel as if stepping into a completely different Japan.

This route works well with a 14-day JR Pass if you're moving fast. If you're spending longer stretches in one city, skip the pass and bus between them.

What Backpacking Japan Actually Costs

My daily breakdown for three weeks:

Accommodation averaged ¥3,000/night ($20). Food costs around ¥2,000 to ¥3,000/day ($13-$20), with konbini breakfasts, cheap lunch spots, and one proper dinner.

Transport within cities costs ¥500-¥1,000/day using IC cards. Adding entrance fees, occasional splurge meals, and a few day trips, I averaged about $55 to $65 per day, all in.

That's less than I spent backpacking through Portugal, and the food in Japan was significantly better. If you're looking for more ways to stretch your budget, here are a few ideas for experiencing Japan for less.

Japan isn't the budget-buster people think it is. The trains are on time, the food is incredible at every price point, and I never felt unsafe at any time - not walking through Shinjuku at 2 a.m., not leaving my bag on a train seat while I ran to grab a coffee (it was still there, obviously, because Japan).

Bring cash. Download maps offline. Don't skip Osaka. And if someone tells you Japan is too expensive to backpack, they just haven't done it right.


This story was published in collaboration with Roambit and edited by the Go Backpacking editorial team for clarity and style.

5 Comfort Essentials for Long Travel Days

Long travel days are part of backpacking, whether a red-eye flight, a 10-hour bus ride, or a string of connections across time zones. The goal isn't to eliminate discomfort entirely. It's to manage it well enough that you still arrive feeling like yourself.

Most experienced travelers figure this out the hard way. It's not about packing more but packing smarter. A few small, well-chosen items can make a noticeable difference in how you feel after hours on the road.

Travel bag with reusable water bottle and snacks at airport during long travel day
Packing simple essentials like water and snacks can make long travel days far more comfortable.

These five essentials focus on hydration, hygiene, sleep, personal care, and health - the things that quietly determine whether a long travel day feels manageable or exhausting.

Long Travel Day Essentials to Stay Comfortable

1. Manage Hydration and Snacks

Dehydration creeps up slowly during travel. Between dry airplane cabins, long stretches without water, and irregular meal timing, it's easy to feel off before realizing why.

A reusable water bottle is one of the simplest ways to stay ahead. Filling up whenever you can-at airports, bus stops, or cafés-helps maintain steady hydration throughout the day.

For longer journeys, adding electrolyte packets helps preserve energy, especially when meals are delayed or inconsistent. It's a lightweight addition that makes a noticeable difference.

Snacks matter just as much. Instead of relying on whatever is available in transit hubs, many travelers carry small, high-energy options like nuts, trail mix, or energy bars. These take up little space but prevent dips that make travel harder than it needs to be.

Keeping water and snacks within easy reach, not hidden in your bag, makes it more likely you'll use them.

Pro Tip: Don't wait until you feel thirsty or drained. Small, consistent sips of water and light snacks throughout the day help sustain steady energy and avoid sudden crashes.

2. Build a Compact Hygiene Kit

After hours on the move, basic hygiene can make a big difference. A simple kit helps you reset during long layovers or before arriving at your destination.

A practical setup might include a travel toothbrush, toothpaste, hand sanitizer, deodorant, and a small washcloth. For longer travel days, a compact microfiber towel can also come in handy.

Keep it minimal and accessible. A quick refresh kit fits in a daypack or personal item.

For travelers with specific health or personal care routines, it's worth thinking ahead about what's actually needed in transit. For example, some travelers rely on travel-friendly equipment like RespShop's AirFit F30, along with compact CPAP setups, to maintain sleep routines on long-haul trips. Having gear that's designed to be portable can make that process much easier.

The same logic applies to other personal care items. Choosing compact, travel-ready versions helps reduce bulk while covering essential needs.
Pro Tip: Keep your hygiene kit in an outer pocket or small pouch so it's easy to grab during a layover without unpacking your entire bag.

3. Plan for Sleep and Recovery on the Road

Sleep often makes the difference between arriving refreshed and exhausted. While you can't control your environment on a plane or bus, you can improve your chances of getting some rest.

Airplane seat with travel pillow, mask, and earbuds.
A few simple items, like a travel pillow, an eye mask, and earplugs, can go a long way toward blocking out light and noise. Even short rest periods make a noticeable difference, especially with jet lag or tight schedules.

For some travelers, keeping consistent sleep routines is more than a matter of comfort. For example, research shows that sleep apnea affects millions of people worldwide, making it important for those individuals to maintain reliable sleep setups even while traveling.

That might mean planning ahead with portable gear or ensuring accommodations can meet their needs.

For everyone else, the goal is simpler: create a small window of comfort wherever you are. This might mean choosing a quieter gate area, adjusting your seat, or using downtime to rest.

Key Tip: Even if you can't sleep fully, closing your eyes and resting for 20-30 minutes can help reset your energy and improve how you feel when you arrive.

4. Pack for Period Comfort

Travel doesn't pause for personal needs. Planning makes a big difference in staying comfortable on the road.

Woman smiling while walking down a European street.

Disposable products can take up space and require frequent resupply, which isn't always convenient when moving between destinations. For many travelers, switching to a reusable option simplifies things significantly.

A reusable menstrual disc from nixit provides a compact, long-lasting solution that fits easily into a small toiletry kit. With fewer items to carry and less reliance on finding supplies along the way, travel becomes less physically and psychologically taxing.

This approach fits well with minimalist packing by replacing multiple single-use items with a single reliable solution. This flexibility is useful on long transit days with limited restroom access.

Pro Tip: Keep a small, discreet pouch for personal care items so they're always easy to access without digging through your bag.

5. Prepare for Personal Health Needs Without Overpacking

Open suitcase with neatly folded clothes and travel essentials.

A small health kit can go a long way in making travel feel more manageable. Instead of packing for every scenario, focus on what you actually use. A few basics: pain relievers, motion sickness medication, and a couple of bandages usually cover most situations.

Travelers with ongoing health needs should be especially intentional about what they bring with them. Keeping medications in their original containers and packing them in a dedicated pouch helps avoid issues during security checks or border crossings.

It also helps to recognize broader health considerations. For example, over 890 million adults worldwide live with obesity, making it common for travelers to manage health conditions while on the road.

Bring only what you need and keep it organized. A simple pouch or pill organizer keeps everything in one place and is easy to access when needed.

Important: Avoid the "just in case" trap. Focus on the items you regularly use rather than overpacking for unlikely scenarios.

The Bottom Line

Comfort on long travel days isn't about having everything - it's about having the right things.

Hydration, hygiene, sleep, personal care, and health each play a role in how you feel after hours in transit. When those basics are covered, everything else becomes easier to manage.

Most of these strategies don't require much space or planning. They're simple adjustments that help reduce friction during long days of travel.

With a little preparation, even the most exhausting travel days can feel easier to handle, leaving you ready to enjoy the destination when you arrive.

_____

This story was published in collaboration with nixit and RespShop and edited by the Go Backpacking editorial team for clarity and fit.

5 Tech Tips for Smarter Travel

Backpacking today is as much about managing your tech as it is packing your gear. Phones hold boarding passes, maps replace guidebooks, and a dead battery can quickly turn an easy travel day into a stressful one.

Most travelers think carefully about what goes into their backpacks, but tech is often an afterthought. A little preparation before departure can help keep everything running smoothly on the road.

Woman working remotely in Turkey
A woman working remotely in Turkey (photo: Aleh Tsikhanau)

These five simple strategies cover the most important travel tech essentials for protecting devices, keeping plans accessible, and preventing minor glitches from becoming major disruptions.

Travel Tech Essentials for Backpacking

1. Choose Devices That Match Your Trip

Not every trip requires the same setup. A weekend getaway might only require a smartphone, while a longer backpacking trip or a remote-work itinerary may warrant bringing a second device.

The key is being intentional. Extra gear adds weight and risk, so every item should serve a purpose.

For longer trips, some travelers choose a lightweight laptop or tablet to manage bookings, photos, or work on the road. In those cases, selecting reliable but affordable gear is important.

Certified refurbished laptops from PCLiquidations can be a practical option, offering solid performance without the stress of carrying an expensive new device through unpredictable environments.

Battery life, durability, and portability should guide the decision. A device that can last a full travel day without constant charging is often more valuable than one with premium specs.

Pro Tip: For extended trips, consider a backup device strategy. Even a basic secondary device can be a blessing if your primary one is lost, stolen, or damaged.

2. Protect Your Gear From Drops and Weather

Backpacking environments can be harsh on electronics. Between crowded buses, hostel bunks, and sudden rainstorms, devices endure more abuse than at home.

Smartphone cases are travel tech essentials, shown inside a rainy tent window.

A layered approach to protection works best. Start with the basics: a durable case and a tempered-glass screen protector. For added resilience, keep electronics in a dry bag or waterproof pouch inside your main pack.

Personalizing your gear can also help. Using something distinctive, like Custom Envy's custom sublimated phone cases, makes it easier to identify your device in common areas like hostel charging stations, where multiple identical phones are plugged in.

For larger items like tablets or laptops, a padded sleeve provides an extra layer of security without adding much bulk.

Pro Tip: Keep your most-used device (usually your phone) in a consistent, easy-to-access spot. It reduces the chances of accidental drops while digging through your bag.

3. Set Up Offline Maps and Backup Documents

One of the easiest ways to avoid travel stress is by preparing for moments without internet access. Arriving in a new city late at night with no signal is common and easily handled with some prep.

Backpacker checking directions on smartphone at train station while traveling
Using a smartphone for navigation in a busy train station.

Before departure, download offline maps for each destination. Apps like Google Maps allow users to save entire regions, making navigation possible even without data.

It's also smart to store key travel documents (passport copies, insurance information, reservations) in an accessible offline folder. Keeping a second copy in secure cloud storage provides an additional layer of backup.

Language packs and translation apps can also be downloaded in advance, helping bridge communication gaps immediately upon arrival.

Pro Tip: Save your accommodation location as a pinned point in your maps app before you arrive. It's a basic step that can save a lot of confusion after a long travel day.

4. Build a Simple, Reliable Power Kit

Power management is one of the most overlooked parts of travel planning, until it becomes a problem.

A dead phone doesn't just mean no social media. It can mean no boarding pass, no directions, and no way to contact your next accommodation.

A basic power kit should include a high-capacity portable charger, a compact travel adapter, and short charging cables to minimize clutter. Keeping everything in one small pouch makes it easy to grab.

For longer trips or remote travel, some backpackers also carry a small solar charger as a backup. While not essential for every trip, it can be useful in off-grid situations.

Airline restrictions are worth noting as well. Most carriers limit battery capacity to 100Wh, so it's important to check before flying.

Pro Tip: Charge your power bank whenever you get the chance at airports, cafes, or hostels. Treat it like a backup fuel tank, not something you only think about when empty.

5. Run a Basic Digital Security Routine

Travel often means relying on public Wi-Fi in airports, cafes, and hostels, which can expose personal data if precautions aren't taken.

A few simple habits can go a long way. Start by using strong passwords and enabling biometric locks on devices. Avoid logging into sensitive accounts on shared or public computers.

Using a reputable VPN on public networks offers an extra layer of protection, especially when accessing banking or personal information.

Backing up essential data before leaving home is also critical. If a device is lost or stolen, having secure backups ensures nothing critical is lost with it.

While most trips go smoothly, preparing for worst-case scenarios is part of traveling smart.

Pro Tip: Enable "Find My Device" or similar tracking features before your trip. If something goes missing, having that tool ready can make recovery much easier.

The Bottom Line

Technology plays a central part in modern travel, and having the right travel tech essentials makes a noticeable difference on the road.

A little preparation before departure - choosing the right devices, properly protecting them, and setting up simple systems - can prevent the most common issues travelers face on the road.

These aren't complicated strategies. They're small, practical steps that help keep everything functioning well when plans inevitably shift.

With the right setup, travelers can spend less time troubleshooting and more time appreciating the journey.

_____

This story was published in collaboration with PCLiquidations and Custom Envy and edited by the Go Backpacking editorial team for clarity and fit.

6 Reasons To Rent a Yacht Instead of a Hotel

For most trips, booking a hotel is the default. It's simple, familiar, and works almost anywhere. But in some destinations, especially coastal regions and island chains, another option can change how you experience a place: renting a yacht.

If you've ever looked into how travelers rent yachts for a week in places like Greece or Croatia, you've probably noticed it's not only about luxury; it's a different way to move through a destination.

Yacht anchored in turquoise water near a coastline, illustrating yacht vs hotel travel experience
A yacht offers a different way to explore coastal destinations. (photo: iStock)

This isn't about over-the-top travel or celebrity lifestyles. In the right setting, a yacht can actually be a practical (and memorable) way to explore more in less time.

Renting a Yacht vs. Staying in a Hotel: What To Consider

1. You Want to Explore Multiple Destinations Without Repacking

If your trip involves hopping between islands or coastal towns, staying in a hotel means constantly packing and unpacking, checking in and out, and arranging transportation. With a yacht, your accommodation moves with you.

Instead of bouncing between hotels, you can:

  • Wake up in a new destination each day.
  • Visit smaller towns and harder-to-reach beaches.
  • Skip the logistics of ferries, taxis, and check-in times.

For destinations like the Caribbean, the Italian Riviera, the Balearic and Greek Islands, or parts of Southeast Asia, this can simplify your trip more than you expect.

2. Access to Places You Can't Reach by Land

Some of the best coastal spots aren't easily accessible by car or on foot.

A boat opens up:

  • Secluded beaches
  • Secret coves
  • Small islands with limited infrastructure

These are often the places that feel the least crowded and the most memorable - the kind of spots that don't show up in every itinerary.

3. Built-In Flexibility

One of the biggest advantages of traveling by boat is the flexibility it offers. If a destination feels crowded or the weather changes, you're not locked into a fixed plan. You can adjust your route, spend more time where you like, or skip a stop entirely.

That kind of flexibility is hard to replicate with hotel bookings and pre-arranged transportation.

4. It Can Make Sense for Small Groups

While renting a yacht might sound expensive, the cost becomes more reasonable when split among a group.

For example:

  • A group of 4-8 travelers sharing the cost.
  • Accommodation + transportation bundled into one.
  • Fewer separate bookings to manage.

In some cases, it compares to mid-range hotels plus daily transport, especially in destinations where moving between islands adds up quickly.

5. A More Immersive Travel Experience

Hotels tend to separate you from your surroundings. You check in, head out during the day, and return at night.

On a boat, you're constantly in the environment:

  • Watching the coastline change throughout the day.
  • Swimming directly from where you're staying.
  • Spending evenings anchored in quiet bays instead of busy town centers.

It's a different rhythm of travel, slower, more connected, and often more memorable.

6. Activities Are Built Into the Experience

Depending on the setup, many boats come equipped with things like:

  • Snorkeling gear
  • Paddleboards or kayaks
  • Space to relax, read, or take in the views

Instead of planning separate daily excursions, much of the experience is already built in.

Who a Yacht Rental Is Best For

Renting a yacht isn't for everyone, but it can be a great fit in the right situation. It works best for small groups who want to share costs, travelers planning a coastal or island-heavy itinerary, and anyone who appreciates flexibility over a fixed schedule.

It's also a strong option if you enjoy slower, experience-driven travel where the trip itself is as important as the destinations. Instead of rushing between hotels and tours, you settle into a rhythm and experience a place from a different perspective.

If your trip is more city-focused or you're traveling solo on a tight budget, a hotel is usually the better choice. But for the right itinerary, a yacht can offer a surprisingly practical alternative.

Is Renting a Yacht Worth It?

For most trips, a hotel still makes the most sense, especially if you're traveling solo or staying in one city. But if your itinerary involves the coast, islands, or multiple stops, renting a yacht can be a smart alternative that eases logistics and opens up experiences you wouldn't otherwise have.

It's not about luxury. It's about how you want to experience a destination. And in the right place, traveling by boat can turn a good trip into something a lot more memorable.

_____

This story is published in partnership with GetBoat.com.

How To Save Money on Data While Backpacking Europe With an eSIM

Backpacking through Europe often means quickly moving from city to city, navigating train stations, hostel check-ins, and last-minute bookings. One of the fastest ways to blow your travel budget is to rely on costly international roaming or to scramble for a new SIM card at each border.

Traveler using a smartphone with Europe eSIM on a cobblestone street in Denmark
Photo credit: Aleksandar Nakic

An affordable eSIM plan makes European travel easier. Instead of swapping SIM cards or relying on hostel Wi-Fi, set up a digital data plan before your trip and stay connected across countries.

For budget travelers in France, Germany, Italy, and Spain, it's one of the simplest and most affordable ways to access maps, messaging, and booking confirmations throughout the trip.

Comparing Roaming Charges, Local SIMs, and eSIM Solutions

Understanding the real cost of connectivity is essential before stepping off the plane. Many assume that using a home SIM card abroad with careful usage will suffice.

In reality, roaming fees add up quickly-especially when crossing countries-turning an affordable trip into an expensive ordeal.

The choice between traditional roaming, purchasing local SIM cards, or opting for digital eSIM services depends largely on travel style, destination list, and data requirements.

If you want to save money, consider an affordable eSIM for Europe travel when planning a two-week backpacking trip, as these differences become especially clear.

Roaming Charges: The Hidden Expense?

Continuing to use a home country's mobile plan while abroad often leads to some of the steepest bills. Typical rates range from $5 to $15 per day, depending on the provider and region.

Over 14 days, this means spending up to $210 on connectivity alone, not including extra charges for calls or texts.

The uncertainty surrounding roaming fees, combined with the risk of unreliable support if something goes wrong, pushes many budget travelers to seek alternatives.

While short trips or special "travel bundles" from certain carriers may seem tempting, always scrutinize the fine print. For most multi-country journeys, local SIMs or prepaid eSIMs offer considerable savings and greater peace of mind.

Domestic SIM Cards: The Classic Backpacker Choice

Buying a SIM card upon arrival has long been the go-to way to save on data and calls. Most local prepaid plans offer generous data allowances-sometimes even unlimited data-for €20-€40 (about $23-$47) over two weeks.

This approach gets cumbersome when crossing borders, as each country requires a new SIM and registration.

Some providers advertise "Europe-wide" packages, but coverage can be inconsistent, and rules vary by nation. Activation procedures sometimes use valuable travel time.

For those remaining in a single country or in major cities, local SIMs can still offer excellent value, with clear pricing and minimal financial risk.

Prepaid Esim: The Flexible, Affordable Alternative

The digital installation of a prepaid eSIM removes the hassle of physical cards. Modern eSIM plans span multiple European countries, ideal for backpackers and interrailers who need flexibility.
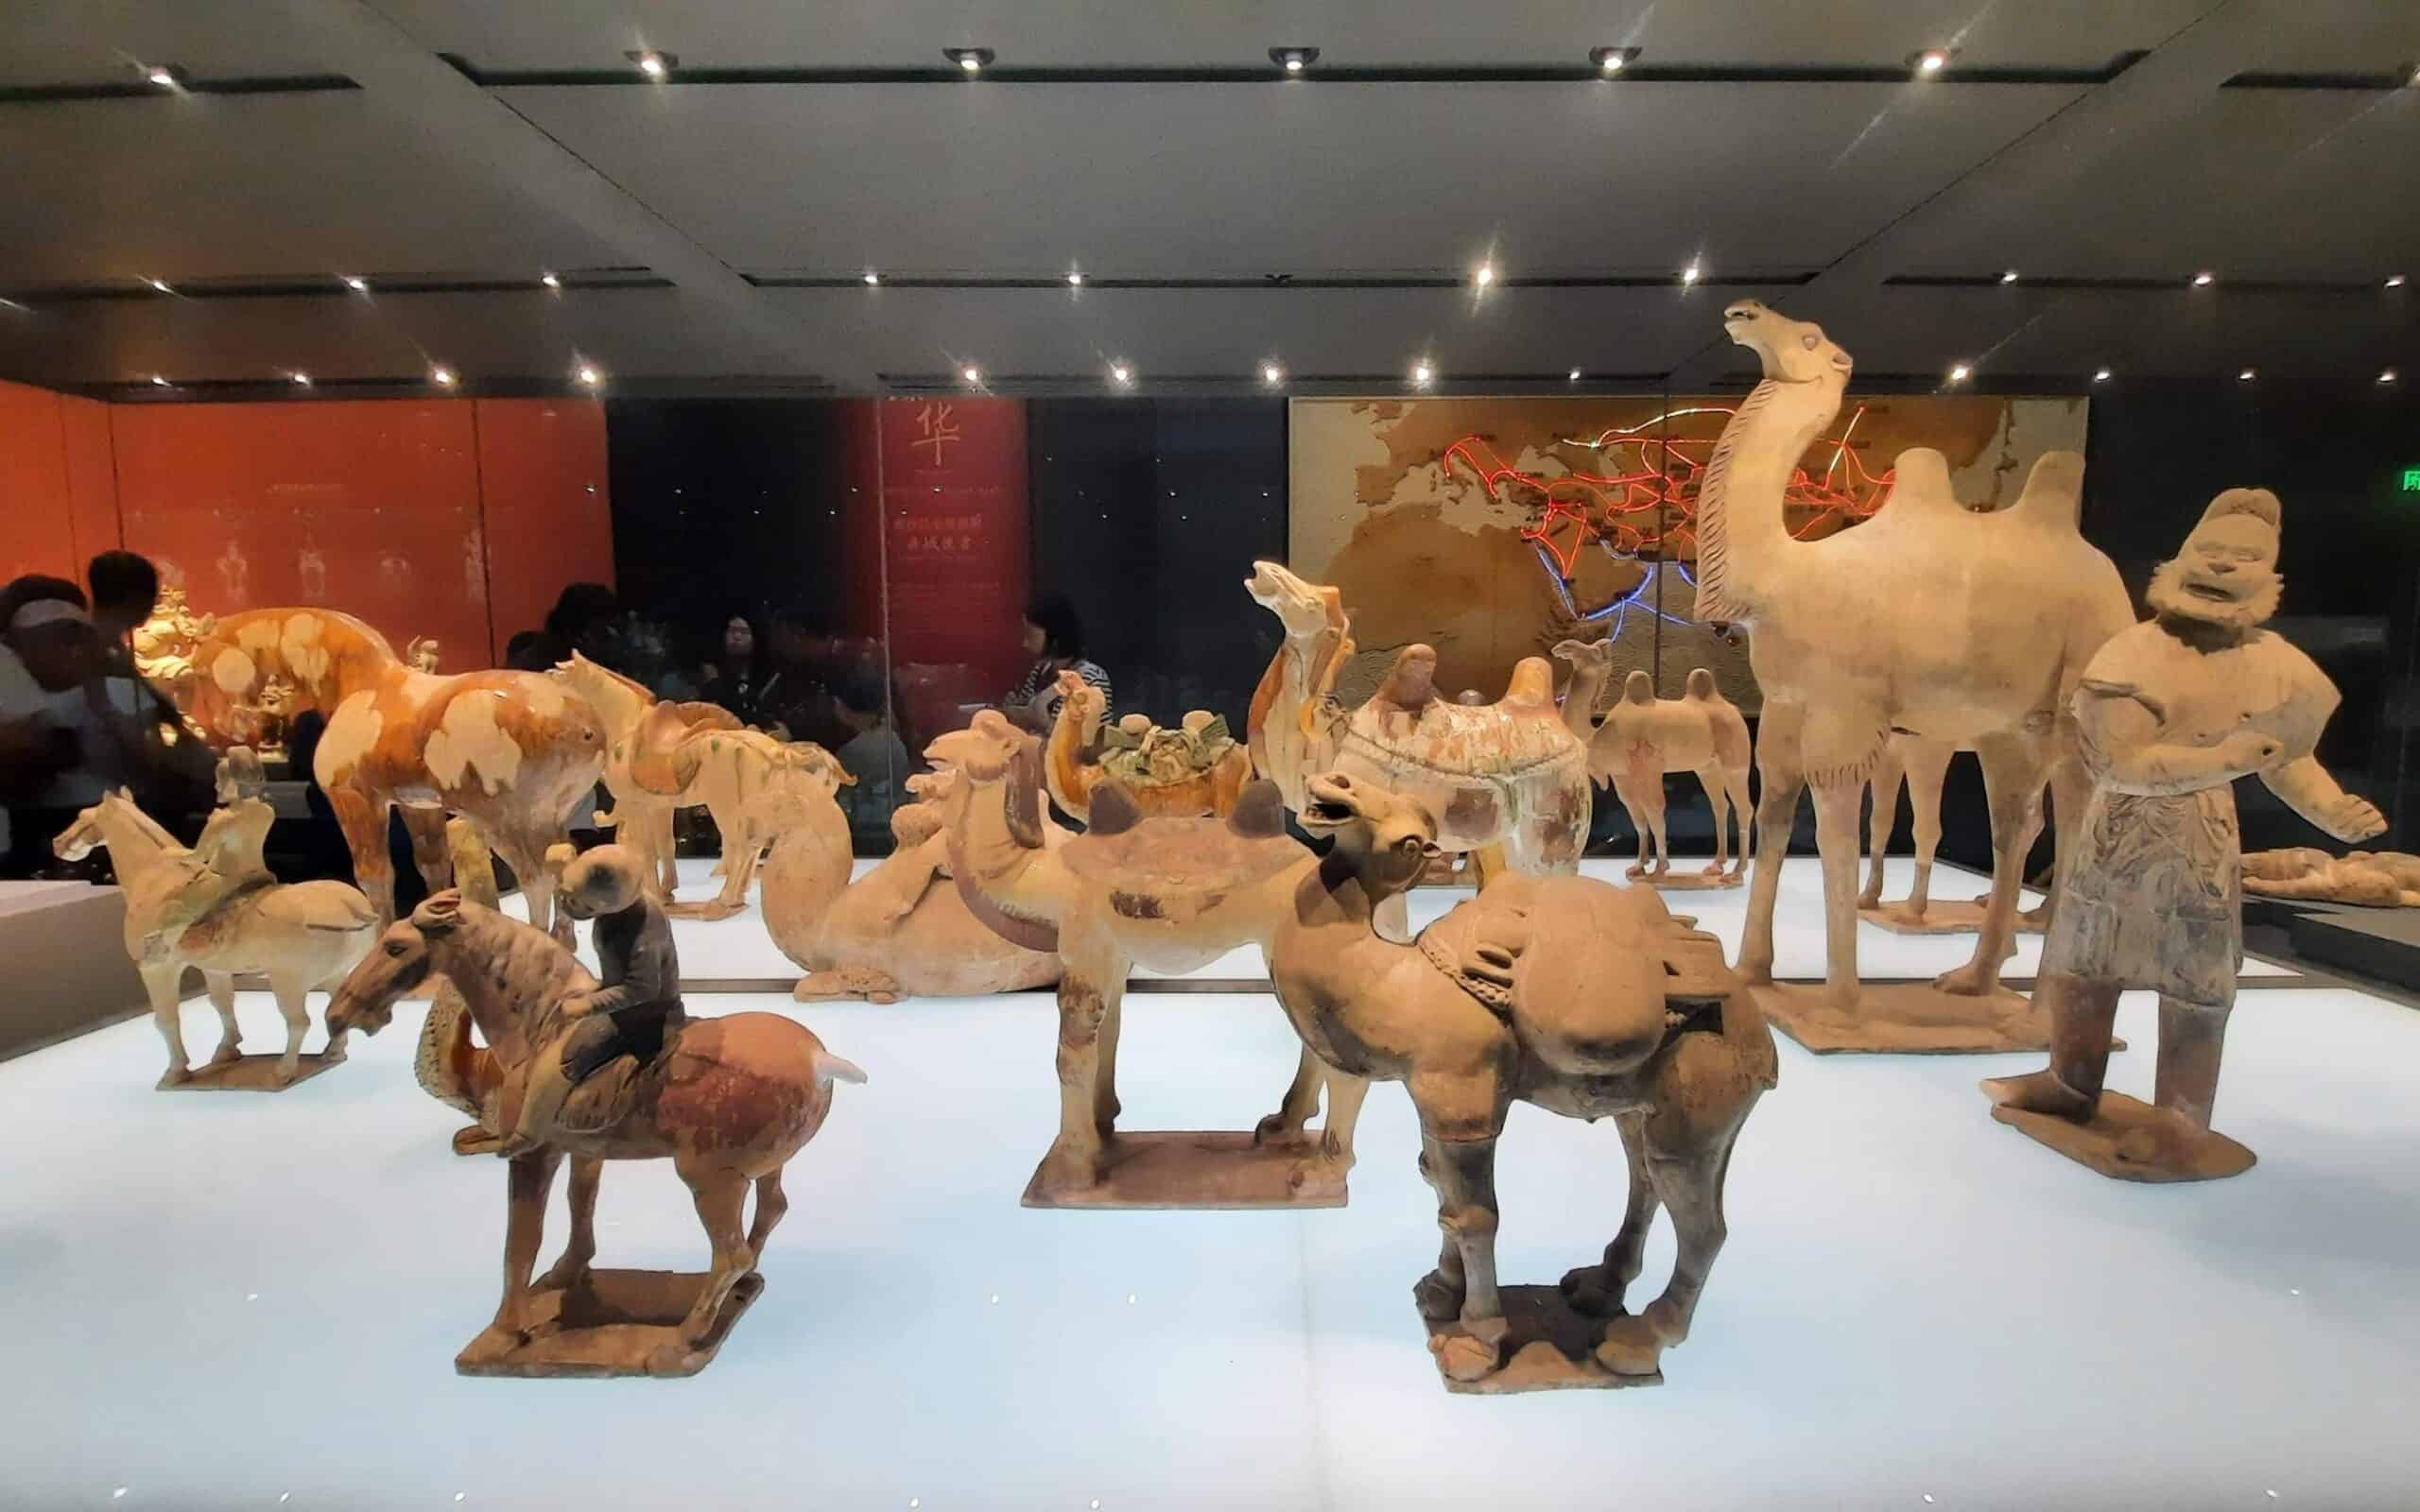
Prices typically start around $25-$35 for two-week packages offering 5-10GB. More robust or unlimited data plans occasionally reach $50-$65 but still cost less than several local SIMs or daily roaming add-ons combined.

Activation is quick: scan a QR code, follow a few prompts, and enjoy instant access. Leading popular eSIM providers also supply 24/7 support and easy-to-use account management via smartphone apps.

Coverage across multiple countries is usually seamless. Confirm included destinations before buying, as some areas may cost more.

Two-Week Backpacking Trip: Real Cost Breakdown

Imagine a standard route covering France, Germany, Italy, and Spain.

For a 14-day journey, here's a realistic breakdown of communication costs based on typical use (navigation, translation, social media, messaging, occasional streaming):

  • Home SIM with international roaming: $10 per day × 14 = $140
  • Four local SIM cards (one per country): Average $25 each × 4 = $100
  • Prepaid eSIM plan (pan-Europe coverage): $30 for 10GB (enough for most needs)

The price comparison tells a powerful story: digital-first eSIMs clearly outshine other options. Even heavy data users save money and time. Stop stressing and choose the modern, effortless path to staying connected.

Switching networks takes seconds, and there is no need to struggle with language barriers at kiosks or stores.

Many providers offer direct app-based support, ensuring help is available anytime, unlike local SIMs, which frequently require in-person assistance during business hours. Instant activation also benefits late-night arrivals or last-second planners.

How Prepaid eSIM Saves Money and Hassle

Choosing a prepaid eSIM removes surprise charges and logistical problems common with older methods. Whether trekking through the Alps or catching overnight trains, a reliable connection improves safety and convenience.

Prepaid rates are fixed upfront, eliminating the fear of hidden roaming fees or excess data charges appearing later.

For those with unlocked phones, the transition from analog to digital is smooth and fast. Setup takes minutes, freeing more time to explore rather than hunting down telecom shops. With no paperwork and streamlined sign-up, spontaneous itinerary changes are easy.

Frequent updates from top providers also mean steadily improving service quality, an important asset for travelers who rely heavily on constant internet access for bookings or schedule checks.

Using Hostel Wi-Fi vs Mobile Data During European Travel

Relying exclusively on hostel Wi-Fi is a familiar tactic for tight-budget travelers.

Free communal networks within shared spaces foster camaraderie but can suffer heavy traffic, leading to sluggish speeds, particularly during peak times. Uploading photos or video calling family may become challenging.

Public networks also pose privacy risks. Sensitive activities such as banking or booking accommodations are safer over a private, encrypted data connection. Long bus rides or rural excursions further reveal the limitations of a Wi-Fi-only approach.

The best travel strategy blends a flexible, affordable eSIM for daily tasks with hostel Wi-Fi for bigger downloads. This savvy mix helps you dominate costs without ever feeling disconnected or left behind.

Tips for Getting the Best Out of Both Options

Maximizing value from both mobile data and public Wi-Fi does not require complicated planning.

Use these simple strategies to stretch every euro while staying reliably connected:

  • Use hostel Wi-Fi for bulk downloads, evening backups, movie streaming, and non-urgent communications.
  • Reserve mobile data for navigation, translations, emergency calls, and essential messaging while on the move.
  • Monitor data usage regularly and connect to secure Wi-Fi whenever possible, particularly on long train or bus journeys.
  • Install lightweight messaging or offline apps to extend data longevity when necessary.

By blending these approaches, you can achieve the lowest communication expenses while enjoying steady access to maps, information, and friends back home.

Smart use of Wi-Fi supplements affordable eSIM plans, delivering hassle-free connectivity regardless of destination or unforeseen detours.

FAQ: Affordable eSIM for Europe Travel

How does prepaid eSIM compare to using local SIM cards for multi-country trips?

Prepaid eSIM streamlines cross-border travel by enabling a single digital plan to work across many European nations.

Domestic SIM cards typically require purchase and registration for each entry into a different country, which adds inconvenience and limits flexibility.

Over two weeks spanning four countries, eSIM tends to be both cheaper and easier to manage-there is no need to make repeated in-store purchases or complete paperwork.

  • eSIM: Digital setup, immediate use in covered regions
  • Local SIM: Requires separate acquisition and activation, potential language and administrative obstacles
Prepaid eSIMVery easy$30–$60
Local SIMModerate difficulty$80–$120

Are affordable eSIM plans reliable for unlimited data while traveling in Europe?

Many affordable eSIM options now offer either high data limits or genuine unlimited data, making them perfectly suited for everyday browsing, maps, messaging, and even streaming.

While some plans may slow speeds once a certain threshold is reached due to fair-use policies, most travelers find these packages fully adequate for a two-week backpacking tour. Reliability is generally excellent compared to older SIM-swapping routines.

  • Review terms for fair usage caps or speed reductions on unlimited plans.
  • Check network coverage information to ensure all intended countries are supported.
  • A reliable connection also depends on device compatibility with eSIM features.

What should be considered when covering multiple countries with eSIM?

The most affordable eSIM packages for Europe offer broad coverage across multiple countries, thanks to agreements with local networks.

Always check the list of included destinations before purchase, as some regions may require additional packages or could experience weaker signal strength.

  • Seek plans with explicit country lists and regional details.
  • Top providers publish interactive maps showing exact network reach.

Can eSIM activation really be done without local support or in shops?

Yes, a digital installation usually involves scanning a QR code sent by email or via an app, then confirming on the device. There is no waiting in line or interacting with sales clerks.

If any complications arise, reputable plans offer 24/7 support via live chat or a helpline, eliminating the need to rely on local shop hours or on speaking a foreign language.

_____

This story is published in partnership with Orange Travel.

How Vietnam Shaped Me as a Travel Creator

Editor's note: Travel creator Max Zaharenkov shares how backpacking Vietnam, from Hanoi and Ha Long Bay to Hoi An and Sa Pa, helped shape his photography and storytelling.

In 2016, I had a camera I barely knew how to use, a backpack falling apart at the zipper, and about $800 to my name. I had maybe 30 countries under my belt. Now I am at 117. But the place that cracked me open as a creator... that was Vietnam.

Travel creator Max Zaharenkov shares his Vietnam travel story
Travel creator Max Zaharenkov

The Vietnam Destinations That Shaped Me as a Creator

Hanoi, March 2016

The first thing that hits you is the sound. Thousands of motorbikes weave through intersections with zero traffic lights, and somehow nobody crashes. I stood on a corner near Hoan Kiem Lake for 20 minutes, frozen, just watching.

A woman walked through the middle of all of it, carrying two baskets of dragonfruit on a bamboo pole across her shoulders. She did not flinch. Moved through those motorbikes like water around stones.

I lifted my camera and took what I now consider my first real photo. It got maybe 200 likes. I could not have cared less. Something shifted right there.

I ate pho for breakfast, lunch, and dinner for 11 days straight. Not as a challenge. It was $1.50 a bowl, and every single one tasted different.

I started photographing each bowl. The steam at 6 am. The tiny plastic stools. The condensation on the iced tea they hand you without asking.

There was a grandma who ran the stall near my hostel on Ma May Street. Every morning, I would sit down, pull out my camera, and she would shake her head at me.

She would say something in Vietnamese that I never understood. But I understood the meaning perfectly.

Eat first. Photo later.

She taught me something I still carry. The experience comes first. The content comes second. Always.

The best content comes from the moments you almost forgot to photograph.

Ha Long Bay at 4:30 am

I took a $45 budget boat tour: two days, one night. The boat smelled like diesel. The mattress was thinner than my phone.

I woke up at 4:30 am because a rooster was crowing on a floating fishing village. Nobody warned me about the roosters on floating villages. That was not in the TripAdvisor reviews.

But that rooster changed everything. I stumbled up to the deck half asleep, and the sunrise was happening. Gold and pink bleeding into 1,600 limestone islands of Ha Long Bay that have been sitting there for 500 million years.

I had never intentionally shot during golden hour before. That morning, I realized light is not just something that exists. Light is the whole game.

Hoi An at Night

An ancient town where every building is painted yellow. At night, hundreds of silk lanterns light up over the Thu Bon River.

I got a custom suit for $35. Ate cao lau, a noodle dish you can literally only get in Hoi An because the noodles are made with water from one specific well. Look it up. It is real.

I took hundreds of photos of those lanterns. Most were garbage. But I kept going back every night and started noticing things. How warm tones sit next to cool tones. How a single lantern reflected in the water tells a better story than fifty crammed into one frame.

I did not yet know the words: composition, color theory, and negative space. But that obsessive need to understand why something works visually, that started in Hoi An at midnight on a bridge.

The Hai Van Pass

I rented a semi-automatic motorbike for $7 a day. I had ridden one exactly twice before. Both times in a parking lot.

So naturally, I decided to ride a mountain pass with cliffs on one side and the South China Sea on the other. Jeremy Clarkson called it one of the best coast roads in the world. He was not wrong.

There are points where the clouds are below you. You are riding above the clouds on a $7 motorbike in Vietnam, where you do not speak the language, and your mom has zero idea where you are.

I pulled over at the top, sat on a concrete barrier, and stared at the ocean for 45 minutes. Did not take a single photo. Some moments are just for you. That was the moment I knew this was not a gap year hobby. This was my life.

Sa Pa and the Mud

The rice terraces in Sa Pa have been carved into the mountain slopes by the Hmong people over hundreds of years. No machines. Just hands and time.

I did a homestay with a Hmong family. The dad showed me their irrigation system - bamboo channels that move water using nothing but gravity. Pure engineering genius.

I posted a photo from there that became one of my most-shared images at the time. Mist rolling through the terraces at sunrise. A single figure on a narrow ridge. First photo I ever looked at and thought, "Okay, maybe I am decent at this."

I slipped and fell face-first in the mud about 30 seconds after taking it. Two Hmong kids are absolutely dying laughing at the clumsy tourist. Very on-brand for 2016 me.

What Vietnam Gave Me

Vietnam cost me $25 a day. That covered food, a bed, transport, and the occasional bia hoi, fresh beer for 25 cents a glass on a plastic stool on the sidewalk. Best deal in history.

But what it gave me was worth more than any brand deal since. It taught me to look before I shoot. It taught me the best stories live in small details...the steam, the rooster, the yellow walls, the mud on your knees. It taught me that discomfort is where every good thing starts.

I have been back three times since. Every time it feels like returning to a place that somehow already knows you.

If you are a creator wondering where to go next...go. Bring your camera. Bring an open mind. And eat the pho before you photograph it.

25 Best Things To Do in Kauai: Waterfalls, Beaches, and Epic Island Adventures

Kauai has always struck me as Hawaii's wild heart. The mountains are impossibly lush, sea cliffs drop straight into the surf, and the rainforests seem like they breathe after a good downpour.

If you're drawn to hiking muddy trails, swimming in warm water, or just wandering quiet stretches of sand, you'll find yourself wanting to return to the Garden Island again and again.

Aerial view of the Na Pali Coast on Kauai with red and green sea cliffs rising above the Pacific Ocean
Seeing the Na Pali Coast from the air is one of the highlights

After two trips in just four months, I've managed to cover a lot of ground on Kauai, from bouncing along the waves beneath the Na Pali cliffs to pursuing sunsets at the end of long days.

There are still a few adventures on my list, but the experiences that stood out most from my recent time on the island are listed below.

If you're planning your first trip, these are some of the best things to do in Kauai - the adventures I'd put at the top of your list - the ones I've actually tried, from winding drives through misty mountain valleys to afternoons spent out on the water, salt in the air, and sun on your face.

Quick Guide to the Best Things To Do in Kauai

If you're pressed for time, these are the stops I'd make sure not to miss.

Best boat tour: Na Pali Coast boat tour
Best scenic drive: Waimea Canyon Drive
Best beach: Hanalei Bay
Best viewpoint: Kalalau Lookout
Best waterfall: Wailua Falls
Best sunset spot: Beach House Restaurant or Welina Terrace at 1 Hotel Hanalei Bay

If you only have a few days on the island, these are the top things to do in Kauai that I'd prioritize.

Where the Best Things To Do in Kauai Are Located

Kauai isn't a big island, but its best spots are tucked into different corners. Figuring out where everything is before you go will save you a lot of backtracking and help you squeeze the most out of each day behind the wheel.

North Shore

The north shore is where Kauai feels at its wildest. Steep green mountains loom over endless beaches, and hidden valleys seem to disappear into the mist. My favorite stops here are Hanalei Bay, Hanalei Town, Tunnels Beach, Hanalei Valley Lookout, Kilauea Lighthouse, and sunset at Welina Terrace.

West Side

Head west and the landscape changes fast - red canyons open up, and the road twists its way up toward the cool air of Koke'e State Park. Waimea Canyon and Kalalau Lookout are both here, and I'd return to each in a heartbeat.

South Shore

The south shore is almost always sunny and has some of my favorite swimming beaches on the island. I'd spend time at Poipu Beach, swing by Spouting Horn, wander through Old Koloa Town, and end the day watching the sunset from the Beach House Restaurant.

Island-Wide Adventures

Some of my best Kauai memories happened far from the crowds, boating along the Na Pali Coast, or seeing the island from a helicopter. A few of the wildest places are only reachable if you're ready for a bit of adventure.

15 Best Things To Do in Kauai for First-Time Visitors

1. Take a Na Pali Coast Boat Tour

Seeing the Na Pali Coast from the water is something I'll never forget. The cliffs shoot straight up from the Pacific, green and streaked with waterfalls after a rain. Sea caves yawn open at the base, and narrow valleys vanish into the mountains beyond.

Catamaran sailing along the Na Pali Coast cliffs on Kauai with turquoise ocean water and steep sea cliffs
Cruising beneath the cliffs of the Na Pali Coast

On a Na Pali Coast boat tour, you get right up close to this wild coastline (places you'd never reach on foot).

Depending on the captain and the weather, you might jump in to snorkel a quiet cove, or spot dolphins and sea turtles riding the waves just off the bow. Every trip feels a little different, determined by the ocean's mood that day.

On my most recent trip to Kauai, this was easily one of the top highlights of the island.

2. See Kauai on a Helicopter Tour

If I could only choose one adventure, it would be seeing Kauai and the Na Pali Coast from the air. Hovering above those ridges is one of the most awe-inspiring things I've experienced.

The author standing beside a blue helicopter in a lush green valley on a Kauai helicopter tour
Our helicopter landed in Kauai's lush interior so we could visit Manawaiopuna Falls.

The boat ride is fantastic, but the helicopter shows you just how untamed the island really is. From above, every ridge glows green, valleys slice through the land, and waterfalls tumble down sheer cliffs.

The helicopter gave me a glimpse of Kauai's rugged interior and left me with a whole new regard for the Na Pali Coast. I'll never forget skimming past the coast, looking down at waves breaking on rocks.

If you're going to splurge on one thing, let it be the helicopter ride. It's the experience that stuck with me the most from my last visit.

For more details on the flight route, the experience, and the company I used, read my full guide to the Kauai helicopter tour.

3. Visit Hanalei Bay

Hanalei Bay is gorgeous and has become one of my favorite places in Kauai after two visits.

Hanalei Bay beach on Kauai with gentle waves, golden sand, and green mountains in the background
Morning light along Hanalei Bay

Our first visit was brief, arriving before sunset. Watching the last light from Hanalei Pier, with the mountains behind, is unforgettable.

When we came back in February 2026, we spent two nights on the north shore and finally had time to really explore Hanalei Bay.

Beyond Hanalei Bay, we also explored nearby north shore highlights like Tunnels Beach and Kilauea Point National Wildlife Refuge.

The north shore is also one of the best places on the island to settle in for a leisurely evening. We caught sunset drinks at Welina Terrace, then later enjoyed the lively atmosphere at Happy Talk Lounge. For dinner, both Tahiti Nui and Bar Acuda are excellent reasons to linger after sunset.

Hanalei Bay is worth the trip for the scenery alone, but don't rush - make time for the beaches, restaurants, and those little viewpoints along the way. The north shore's magic is tough to put into words.
4. Explore Waimea Canyon

Waimea Canyon is called the Grand Canyon of the Pacific, and after witnessing its red, rust, and green cliffs stretching for miles, I understand why.

Waimea Canyon panorama Kauai
The colorful peaks and valleys of Waimea Canyon

On our February 2026 trip, Kel and I drove up to Waimea Canyon and loved every minute. We skipped the hikes this time and just pulled over at every scenic spot that caught our eye along the canyon road.

Each overlook gave us a new angle - sometimes the whole canyon, sometimes a closer look at a massive waterfall. The higher we climbed, the more the landscape seemed to open up around us.

800-foot-tall Waipo'o Falls Waimea Canyon
The 800-foot-tall Waipo'o Falls

Around midday, we stopped for lunch at Koke'e Lodge Restaurant, a perfect break before heading back toward the south shore. The lodge has a rustic, old-school feel that fits this part of the island, and it was a relaxing pause between viewpoints.

While we didn't hike this time, Waimea Canyon and Koke'e State Park offer some of the island's best trails, from short walks to long hikes with stunning views.

Even if you don't lace up your boots, just driving the canyon road and pulling over at the overlooks is time well spent.

5. Drive to Kalalau Lookout in Koke'e State Park

If you're driving through Waimea Canyon, keep going until you reach Kalalau Lookout. For me, it's one of the most dramatic views you'll find anywhere on Kauai.

Kalalau Valley Lookout
Clouds part to reveal the Kalalau Valley

We made the extra drive out to Kalalau Lookout during our canyon tour, and it was absolutely worth it. The canyon views are impressive, but from here, you can watch the Na Pali Coast fade into the ocean.

If you're lucky enough to catch it on a clear day, the cliffs and valleys look impossibly rugged. It's one of those places where no photo can really capture the scale of what you're seeing.

Because it's located within Koke'e State Park, this stop is easy to combine with your Waimea Canyon drive and any nearby scenic pull-offs. Even if you don't plan to hike, the lookout alone is worth the trip.

6. Relax at Poipu Beach

If you're based on the south shore, Poipu Beach is an easy spot to while away a few hours by the water. There's a wide crescent of golden sand, calm spots for swimming, and plenty of room to spread out.

Watch for Hawaiian green sea turtles and Hawaiian monk seals. They sometimes haul themselves right onto the sand for a nap. Seeing giant sea turtles up close turned an ordinary beach day into something special.

Sea turtles resting on the sand at Poipu Beach in Kauai with palm trees and beachgoers in the background
Hawaiian green sea turtles at Poipu Beach

Whether turtles or seals are present, respect any boundaries marked with cones, and if you see them in the water, keep your distance.

It's important to remember that both Hawaiian green sea turtles and monk seals are protected under the Endangered Species Act, and approaching them can be both unsafe for visitors and harmful to the animals.

Whether you're swimming, catching a sunset, or simply taking a break between adventures, Poipu Beach is an easy and convenient destination to include in your itinerary.

Alternatively, nearby Brennecke's Beach and Shipwreck Beach also offer excellent opportunities for swimming, bodyboarding, or relaxing by the water, providing additional options for visitors seeking diverse experiences along the south shore.

7. Visit Kilauea Lighthouse and Wildlife Refuge

Even with the lighthouse closed for renovations when we visited, Kilauea Point National Wildlife Refuge was still well worth the stop.

Kilauea Lighthouse north shore Kauai
Kilauea Lighthouse stands 180 feet above sea level

Perched on a dramatic headland along the north shore, the refuge gives you sweeping views of the coast, with steep green cliffs dropping straight into the Pacific. It's one of my favorite places to take in the rugged shoreline and watch the waves roll in from above.

What really sets this place apart is the birdlife. We spent as much time scanning the cliffs and sky as we did watching the ocean. Depending on when you visit, you might spot red-footed boobies, frigatebirds, or even albatrosses gliding overhead.

Need To Know: A timed-entry ticket valid for 45 minutes is required due to limited parking; enforcement is strict. Visitors generally enter by vehicle only, as walking down the steep access road is not permitted. You can reserve your entry online at Recreation.gov.

8. See Wailua Falls

Wailua Falls is one of the most spectacular waterfalls in Kauai, and it's remarkably easy to visit.

Wailua Falls on Kauai with a rainbow in the mist above the plunge pool
A rainbow in the mist at Wailua Falls

Kel and I pulled over here on our last trip, and the view was even better than I remembered. The twin falls plunge into a green valley, making it one of the most photogenic spots we found - and you don't even have to hike to get there.

Parking is tight, so I'd go early if you can. There's less crowding, and the morning light helps with photos. For a waterfall this easy to reach, Wailua Falls is absolutely worth a stop.

9. Visit Kilohana Plantation

If you're looking for a change of pace from beaches and overlooks, Kilohana Plantation Estate is a fun way to mix in some local history and culture.

Kel and I spent a morning here, starting with a ride on the Kauai Plantation Railway. The 40-minute tour winds through gardens, orchards, and farmland, and you pick up a bit of the estate's backstory as you go.

Afterward, I popped into the Koloa Rum tasting room for a guided tasting, a fun way to try one of Kauai's local spirits.

Kilohana is also a solid spot for lunch. We didn't have time to eat at The Plantation House, but we did wander through the old estate and gardens before heading out.

10. Watch Sunset at Beach House Restaurant or Welina Terrace

One of the best things to do in Kauai is slow down at the end of the day and watch the sun sink into the Pacific.

North shore sunset as seen from Welina Terrace
Sunset over the north shore from Welina Terrace

On the south shore, The Beach House Restaurant is a classic sunset spot. Dinner here comes across like an event. When Kel and I visited, the whole place buzzed as the sky changed from orange to pink, and everyone clapped when the sun finally disappeared.

If you want a more dramatic setting, Welina Terrace at 1 Hotel Hanalei Bay is hard to beat. The view over Hanalei Bay and the mountains is one I still think about, even if only a drink here is a splurge.

Reservations help if you want a prime table, but we managed to walk into Welina Terrace at the last minute and still snagged a seat with a partial view. It's worth trying even if you haven't booked ahead. Just be aware that valet parking will cost you $20.

For more meal ideas, check out my Feastio guide to the best restaurants in Kauai.

11. Visit Hanalei Town

Hanalei Town is one of those places I always look forward to-laid-back, a little quirky, with that surf-town energy and some of my favorite food on the island.

On our last visit, Kel and I whiled away hours here, browsing little shops, grabbing coffee, and just soaking up the relaxed vibe. Hanalei is the kind of spot that makes you want to slow down and wander.

For food and drinks, Hanalei Town never disappoints. We had a fun meal at Tahiti Nui, which felt extra special since I'd just watched The Descendants on the flight over. It's always fun to see a place in person after spotting it in a movie.

Other favorites: dinner at Bar Acuda, breakfast at Hanalei Breakfast Company, coffee from Wishing Well, and a sweet treat from Holey Grail Donuts.

We also stopped by Hanalei Dolphin Fish Market, which is a great spot if you're after fresh local seafood. Even if you're here mostly for the beaches, make time for Hanalei Town.

12. Spend Time at Tunnels Beach

Tunnels Beach is one of the most striking stretches of sand on Kauai's north shore, framed by lush mountains that seem to rise straight up behind the shoreline.

Tunnels Beach Kauai north shore
Tunnels Beach on Kauai's north shore

We went early in the morning, which made parking easy and let us enjoy the beach before anyone else showed up. We spent over an hour just walking on the sand and taking in the views. Even without swimming, it was one of the most memorable stops of our trip.

One thing to know before you go: parking for Tunnels Beach is notoriously tough because space is limited and enforcement is strict. The easiest option is to park at Ha'ena Beach Park and then walk about half a mile along the beach to reach Tunnels.

When we visited, signs warned against swimming due to strong currents, so we stayed on shore. Conditions change quickly on the north shore, so always check the warnings before getting in.

Even if you stay on the sand, the setting is incredible: turquoise water, mountains at your back, and a wide open beach. Tunnels is well worth the effort.

13. Visit Spouting Horn Blowhole

Spouting Horn is a quick stop, but if you're already on the south shore, it's worth pulling over to watch for a few minutes.

Near Poipu, this blowhole shoots seawater up through the lava rocks when the waves hit just right. It's curiously satisfying to watch, especially if the surf is up.

14. Take a Scenic Drive Along the North Shore

The drive along Kauai's north shore is one of the most scenic on the island. Between Princeville, Hanalei, and Ha'ena, the road winds past emerald mountains, taro fields, beaches, and dramatic coastal views.

Kel and I drove this route several times, and it never got old. Even the stretches between stops felt like part of the adventure.

15. Stop at Hanalei Valley Lookout

Hanalei Valley Lookout is a classic north shore stop - easy to pull over and snap a photo. From here, you get sweeping views of the taro fields spread across the valley floor, framed by jagged green mountains in the distance.

More Fun Things To Do in Kauai

Even after two trips to Kauai in the last four months, there are still a handful of adventures I'm hoping to try next time.

  • Hike the Kalalau Trail - One of Hawaii's most famous hikes, with jaw-dropping views along the Na Pali Coast.
  • Kayak the Wailua River - Paddle through rainforest scenery, frequently paired with a hike to Secret Falls.
  • Explore the hiking trails in Koke'e State Park - Scenic day hikes with canyon and coastal views.
  • Take an ATV tour - Explore Kauai's rugged backcountry and movie locations.
  • Go mountain tubing - Float through historic plantation irrigation canals and tunnels.
  • Go ziplining - Soar above rainforest canopies and valleys.
  • Visit Kauai's botanical gardens - From Limahuli Garden & Preserve on the north shore to the McBryde Garden and Allerton Garden on the south shore, the island's gardens showcase extraordinary tropical and native plants.
  • Take a surfing lesson - A classic Kauai experience for beginners and experienced surfers as well.
  • Visit Iraivan Temple and Kauai's Hindu Monastery - A peaceful cultural stop with beautiful temple grounds.
  • Walk the Maha'ulepu Heritage Trail - An approachable coastal hike.

FAQs About the Best Things To Do in Kauai

What is the No. 1 thing to do in Kauai?

For me, it's seeing the Na Pali Coast, whether by boat or helicopter.

How many days do you need in Kauai?

I'd recommend at least 4-5 days.

What side of Kauai is best for first-time visitors?

South shore for sunshine and convenience, north shore for scenery.
Closing Thoughts

Dave Tunnels Beach
Visiting Tunnels Beach (photo by Kelly Lemons)

From cruising underneath the towering cliffs of the Na Pali Coast to watching the sun set over Hanalei Bay, these are the experiences that stood out most from my two recent trips to Kauai.

What keeps me coming back to Kauai is the variety. In a single trip, you can see the island from a chopper, drive through a canyon that seems to go on forever, walk quiet beaches, eat some of the best seafood, and still leave with a list of reasons to return. Even after two visits in four months, I'm already planning what I'll do next time.

If it's your first time visiting the Garden Island, this guide should give you a great starting point for discovering the best things to do in Kauai.

How To Buy a Motorbike in Hanoi Without Getting Ripped Off

Buying a motorbike in Hanoi is one of the most popular ways to travel in Vietnam, especially for backpackers planning to ride north to Sapa or Ha Giang, or south to Ho Chi Minh City. But not every bike in the Old Quarter is worth the asking price.

After buying two bikes in Hanoi, including one that broke down on the Long Bien Bridge within minutes, here's what I learned about where to buy, what to check, and how to avoid getting ripped off.

I first visited Vietnam in 2016. I'd spent a month in Laos with my best mate Jim, and we flew into Hanoi with no real plan beyond finding a hostel and figuring out what to do next.

We checked into Hanoi Backpackers that afternoon, and by that evening, we were sitting cross-legged on the floor of our dorm room with two American brothers from Chicago, Nick and Anthony.

They'd been talking about buying motorbikes and riding north into the mountains. None of them had ever been on a bike. I'd ridden a moped when I was 16 and thought I knew what I was doing, which of course I didn't.

We went out for beers, and by the end of the night, the four of us had decided we were going. The next morning, we were out in Hanoi's Old Quarter, looking at bikes. The morning after that, we left Hanoi.

buy a motorbike in Hanoi Old Quarter Vietnam
My first bike (left) and Jim's bike (right), in Hanoi, before setting off

We were crossing the Long Bien Bridge, all four of us in a line with our bags strapped to the back, horns blaring, trucks passing close enough to touch.

The heat, the noise, the chaos of it all. I was absolutely buzzing. Then my engine cut out. Something to do with the carburetor, apparently, though I didn't know what that meant at the time.

I managed to flag Nick down, and he rode ahead to get the others while I turned the bike around and pushed it back down the side of the bridge towards oncoming traffic. Not exactly the start I'd been hoping for.

I got the bike back to the shop and somehow managed to get all my money back. Within minutes, I'd found a replacement at another shop further down the street. I gave this one a much more thorough going-over than the first.

I'd have brought that second bike home if they'd let me take it on the plane. It took me north to Ba Be Lake, back to Hanoi, and then all the way through Central Vietnam to Ho Chi Minh City. Along the way, you can stop in places like Hoi An at your own pace, instead of rushing through by bus or plane.

Weeks on the road, through mountains and rice paddies and towns where we were the only foreign visitors in months. It cost me $200 to buy, and I sold it at the other end for $130, seventy dollars for the whole thing.

This is everything I wish I'd known before I handed over that first $200.

Quick checklist before you buy:

  • Test ride the bike
  • Check brakes, lights, and horn
  • Verify the blue card matches the frame number
  • Look for oil leaks and smoke
  • Budget $50-$100 for repairs
  • Upgrade to a full-face helmet before leaving Hanoi

Honda Win vs Other Motorbikes in Vietnam

If you spend five minutes looking into motorbikes in Vietnam, you'll hear about the Honda Win. It's the iconic backpacker bike. People talk about theirs the way you'd talk about someone you traveled with, not something you bought.

My second bike is in the shop on Phuc Tan.

Here's the thing, though. What's being sold as a "Honda Win" in Hanoi today is either a Chinese replica or a bike that's been through so many riders and repair shops that there isn't a single original Honda part left on it. It's the motorbike equivalent of the ship of Theseus.

At $200, it doesn't really matter what the badge says. What matters is whether it starts, whether it stops, and whether it'll get you from Hanoi to Ho Chi Minh City in one piece.

Where To Buy a Motorbike in Hanoi

This is the section that matters most. You've got three real options if you're trying to buy a motorbike in Hanoi.

Motorbike Shops

Fair enough, here you go. The Old Quarter has several shops catering to backpackers. Phung Motorbike sits on Ngo Huyen, the main backpacker street. A few minutes away on Dao Duy Tu, Style Motorbikes is well respected in the expat community and sells used Detech Esperos for around $500 to $600.

For something cheaper, Thang Motorcycle Tours specializes in rebuilt Wins at around $350. It has branches in Hue, Ho Chi Minh City, and Hanoi, which matters if you want a warranty you can actually use on the way south.

A warranty sounds great, but unless you're buying from somewhere like Thang, you're not riding back to Hanoi to claim it. The real reason to buy from a shop is accountability. Someone has looked at the bike before selling it to you, and if it's a disaster, they'll hear about it on every Facebook group going.

The author's second bike, packed up, ready to ride through Vietnam!
My second bike, packed up, ready to go!

If those prices feel steep, head to Phuc Tan street, about a ten-minute walk north of the Old Quarter along the Red River. There's a cluster of shops there selling cheaper backpacker bikes. The online reviews for some of them are mixed, so do your homework and don't hand over cash until you've checked the bike properly.

There's also a helmet shop on that stretch, where we upgraded from the plastic buckets that came with our bikes to proper full-face helmets. Do this before you leave Hanoi. The bucket helmets are basically decorative.

The accountability thing isn't theoretical. I bought my first bike from a shop on Phuc Tan for $200, and when it died on the bridge, I managed to get all my money back and found a replacement at another shop further down the street within twenty minutes.

Having a shop to go back to when something goes wrong immediately is worth more than you'd think.

Buying From Other Backpackers

This is often the best value, and the option I'd look into first. Travelers arrive in Hanoi every day, having just finished the ride from the south, and they're looking to sell quickly because they've got a flight booked or their visa is running out.

You'll find them in hostels, on Facebook groups, and sometimes just parked up on the street with a "for sale" sign taped to the seat.

The advantage here is honesty. Most backpackers will tell you straight what the bike was like on the trip, the breakdowns, the weird noises, the bits that got fixed along the way.

Suppose they traveled in a group, even better. Ask whose bike was the most reliable and whose was the least. It's always a running joke in the group, and they'll happily tell you everything.

The biker gang! From left to right: Anthony, Tom (me), Nick, Jim

The downside is that these bikes haven't been looked at since the last rider finished their trip. That's easily solved.

Loads of small mechanic shops in the backpacker area will give a bike a once-over for next to nothing - change the oil, check the brakes, tighten some loose nuts, fix a dodgy speedo. It'll cost you a few dollars, and it's well worth doing before you set off.

Facebook Groups and Hostel Noticeboards

Groups like "Vietnam Backpacker Sales" and "Vietnam Motorbike For Sale" get multiple new listings every day. You can browse before you even arrive, which gives you a sense of what's available and the going rate.

Chotot.vn is the Vietnamese equivalent of Gumtree and is worth checking too.

Backpacker hostels in the Old Quarter often have noticeboards with bikes for sale, or you'll get chatting to someone in the dorm who mentions they're looking to offload theirs.

Whichever route you take, always see the bike, ride it, and check it in person before handing over any money.

How To Check a Bike When You Know Nothing About Bikes

Most backpackers who buy a motorbike in Hanoi have never owned one before. That's fine. You don't need to be a mechanic. Here's a simple checklist anyone can run through.

Start it up. Does it fire on the first or second kick? If it takes five or six attempts and sounds like it's dying, walk away.

Roadside stop at an unknown location

Listen to the engine. It should idle smoothly. Rattling, knocking, or grinding sounds are bad. Rev it a few times. The revs should rise cleanly and fall straight back to a steady idle, without hanging or sticking on the way down.

Check the exhaust while you're at it. A bit of white smoke on a cold start is normal, but white smoke on a warmed-up engine means trouble. Blue smoke means it's burning oil. Black smoke means the carburetor is off. Any of those, and you walk away.

Check for leaks. Look under the bike for oil or petrol drips. Check around the engine casing for wet patches.

Test ride it. Ride it in a straight line and loosen your grip on the handlebars. You're feeling for two things: whether it pulls to one side (could mean a bent frame from a crash), and whether there are vibrations through the bars (can indicate worn headstock bearings).

Shift through all the gears. Pay special attention to finding neutral. If it struggles, that's a common issue that tends to get worse.

Brakes. Test front and rear. They should respond firmly without squealing or grinding. You'd be amazed at what some of these bikes have going on with their brakes.

During one of our breakdowns, a mechanic changing the brake pads on a mate's bike found folded-up Coke cans stuffed behind them to make them fit, because the pads were the wrong model.

That's the kind of thing you're dealing with. Your brakes will take a hammering in the mountains, so you need these to be solid.

One of author's pit stops, refueling, and some much-needed maintenance
One of many pit stops, refueling, and some much-needed maintenance

Tyres. Look for bald patches, cracks, or bulges.

Lights and horn. Headlight, indicators, brake light, and horn. The horn is not optional in Vietnam. Vietnamese drivers communicate with their horns, and you'll use yours more than any other control. If it doesn't work, get it fixed before you leave.

Look at the paint. A lot of these bikes get sprayed before being sold. Sometimes that's cosmetic, sometimes it's hiding corrosion, especially around the fuel tank. If the paint looks fresh and uniform, don't be fooled. Run your hand over the tank and frame and feel for rough patches or bubbling.

The same goes for stickers. Feel the edges and make sure they're not covering up dents, cracks, or rust.

Check the paperwork. The blue card numbers should match the chassis and engine numbers stamped on the bike. If they don't match, walk away.

How Much Does a Motorbike Cost in Hanoi?

For a backpacker planning to buy a motorbike in Hanoi, ride across Vietnam, and sell it at the other end, $200 is the sweet spot. You want to spend enough that you're not buying a disaster, but not so much that you'll be devastated if it dies halfway through.

Shop prices for a Win run $300 to $400. Buying from another backpacker can be cheaper, sometimes $150 to $250. Have your budget in US dollars in cash; it makes the transaction simpler, and sellers tend to prefer it.

Budget another $50 to $100 for repairs. You will break down, and the good news is that it rarely costs much to fix. There are mechanics in virtually every town in Vietnam; look for signs saying "Honda" or "Rua Xe."

Even when we broke down miles from anywhere in the mountains, we managed to coast the bike to a house where a man took the entire clutch apart, replaced what needed replacing, and put it back together while we sat and had dinner with his family. It cost about $10, and he refused to take any more.

Dinner with our mountain mechanic and his family

Don't spend $500 on a bike if you've got months of traveling ahead of you after Vietnam. The cheap bike might break down more, but it'll break down cheaply, and you'll have better stories to tell.

Motorbike Paperwork, License, and Insurance in Vietnam

The blue card (Giay Dang Ky Xe) is the registration document for every motorbike in Vietnam. Think of it as the title deed. It lists the chassis number, engine number, registration plate, and owner's name. It will have a Vietnamese name on it, not yours. That's normal.

Foreigners can't easily register bikes in their own names, so they pass them among travelers using the same blue card. As long as you have it, you're effectively the owner.

Make sure the numbers on the blue card match the numbers stamped on the bike's frame and engine. If they don't match, the bike may have been stolen, or its paperwork swapped, and the police can impound it. Photograph the blue card and the seller's ID before handing over any cash.

The other thing to be aware of is licensing and insurance. Vietnamese traffic police have been clamping down on foreign riders without valid licenses; fines can be significant, and if you're riding without one, your travel insurance might not cover you if something goes wrong.

I'm not going to pretend to be an expert on the current rules. Before you leave, check your government's travel advice and review the latest Vietnam motorbike license and IDP guide from Tigit Motorbikes to make sure you understand the risks you're taking.

Editor's note: Rules and enforcement can change, so always verify the latest licensing and insurance requirements before riding.

What To Buy If You Don't Want a "Win"

The Win is a manual bike with a clutch. If you've never ridden before, that's a steep learning curve on top of an already steep learning curve of navigating Vietnamese traffic.

Semi-automatics are a solid alternative. The Honda Wave is the most popular, practically indestructible, and has no clutch lever to worry about.

You still shift gears with your foot, but there's no clutch coordination required. For a total beginner, it's much less stressful. Honda Dreams are similar.

Travelers on motorbikes somewhere in the mountains of Vietnam
A group photo, somewhere in the mountains

Full automatic scooters are the easiest to ride, but they struggle in the mountains and lack the power for a loaded-up cross-country trip.

If you've got a bigger budget, companies like Tigit Motorbikes and Rentabike Vietnam offer one-way rentals on proper bikes, with pickup in Hanoi and drop-off in Ho Chi Minh City.

It costs more than buying a beater, but you skip the buying-and-selling hassle entirely, and if something goes wrong, you've got someone to call.

How To Sell Your Motorbike in Ho Chi Minh City

When you reach Ho Chi Minh City, you need to offload the bike. Post it on Facebook groups like "Vietnam Backpacker Sales," be honest about the condition, and price it 10 to 15% higher than what you actually want.

Everyone negotiates. Throw in your helmet, bungee cords, and phone mount to sweeten the deal.

There are also shops along the backpacker streets in HCMC with signs saying they buy bikes. That's what I did. They offered me $130. I'd paid $200 in Hanoi. The bike had taken an absolute battering on the way down, and I was happy with $130 - just $70 for the whole trip.

Jim had a slightly different experience. We'd left his bike at a repair shop one afternoon and went to find food.

Walking back, we could see black smoke rising from roughly where the shop was. We joked that it was Jim's bike on fire. When we got back, Jim's bike was on fire. Burnt to a crisp.

The guys in the shop were already working frantically to strip it down to the frame. They couldn't save it, so they ended up giving him a semi-automatic scooter to finish the trip.

He sold that in HCMC for about $100. Not bad for a bike that was technically a replacement for a bike that no longer existed.

Nick and I with the remains of Jim's bike

The $70 Trip

The four of us stayed together all the way to Ho Chi Minh City and then carried on into Cambodia before Nick and Anthony flew home to Chicago. We still keep in touch.

Two lads we met on the floor of a hostel dorm room became some of the best friends I've ever made, and none of it would have happened if we hadn't walked into a bike shop the next morning.

In one of the towns up north, out in the sticks, we were out looking for somewhere to get a drink when we stumbled across a wedding happening in a marquee in the middle of a small town.

The moment someone spotted us, they were waving us in, sitting us down, pouring rice wine before we'd even had a chance to introduce ourselves.

Nobody spoke a word of English, and we didn't speak a word of Vietnamese, so everything happened through gestures and laughter. They taught us their toasts.

We joined in without understanding any of them. We ended up singing Dancing Queen on karaoke, and I've still got a photo with the bride and groom. None of that would have happened on a bus.

The author with Vietnamese wedding couple
Myself with the bride and groom

There's also something about rolling into these mountain towns four abreast on loud bikes that makes you feel like the coolest person on earth. You're not.

You're sunburnt, your clutch cable is held together with duct tape, and you haven't showered in days. But for a few seconds, pulling into a town square with the engines echoing off the mountains, you absolutely are.

The whole trip cost me $70 in bike money and maybe another $50 in repairs. I've spent more on a night out in London.

If you're sitting in a hostel in Vietnam right now reading this and wondering whether to do it, stop wondering. Go and buy a bike. Just check the brakes for Coke cans before you set off. 

Things To Do in Valencia: 10 Budget Experiences and Photo Ideas

Valencia is one of the most dynamic coastal cities in Spain, known for its sunny weather, historic buildings, Mediterranean beaches, and vibrant lifestyle.

Famous for its museums, food, and attractions, the city can also be enjoyed on a budget. From gardens and historic neighborhoods to beaches, there are many unforgettable free experiences to enjoy in Valencia.

Valencia Attractions

1. Wandering Between the Turia Gardens

One of the most beloved public spaces in Valencia is the Turia Gardens, a vast green park running through the city center. The park was designed in the former riverbed of the Turia River and stretches several miles, linking many of Valencia's main monuments.

A serene scene in Turia Gardens in Valencia, capturing a woman sitting by the water surrounded by palm trees and modern architectural elements, reflecting the calm and beauty of one of the city's most iconic parks.
Peaceful moment in Turia Gardens, Valencia

Walking in the gardens offers a peaceful escape from the urban environment. Visitors find tree-lined paths, playgrounds, fountains, sports facilities, and shady spots perfect for relaxing. Locals often come to jog, cycle, do yoga, or spend time outdoors.

As a photographer, I found the Turia Gardens particularly beautiful in the morning. Soft sunlight shone through the trees, creating gentle lighting and fewer crowds, allowing me to capture clean, relaxed shots during my visit.

2. Exploring the History of the El Carmen Neighborhood

The El Carmen district is the cultural and historical heart of Valencia. Located within the old city walls, this neighborhood comprises narrow, winding streets, centuries-old buildings, colorful street art, and hidden plazas that testify as the city's long history.

As mentioned earlier in the article, exploring El Carmen feels like traveling back in time. Visitors can admire medieval architecture, see the remains of ancient city walls, and arrive at a lively square where people meet in cafes and restaurants.

During my visit to El Carmen, the vivid contrast between centuries-old stone walls and bright street art stood out.

I discovered that wandering through the district and getting lost among its streets led to some of my favorite candid photography moments, thanks to the mixture of history and creativity.

3. Enjoying the Beautiful Beaches of Valencia

Valencia has several wide, sandy beaches close to the city center. Playa de la Malvarrosa and Playa de las Arenas are among the most popular, with long stretches of golden sand and beautiful views of the Mediterranean Sea.

Beach time is free and a great way to enjoy Valencia's relaxed lifestyle. Visitors can swim, sunbathe, stroll along the shore, or watch the waves.

When I visited Valencia's beaches in the evening, I noticed the seaside promenade was lively but relaxed, with musicians and street performers.

I found sunset to be the best time to take photos, as the atmosphere was especially vibrant and the reflections on the water were beautiful.

4. Admiring the City of Arts and Sciences from the Outside

The City of Arts and Sciences is one of the most recognizable modern landmarks of Valencia. Designed by the eminent architect Santiago Calatrava, the complex features futuristic buildings that host museums, an aquarium, and a planetarium.

Although some attractions require tickets, walking around the complex is totally free. The dramatic white structures, curved architectural lines, and reflective pools create the extraordinary visual landscape.

Many visitors enjoy walking around the surrounding gardens and taking pictures of the iconic buildings.

Personally, I found this to be one of the most photogenic places in Valencia, especially at golden hour, with beautiful reflections of the buildings in the water.

5. Exploring the Area of the Central Market

The Central Market of Valencia is one of the biggest and oldest food markets in Europe. Even for those who do not intend to buy anything, going to the market is an interesting cultural experience.

The building itself is an extraordinary example of modernist architecture, with its stained-glass windows, colorful ceramic tiles, and large decorated dome.

Inside the market, there are hundreds of stalls exhibiting fresh fruits, vegetables, seafood, spices, and traditional Spanish ingredients.

Walking through the market, visitors can see the local life and appreciate the distinctive features of Valencia's lively culinary culture. What caught my attention were the bright hues inside.

If you enjoy photography, whether street or food, midmorning is the best time, when the market is busiest and most alive.

6. Visiting the Towers of the Serranos

The Serranos Towers are among the most famous historic structures in the city of Valencia. These impressive medieval gates were once part of the city's defensive wall system and, for many centuries, were one of the main gates into the old part of the city.

This gives a sense of the historical importance of Valencia, as seen from standing near the towers. Visitors can admire the size of the structures and imagine what they would have protected the city.

The streets offer excellent opportunities for photography, especially in the evening when the towers are lit. I found the best shots just before sunset, when warm light bathes the stone, beautifully illuminating its texture.

7. Relaxing in Plaza de la Virgen

Plaza de la Virgen is one of the most photogenic squares in Valencia and an important meeting place for locals and tourists alike. The square is surrounded by historic buildings, which include the Valencia Cathedral and the Basilica of the Virgin.

Family photoshoot at Plaza de la Virgen in Valencia with parents holding their baby girl in gentle golden light.
Family moments at Plaza de la Virgen, Valencia

At the plaza's center, a beautiful fountain depicts the Turia River and its irrigation canals. Sitting nearby and watching Valencia's daily life can be an easy yet unforgettable experience.

Street musicians often play in the area, adding to the friendly and energetic atmosphere. I enjoyed sitting here one evening for no particular reason. The mix of street music, soft lighting, and the buzz of people makes it feel really alive.

8. Taking a Sunset Walk at Marina - Sunset Walk at the Marina

Valencia Marina has become one of the most enjoyable waterfront areas in the city. Over the past 10 years, the marina has undergone redevelopment, featuring modern architecture, open public spaces, and charming walking paths.

It is especially fun to walk down the marina in the late afternoon or evening. Visitors can watch the sailing boats and cyclists ride along the promenade as they gather with others to enjoy the sunset over the Mediterranean Sea.

The relaxed environment makes the marina the perfect place to unwind at the end of the day after exploring the city. From my experience, this is one of the best spots to relax. The sunset views over the Mediterranean are remarkably peaceful and perfect for wide-angle photography.

9. Catching Memories with a Maternity Photoshoot in Valencia

Although some of Valencia's attractions are free, some experiences can be both valuable and relatively affordable.

One of these is to organize a maternity photoshoot in Valencia. The city's extraordinary union of historical sites, thriving gardens, and beautiful beaches offers an ideal backdrop for capturing special moments in life.

Maternity photoshoot in Valencia at Marina Port Saplaya with family posing by boats and colorful waterfront houses.
Maternity moments by the marina in Valencia

Couples and families usually choose Turia Gardens, the City of Arts and Sciences, or the beaches in Valencia for sunset photos. The city's relatively warm Mediterranean light and lovely landscapes make for a beautiful backdrop for documenting the passage toward parenthood.

For travelers who appreciate photography and storytelling, adding a maternity photoshoot to a visit to a particular place can make a regular trip more memorable. I think Mediterranean light is so soft that it makes portraits feel more intimate, giving the photos a more timeless, iconic look.

10. Using Proposal or Engagement Photoshoot to Celebrate Love

Valencia is generally considered a place of romance and, hence, a great place to get engaged and to propose. Many couples find having a proposal or engagement photoshoot in Valencia a more important milestone to capture.

Romantic proposal photoshoot in Valencia with a couple embracing on a stony hill at sunset with panoramic landscape view.
Engagement photoshoot with breathtaking views in Valencia

The city has plenty of scenic places for such moments. A proposal at sunset on the beach, in a quiet corner of the historical old town, or near the striking architecture of the City of Arts and Sciences can always create an unforgettable setting.

Couples often use the outing for sightseeing, as well as for a proposal or engagement photoshoot, so that they can keep their memories as keepsakes. Valencia's beautiful scenery, warm weather, and romantic atmosphere make it an ideal place to celebrate love.

In my opinion, the quieter corners of the old town are less crowded, more personal, and especially beautiful at sunset, often leading to the most authentic and emotional moments.

How To Stay Organized While Traveling and Working Remotely

Staying organized while traveling and working remotely felt chaotic when I first started. New environments, changing schedules, and unreliable Wi-Fi made it hard to stay on track.

Over time, I realized staying organized doesn't require strict routines or complicated systems. For me, it comes down to a few simple habits, lightweight tools, and a clear approach to managing time and tasks, no matter where I am-beach town, busy city, or somewhere in between.

Laptop on a windowsill with coffee and city view for remote work while traveling.
Remote workspace setup while traveling (photo: Unsplash)

Keeping a Simple Daily Routine

A flexible routine gives me stability, even when everything else is changing.

Starting My Day With Clear Priorities

I try not to overload my day. Instead, I focus on two or three key tasks each morning and make sure those get done first.

Most days, I block off a few uninterrupted hours, usually between 8 a.m. and 11 a.m., to handle my most important work. That early focus helps me stay productive and keeps the rest of the day from feeling daunting.

Where I work matters too. Sometimes it's a quiet café, other times a coworking space, or just a calm corner of my room-the setting changes, but the routine stays consistent.

Managing Work Without Stress

When I break things down, everything feels easier to manage.

Splitting Tasks Into Smaller Steps

One of the most useful habits I've built is breaking larger projects into smaller, doable steps.

I keep a simple task list on my phone using apps like Apple Notes or Todoist. As I move through the day, I update it and check things off. That sense of progress keeps me encouraged and focused.

Before submitting written work, I sometimes run it through an AI detector free tool to verify that everything reads naturally and sounds like my own voice.

Choosing the Right Work Environment

Where I work has a big impact on how productive I feel.

Finding Spaces That Match My Energy

I don't look for perfect workspaces anymore-simply places that help me focus.

  • Cafés are great for lighter tasks or planning.
  • Coworking spaces work best when I need a few solid hours of focus.
  • Hostels or shared spaces can be energizing when I want some social interaction.
  • My room is usually best for deep work or calls.

I'll often switch locations during the day if I feel my energy dropping. That change alone can make a big difference.

Keeping My Digital Files Organized

When my files are organized, my work feels a lot easier.

Using a Simple Folder System

I keep everything in clearly labeled folders by project or client. It's simple, but it saves me a ton of time when I need to find something quickly.

Most of my files are stored in the cloud using Google Drive or Dropbox so that I can access them from anywhere. I also name files clearly so I know exactly what I'm opening without having to guess.

I've learned the hard way that backups matter, so I keep copies of important work just in case.

Keeping Connected Without Distractions

Communication can easily take over your day if you let it.

Checking Messages at Set Times

Instead of constantly checking messages, I respond at specific times, usually once late in the morning and again in the afternoon. helps me stay focused for longer stretches and keeps my work from getting interrupted every few minutes.

I also keep all work communication in one place whenever possible, which makes it easier to stay organized and avoid overlooking anything important.

Managing Work and Travel

One of the biggest challenges is making sure work doesn't take over the entire trip.

Planning Work Around Travel

I usually schedule my work in the morning so I can leave the rest of the day open for exploring.

That might mean walking through a new neighborhood, trying local food, or spending time outside. Knowing I've already handled my priorities makes it easier to enjoy where I am.

If I know I'll be out all day, I adjust my workload ahead of time so I'm not stressed about it later.

Keeping My Mind Clear and Focused

Staying organized isn't just about systems-it's also about mindset.

Taking Short Breaks

I've found that short breaks make a big difference. Sometimes I step outside, grab a coffee, or take a few minutes away from my screen.

Those small resets help me come back with better focus.

Travel itself also helps keep things fresh. New places and experiences naturally break up the routine and keep me from burning out.

Packing Smart for Work

What I bring with me directly affects how smoothly I can work.

Sticking to the Essentials

I try to keep my setup simple:

  • Laptop
  • Charger and adapters
  • Noise-canceling headphones
  • A small notebook

Everything stays organized in one bag so that I can move easily between locations. I also make sure I have access to important files if something goes wrong.

Building Habits That Work Anywhere

The biggest shift for me has been building habits that don't depend on location.

Staying Consistent

Even when I'm in a new city, I try to keep a few things the same-when I start work, how I plan my day, and how I manage my tasks.

That consistency makes every new place feel more familiar and keeps everything operating smoothly.

Over time, these habits have become second nature, and I don't have to think about them as much.

Final Thoughts

Staying organized while traveling and working remotely became much easier once I focused on keeping things simple.

A flexible routine, clear task management, and a bit of structure go a long way. With the right habits in place, I'm able to stay productive while still enjoying everything that comes with being on the road.

_____

This story was published in collaboration with ZeroGPT.

5 Best SD Card Recovery Software to Recover Your Travel Photos & Videos

Losing your photos and videos from a trip hits really hard. One wrong click, a formatting error, or a sudden card glitch - and everything's gone. The fastest way to get those files back is to use recovery software. But with so many options, it's easy to waste hours on tools that won't deliver any results. So instead of guessing, here are five of the best SD card recovery tools that are actually worth trying.

Man holding DSLR camera (photo: Mong Mong, Pexels).
Man holding a DSLR camera (photo: Mong Mong)

A quick warning before we start: stop using the SD card right away. Every new file written to it reduces the chances of recovery. Also, you will need a computer and an SD card reader, so make sure you have both on hand.

What Matters Most When You Choose the SD Card Recovery Software For PC

Most SD card recovery software works similarly, so choosing between them comes down to what each tool actually offers in practice. A few criteria make this decision much simpler.

  1. Overall performance. Some tools will scan and list hundreds of files, but fail to restore usable content. What matters is how accurately the software reconstructs files under real-world conditions - reading raw sectors, recognizing file formats, and piecing them together even when the file system is partially damaged. Scan speed plays a role, too, especially on larger cards.
  2. Supported file formats. Travel photos and videos often go beyond JPG and MP4. Cameras use RAW formats like CR2 or NEF, and action cams produce larger video files. A good SD card recovery app should support both common and advanced formats, otherwise files may be missing or unusable after recovery.
  3. Ability to handle different data loss scenarios. Accidental deletion is the simplest case - most tools handle it. Formatted cards, logically corrupted cards, and cards that appear as RAW (unreadable) in Windows are harder to handle. Not every tool handles all three equally well.
  4. Ease of use. Most people who lose files on an SD card are not data recovery specialists. Clear navigation, simple controls, and file preview let anyone get through the process without prior experience.
  5. Price and value. Price matters, and what you get for it matters even more. Many tools offer free versions, but they usually come with strict limits. Always check what the tool is really capable of before committing.
  6. Extra features. Useful additions include video repair, disk backup, and file filtering. These often separate basic free recovery software for SD cards from more capable tools.

Quick Comparison Table of the Best SD Card Recovery Software

Just need to quickly choose a tool to recover SD card photos without reading the whole thing? Here's the table that gives a clear overview of the software mentioned in this article.

ToolOverall RatingOSPriceFree VersionSupported File FormatsScenario CoverageRecovery Success RateEase of Use
Disk Drill5 (out of 5) starsWindows, macOSFrom $89Yes (100MB Windows / Preview macOS)Very wide range (JPG, PNG,  TIFF, MP4, MOV, RAW etc.)FullVery HighVery Easy
UFS Explorer4 (out of 5) starsWindows, macOS, LinuxFrom $69.95Yes (256 KB / 768 KB per file)Wide range, incl. RAW & videoFullHighHard
Ontrack EasyRecovery4 (out of 5) starsWindows, macOSFrom $59.99Yes (1GB limit, 25MB per file)Common + partial RAWAdvancedHighEasy
DiskGenius3 (out of 5) starsWindowsFrom $69.99Yes (64KB per file)Common + partial RAWAdvancedModerateMedium
Recuva3 (out of 5) starsWindows$24.95Yes (unlimited basic recovery)Common formatsBasicModerateEasy

5 Best Memory Card Recovery Software for Travel Photos & Videos

The tools below all aim to recover lost data from an SD card, but they differ in how easy they are to use and how well they handle more complex situations. Looking at them side by side makes it easier to understand which one suits you the best.

1. Disk Drill

Disk Drill SD Card Recovery is the most balanced option in this list. It combines strong recovery performance with a workflow that doesn't require technical knowledge. That combination is what makes it stand out, especially for travel photos and videos.

Disk Drill SD Card Recovery screenshot.
Star Rating5 (out of 5) stars
OSWindows, macOS
PriceFrom $89 per year
Free VersionYes (on Windows up to 100MB recovery)
Supported File FormatsCommon + RAW (CR2, CR3, NEF, ARW, RAF, RW2 and others), MXF, MTS, etc.
Pros+ Very easy to use
+ High recovery success rate
+ Advanced Camera Recovery for fragmented video files
+ Works with corrupted and RAW SD cards
+ Excellent file preview before recovery
+ Byte-to-byte backup for damaged cards
+ Clean and clear interface
+ Fast and consistent scan results
+ Supports a wide range of camera formats
Cons- Not available on Linux
- Not entirely free

Disk Drill is the clearest example of a recovery tool that requires no technical background. The workflow is obvious from the start: select your SD card, run a scan, preview results, and recover what you need.

What stands out most is its handling of fragmented video files. Many tools struggle with long MP4 or MOV clips split across multiple card segments - they appear in the results, but playback is corrupted.

Disk Drill's Advanced Camera Recovery feature rebuilds these files by piecing the fragments back together in the correct sequence.

Format support covers 400+ file types, and it handles corrupted and RAW cards well. The byte-to-byte backup feature lets you create a disk image before touching the original - a smart move when the card is unstable.

The preview system is genuinely useful too. Before committing to recovery, you can view photos and even play back video clips to verify whether the file is intact. 

The only limitation is the free recovery cap: 100 MB on Windows, and preview-only on macOS. That's still enough to test the tool and see exactly what's recoverable before spending anything.

For a large batch of photos and videos, though, you will likely need the paid version. That said, for most users dealing with a lost trip's worth of images, Disk Drill offers the best combination of power and accessibility.

2. UFS Explorer Standard Recovery 

UFS Explorer is a strong choice for advanced users and complex cases, especially when the file system is damaged and preserving file structure matters. It focuses on precision over simplicity, though, so for quick, straightforward recovery, it may feel unnecessarily complicated.

UFS Explorer screenshot.
Star Rating4 (out of 5) stars
OSWindows, macOS, Linux
PriceFrom $69.95 for unlimited use
Free VersionYes (recovers files up to 256 KB only)
Supported File FormatsCommon + RAW (CR2, NEF, ARW), custom formats (via signatures)
Pros+ High recovery accuracy in complex scenarios
+ Strong metadata preservation (file names, folder structure)
+ Advanced scan configuration options
+ Ability to scan specific disk areas
+ Suitable for damaged or partially readable SD cards
Cons- Complex and technical interface
- Steep learning curve
- Slower workflow for basic tasks
- Overwhelming for non-experts
- Very limited free recovery

Unlike simpler tools, UFS Explorer gives you more control over the recovery process. You can adjust scan parameters, target specific areas of the SD card, and define custom file types. This is useful when working with unusual formats or partially corrupted data.

It also handles file system-based recovery well, often restoring folder structure and file names. That makes a big difference when recovering large photo collections, where sorting files manually would take hours.

That said, the interface isn't designed for quick use. It shows many options at once, and without prior experience, it's easy to feel overwhelmed. For a non-technical user who just needs their photos back, it may create more friction than results.

3. Ontrack EasyRecovery

Ontrack EasyRecovery works best when you want a balance between ease of use and capability. It's a solid option for everyday recovery tasks, but not the strongest choice for more complex cases or advanced video recovery.

Ontrack EasyRecovery screenshot.
Star Rating4 (out of 5) stars
OSWindows, macOS
PriceFrom $59.99 per year
Free VersionYes (up to 1GB total recovery; max 25 MB per file)
Supported File FormatsCommon + some RAW (CR2, NEF), HEIF
Pros+ Easy-to-use interface
+ Works in most common data loss scenarios
+ Includes media repair tools
+ Supports both simple and moderately complex cases
+ Well-structured scan results
Cons- Slower scan speed compared to some tools
- Less effective with fragmented video files
- Advanced features locked behind higher tiers
- Free version has file size recovery limits
- No lifetime purchase option

The software offers a clean, guided interface that walks users through the recovery process step by step and performs well across most common loss scenarios - accidental deletion, formatted cards, and some corruption cases.

One feature that sets it apart from simpler tools is its built-in media repair capability. In addition to recovering files, it can attempt to repair damaged photos and videos after recovery, which is useful when files come back partially corrupted. This makes it a reasonable pick for users who want recovery and basic repair in one place.

The downsides are mostly around performance and pricing. Scans tend to run slower than Disk Drill's, and the more advanced features, such as deeper scan modes and broader scenario coverage, are locked behind higher-priced tiers.

The subscription-based pricing model may also feel less attractive compared to a one-time purchase for occasional use.

4. DiskGenius

DiskGenius takes a slightly different angle. It combines SD card recovery software with disk management tools, making it more versatile but also harder to use.

DiskGenius screenshot.
Star Rating3 (out of 5) stars
OSWindows
PriceFrom $69.99 per month
Free VersionYes (recovers files up to 64 KB each)
Supported File FormatsCommon + Some RAW (CR2, NEF), limited support for advanced formats
Pros+ Combines data recovery with disk and partition tools
+ Useful for repairing file systems
+ Flexible scan options
+ Supports multiple file systems
+ Can recover lost partitions
+ Good for structured recovery scenarios
Cons- The interface is less intuitive
- Very limited free recovery size
- Weaker performance with RAW photos and large videos
- Not beginner-friendly
- Inconsistent results in complex recovery cases

DiskGenius is a hybrid tool that combines data recovery with partition management, disk repair, and other storage utilities. That makes it a genuinely useful option for users who need more than just file recovery in one place.

It handles partition recovery well, supports multiple file systems, and gives technically minded users a level of control that dedicated recovery tools typically don't offer.

For travel photo and video recovery, it's still a capable option, but not the most specialized one. Recovery results for RAW images and large video files can vary compared to tools designed specifically for media.

The interface also leans more toward system-level tasks, which may feel less intuitive if your goal is simply to restore photos.

The free version has a 64 KB per-file recovery limit, which is quite restrictive for most photo and video formats. In practice, it works better as a trial to check scan results rather than for full recovery.

5. Recuva

Recuva is one of the simplest tools in this list. It works best when files have been recently deleted, and the SD card is still in good condition. It's a solid starting point if you want free SD card recovery software, though more complex cases may require a more advanced tool.

Screenshot Recuva SD card recovery software.
Star Rating3 (out of 5) stars
OSWindows
Price$24.95 per year (adds updates and support only)
Free VersionYes (unlimited recovery)
Supported File FormatsMostly common formats (JPG, PNG, TIFF, MOV, MPG, MP4, AVI etc.)
Pros+ Free recovery with no size limit
+ Lightweight and fast to install
+ Simple interface with guided wizard
+ Quick scan works well for recent deletions
+ Portable version available (no installation needed)
Cons- Limited support for RAW and advanced formats
- Weak performance on formatted or corrupted SD cards
- No advanced recovery features
- Basic preview capabilities
- Interface feels outdated
- Lower success rate in complex scenarios

Recuva is one of the most widely downloaded recovery tools available - largely because it is free, lightweight, and straightforward to use.

For the specific case of recently deleted files that have not yet been overwritten, it works quickly and without complications.

There is also a portable version, which means you can run it directly from a USB drive without installing anything on the PC.

That said, Recuva has real limitations beyond basic deletion. It relies heavily on the file system, so if the SD card appears as RAW or the file system is damaged, it will not scan the card.

Recovery from formatted or corrupted cards is also unreliable. RAW image format recovery from DSLRs is weak as well. In addition, the interface has not been updated in years, and compared to more current tools, it feels dated.

FAQ

Can memory card recovery software restore all lost files?

Not always. If you're familiar with data recovery basics, you'll know the key factor is always whether the original data has been overwritten. If new files were saved to the SD card after deletion, some original files may be permanently lost

Can I recover files from a corrupted SD card?

Yes, but results depend on the tool. Advanced software can scan the card even when the file system is damaged or shows as RAW. Tools with deeper scanning capabilities handle these cases better than basic recovery apps.

Is it safe to use SD card recovery software?

Yes, as long as you avoid writing new data to the SD card. Recovery tools typically read data without modifying it. For added safety, some tools let you create a full backup image before scanning.

Can recovery software fix a physically damaged SD card?

No. Software only works with logical issues like deletion or corruption. Physical damage, such as a broken connector or memory chip, requires professional recovery services.

Is there a difference between paid and free SD card recovery software?

The main difference is in limits and features. Free recovery tools often restrict how much data you can restore or lack advanced capabilities. Paid versions usually provide full recovery, better format support, and additional tools like video repair or disk backup.

Conclusion

We've walked through five tools, each with its own strengths and limitations. So which one to pick? To be honest, it depends on your situation and how comfortable you are with recovery software.

That said, Disk Drill remains the obvious leader here. If your goal is to get lost photos and videos back with minimal fuss, it handles practically any scenario without requiring you to understand how any of it works under the hood.

Whatever software you're going to use, remember: the moment you realize something is missing from your SD card, stop using it.

Once the data is overwritten, no recovery tool can restore it. Act fast, keep the card untouched, and give the recovery tool the best possible chance.

_____

This story was published in partnership with CleverFiles Inc.

Carry the Memory: Meaningful Personalized Gifts for Backpackers and Travelers

Traveling is one of the most enriching experiences in life, supplying a collection of stories, landscapes, and moments that stay with us forever. As backpackers, we are masters of efficiency, packing our entire lives into a few cubic liters of fabric.

This minimalist approach challenges us to balance collecting meaningful memories with keeping our packs light. Generic souvenirs like plastic keychains and mass-market t-shirts rarely capture our personal journey, often collecting dust or being forgotten after the trip.

Patches are good personalized gifts for travelers (photo: Fearless on Four Wheels, iStock).
A backpack covered in patches (photo: iStock)

The rise of the personalized gift industry has allowed travelers to combine sentimental value with practical needs. This central argument-that customization allows backpackers to preserve meaningful memories without sacrificing efficiency-frames the evolving role of travel gear.

Why Backpackers are Embracing Customization

For a backpacker, gear is identity. Living out of a bag for months, every item serves a purpose, often survival or basic comfort. Customization adds ownership to that gear.

Standing Out in the Hostel Dorm

A primary benefit of personalization is practical. In a crowded hostel dorm, it is easy to mistake someone else's gear for one's own, especially popular backpacks, water bottles, and electronics.

Customization offers immediate identification. A named patch or engraved flask not only marks your gear, reducing stress from misplaced items, but also adds a personal touch.

Emotional Anchors on Long Journeys

Long-term travel can be isolating, and personalization bridges the distance to home. A photo, an engraved ring, or a personalized compass comforts and reminds you of the memories awaiting your return.

Celebrating a Legacy of Adventure

Personalizing travel items transforms routine purchases into gifts that celebrate a shared adventure, turning them into heirloom-quality keepsakes.

Functional Personalized Gear for the Modern Traveler

When choosing a gift for a backpacker, utility must be the top priority. The best customized items fit naturally into their packing list.

Custom Engraved Water Bottles and Tumblers

A durable, insulated water bottle is mandatory for any traveler. Companies like Hydro Flask and Yeti have recognized this and offer streamlined laser engraving services directly on their websites.

Adding a name, coordinates, or a simple design to a bottle doesn't affect it but raises its sentimental value, making it a daily reminder of favorite trips.

The Monogrammed Passport Cover and Travel Wallet

A passport is a backpacker's most important document. A high-quality leather cover protects it while offering a classic canvas for personalization.

Watching an artisan in Florence use a heated brass stamp to press your initials into leather creates an experience that becomes part of the gift's story. Gifts are timeless mementos that will age gracefully with your travel history.

Custom Backpack Patches and Embroidery

Sewing patches onto backpacks is a tradition nearly as old as backpacking itself. Modern technology has updated this practice, enabling fully custom-designed patches.

You can design a patch representing your trekking group, a stylized trail, or your home state's flag with a globe. This gives your pack character, turning your gear into a conversation starter in any hostel.

Wearable Memories: The Jewelry of Longitude and Latitude

Jewelry has long been a powerful way to keep sentiment close. For travelers, it offers a discreet and stylish way to wear their journey. It is one of the most popular trends in travel jewelry.

Pendants, rings, or cuffs can be stamped or engraved with the precise GPS coordinates of a favorite location. It could be the summit of Kilimanjaro, the island where you learned to scuba dive, or the cafe where you met your best friend.

The beauty of coordinate jewelry resides in its subtlety. To others, it appears as elegant geometry, but to the wearer, it is a key to a profound memory.

Stamped Travel Bands and Rings

Simple metal bands, often in sterling silver or durable stainless steel, can be hand-stamped with dates, city names, or quotes about freedom and adventure.

As you travel, the metal may pick up tiny scratches and marks. These add to the stamped aesthetic and tell the physical history of your journey.

Technological Personalization for the Digital Nomad

In an age where technology is essential for travel, from mapping to working, customization has extended into the digital domain.

Personalized Phone Cases and Laptop Sleeves

For a travel blogger or digital nomad, a phone and a laptop are primary tools. Custom cases let you print high-res images on durable materials. These could be a photo you took, a vintage map scan, or stars as they appeared on your journey's start date.

GPS-Mapped Items and Physical Routes

For cyclists or long-distance hikers, engraving your GPS coordinates and route on wall art or a small metal plate for your backpack is a distinctive way to celebrate a physical achievement. It tangibly represents the miles you traveled.

Maintaining Memories After the Journey

While backpackers focus on what to carry, the value of personalized gifts does not end when the trip ends. They offer a unique way to celebrate returning.

The Modern Photo Book

Standard photo prints are making a comeback, but the modern photo book is a significant upgrade. Using designer templates, companies like Shutterfly and Blurb let you create professional-grade, hardbound books.

You can mix personal stories and travel journal entries with hundreds of digital photos. This creates a physical legacy more compelling than a digital album.

The Permanence of Laser Crystal Etchings

For travel lovers seeking an alternative to paper memories, laser crystal companies like Artpix3D utilize high-definition laser technology.

They specialize in sub-surface laser engraving, which transforms flat 2D photographs into elaborate 3D images trapped inside optical crystal.

This application often creates permanent displays, such as memorials. They are viewable from different angles as if the memory is frozen in time.

While this technology can recreate sophisticated scenes and monuments, some prefer simpler, classic applications, such as the picture engraved gifts process. It permanently captures a favorite face or landmark in sparkling clarity. This creates a permanent artifact that cannot fade, tear, or be lost digitally.

Digital and Post-Trip Customization

The present-day travel experience is increasingly "phygital," combining the physical journey with a digital footprint.

Customized Travel Videos and Compilations

In 2026, personal travel videos are on the rise. Services and freelancers are available to edit your raw GoPro and phone footage into professionally narrated documentaries.

These digital gifts are easy to store, take up almost no space in your packing, and let you relive your adventures cinematically for decades.

Personalized Post-Trip Maps and Scratch-Offs

Scratch-off world maps have been popular for years, but new companies feature customizable map prints. You can upload your travel itinerary and have locations connected by a styled line, turning your path across a continent into art for your home or office.

Making It Sustainable: The Eco-Friendly Trend in Personalized Gifts

Backpackers are becoming more environmentally conscious. They want gifts tailored not just to their names but also to their values. The market has responded with more eco-friendly customized items.

Engraved bamboo flasks, organic cotton items, and recycled-glass awards reflect eco-friendly values. Choosing sustainable, customized gifts shows care for the recipient and the planet.

Personalization is the link between physical possessions and emotional travel memories. By elevating ordinary gifts into personal mementos, customization enables backpackers to celebrate their stories and adventures efficiently-a theme central to this discussion.

_____

This story was published in collaboration with ArtPix 3D®.

Backpacking Kyiv: A Budget Travel Guide for First-Time Visitors

Kyiv is one of those cities that amazes you. It's large and vibrant, and, unlike many destinations, it doesn't feel like a tourist attraction. For backpackers seeking an authentic experience on a budget, this travel guide highlights Kyiv's unique neighborhoods, affordable eateries, and local transportation options.

Editor's note: Ukraine remains under martial law following Russia's full-scale invasion in 2022. Travel conditions, transportation options, curfews, and safety risks can change quickly. Travelers should review current government advisories and local guidance before planning a trip to Kyiv.

Kyiv city center (photo: Glib Albovsky, Unsplash).
Kyiv city center (photo: Glib Albovsky)

Why Kyiv Warrants a Spot on Your Backpacking Route

Most backpackers in Europe head west. If you're watching your budget, that's a mistake. Kyiv, the capital of Ukraine, offers something many famous cities have lost: a true sense of exploration, not just following the crowd.

History is everywhere in Kyiv. You might see a golden-domed monastery on one street and a modern cafe beside a Soviet-era building on the next corner.

Kyiv is fascinating to explore because of this mix of the old and the new. And the list of things to do in Kyiv is really extensive.

Night markets, river beaches, street art areas, underground museums, and boat rides on the Dnipro are all available. Some nightlife and entertainment activities remain limited due to wartime curfews and changing local security conditions.

You'll never run out of things to do. Best of all, most activities are extremely affordable.

Kyiv Travel Guide

Getting There Without Breaking the Bank

Traveling to Kyiv on a budget is possible. Booking tickets a few weeks ahead can be surprisingly cheap.

Because Ukrainian airspace remains closed during the war, most international travelers currently reach Kyiv by train or bus from neighboring countries such as Poland or Moldova. Overnight rail connections remain one of the most practical and affordable ways to enter the city.

Overnight trains and buses from Poland, Hungary, or Romania are good options. They're slower, but you wake up in Kyiv and save on a night's lodging.

Many backpackers find this trade-off sensible. These routes fill up fast, so reserve your seat early, especially in summer.

Where To Sleep: Budget Hostels and Cheap Stays in Kyiv

There are many types of hostels in Kyiv, and most are reasonably priced. Many are in the city center, so you can walk to most major attractions without paying for transportation.

Choose hostels that include a kitchen or serve breakfast. Small amenities like these save you money over the course of a week.

Budget travelers often choose the Podil neighborhood. It is vibrant, well-connected to the rest of the city, and full of cafes and small eateries.

Avoid cheap-looking locations far from the center, as transportation costs may erase savings.

Eating Well on a Tight Budget: Local Food You Must Try

Kyiv is a highlight for budget diners. Ukrainian food is filling, so you don't need much. Try salo, varenyky, and borscht. Most are affordable locally.

Visit a stolovaya, a canteen-style self-service restaurant, for the best daily meal deal. You point at what you want and get a full plate for almost nothing. Locals eat at these restaurants citywide.

Street food shines, especially in summer, at parks and squares. Fresh food markets are also great. Have a riverside picnic on bread, cheese, and fruit for just pennies.

Top Free and Low-Cost Sights To See in the City

Kyiv is generous with free attractions. Kyiv Pechersk Lavra-the Monastery of the Caves-is among the city's most striking spots and is free to visit.

Pecherskyi is recommended in most Kyiv travel guides (photo: Eugene, Unsplash).
Pecherskyi District (photo: Eugene)

It's worth a walk to see the grounds of the Kyiv Pechersk Lavra. Andriyivsky Descent's cobblestone lane is full of galleries, artisans, and souvenir vendors. You can spend hours without spending anything.

Mariinsky Park is free and offers lovely views of the Dnipro. Check if the National Museum of the History of Ukraine has free admission days. Free walking tours run daily in the center-great for your first day.

Getting Around Kyiv: Metro, Buses, and Walking Routes

Use the metro for affordable travel across Kyiv. Buy tokens at stations and use the network to reach most sights at a low cost.

Soviet-era designers built several metro stations with dramatic architecture, making each one worth a visit. Buses and trolleybuses fill gaps the metro doesn't cover. Often, walking is best for shorter distances.

Enjoy exploring the city center on foot, since it is compact and the streets offer plenty to see. Avoid taxis unless you use a reliable app, as some drivers overcharge visitors.

Final Thoughts

Kyiv has flaws and rough edges, like any big city, but that's part of its appeal. You experience something genuine. Standing in a city that keeps evolving feels exciting.

Stay patient and open-minded-Kyiv will surprise you. Explore the incredible history of this Ukrainian city, taste local cuisine, and meet new people. These turn your vacation into a memorable experience, not just a checklist.

Despite the challenges of wartime, Kyiv continues to show resilience, culture, and community. Travelers considering a visit should stay informed, remain flexible, and approach the experience with sensitivity and respect for the realities Ukrainians continue to face.

_____

This story was published in partnership with Visit Kyiv.

The Top Things To Do in Sydney for Young Families

Sydney is an excellent destination for young families visiting from the US, with abundant outdoor spaces and world-class wildlife attractions. Hands-on animal experiences and relaxed harbor-front areas make it easy to plan days out that are fun for children and hassle-free for parents.

Darling Harbour Sydney family-friendly destination (photo: David Jia, Pexels).
Darling Harbour (photo: David Jia)

When planning family days out in Sydney, many parents rely heavily on their phones to use digital maps, use transport apps, and manage e-tickets while on the move.

Using a VPN download on public Wi-Fi in busy tourist hubs like Darling Harbour can help shield your personal and financial data while traveling with kids.

Family-Friendly Sydney Attractions

Taronga Zoo

Taronga Zoo is an absolute top attraction for young families, delivering a rare combination of incredible wildlife and the best views of the Sydney Opera House.

Situated just a short, scenic ferry ride from Circular Quay, Sydney's main harbor hub, the zoo is designed with families in mind.

Children can see animals from around the world, including majestic giraffes and cheeky meerkats, and enjoy engaging daily keeper talks.

The site features wide, stroller-friendly paths that make crossing the hilly terrain easy. The Sky Safari cable car provides a bird's-eye view that usually enthrals toddlers.

Hands-on activities and dedicated play areas ensure that younger children stay interested and active throughout the entire visit.

Darling Harbour

Darling Harbour is one of Sydney's most versatile family-friendly precincts because many attractions are clustered within walking distance.

At the heart of the area is the Darling Quarter playground, featuring massive slides and water play zones, great for cooling off on a warm Sydney afternoon.

Beyond the parks, the waterfront walks are wide and safe, leading families past the Australian National Maritime Museum and casual dining options.

Baby-change facilities and stroller parking make it easy to spend a full day here without complicated logistics or long travel times between activities.

SEA LIFE Sydney Aquarium

For an immersive indoor experience, SEA LIFE Sydney Aquarium is a first-rate choice, especially for young children fascinated by the big blue.

Yellow fish Sydney Aquarium (photo: Yang Li, Unsplash).
A yellow fish at the Sydney Aquarium (photo: Yang Li)

The aquarium is home to an enormous variety of marine life, from sub-Antarctic penguins to massive sharks and sawfish.

The walkthrough ocean tunnels let kids feel as if they are walking on the seabed, offering an educational and entertaining outing. It is a good option for a rainy day or when the family needs a slower-paced activity away from the midday sun.

The vivid displays of the Great Barrier Reef are a highlight, offering a sensory-rich experience that fascinates even the youngest visitors.

Royal Botanic Garden Sydney

If you're looking for a calm escape in the heart of the Central Business District (CBD), Sydney's Royal Botanic Garden is the perfect spot. The gardens offer extensive open lawns where children can run freely, along with shaded picnic spots for a relaxed lunch.

With its carefully maintained paths, it's ideally suited to parents who want to soak in the scenic harbor views while the kids explore the assorted plant life.

The Calyx often hosts rotating floral displays and kid-friendly workshops, making it a great place to introduce young children to the wonders of nature in a safe, controlled environment.

_____

This story was published in partnership with Proton VPN.

How To Use Your iPhone Internationally Without Extra Fees

Packing for an international trip usually comes down to the basics: passport, adapters, and local currency. One detail travelers often overlook is how to use an iPhone internationally without racking up unexpected charges.

Woman photographs Mt Kilimanjaro Keny iPhone (photo: Diy13, iStock).
A woman photographs Mt Kilimanjaro with her iPhone (photo: iStock)

Many travelers assume their phone will work abroad, only to discover how quickly roaming charges can add up. With a few simple settings and some preparation, your iPhone can become one of the most useful tools for managing a trip.

This guide explains how to use an iPhone abroad, from avoiding roaming charges to setting up an eSIM, downloading offline maps, and keeping the device secure while traveling.

Should You Turn off Mobile Data When Abroad on an iPhone?

Let's start with the question that catches most travelers off guard. Roaming charges are real, and depending on your carrier, a few days of unmonitored data usage abroad can result in a bill more memorable than the trip itself.

Before you land, it's worth heading into Settings > Cellular and deciding exactly what you want your phone to do.

The safest approach is to turn off data roaming, not cellular data altogether, but specifically the option that lets your phone connect to foreign networks at your carrier's international rates. This way, your phone stays connected at home while blocking surprise charges overseas.

If you're traveling with an iPhone 16, the improved Wi-Fi performance means relying on local wireless networks feels somewhat less like a compromise and more like a perfectly workable plan.

Wi-Fi at hotels, cafés, and airports tends to cover most needs: messaging apps, email, maps, and even video calls.

Things get trickier when you're on the move, navigating between neighborhoods, catching a cab, or pulling up a restaurant recommendation in the street. A bit of planning ahead makes all the difference, and we'll get to that shortly.

What Are the Advantages of Using an eSIM?

If the previous section left you thinking, "I'd rather just have data wherever I go," an eSIM is probably your answer.

An eSIM is a digital SIM built into your phone that lets you add a local carrier plan without swapping any cards. You can set one up before you leave, activate it when you land, and start browsing at local rates right away.

The iPhone 17 supports multiple eSIM profiles at once, so you can keep your regular number active for calls and texts while running a separate data plan from a local provider-no juggling or hunting for a SIM card shop at the airport.

It sounds like a small convenience until you've actually used it on a trip. Then it becomes hard to imagine traveling without it.

Providers like Airalo, Holafly, and Maya offer regional eSIM plans at rates that are often a fraction of what your home carrier charges for international roaming.

You browse their options, pay online, and receive a QR code to scan from your iPhone's settings. Simple, fast, and genuinely useful, especially for frequent travelers.

How To Use Apple Maps and Google Maps Offline Abroad

Once your data is sorted, the next step is navigation. Both Apple Maps and Google Maps let you download maps for specific regions, so they work without an internet connection. It takes five minutes to set up before your trip and can save you a lot of frustration once you're there.

Backpacker uses iPhone trekking mountains Asia (photo: lzf, iStock).
A backpacker checks their signal in the mountains (photo: iStock)

In Google Maps, search for your destination city, tap its name at the bottom of the screen, and tap Download.

Apple Maps added offline map support with iOS 17; search for an area, tap the three-dot menu, and save it to your device.

Do this over Wi-Fi at home, and you'll have turn-by-turn directions available throughout your trip at zero data cost.

It's also worth downloading Google Translate's language packs. The app works offline for text translations, and the camera mode translates text in real time through your phone's viewfinder.

It is one of the most useful tools for getting around in a country where you don't speak the language. Menus, street signs, transit maps: all readable, all offline.

How To Manage Your iPhone's Battery Life While Traveling

Navigation, camera, translation apps, music. Travel puts your battery under more pressure than a typical day at home.

Running out of charge in an unfamiliar city is more than inconvenient. It can leave you without a map, a contact number, or a way to pay if you're using Apple Pay.

A portable charger is the simplest fix. A compact 10,000mAh power bank fits easily in a bag and gives your iPhone two or three full charges, enough for a full day of heavy use.

Pair that with enabling Low Power Mode, dimming the screen, and turning off Wi-Fi when you're not near a network, and your battery will last noticeably longer.

On the device side, Background App Refresh quietly drains battery by updating apps you're not using.

Turning it off for most apps (Settings > General > Background App Refresh) is a small adjustment with a bigger impact than you'd expect.

While you're there, check which apps have access to your location and consider switching them to "While Using" rather than "Always". This is another easy win for battery life.

What To Do if Your iPhone Gets Lost or Stolen Abroad

It's not a scenario anyone wants to think about before a trip, but it's worth spending ten minutes on it now rather than panicking later.

Apple's Find My app lets you track your iPhone on a map, trigger a sound if it's nearby, lock it remotely, or, as a last resort, erase it completely so your data doesn't end up in the wrong hands.

Lost Mode is the feature to know here. Activate it via Find My or iCloud.com, and your phone will be locked immediately.

You can display a custom message on the screen with a phone number, and the phone will continue logging its location even if someone tries to use it. If it was just misplaced rather than stolen, you'll often find it within minutes.

Before you leave, take a moment to confirm that Find My iPhone is turned on (Settings > [Your Name] > Find My) and that your iCloud backup is up to date.

If the worst does happen, your photos, messages, and contacts are safe and ready to restore to a new device.

For travelers who want a backup device or a more affordable upgrade before a trip, Back Market, the largest online marketplace dedicated to refurbished electronics, is a good place to start. You'll find a solid range of iPhone models at prices that leave room in the budget for the trip itself.

Traveling internationally with an iPhone requires little preparation, but the preparation you do make makes a real difference.

A local eSIM, offline maps, a few tweaked settings, and a backup plan for emergencies are all it takes to go from hoping things work out to knowing they will. The rest is just enjoying where you are.

_____

This story was published in partnership with Back Market.

Responsible Desert Tourism in Huacachina: Top Tour Agencies To Choose

Have you ever thought about visiting a desert oasis while still protecting nature? Huacachina is one such beautiful place where you can enjoy the dunes, calm vibes, and fun rides, while also traveling mindfully.

Many people visit here every year, and with a little care, we can keep this place as lovely as ever for everyone.

Huacachina, Peru (photo: Willian Justen de Vasconcellos, Unsplash).
Huacachina, Peru (photo: Willian Justen de Vasconcellos)

Huacachina is a small oasis village in Peru, surrounded by big golden dunes. It feels peaceful and refreshing, like a hidden spot in the middle of the sand.

Tourists come here for dune buggies, sandboarding, and sunset views. But responsible tourism is not just about enjoying; it is also about respecting the place, people, and environment.

When you travel with awareness, you help protect the beauty that attracted you in the first place.

Why Responsible Tourism Matters in Huacachina

When you visit a natural place like Huacachina, your small actions can make a big difference. This place depends on tourism, but it also needs protection so that future visitors can enjoy the same beauty.

Responsible tourism means you travel in a way that supports local people, respects nature, and avoids waste.

It is about simple habits like not littering, choosing eco-friendly tours, and following local guidelines. These small efforts add up and help keep the destination clean and welcoming.

In Huacachina, the desert ecosystem is delicate. The dunes shift naturally, and the oasis's water needs care.

When visitors choose responsible tours and behave thoughtfully, it helps maintain the balance. You are not just a visitor; you become part of the place for a short time.

Respecting the Natural Environment

The desert may look empty, but it has its own life and system. Keeping it clean is very important. When you walk on dunes or enjoy activities, try to stay on marked paths and follow your guide's instructions.

Avoid throwing plastic or food waste in the sand. Even small items can stay there for a long time. Carry your waste back and use proper bins. This simple habit keeps the dunes fresh and pleasant for everyone.

Also, avoid disturbing the natural shape of the dunes. Let them stay as they are. This helps preserve the natural beauty that makes Huacachina special.

Supporting Local Communities

Local people in Huacachina depend on tourism for their daily income. When you book tours from local agencies, eat at nearby places, or buy handmade items, you directly support them.

This also gives you a more personal experience. You can learn about local culture, food, and daily life. It feels more real and warm compared to a rushed visit.

Even small actions like talking politely, respecting traditions, and showing appreciation can create a positive connection with locals.

Choosing Eco-Friendly Activities

Many tours in Huacachina now focus on safe and mindful travel. These tours follow rules that protect the dunes and ensure visitors' safety.

Activities like dune buggy rides and sandboarding are exciting. When done with trained guides, they are also safe and organized. Choosing the right agency makes a big difference in your experience.

Sandboarding the dunes of Huacachina (photo: Alvaro Palacios, Unsplash).
Sandboarding the dunes of Huacachina (photo: Alvaro Palacios)

Eco-friendly tours often use proper routes, trained drivers, and controlled group sizes. This keeps the activity enjoyable without disturbing the environment too much.

How To Plan a Responsible Huacachina Trip

Planning your trip with care makes everything better. You can enjoy your time fully while also doing your part for the environment.

Before booking your Huacachina tour, take a moment to check how the agency operates. Look for those who respect nature, follow safety standards, and support local communities.

Travel Light and Smart

Carrying less plastic and more reusable items is always a good idea. Bring a reusable water bottle, sunglasses, and comfortable clothes.

Light travel makes movement easy and reduces waste. You feel more relaxed and ready to enjoy the place without stress.

Also, pack only what you really need. This keeps your travel simple and smooth.

Follow Local Guidelines

Every place has its own rules, and Huacachina is no different. Local guides usually explain what to do and what to avoid. Listening to them makes your trip safe and enjoyable.

Simple things like staying with your group, respecting quiet areas, and following time schedules help everyone.

When everyone follows the rules, the environment remains protected, and the experience improves for all visitors.

Be Mindful During Activities

While enjoying dune buggies or sandboarding, stay aware of your surroundings. Keep a safe distance and listen to instructions carefully.

Yellow dune buggy Huacachina Peru (photo: Willian Justen de Vasconcellos, Unsplash).
A dune buggy (photo: Willian Justen de Vasconcellos)

Enjoy the fun, but stay balanced and calm. This helps avoid any confusion and keeps the experience smooth.

Take your time, enjoy the moment, and avoid rushing. This way, you get the best out of your trip.

Top Tour Agencies To Choose in Huacachina

Many tour agencies in Huacachina offer well-managed and enjoyable experiences. These agencies focus on safety, comfort, and responsible travel practices.

1. Guru Explorer

Guru Explorer is known for its well-organized tours and friendly approach. Their team ensures visitors feel comfortable while also adhering to responsible tourism practices.

They focus on smooth planning and clear communication, which makes the whole experience relaxed and enjoyable.

2. Peru Desert Adventures

Peru Desert Adventures offers guided tours with trained drivers and knowledgeable guides. They provide a balanced mix of fun activities and useful information about the desert. Visitors feel safe and informed throughout the experience.

3. Oasis Explorer Tours

Oasis Explorer Tours is popular for its personalized service. They take the time to explain the surroundings and help visitors understand the beauty of Huacachina in a calm, simple way. Their tours feel relaxed and well-paced.

4. Sand Dune Experience

Sand Dune Experience offers structured, easy-to-follow tours. Their guides are supportive and explain everything clearly. This makes it a good option for both first-time visitors and those who prefer a smooth experience.

5. Ica Desert Tours

Ica Desert Tours connects visitors with local experiences. Their focus is on creating a natural and enjoyable atmosphere while following proper travel practices. Visitors can enjoy both adventure and local culture.

Best Time To Visit Huacachina

Huacachina is enjoyable year-round, but the best time is usually during the cooler months, when the weather is pleasant and comfortable.

Early mornings are calm and peaceful. You can walk around the oasis and enjoy the fresh air. Evenings are equally beautiful, especially during sunset.

Sunset time is something many people truly enjoy. The sky changes colors, and the dunes look golden. It creates a calm and memorable moment that stays with you for a long time.

Simple Tips for a Better Experience

A little preparation can make your trip more comfortable and enjoyable. Wear light clothes that allow easy movement and protect you from the sun.

Carry sunscreen, sunglasses, and enough water to stay hydrated. These small things help you stay comfortable throughout the day.

Take breaks when needed and do not rush your activities. Sit near the oasis, feel the calm atmosphere, and enjoy the silence around you.

Talking to locals, trying simple food, and spending quiet time can make your experience more meaningful. It is not always about doing more; sometimes it is about enjoying small moments.

Final Thoughts

Responsible tourism in Huacachina is all about enjoying the desert while taking care of it. By choosing the right tour agency, following simple habits, and respecting the place, you can have a memorable and meaningful trip.

It is simple and natural when you think about it. A little awareness and care can help keep Huacachina as beautiful for future visitors as it is for everyone who visits now.

_____

This story was published in partnership with Guru Explorers.

Riding Into Stillness: What Slow Travel Feels Like on Horseback

Horseback riding travel is the essence of slow travel, exchanging speed for deeper presence and true connection with the land. Rather than racing from place to place, you experience each landscape at its own pace, guided equally by your horse and the world around you.

Horseback riding tour at Skogafoss Waterfall in Iceland (photo: Blue Planet Studio, iStock).
Riders at Skogafoss Waterfall, Iceland (photo: iStock)

What Horseback Riding Travel Feels Like

There's a moment, usually just after the last visible road disappears, when travel stops feeling like transit and begins to feel like something else entirely.

It's not dramatic. There's no clear dividing line. Just a gradual shift, the kind you notice only because everything else falls away. The background noise fades first: engines, distant conversations, the low whirr of connectivity.

What replaces it isn't silence. Not exactly. Instead, it's a different kind of soundscape. Wind rustling through the grass. The dull rhythm of hooves on uneven ground. Leather creaking, slow and steady.

When you first travel by horseback, you realize how rarely you fully experience a place. This journey is not about passing through, but about being truly present each step of the way.

A Different Way of Moving Through a Destination

Backpacking, at its core, has always been about stripping travel back to essentials, carrying what you need, adapting to terrain, and accepting a certain unpredictability. But even then, there is often a forward drive, a low-key urgency to reach the next point.

On horseback, that urgency dissolves. The pace is not entirely in your control. It belongs to the horse, to the terrain, to the conditions underfoot.

You begin to understand distance not as something to overcome, but as something to inhabit. A stretch of land that might appear insignificant on a map becomes expansive when experienced step by step, breath by breath.

It's within this space that experiences curated by platforms like Globetrotting begin to make sense, not as luxury in the conventional sense, but as access to a slower, more intentional form of travel.

For travelers looking to experience this kind of horseback riding travel, guided journeys like these offer an accessible way to step into a slower rhythm.

The journeys are less about crossing off destinations and more about entering landscapes in a way that feels earned.

The Connection Between Rider and Horse

What may surprise you most is not the scenery, though that's often remarkable, but the relationship that forms without words.

A river crossing on horseback (photo: Nacho Canepa, Pexels).
A river crossing on horseback (photo: Nacho Canepa)

A horse constantly reads the world-its footing, the land's slope, subtle weather changes. You sense those decisions before consciously registering them: a shift in weight signals uncertainty, a confident stride reassures you, often before you're aware you needed it.

There is trust in that exchange, but also a kind of humility. You are not in full control, and that becomes part of the experience rather than a limitation.

Over time, the communication becomes quieter, more intuitive. You stop thinking in terms of commands and start responding to movement, to rhythm, to small adjustments that feel almost instinctive. It is not something that can be easily explained; it can only be experienced.

The Texture of the Day

By afternoon, the ride settles into your body. Your legs carry an ongoing ache from keeping balance. Your hands remember the tension of the reins. Your back adjusts constantly, following the motion beneath you. It is not discomfort in the usual sense; it is awareness.

And with that awareness comes a sharpening of everything else. You notice the smell of rain long before it arrives, carried gently on the air. Dust rises at every step, dry and mineral.

The saddle, warmed by the sun, releases a fragrance of worn leather which lingers in the heat. These details are not remarkable in isolation, but together they create a kind of continuity that stays with you.

There is no screen to mediate them. No need to capture them. They exist fully in the moment.

Why Horseback Travel Is the Ultimate Slow Travel Experience

Without schedules or signals, time loosens its grip. You begin to measure the day differently. Not in hours, but in shifts, light changing across a valley, the gradual cooling of air as elevation rises, the rhythm of movement that replaces the constant checking of what comes next.

Horseback riding in Mendoza, Argentina (photo: Ricardo Duarte, Pexels).
Riding in Mendoza, Argentina (photo: Ricardo Duarte)

When you stop, it is not because a plan dictates it, but because the horses need rest or the terrain demands it. You dismount, stretch, and for a while, nothing happens.

The horses graze. The landscape stays unchanged. There is no performance in it, no sense that the moment needs to be shared or documented to have value. It simply is.

What Slow Travel Reveals

There is a tendency to think of slow travel as an escape, but it feels more accurate to describe it as a recalibration.

Moving at the pace of a horse reveals how much is missed when speed becomes the default. Landscapes flatten when viewed too quickly. Distance loses meaning. Even memory becomes fragmented when experiences are reduced to highlights.

Here, nothing is condensed. A valley is not something you pass through; it is something you inhabit for hours. A climb is felt in the body, not just observed. The weather is not the background; it shapes the experience directly.

This kind of travel does not offer constant stimulation. Instead, it asks for attention.

What Stays With You Following the Journey

By the end of the journey, what remains is difficult to translate. Not images, exactly. Not even specific moments. More a collection of sensations, the rhythm of movement, the subtle understanding between you and the horse, the physical memory of terrain underfoot.

These are not things that fit neatly into stories designed for quick consumption. They stay with you differently.

In a way, that may be the most defining aspect of traveling like this. It resists simplification. It asks for presence in a world that often rewards distraction.

Long after the ride ends, what lingers is not where you went, but how you moved-slowly, attentively, in step with something that cannot be rushed.

_____

This story was published in collaboration with Globetrotting.

A First-Time Visitor's Guide to Oahu: Where To Stay, Eat, and Explore

Oahu is known as The Gathering Place because it's the preferred Hawaiian island for many tourists.

Visitors experience a unique blend of contemporary urban life, beautiful natural landscapes, and rich history. It's popular with both domestic and international travelers.

Waikiki Beach on Oahu (photo: Jess Loiterton, Pexels).
Waikiki Beach, Oahu (photo: Jess Loiterton)

This travel guide helps you plan the best Oahu vacation by sharing essential details, from where to stay to how to save money.

Oahu Travel Guide

Accommodations

Where you stay shapes your experience on the island, and there are countless hotel and resort options to suit your needs.

Waikiki is a key location, with easy access to Honolulu International Airport, rental car agencies, shopping centers, and entertainment venues.

?The North Shore town of Haleiwa offers visitors a peaceful atmosphere, with galleries, surf shops, and restaurants.

If you're budget-conscious, book early to save. Military personnel can explore Hawaii military base lodging by first checking eligibility and travel information.

Activities and Tours

Oahu offers many activities that showcase its history and natural treasures. The Diamond Head Crater lookout offers views of Honolulu and the coastal districts.

Hanauma Bay gives snorkelers the chance to swim with tropical fish in pristine surroundings. For history lovers who want to honor the soldiers who fought in the attack on Pearl Harbor, the USS Arizona Memorial is a must-see.

USS Arizona Memorial at Pearl Harbor (photo: Tim Mossholder, Unsplash).
USS Arizona Memorial at Pearl Harbor (photo: Tim Mossholder)

Visitors to North Shore, Kaimuki, and Honolulu can experience authentic island culture beyond the main tourist attractions. Guided tours are the best way to explore attractions, historical sites, and the island's beaches.

Where To Dine

Oahu restaurants offer a variety of food options to suit different preferences. In Waikiki and Kapahulu, you will find Asian, Hawaiian, and seafood cuisine. You can choose from food trucks, fast food, or elegant dining experiences.

?Kaimuki and Haleiwa offer family-run catering companies and bakeries. Waialua Bakery & Juice Bar and Paalaa Kai Bakery, alongside tailored catering services like 808 Meal Prep and Ke Nui Kitchen, are the most popular.

Besides poke bowls and plate lunches, restaurants provide loco moco dinners and takeout. Eating like a local or making your own meals lets you enjoy local cuisine while staying on budget.

Optimal Visiting Times on Oahu

Oahu is a reliable travel destination year-round with pleasant weather. Between April and June and between September and October, travelers enjoy fewer crowds and good weather.

Surfers visit the North Shore in winter for excellent conditions from large Pacific waves. The island's beaches are best for snorkeling, swimming, and other activities during the calm summer months.

Travel Costs and Budgeting

Traveling to Oahu can be expensive because some hotels, tours, and eateries charge higher prices.

To cut costs, travelers should reserve lodging in advance. Free outdoor activities and paid excursions help visitors manage their budget.

Exploring public transport, beaches, and hiking routes is affordable and provides unique experiences. You can also choose group tours to iconic spots, but be sure to book in advance.

Endnote

For those who want to go beyond tourist attractions and experience island life, Oahu has much to offer. Every location features varied terrain and distinct opportunities for adventure. Smart travelers can find hidden gems without straining their budget.

_____

This story was published in partnership with TDY Lodging.

The Digital Security Essentials That Every Backpacker Needs

Backpacking strips things back to basics. You carry what you need, leave what you don't, and figure out the rest as you go. Most backpackers get good at packing light, but when it comes to digital security, the same minimalist thinking often does not apply. Essentials get overlooked, and gaps get exploited.

Young woman using Wi-Fi at a capsule hotel is convenient, but it's also one of the biggest digital security risks backpackers face (photo: Franci Leoncio/iStock).
A young woman working on her laptop at a pod hotel (photo: Franci Leoncio/iStock)

For travelers, it's about being as street-smart online as in an unfamiliar city. A little preparation before you leave and a few consistent habits on the road make a bigger difference than most people realise.

Your Email Inbox Is More Exposed Than You Think

Every time you use Wi-Fi at a hostel, bus station, or beachside café, you connect to a network you know nothing about. These connections can be monitored, and anything you send without encryption, such as login details, booking details, or emails, can be intercepted.

Your mail account is a valuable target. It is the key to everything else: password resets, booking confirmations, bank alerts, and identity verification. Losing access mid-trip can derail your life, not just your travels.

The Basics That Actually Matter

You do not need to overhaul your entire digital life before you leave. A few fundamentals cover most of the risk.

Start with two-factor authentication. Enable it on every account that offers it, starting with email. If someone gets your password, 2FA means they still cannot access your account. Set it up before you leave. Do not wait until you are at the airport.

A virtual private network encrypts your connection and prevents others on the same network from seeing your traffic. It is one of the most effective tools a traveler can use. Good options are available for a few pounds a month. Install and test it before you travel.

Always use strong, unique passwords. Using the same password across multiple accounts is a common mistake. A password manager makes it easy to generate and store unique credentials for every account without having to remember them all.

Every device you carry should require a PIN, fingerprint, or face ID to unlock. If your phone or laptop is stolen, a lock screen is the first line of defense between a thief and your data.

Put Email Threats in Context

Email is one of the most widely used and targeted communication tools in the world. With around 5 billion users globally, it is a prime target for scammers and cybercriminals.

Phishing emails are frequently disguised as booking confirmations, travel alerts, or account notifications. These are the kinds of messages a backpacker is likely to expect and read while weary or unfocused.

Pause before clicking any link in an unsolicited email, even if it looks legitimate. Check the sender's address carefully. When in doubt, go to the website instead of following the link.

Staying Sharp on the Road

Digital security is not a one-time setup. It is an ongoing habit. Log out of accounts when you are done, avoid sensitive transactions on public Wi-Fi without a VPN, and keep devices and apps updated.

Backpacking teaches you to adapt rapidly and stay alert. That same instinct serves you well online. The threats are real, but so is your ability to stay ahead of them with the right know-how and tools.

_____

This story is published in collaboration with Proton Mail.

How Splitting a Kosher Villa in the Catskills Can Cost Less Than a Hotel

For years, a group of friends who kept kosher took the same summer trip to the Catskills. They booked several hotel rooms and spent the week running into each other in hallways or parking lots, while paying high prices for the experience.

During one trip, three couples stayed in hotel rooms next to each other in Sullivan County. They paid more per night than it would have cost to rent a whole house nearby. At the time, they didn't know renting a large house was possible.

Things changed when someone found Kvation, a booking website for kosher vacation rentals. The group could now browse listings with real prices and availability, without waiting days for hosts to reply.

A large kosher villa in the Catskills of New York.
A large kosher villa in the Catskills can comfortably host multiple families, making it a practical alternative to booking several hotel rooms.

They ended up booking a seven-bedroom kosher villa in the Catskills and split the cost among several couples. Each family paid less than they would have for one hotel room. Since then, they haven't gone back to hotels.

Why Airbnb Often Doesn't Work for Kosher Travel

For many travelers, Airbnb is a great solution. The platform features unique properties, friendly hosts, and an easy booking process. But for kosher-observant families, Airbnb can be difficult.

The issue isn't the quality of the homes. Airbnb is built for the general market. However, kosher requirements usually fall outside that system.

For example:

  • Kosher kitchens: Airbnb kitchens have typically been used by previous guests for non-kosher food, making them unfit for many observant travelers.
  • Shul proximity: The platform doesn't allow travelers to filter properties based on walking distance to a synagogue.
  • Eruv boundaries: Airbnb listings generally don't indicate whether a property is located within an eruv.

For kosher travelers planning a large family or group trip, these details become essential. That's why many kosher groups now turn to dedicated booking sites focused on kosher vacation homes.

Listings often include fully kosher kitchens, properties located within established eruv communities, and homes designed to host large Shabbos meals.

Kosher kitchen (with a meat side and a dairy side used for kosher food) at a vacation rental in the Catskills.
Kosher kitchen (with a meat side and a dairy side used for kosher food)

The Budget Math Behind Renting a Villa

The real surprise for many travelers is how the cost compares with hotels.

A typical hotel room in the Catskills during peak summer or around Jewish holidays can range from $280 to $380 per night. Over a long Shabbos weekend from Friday to Sunday, four couples could easily spend $3,300-$4,500 just on hotel rooms.

By comparison, a large kosher vacation home with seven or eight bedrooms, a full kosher kitchen, and space for a large group might cost $1,800-$3,500 for the entire weekend.

Split between four couples, that is roughly $450-$875 per couple for the entire stay.

The price difference is significant. The experience itself is often even better.

What a Kosher Villa Offers That Hotels Can't

Staying in a private vacation home creates a completely different group experience.

Instead of separate hotel rooms and crowded restaurants, everyone shares the same space. Families cook together in a kosher kitchen, prepare meals in advance for Shabbos, and gather around one table.

Kids can move freely between bedrooms and outdoor spaces, while adults relax together without coordinating multiple hotel rooms or reservations.

For observant Jewish travelers, several features make kosher vacation homes especially appealing:

  • A fully kosher kitchen: Separate sinks, cooking surfaces, and appliances designed for kosher use.
  • Within walking distance of a synagogue: Kosher rentals are within walking distance of shuls, and many homes are located within established eruv communities.
  • Space for large groups: Villas can comfortably host extended families or multiple couples under one roof.
  • Proper dining areas: Long tables and gathering spaces designed for group or family meals.

These aren't luxury extras. For Shabbos and kosher holiday travel, they are essential.

Private vacation homes in the Catskills give groups more space to relax together than traditional hotel stays.

Why the Catskills Remain a Popular Destination

The Catskills have been a summer destination for New York's Jewish community for more than a century. While the famous Borscht Belt resorts have mostly disappeared, the region still has a strong Jewish infrastructure. 

Communities like Liberty, Monticello, South Fallsburg, Woodridge, Woodbourne, White Lake, and Loch Sheldrake offer kosher grocery stores, multiple synagogues, and established eruv boundaries.

For travelers from New York City, the Catskills are conveniently close. Many destinations are just 1½ to 3 hours by car, making them ideal for long weekends or extended summer stays.

Beyond the community infrastructure, the region offers classic Catskills scenery: forested mountains, lakes, hiking trails, and small towns that make for a relaxing escape from the city.

Booking a Kosher Vacation Rental

Before specialized platforms grew common, many travelers found kosher rentals through word of mouth, Facebook groups, or classified listings. The process was slow and uncertain. Dedicated kosher rental platforms changed that.

Many listings now contain detailed information about kosher kitchens, group capacity, nearby synagogues, and other amenities. Travelers can browse availability, compare properties, and book online.

For one group that switched from hotels to villas, the process was simple:

  • Search for kosher vacation rentals in the Catskills based on group size.
  • Compare several properties based on amenities, kosher kitchen setup, eruv, and location.
  • Book the rental online and split the cost between families.

What used to take days of emails and phone calls can often be done in an afternoon.

Large dining area to share Shabbos meals together during a Catskills getaway.
Large dining areas make it easy for families and friends to share Shabbos meals during a Catskills getaway.

Tips for Splitting a Vacation Rental With Friends

If you've never shared a vacation rental with multiple families, a few simple guidelines can make the process easier.

Focus on the per-couple cost. A $2,800 villa might sound expensive, but split among four couples, it is only $700 per couple.

Divide bedrooms fairly. Rooms with private bathrooms or larger spaces can carry a higher share of the cost if needed.

Plan food together. Many groups split grocery costs and prepare Shabbos meals as a group in your rental's kosher kitchen, which is often cheaper and more enjoyable than eating out (or have prepared Shabbos food delivered to your rental from the nearby kosher grocery for a more curated experience).

Book early for holidays. Kosher vacation rentals in the Catskills fill quickly around Pesach, Sukkot, and peak summer weekends.

When done well, splitting a large house can make a group trip significantly more affordable than staying in separate hotel rooms.

A Different Way to Travel Together

For many families, the first time staying in a kosher vacation villa can feel like a revelation.

Instead of coordinating hotel rooms and meal plans, everyone stays together in one place, cooks together, and enjoys a more relaxed pace. The trip feels a bit less like a hotel stay and more like time in a shared home.

Many groups who try it once end up repeating the experience year after year.

For families seeking kosher vacation rentals in the Catskills, browsing available accommodations online can be a useful starting point. Services like Kvation allow travelers to search for properties by group size and kitchen setup, and to verify eruv coverage.

And once travelers run the numbers, they often come to the same conclusion: Why didn't we do this sooner?

_____

This article was produced in partnership with Kvation.

Must-Know Tips for a Stress-Free and Safe Trip to Canada

Canada draws tourists from around the world with its natural landscapes, modern cities, and unique local cuisine. The country is known for its national parks, friendly people, and diverse cultures.

To enjoy a comfortable, hassle-free vacation, familiarize yourself with Canadian customs in advance. Canada has its own rules, traditions, and daily nuances. For example, plan for mobile service, learn the transportation system, and know cultural norms.

Canadian flag on the back of a boat.
Canadian flag

This article covers the key tips for a safer, easier, and more enjoyable trip, starting with mobile connectivity, then weather, nature safety, sales tax, adapters, and local customs.

How To Make Your Canada Trip Safer, Easier, and More Enjoyable

Get Your Mobile Connectivity Ready Before You Travel

A dependable internet connection is essential for any trip. It helps you create routes on maps, use translators, check transportation schedules, and quickly find nearby restaurants and attractions. You can also manage bookings, order taxis, and stay in touch with loved ones.

The first tip is to set up your eSIM before your trip. Unlike a traditional SIM card, an eSIM doesn't require any physical installation.

Activate a plan on your smartphone, and your mobile internet will be ready to use as soon as you arrive. This saves you from searching for a phone store at the airport and helps you avoid expensive international roaming fees.

For travel in Canada, the eSIM Plus Canada virtual number offers wide coverage and a stable connection. This is especially important in a large country where routes often pass through natural parks, small towns, and remote regions. You can stay online almost the entire trip and feel more confident on the road.

Be Prepared for Canada's Varied Weather

Canada's vast territory means the weather varies by region, even during the same season. The West Coast is usually milder with frequent rain and calm winters. The central and northern regions face harsher conditions, with winter temperatures well below zero.

Paddling Lake Moraine in Alberta, Canada (photo: Joydeep Sensarma, Unsplash).
Paddling Lake Moraine in Alberta (photo: Joydeep Sensarma)

Focus on the forecast for your destinations, not just the general outlook, to pack appropriately. Bring a windbreaker for rain and a warm jacket for cold areas.

Stay Safe While Exploring Nature

Canada's national parks, trails, and forests draw visitors. Explore them with care and follow local rules.

The third tip is to plan your hikes or treks by familiarizing yourself with the park's recommendations and following designated trails. Marked trails help preserve the ecosystem and make it safer for visitors.

Pay attention to signs and warnings, especially about wild animals. Simple precautions let you enjoy nature safely.

Remember: Sales Tax Is Not Included in Listed Prices

In Canada, store and cafe prices usually appear without tax. The final amount may be slightly higher than expected at checkout. Tax is added at the time of purchase and varies by province, sometimes reaching about 15% of the cost.

This is standard for locals, but travelers ought to keep it in mind to manage expenses and stick to a budget. It is one of the top tips for planning your trip to Canada.

Don't Forget a Socket Adapter

Tourists often forget to check if their devices are compatible with Canadian outlets. Canada uses type A and B plugs and operates on 120 volts, which differs from many other countries that may use other plug shapes or voltage standards.

Colorful street art in Montreal (photo: Benoit Debaix, Unsplash).
Colorful street art in Montreal (photo: Benoit Debaix)

If your devices are designed for European, Asian, or other standards, you will need an adapter and possibly a voltage converter to use them in Canada.

The fifth tip is to ensure your devices can be charged from local power outlets before you arrive. This way, you can safely charge your phone, laptop, and camera in a hotel, car, or cafe, without stress or postponing important tasks or photos.

Follow Regional Customs and Courtesies

Canada is known for its politeness. Tourists should learn about the local culture to feel comfortable. People here value personal space and respectful behavior.

The final advice is to respect all local cultural and decency norms. For example, in public places, it is customary to follow queues, politely address those around you, and remember the simple words "please" and "thank you".

Pay attention to these small details to show respect and make your trip easier and more enjoyable. By following these tips, you'll set yourself up for a safe and relaxed trip!

_____

This story was published in partnership with eSIM Plus.

10 Best Day Trips from Los Angeles: Beaches, Mountains & Desert Escapes

Los Angeles, often called the "City of Angels," is famous for its beaches, film studios, and larger-than-life attractions like the Hollywood Sign and Santa Monica Pier. But it's also a major hub for education, with more than 100 colleges and universities in the region, including USC and UCLA.

For students and young travelers, LA offers an exciting mix of culture, entertainment, and opportunity. Still, life in a sprawling city can feel overwhelming at times. Whether you're studying in Los Angeles or simply visiting, it's easy to need a break from traffic, crowds, and busy schedules.

Driving in Joshua Tree National Park, one of the popular day trips from Los Angeles (photo: Anna Galimova).
Driving in Joshua Tree National Park (photo: Anna Galimova)

The good news is that some of Southern California's best destinations are just a short drive away. From desert landscapes and mountain lakes to charming coastal towns, these day trips from Los Angeles make it easy to recharge and explore beyond the city.

LA Day Trips

Joshua Tree National Park: The Best Desert Day Trip from Los Angeles

Distance from Los Angeles: 130 miles (about 2.5 hours)
Best way to get there: Drive

Joshua Tree National Park is one of Southern California's most unique landscapes. The park sits where the Mojave and Colorado deserts meet, creating an extraordinary environment filled with twisted Joshua trees, massive boulder formations, and wide-open desert views.

It's an excellent destination for outdoor lovers. Popular hikes in Joshua Tree include Hidden Valley, Ryan Mountain, and Arch Rock. Photographers also love the park for its dramatic rock formations and incredible sunsets.

If you're looking for a day trip that feels like a true getaway into nature, Joshua Tree is hard to beat.

Palm Springs

Distance from Los Angeles: 106 miles (about 2 hours)
Best way to get there: Drive

Palm Springs is famous for its desert scenery, midcentury modern architecture, and laid-back resort atmosphere. The city has long been a weekend getaway for Angelenos who want to relax by the pool, enjoy the sunshine, and explore the desert.

For sweeping views of the Coachella Valley, ride the Palm Springs Aerial Tramway up into the San Jacinto Mountains. You can also explore the Living Desert Zoo and Gardens or stroll through Moorten Botanical Garden to see a fascinating collection of desert plants.

Palm Springs combines outdoor beauty with art, culture, and excellent restaurants. When you're ready for a break from sightseeing in Los Angeles, head to Palm Springs for a weekend.

Santa Barbara: A Classic Coastal Escape

Distance from Los Angeles: 93 miles (about 2 hours)
Best way to get there: Drive or Amtrak Pacific Surfliner

Santa Barbara offers a relaxed coastal atmosphere with beautiful beaches, Spanish colonial architecture, and a thriving food and wine scene.

The coast and pier of Santa Barbara, California (photo: Zekai Wu, Unsplash).
Santa Barbara (photo: Zekai Wu)

Spend the day walking along the waterfront, visiting Stearns Wharf, or exploring the Santa Barbara Botanic Garden. The city's historic downtown is also worth exploring, especially the courthouse and the charming streets nearby.

Just outside the city lies the Santa Ynez Valley, where you'll find wineries, farm-to-table restaurants, and scenic countryside. Whether you come for the ocean views or the wine tasting, Santa Barbara is an easy and rewarding getaway from LA.

Big Bear Lake

Distance from Los Angeles: 100 miles (about 2 hours)
Best way to get there: Drive

Big Bear Lake offers a mountain escape that feels far from the busy pace of Los Angeles. Located in the San Bernardino Mountains, the area is known for year-round outdoor recreation.

In winter, visitors come to ski and snowboard at Snow Summit and Bear Mountain. During warmer months, the lake becomes a playground for kayaking, fishing, hiking, and mountain biking.

You can also visit the Alpine Zoo, take a walk through Boulder Bay Park, or relax and enjoy the mountain scenery.

Catalina Island

Distance from Los Angeles: 22 miles (about 1 hour by ferry)
Best way to get there: Ferry from Long Beach or San Pedro

Santa Catalina Island feels like a Mediterranean getaway just off the Southern California coast. The ferry ride is part of the adventure, offering views of the Pacific Ocean and, sometimes, dolphins along the way.

Once you arrive in Avalon, you'll find colorful buildings, waterfront restaurants, and scenic hills rising above the harbor. Popular activities include snorkeling, kayaking, zip lining, and glass-bottom boat tours that reveal the island's marine life.

Because of its relaxed island atmosphere, Catalina Island is one of the most unique day trips from Los Angeles.

Ojai

Distance from Los Angeles: 81 miles (about 1.5 hours)
Best way to get there: Drive

Ojai is a small town known for its artistic character, scenic mountain setting, and relaxed pace of life. Surrounded by the Topatopa Mountains and Los Padres National Forest, it's a perfect place for travelers to unwind.

Visitors often spend their day browsing local galleries and boutiques, visiting Bart's Books - the largest outdoor bookstore in the world - or stopping by the local farmers market.

The surrounding hills also offer excellent hiking opportunities, and the area is especially beautiful during sunset when the mountains glow pink in a phenomenon locals call the "Pink Moment."

Solvang

Distance from Los Angeles: 121 miles (about 2.5 hours)
Best way to get there: Drive

Solvang is a charming Danish-style village located in the Santa Ynez Valley. Windmills, half-timbered buildings, and traditional bakeries give the town a distinctive European feel.

Many visitors come to explore the town's bakeries and shops selling Danish pastries, cookies, and specialty foods. You can also visit the Elverhøj Museum to learn about the area's Danish heritage or tour wineries throughout the Santa Ynez Valley.

Solvang's unusual architecture and relaxed atmosphere make it one of the most interesting day trips from Los Angeles.

San Diego

Distance from Los Angeles: 118 miles (about 2.5 hours)
Best way to get there: Drive or Amtrak Pacific Surfliner

San Diego offers beautiful beaches, great weather, and a lively waterfront, all just a few hours from Los Angeles.

Spend your day exploring Balboa Park, home to museums, gardens, and the world-famous San Diego Zoo. The historic Gaslamp Quarter is another popular area filled with restaurants, bars, and historic buildings.

Suppose you prefer the coast, head to La Jolla or Coronado for scenic beaches and ocean views. With so many things to do, San Diego easily ranks among the best Southern California day trips.

Balboa Island

Distance from Los Angeles: 53 miles (about 1.5 hours)
Best way to get there: Drive

Balboa Island in Newport Beach is known for its charming harbor, waterfront homes, and relaxed beach-town atmosphere.

Visitors often spend the day walking the island's scenic waterfront path, browsing local shops, or taking a short ferry ride across the harbor. The nearby beaches are also excellent for swimming, boating, and surfing.

Don't leave without trying a famous Balboa Bar - a frozen banana dipped in chocolate and covered with toppings - one of the island's most popular treats.

Malibu

Distance from Los Angeles: 31 miles (about 1 hour)
Best way to get there: Drive

Malibu is one of the easiest and most scenic day trips from Los Angeles. The drive along the Pacific Coast Highway offers beautiful ocean views, with plenty of beaches and hiking trails to explore.

Stop for lunch at Malibu Farm Pier Cafe (photo: Abhishek Navlakha, Pexels).
Stop for lunch at Malibu Farm Pier Cafe (photo: Abhishek Navlakha)

El Matador State Beach is known for its dramatic sea stacks and coastal cliffs, making it a favorite spot for photographers. Malibu Pier offers classic California coastal scenery along with restaurants and small shops.

For a more active day, head inland to hike Solstice Canyon or explore Leo Carrillo State Park.

Final Thoughts

Now that you know some of the best day trips from Los Angeles, where will you go first? Whether you're a student looking for a quick weekend escape or a traveler eager to explore Southern California, these destinations offer something for everyone.

For students studying in LA, having the right place to live can make it even easier to explore the region. Platforms like amber, which help students find accommodation around the world, connect travelers with student housing in more than 250 cities and over one million beds globally.

With a comfortable home base in Los Angeles, it's easier to focus on what matters most: studying, meeting new people, and discovering places like these incredible day trips throughout Southern California.

_____

This story was published in partnership with amber.

How Cashless Travel Is Changing Tipping for Hotel Staff and Tour Guides

Travel has become increasingly cashless. From tapping a credit card on a subway gate to paying for a coffee with a phone, many travelers now move through an entire trip without ever touching paper currency.

While this shift makes travel more convenient, it has an unintended side effect in the hospitality industry. Many workers who relied on cash tips, such as hotel housekeepers, bellhops, drivers, and tour guides, often miss out on gratuities because travelers no longer carry cash.

Two young travelers checking-in with cashless pay at a hostel (photo: Ketut Subiyanto).
Young women checking in at a hostel (photo: Ketut Subiyanto)

For travelers who want to show appreciation for great service, the new payment landscape is quietly changing how tipping works.

Why Cash Tipping Is Disappearing in Travel

Cash use had already been declining for years, but the trend accelerated during the COVID-19 pandemic. Hygiene concerns prompted businesses and customers to adopt contactless payments, mobile wallets, and card-only transactions.

Many travelers who stopped carrying cash during that period never returned to the habit. Today, it's common for people to rely on digital payments when moving through airports, hotels, restaurants, and tours.

Payment habits also vary widely between countries, and travelers often encounter different tipping expectations abroad. People discover this when relocating or spending extended time overseas, such as when adjusting to life in the UK.

For hospitality workers, tipping opportunities were historically built around cash. When travelers stopped carrying cash, many spontaneous tipping moments disappeared.

Hospitality Workers Most Affected by Cashless Travel

Not all hospitality roles are impacted equally by the decline of cash. Restaurant servers still interact with guests through point-of-sale systems - the payment terminals where diners leave a tip before completing a card transaction.

But many workers travelers encounter during a trip provide service outside of a traditional checkout moment. These include:

  • Hotel housekeepers, who clean rooms while guests are out exploring.
  • Bellhops and luggage handlers assist with bags before check-in or after checkout.
  • Valet attendants, who return cars long after the initial parking payment.
  • Hotel shuttle drivers who transport guests to airports or attractions.
  • Tour guides and activity operators, especially on prepaid tours.

In these situations, there is often no payment terminal nearby. Historically, travelers handed over a few bills as a token of appreciation. Without cash, that exchange often does not happen.

When Travelers Want to Tip but Don't Have Cash

Many travelers have experienced this moment: a helpful driver loads luggage into a van, or a hotel housekeeper leaves a room spotless, and you want to leave a tip but realize you don't have any cash.

Global currencies (photo: Jason Leung).
Cash is disappearing from the travel experience (photo: Jason Leung)

This situation is especially common when traveling internationally. Visitors may not have local currency, or they may rely on credit cards and mobile payments while abroad. 

The result isn't a lack of generosity. Often it's a logistical problem: the intention to tip exists, but the ability to do so easily has disappeared.

How Digital Tipping Is Changing Hospitality

To adapt to the cashless travel environment, many hotels and tour operators are experimenting with new ways to make tipping easier without requiring physical cash.

One growing approach is digital tipping. In these systems, hospitality workers are assigned QR codes or NFC-enabled identifiers that guests can scan with their phones. The guest can then leave a tip using a mobile wallet or a credit card via a simple web page, usually without needing to download an app.

The adoption of digital tipping platforms like eTip across hotels, valet services, and hospitality businesses has helped restore tipping opportunities in situations where cash used to be the only option.

As more destinations adopt these tools, travelers may start seeing digital tipping options during everyday travel experiences, whether checking into a hotel, taking a guided tour, or exploring major cities like Los Angeles.

For travelers, the experience is simple: scan a code, select an amount, and complete the tip in seconds.

What Travelers Should Know About Digital Tipping

If you travel frequently, you may start noticing digital tipping options in more places. Hotels, transportation services, and tour operators are increasingly experimenting with these tools.

A few things travelers should know:

  • Most systems work through QR codes, often displayed in hotel rooms or on name badges.
  • No app is typically required - the tip can be completed through a web browser.
  • Mobile wallets and credit cards are usually accepted.
  • Some systems allow travelers to tip specific workers, such as a housekeeper or bellhop.

In many cases, these systems recreate the traditional tipping moment in a format that works for modern payment habits.

Why It Matters

Hospitality workers have long depended on gratuities as a meaningful part of their income. When tipping opportunities disappear because travelers no longer carry cash, the impact is significant.

Digital tipping doesn't replace the wider discussion of wages in the hospitality industry, but it does address a practical problem created by the shift to cashless payments.

For travelers who value good service, these tools give a simple way to continue offering thanks, even when the only thing in your pocket is a smartphone.

The Future of Tipping in a Cashless World

Cashless travel is likely here to stay. As mobile payments become more common around the world, the hospitality industry will continue to adapt to ensure tipping remains possible.

That means travelers may increasingly encounter QR codes, mobile tipping pages, and other digital tools designed to make it easier to reward great service.

For the people behind the scenes who help make trips smoother, the drivers, guides, and hotel staff that travelers rely on every day, that small moment of appreciation can still create a meaningful difference.

_____

This story was published in collaboration with eTip.

10 Unique Things You'll Only Experience in Darwin

Darwin plays by its own rules. Tropical, multicultural, and just a little bit wild around the edges-in the best way-this city stands apart. If you're heading to the Top End, immerse yourself in these experiences that faithfully capture what makes Darwin different from anywhere else in Australia.

A beach in Darwin (photo: Vladimir Haltakov)

Things To Do in Darwin

Darwin may be small compared with other Australian cities, but it offers a surprising range of experiences. From tropical markets and dramatic sunsets to nearby national parks and wet-season storms, there are plenty of memorable things to do in Darwin for travelers exploring the Northern Territory.

These highlights capture the character of Australia's laid-back Top End capital.

Eat Laksa for Breakfast (Yes, Really)

In Darwin, laksa isn't just lunch or dinner; it's a morning ritual. Head to Parap Markets on a Saturday and you'll see locals lining up early for a steaming bowl despite the heat.

The rich coconut broth, noodles, and chilli hit differently in the tropics. It's sweaty, spicy, and absolutely part of the Darwin experience.

Laksa (photo: Amanda Lim, Unsplash).
Laksa (photo: Amanda Lim)

Watch a Classic Top End Sunset

Sunsets in Darwin aren't subtle. With wide coastal views over the Timor Sea, the sky puts on a show most evenings. Nightcliff Foreshore, Mindil Beach, and Cullen Bay are all reliable spots.

Bring something cold to drink, get there early, and don't rush off once the sun drops; the colours often linger.

Learn What "Crocwise" Actually Means

One of the biggest adjustments for visitors is realising you can't jump into any stretch of water. Saltwater crocodiles and marine stingers are part of life up here.

Being crocwise means respecting signage, keeping your distance from waterways, and choosing designated safe swimming areas. Locals take it seriously for good reason.

Escape the Heat at Litchfield National Park

When Darwin locals want to cool down, they don't head to the beach; they head inland. Litchfield National Park is the go-to escape, especially in the dry season.

Florence Falls and Wangi Falls are crowd favourites, and both work as a day trip. Clear water, shady surrounds, and proper Top End scenery make the drive worthwhile.

A waterfall at Litchfield National Park in Darwin (photo: Lucid, Unsplash).
A waterfall at Litchfield National Park (photo: Lucid)

Experience the Million Dollar Fish Buzz

Fishing runs deep in the Northern Territory, yet the Million Dollar Fish competition elevates the excitement. Tagged barramundi are released into local waterways, giving lucky catches a chance to win serious prize money.

Even those not fishing will overhear plenty of enthusiastic chatter about the event around town.

Feel the Build-up of Humidity for Yourself

Darwin's climate has a personality. During the build-up and wet seasons, humidity rises quickly, making the air feel thick.

Locals adapt with early starts, air conditioning, and a slower midday pace. Once you experience it, you'll understand why daily routines shift with the weather.

Watch a Tropical Thunderstorm Roll In

Top End storms don't mess around. During the wet season, lightning can light up the sky before heavy rain arrives in sheets.

It's loud, dramatic, and strangely impressive to watch from a dry spot. Many locals treat storm-watching as its own kind of entertainment.

Zip Around on Darwin's Orange E-Scooters

Those bright orange e-scooters scattered around the Central Business District aren't just for show. They're a quick and easy way to get between the waterfront, city centre, and foreshore. Perfect for short hops; avoid the midday heat and ride responsibly.

Time Your Visit Around the Dry Season

An ibis spotted in Darwin (photo: Bob Brewer, Unsplash).
An ibis spotted in Darwin (photo: Bob Brewer)

Darwin experiences two seasons: wet and dry. The dry season, roughly May to October, is when the city is most comfortable. Expect blue skies, lower humidity, thriving markets, and ideal road-trip conditions.

The wet season has its own dramatic appeal, but the dry is when most visitors discover their rhythm.

Use Darwin as Your Access to the Wild Top End

The city itself is only part of the story. Darwin shines as the launch point for bigger Northern Territory adventures. Within reach, you've got Kakadu, Nitmiluk, and plenty of secluded spots.

Having your own vehicle makes a huge difference here. Many travelers arrange a campervan hire in Darwin to explore the Top End at their own pace, with places like Kakadu National Park and Nitmiluk Gorge within driving distance. Traveller's Autobarn is one option for picking up a campervan before heading out of the city.

Final Thoughts

Darwin isn't polished, and that's exactly why it sticks with people. Between its tropical climate, strong local culture, and easy access to wild landscapes, the things to do in Darwin feel unlike anywhere else in Australia.

Give yourself time to slow down, stay flexible with the weather, and lean into the local way of doing things. That's when the Top End really starts to shine.

_____

This story is published in partnership with Travellers Autobarn.

How Contrast Therapy Is Reshaping Recovery for Adventure Travelers

Long hiking days, back-to-back dive trips, multi-day treks, sunrise surfing, and long-haul flights that leave your legs stiff and swollen push your body in ways that feel incredible in the moment and exhausting the next morning.

Recovery isn't just for pro athletes. For backpackers and outdoor travelers, it can mean enjoying the next day's adventure instead of dragging yourself through it.

A cold plunge like this one in Maine can be a part of contrast therapy for faster recovery (photo: Gin Majka, Unsplash).
Women doing a cold plunge in Maine (photo: Gin Majka)

Contrast therapy, alternating between hot and cold exposure, is gaining traction beyond locker rooms. From mountain towns to coastal surf hubs, spas and gyms with cold plunge pools are making this recovery method more accessible to travelers who want to stay active throughout their trip.

Instead of seeing recovery as something to do at home, more travelers are building it into their itineraries.

Key Takeaways

  • Boost circulation after long hikes, climbs, or flights.
  • Reduce soreness so you can stay active day after day.
  • Limit inflammation from repetitive strain and heavy packs.
  • Support consistent performance on multi-day adventures.
  • Use simple hot-and-cold timing cycles safely and effectively.

Why Recovery Matters More on the Road

When you're at home, soreness is manageable. When you're traveling, it can derail your plans.

Backpackers often carry 20 to 40 pounds for hours at a time. Trekking at altitude taxes the cardiovascular system. Long flights slow circulation and contribute to stiff joints. Surf trips, ski weeks, and cycling tours stack activity on consecutive days with little rest.

That's where contrast therapy fits naturally into adventure travel. It's not about chasing elite athletic gains. It's about staying functional, mobile, and energized so you can fully experience your surroundings.

How Hot and Cold Improve Circulation

Contrast therapy works by alternating heat and cold exposure. Heat dilates blood vessels, increasing circulation and relaxing tight muscles. Cold constricts vessels, helping reduce swelling and temporarily numbing soreness.

Switching between the two creates a pumping effect that encourages blood flow in and out of tired tissues. This circulation helps deliver oxygen and nutrients while clearing metabolic waste that builds up after intense activity.

For travelers who've just completed a long summit day or arrived after an international flight, that circulation boost can make a noticeable difference in how quickly legs and hips feel normal again.

Faster Recovery After Long Hiking Days

After extended trekking or climbing, muscles often feel heavy and inflamed. Contrast therapy may help reduce muscle tension and support faster recovery.

Research published in the Journal of Sports Science and Medicine has shown improvements in muscle perfusion and reduced tension following contrast treatments. While much of the research centers on athletes, the same physiological principles apply to physically active travelers.

The practical benefit? You wake up less stiff, move more easily, and feel more prepared for another active day - whether that's exploring ruins, kayaking a coastline, or taking on another stretch of trail.

Reducing Inflammation and Soreness

Cold exposure limits swelling by constricting blood vessels. Heat relaxes surrounding tissues and promotes circulation. Alternating between the two may help control inflammation caused by repetitive strain, a common issue on backpacking trips.

Travelers often underestimate how cumulative activity affects the body. Three or four consecutive active days can increase soreness.

Integrating contrast sessions, even once or twice during a trip, may help interrupt that buildup before it becomes limiting. It's especially helpful during longer trips where rest days are limited.

Supporting Performance Throughout a Trip

Adventure travel often requires consistency. If you're on a hut-to-hut trek, multi-day cycling route, or ski trip, you don't get to skip days easily.

When muscles recover more efficiently, endurance improves. Joints stay looser. Small aches are less likely to turn into injuries.

Many endurance athletes rely on contrast therapy to stay ready for competition. For travelers, the goal is simpler: preserve energy, reduce pain, and participate fully in the experiences you've planned.

What Is Contrast Therapy?

Scandinavian dry sauna (photo: Clay Banks, Unsplash).
Scandinavian dry sauna (photo: Clay Banks)

Contrast therapy usually involves alternating between hot and cold water immersion.

A common approach looks like this:

  • Three to four minutes in heat (sauna, hot tub, or hot bath)
  • One to three minutes in cold (cold plunge, ice bath, or cold shower)
  • Repeat the cycle three to five times
  • End with cold

The temperature contrast stimulates vascular changes that drive the recovery benefits.

Travel-Friendly Ways to Use Contrast Therapy

You don't need a professional training facility to use this method. Many mountain towns, surf destinations, and wellness-focused cities now offer sauna-and-plunge facilities. Boutique hotels and recovery studios are increasingly adding cold plunge pools.

If you don't have access to a formal setup, you can still adapt the method:

  • Alternate between hot and cold showers.
  • Use a hot tub, then a cold pool at a hotel.
  • End your sauna session with a cold rinse.

Even simple versions can help improve circulation and reduce stiffness.

Safety Considerations

Contrast therapy is generally safe for healthy individuals, but it's important to listen to your body.

Avoid extreme temperatures. Stay hydrated, especially at altitude. If you have cardiovascular conditions or high blood pressure, consult a medical professional before using cold immersion.

Start conservatively. You don't need long ice exposure to see benefits.

The Bigger Picture: Recovery as Part of Adventure

Adventure travel isn't simply about pushing limits. It's about sustaining the experience.

When you build recovery into your itinerary - whether that's a rest day, a mobility session, or a hot-and-cold circuit - you're investing in the quality of your trip.

Contrast therapy isn't a luxury reserved for elite athletes. For backpackers and adventure travelers, it can be a practical tool for reducing soreness, staying consistent, and making the most of every hike, paddle, and summit push. Recover smarter, and you'll travel stronger.

_____

Disclosure: This story was published in collaboration with Heavenly Heat Saunas. The information provided is for informational and entertainment purposes only and does not constitute medical advice. Readers interested in contrast therapy should consult a qualified medical professional before beginning any new recovery practice.

How To Organize a Stress-Free Road Trip Around Kraków in Poland

What if I told you that within two hours of leaving Kraków's Main Square on a road trip, you could be hiking beneath rocky peaks, soaking in thermal waters, or standing inside a centuries-old salt mine carved entirely underground?

Organizing a road trip around Kraków is one of the best ways to see southern Poland. Within just 60 miles (100 kilometres) of the city, you can reach mountains, wooden villages, thermal baths, and UNESCO-listed sites.

A lone wooden hut among rocks and dwarf pines in the high Tatras Mountains of Poland (photo: Pexels).
A lone wooden hut among rocks and dwarf pines in the high Tatras

Yet without a clear plan, your trip may quickly turn chaotic. Which place should you visit first? How many days do you really need? Where can you hire a car that will work best for such a trip?

What You'll Learn From This Article

  • You will learn how to plan a well-structured road trip around Kraków step by step.
  • You will learn how many days to reserve, how to design a logical route across Malopolskie, and how to estimate realistic driving times.
  • You will also find practical advice on choosing a car rental, managing your budget, selecting accommodation with parking, and adjusting your plans to different seasons.
  • Finally, you will learn how to combine popular destinations like Zakopane with lesser-known spots to create a balanced, easy journey.

Ready To Hit the Road Around Kraków? Read This First.

Determining your day count is the first step. A well-paced road trip around Kraków usually takes 3 to 5 days. This gives you enough time to explore the city itself and venture into Malopolskie without rushing from one attraction to the next.

If you have three days, focus on a circular route.

  • Spend day one in Kraków.
  • On day two, head south toward Zakopane in the Tatra Mountains.
  • On day three, visit the Wieliczka Salt Mine or Ojcow National Park before returning to the city.
  • With five days, you can extend your route to include smaller towns such as Nowy Sacz and wooden churches (UNESCO-listed) scattered across the countryside (in Binarowa, Blizne, Debno Podhalaskie, Haczów, Lipnica Murowana, and Sekowa).

Think It's Close? Check the Real Driving Time.

Distances in Malopolskie may look short on a map, but mountain roads can slow you down. The drive from Kraków to Zakopane is about 68 miles (110 km) and typically takes 2 to 2.5 hours, mainly during peak seasons.

Always add a 20 percent buffer to your schedule. This simple rule reduces pressure and gives you room for spontaneous stops.

A Hire Car as the Key To Exploring the Kraków Area at Your Leisure

A road trip around Krakow, Poland (photo: Pexels).
Driving around Kraków

Although Kraków is well connected to the rest of the country by trains and buses, these modes of transport limit your flexibility when travelling.

If you want to stop at scenic viewpoints, explore smaller villages, or adjust your route on the go, having your own vehicle gives you full control over your schedule.

For a smooth start, it makes sense to book a car rental directly at the airport. This eliminates unnecessary transfers and lets you start your road trip immediately after landing.

One reliable option at Kraków Airport is https://kaizenrent.pl/en/car-rental-krakow-airport.

Kaizen Rent operates directly at the airport and offers clear rental terms, making the pick-up procedure quick and simple. Complicated paperwork or ambiguous regulations are the last thing you want when you land.

When choosing a car rental in Kraków, make sure the company provides:

  • Transparent insurance coverage, including collision damage waiver and theft protection
  • Unlimited mileage, especially useful for longer routes across Malopolskie or drives to Zakopane.
  • Seasonal preparation, such as all-season tires for year-round performance
  • Clear rental terms, so you know exactly what you are paying for

For travellers who appreciate efficiency and clarity, Kaizen Rent is a sensible option, as it meets these requirements. Instead of spending time comparing dozens of providers after arrival, you can secure your vehicle in advance and focus on planning your route.

Stop Jumping Around - Plan by Region, Not by Pin on the Map

A Krakow road trip leads hikers to a stone trail in the Tatra Mountains near Zakopane, Poland (photo: Pexels).
Hikers walking a stone trail in the Tatra Mountains near Zakopane

Instead of jumping between isolated sights, group destinations by area. This strategy reduces backtracking and unnecessary driving.

Start Strong - Kraków and Its Must-See Surroundings

Begin with Kraków's Old Town, Wawel Castle, and the Kazimierz district. Then drive 15 km southeast to the Wieliczka Salt Mine. You can combine these sites in one or two days without feeling hurried.

Heading South? Plan Zakopane the Smart Way

Zakopane is a popular mountain town located beneath the Tatra Mountains. Plan at least one overnight stay here. Spend the morning hiking to Morskie Oko or touring Gubalówka Hill.

In the afternoon, relax in one of the regional thermal baths. Travelling by car provides you with access to trailheads outside the town centre, where parking is often easier.

Backpacking in the Tatra Mountains (photo: Pexels).
Backpacking in the Tatra Mountains

Go Beyond the Obvious - Explore the Hidden Corners of Malopolskie

If you prefer quieter places, drive toward the Pieniny Mountains and take a rafting trip on the Dunajec River. You can also visit the UNESCO-listed wooden churches scattered across southern villages. These stops rarely fit into organized tours, which makes a road trip especially valuable.

No Parking, No Peace - Book Wisely

Accommodation choice affects your overall comfort - especially if you travel by car. In Kraków's historic centre, parking is limited and usually paid.

Before booking, check:

  • Does the hotel offer private parking?
  • Is the parking space guaranteed or subject to availability?
  • Is there an extra daily fee?
  • If you want fewer daily logistics issues, consider staying slightly outside the Old Town.

In Zakopane and smaller towns, parking is generally easier - but do not assume it is automatic. During high season (July-August), availability drops fast.

Pro tip: Book accommodation at least 4 weeks in advance during summer. You will get better prices and better locations.

Summer Heat or Winter Snow? Plan for the Season

People walking down Florianska Street toward St. Mary's Basilica in Kraków, Poland (photo: Pexels).
People walking down Florianska Street toward St. Mary's Basilica in Kraków

The weather directly affects your road trip experience.

Summer (June-August)

  • Kraków temperatures often reach 25-30 °C.
  • Mountain areas stay cooler.
  • Afternoon storms are common in the Tatras.

Keep in your car:

  • A light rain jacket
  • Extra water
  • Sunglasses

Winter (December-February)

  • Snow is common around Zakopane.
  • Mountain roads may be icy.
  • Daylight hours are shorter.

Drive slower and check forecasts daily. It's advisable to carry snow chains, especially when driving in mountainous areas.

Spring and Autumn

  • Fewer crowds
  • Lower accommodation prices
  • More relaxed atmosphere

If flexibility matters to you, these seasons are often the most comfortable.

Avoid Budget Surprises on the Road

A hassle-free journey depends on financial planning. Fuel prices in Poland are generally moderate compared to Western Europe, but costs add up over several days.

Calculate approximate fuel consumption based on your route length. For example, a 310-mile (500 km) trip with a car that consumes 1.8 gallons (7 litres) per 62 miles (100 km) requires around 9 gallons (35 litres) of fuel.

Also factor in parking fees in Kraków, entrance fees to attractions, and possible tolls. Creating a simple spreadsheet before departure lets you track expenses and adjust plans if needed.

Leave Space for Spontaneous Moments

Decorated horse-drawn carriages in front of St. Mary's Basilica on Kraków's Main Market Square (photo: Pexels).
Decorated horse-drawn carriages in front of St. Mary's Basilica

While structure helps, flexibility keeps the journey enjoyable. You might discover a roadside bakery in a small village or a lovely lake not listed in your guidebook.

Allow at least half a day without fixed appointments. This open window transforms your road trip from a checklist into a genuine experience.

When driving across Malopolskie, you will often notice local markets or regional food stands. Stop by to try oscypek cheese in Zakopane or sample traditional pastries. These small pauses produce lasting memories.

Drive Smart and Stay Connected

Poland uses right-hand traffic.

Speed limits:

  • 31 miles per hour (50 km/h) in urban areas like Kraków.
  • Up to 75 miles per hour (120 km/h) on express roads

Respect local rules - fines can interrupt both your schedule and your travel budget for Poland.

Before leaving:

  • Download offline maps.
  • Save emergency numbers.
  • Carry a power bank.

The European emergency number 112 works nationwide.

Organizing a road trip around Kraków becomes manageable when you divide the process into well-defined steps. Plan your route by region, allow realistic driving times, secure a reliable car rental, and book accommodation with parking. Modify your strategy to the season and keep part of your schedule flexible.

Now it is your turn to map out your route through Malopolskie and beyond. Start planning today, reserve your vehicle early, and enjoy the freedom of discovering southern Poland at your own pace.

FAQ

How many days do I need for a road trip around Kraków?
Ideally, 3 to 5 days. This gives you time to explore Kraków, Zakopane, and at least one additional region in Malopolskie without rushing.

Is it better to rent a car in Kraków?
If you want flexibility and to reach small towns or mountain trails, renting a car with Kaizen Rent - bookable at the airport - makes it simple and convenient.

Is driving in southern Poland difficult?
Not usually. Roads are well-marked, but mountain routes near Zakopane can be slower and more demanding in winter.

When is the best time for a road trip around Kraków?
There are fewer people and more pleasant weather in late spring and early autumn. Summer is popular but busier.

Can I visit Zakopane from Kraków in one day?
Yes, but an overnight stay lets you explore hiking trails and thermal baths free from the pressure of time.

_____

This story was published in partnership with Kaizen Rent.

Best Types of Jackets for Backpacking in Unpredictable Weather

Backpacking means committing to the outdoors, even when the forecast looks uncertain. That's why choosing the best jackets for backpacking can make all the difference.

Sunshine can turn into wind. Clear skies can shift into rain. Temperatures can drop quickly at elevation.

A hiker wearing a lightweight waterproof shell, one of the best jackets for backpacking - Torres del Paine National Park, Argentina (photo: Andrew Svk).
The sky turns dark in Torres del Paine National Park (photo: Andrew Svk)

The key to staying comfortable is not packing the heaviest jacket you own. It's choosing the right types of jackets that work together as part of a flexible layering system. When the weather refuses to cooperate, adaptability wins.

Why Layering Beats One Heavy Jacket

Instead of relying on a single bulky coat, experienced backpackers use layers that can be added or removed as conditions change.

The National Park Service recommends dressing in layers to regulate body temperature and respond to shifting weather patterns during outdoor activities.

Layering helps prevent overheating during uphill sections and keeps you warm when you stop moving. The right jacket choices make that system work.

Types of Jackets

1. Lightweight Waterproof Shell Jackets

A waterproof shell is one of the most important pieces in unpredictable weather. It protects against rain and wind while remaining breathable enough to prevent overheating.

Look for jackets with sealed seams and ventilation options. Shells should be lightweight and packable so they can live in your backpack without taking up too much space.

Patagonia produces well-known shell jackets, such as the Torrentshell, valued for their durability and reliable waterproofing.

Other dependable options include shell jackets from Arc'teryx and The North Face, both known for weather protection and technical design.

A shell blocks the elements. What you wear underneath provides warmth.

2. Insulated Down or Synthetic Jackets

A climber in a down jacket (photo: Chewool Kim, Unsplash).
A climber in a down jacket (photo: Chewool Kim)

For colder mornings or higher elevations, an insulated jacket becomes essential. These jackets trap body heat without adding excessive weight.

Down jackets are lightweight and compressible, making them popular for backpacking. Synthetic insulation performs better in damp conditions and dries faster.

Rab is known for high-performance down jackets favored by backpackers. Mountain Hardwear also offers insulated options designed for mountain environments.

These jackets work best as mid layers under a shell when conditions turn harsh.

3. Packable Windbreakers

Wind may not soak you like rain, but it can strip away warmth quickly. A lightweight windbreaker adds protection without bulk.

Windbreakers are ideal for mild but breezy conditions and can be layered over base layers or light insulation.

Outdoor Research offers compact wind shells that tuck into a backpack pocket when not in use. This type of jacket is often underestimated but highly practical for changing weather.

4. Softshell Jackets for Breathability

Softshell jackets provide moderate protection while remaining breathable. They are ideal for active sections of a hike where you generate body heat but still need light protection. Unlike waterproof shells, softshells favor flexibility and comfort.

Black Diamond designs softshell jackets that balance stretch and weather resistance for dynamic movement. Softshells are useful when full waterproofing is unnecessary but wind protection matters.

5. Hybrid Jackets for Versatility

Hybrid jackets combine multiple materials into a single piece-insulation in the core, breathable fabric on the sides, and light weather resistance on the exterior.

These jackets adapt well to variable conditions and reduce the need for frequent layer changes. Brands like Columbia and Patagonia offer hybrid designs that work well for backpackers who want fewer separate layers.

How To Choose the Right Combination

A hiker in a red rain jacket at the Grand Canyon in Arizona (photo: Alexander Kaufmann, Unsplash).
A hiker in a red jacket at the Grand Canyon (photo: Alexander Kaufmann)

The best jacket setup depends on climate, elevation, and trip length.

For mild but unpredictable conditions, a lightweight shell and an insulated mid-layer often cover most scenarios. For colder or wetter environments, adding a windbreaker or softshell increases flexibility.

The American Hiking Society emphasizes preparing for sudden weather changes by carrying appropriate protective layers, even when forecasts look stable. Preparedness prevents discomfort and risk.

Packability and Weight Matter

Backpacking is about balance. Jackets should compress easily and avoid adding unnecessary weight. Look for packable designs that fit into their own pockets or compress into small stuff sacks.

Carrying versatile pieces instead of multiple heavy jackets keeps your load manageable.

Why Quality Matters

Unpredictable weather exposes weak construction quickly. Leaky seams, poor insulation, or inadequate ventilation can ruin an otherwise great trip.

Investing in reliable brands and proven jacket types increases confidence on the trail. Comfort and protection are not luxuries in the backcountry. They are essentials.

What to Remember Before You Go

Unpredictable weather does not have to mean unpredictable comfort. Choosing the right combination of waterproof shells, insulated layers, windbreakers, and breathable softshells creates flexibility.

A Patagonia shell, a Rab insulated jacket, a windbreaker from Outdoor Research, or a softshell from Black Diamond all serve different but complementary purposes.

When your jacket system adapts to the weather, you stay focused on the trail rather than the forecast.

_____

This story was published in collaboration with Tactics.

Features To Look for in a Camera Bag for Travel

It is safe to say that photography is not a cheap hobby to pursue. Camera equipment and accessories are a pricey investment, so it is vital to ensure they stay properly protected throughout your travels.

?Investing in high-quality, functional camera bags, like digiDirect camera bags and cases, will not only make carrying your kit much more convenient but also grant you the peace of mind that your prized possessions are safe and secure.

Photography gear and bag (photo: Andrew Neel, Unsplash).
Photography gear and bag (photo: Andrew Neel)

Camera Bag Features

Adjustable Interior Spaces

The reality is, your camera gear setup will change. Either because your shooting style evolves, your chosen subject and environment changes, or you simply find new and interesting accessories you want to include in your kit.

For this reason, it is important to purchase the right bag that will evolve and adapt to these changes as needed.

Many high-quality, practical camera bags feature adjustable dividers and padding, with velcro straps that can be moved or removed as needed.

They significantly improve the bag's usefulness and ensure your gear stays properly separated and doesn't bang together as you walk.

Laptop Space

If you are taking your camera bag on a hike or another outdoor adventure, this feature may be less necessary. But for general travel, you will likely want or need to have your laptop on hand, either for work or to transfer images after a long day of shooting.

Selecting a camera bag with a built-in laptop slot is incredibly convenient, since it eliminates the need to carry separate bags for your devices. If your laptop is on the smaller or lighter side, it takes up minimal additional space and weight.

Waterproof Features

Whether it is a waterproof shell you can put over your entire bag, or a bag made with waterproof materials and zippers, having these incredibly useful features in your travel camera bag will come in handy the next time you are caught out in the rain in the backcountry.

The weather is so unpredictable, and if your gear gets wet, it could be extremely difficult to dry it before it becomes damaged.

Waterproof shells work well for light rain, but if they shift or develop an unexpected leak, it could quickly become disastrous without you knowing. For this reason, it is worth the extra cost to spring for a bag specifically designed with waterproof features.

Tripod Strap

While many modern tripods are made of lightweight materials, most are too big to fit safely in your camera bag.

If you don't have a way to strap your tripod to the outside of your bag, you'll have to carry it. This may take some weight off the bag itself, but you will quickly grow tired of holding it.

A good travel camera bag will have a strap on the side that can securely hold your tripod. However, even these straps do have a limit.

If you are a landscape photographer who regularly travels with large tripods, it may be worth buying a larger bag that can accommodate a folded tripod.

Photographing Death Valley National Park (photo: Tyler Raye, Unsplash).
Photographing Death Valley (photo: Tyler Raye)

Water Bottle Pocket

Whether you are taking a long hike, spending the day exploring a new city, or setting out on an extra-long travel day, you will need to stay properly hydrated, and putting a water bottle inside your bag not only takes up space, but it also invites the worst-case scenario: water leaking all over your expensive gear.

Avoid all possible risks and opt for a bag with a convenient water bottle pocket on the outside. Typically, they are fitted with two, which can be used for bottles or as a handy umbrella holder on more temperamental days.

Back Opening Design

If you have ever found yourself in the position of having to take your bag off, put it on wet or dirty ground to get your camera out, then put it back on, ultimately dirtying your jacket and pants, you will appreciate the benefits of an open-back camera bag.

While your bag technically still needs to go on the floor, put the front down first. This may not make your bag look its prettiest from the back.

Still, it prevents your clothes from getting dirty, which will inevitably transfer to the interior of any vehicle you eventually have to enter.

Waist Strap

If you are traveling with professional gear or just more gear than normal to capture extra special shots on your vacation, investing in an ergonomic bag for long hauls and heavy equipment will be a lifesaver for your lower back, shoulders, neck, and hips.

Having a strap around your waist will help distribute the weight of your bag more evenly, relieving pressure primarily on your lower back and shoulders. While you may not notice it much at first, the longer you carry your bag without this addition, the more uncomfortable it will become.

Camera bag with gear (photo: Skye Studios, Unsplash).
Camera bag with gear (photo: Skye Studios)

Subtleness

When traveling, one of the worst things you could do is publicly announce that you are carrying thousands of dollars' worth of camera gear.

If you are traveling by airplane, it may be worth purchasing a roller bag that will make moving through airports and to and from your hotel much easier. You can include a smaller bag for day outings to carry only the things you need that day.

The key is to find a bag that looks as normal and inconspicuous as possible. Lowepro, a popular camera bag brand in the United States, offers a wide range of bags in standard designs, with all the features of a safe, practical camera bag.

_____

This story was published in partnership with digiDirect.

Best Things To Do in Las Vegas on a Budget: Driving at SPEED VEGAS

Las Vegas has a reputation. Big hotels. Big shows. Big spending. For backpackers, it can feel like a place where budgets disappear fast.

But some of the best things to do in Las Vegas are not about luxury. They're about stories. And few stories travel better than saying you drove a supercar in the Nevada desert.

SPEED VEGAS is a motorsports park in Las Vegas where visitors can drive real supercars on a purpose-built racetrack about 15 minutes from the Las Vegas Strip.

Test drive a Lamborghini, Ferrari, or Porsche at SPEED VEGAS.
Lamborghini, Ferrari, and Porsche

For travelers who usually take buses, trains, or shared rides, this is a different kind of stop.

The SPEED VEGAS Experience

Leaving the Strip Behind

Picture this. You wake up in a hostel near the Las Vegas Strip. You walk past Bellagio, maybe spin once on the High Roller, and watch the crowds flow between casinos. By mid-morning, you order a rideshare south.

Within minutes, the skyline fades. The road opens. The desert stretches wide. On the way, you pass Seven Magic Mountains rising from the sand. A little further down South Las Vegas Boulevard, you arrive at SPEED VEGAS.

Instead of neon signs, there is open sky. Instead of slot machines, there is a racetrack carved into the desert.

Under a shaded carport, a lineup of Ferraris, Lamborghinis, Porsches, McLarens, Corvettes, and other performance cars waits. The terrace overlooks the track, where drivers are already taking laps.

It feels far from the Strip, even though it is close.

Supercars fleet in Las Vegas.
Supercars

The Supercar Moment

Backpacking is about choosing your splurges carefully. This is one of those moments.

After check-in, there is a clear safety briefing. The instructors explain the track layout, braking points, and what to expect on each lap. It is structured and welcoming, even if you have never driven anything more powerful than a rental car.

Then you choose your ride. Some travelers save specifically to drive a Ferrari. Others go for a Lamborghini or Porsche. Even the more entry-level options feel worlds away from everyday driving.

You slide into the seat. The engine starts. The instructor sits beside you, calm and focused.

A SPEED VEGAS staff member gives instruction on driving a Lamborghini.
Supercar driving experience

Learning Fast, Lap by Lap

The first lap is about nerves and discovery. The steering feels sharper than expected. The braking zone comes up quickly. Corners demand attention.

Your instructor talks you through it. Brake here. Keep your head up. Smooth on the throttle.

By the second lap, you feel more in control. By the third, you begin to understand how the car responds to you. You are not just along for the ride. You are driving.

Among all the things to do in Vegas, this is one of the most hands-on. It is active, focused, and surprisingly accessible. For backpackers used to watching from the sidelines, it is empowering.

Blue, yellow, and red Porsches driving on a race track.
Porsches on the track

Cheaper Ways To Feel the Speed

If a full supercar session seems like too much of a stretch, SPEED VEGAS offers other options that still deliver.

Outdoor Go Kart Racing

The outdoor kart track on site is fast and competitive. Sessions are short, which makes them easier on the budget. You race friends head-to-head, chasing lap times and relaying stories afterward.

It is one of those simple, overlooked things to do in Las Vegas that works well for groups traveling together.

Off-Road in the Desert

There is also an off-road track where you can climb into Baja-style race trucks and tackle jumps and banked dirt corners in a controlled setting.

If you have spent days crossing deserts by bus on a Southwest road trip, this flips the script. Instead of watching the landscape roll by, you interact with it.

Dust kicks up behind you. The suspension absorbs the bumps. Instructors guide every session to keep it organized and safe.

Why It's Worth the Splurge

Backpacking is about balance. You cook in hostel kitchens, walk instead of taking taxis, and skip overpriced cocktails. Then once in a while, you choose one experience that feels bigger than the rest.

SPEED VEGAS often becomes that moment.

A Lamborghini doing laps at SPEED VEGAS

Compared with a night of casual gambling or another ticketed show, a session on a real racetrack leaves a stronger memory. It's physical, skill-based, and something you can describe years later.

For travelers building a list of the best things to do in Las Vegas, it stands comfortably alongside the Strip, Hoover Dam, and even the start of a drive toward the Grand Canyon.

It is a different side of the city. Less about chance. More about control.

Explore your options at SPEED VEGAS and see how it fits into your route.

_____

This story is brought to you in partnership with SPEED VEGAS.

Bucket List Destinations for the Perfect Intimate Proposal

Planning the perfect proposal often starts with choosing the right setting - somewhere meaningful and intimate enough to make the moment unforgettable. While the question itself is what matters most, the backdrop sets the mood for the story you will tell for the rest of your lives.

?From dramatic volcanic scenery to quiet coastal hideaways, these bucket-list destinations offer the ideal atmosphere for popping the question away from the din of everyday life.

Santorini, Greece

Santorini in Greece is a popular proposal destination (photo: Darshan Gujrathi).
Romantic Santorini (photo: Darshan Gujrathi)

Santorini is arguably the most iconic proposal destination in the world, famous for its whitewashed buildings and cobalt-blue domes situated precariously above the Aegean Sea.

The island's unique geography, formed by a prehistoric volcanic eruption, creates a natural amphitheater for some of the most spectacular sunsets on Earth.

For partners seeking intimacy, avoid the main crowds in Oia and head toward the higher, quieter elevations of Imerovigli.

?The village of Imerovigli offers secluded terraces with panoramic views of the caldera. As the sky transitions into gold and violet, the glow of a Santorini sunset beautifully complements the sparkle of a solitaire engagement ring during the proposal.

The simplicity of a solitaire setting echoes the clean lines of Greek architecture, letting the diamond's brilliance take center stage against the Mediterranean blue.

Maui, Hawaii

Sunset at Secret Cove Beach (photo: Zetong Li, Unsplash).
Sunset at Secret Cove Beach (photo: Zetong Li)

For a proposal that feels like a tropical escape, Maui delivers a diverse range of intimate settings. The island is a showcase of natural beauty, blending lush rainforests with volcanic shores.

If you're early risers, the summit of Haleakal? at sunrise provides a literal "top of the world" experience when the sun breaks through the clouds at 10,000 feet.

?For those who prefer the sea, the secret coves along Maui's western coast offer quiet stretches of sand where the only witnesses are the crashing waves.

A sunset walk along the Kapalua Coastal Trail provides numerous secret nooks perfect for a private knee drop.

Paris, France

The streets of Montmartre in Paris (photo: Bastien Nvs, Unsplash).
Montmartre (photo: Bastien Nvs)

Paris is known as the "City of Light," but it could just as easily be called the City of Romance. While the Eiffel Tower is a classic, those seeking intimacy often look to the lesser-known gardens or the charming streets of Montmartre.

The banks of the Seine near the Île Saint-Louis offer a peaceful riverside setting, especially in the evening, when the city's lights reflect off the water.

?For a truly private moment, the Square du Vert-Galant (a tiny park at the tip of the Île de la Cité) offers a serene, leafy enclave that feels worlds away from the busy boulevards.

_____

This story is published in partnership with Shane Co.

Your Complete Travel Guide to Georgia for First Time Visitors

Georgia has emerged as one of the most compelling destinations for adventure travelers seeking authentic experiences. With its ancient heritage, fascinating culture, dramatic mountain landscapes, and centuries-old traditions, this small country offers far more than most expect. This Georgia travel guide highlights the very best it has to offer.

View of Tbilisi from Narikala Fortress, a sightseeing tip in most Georgia travel guides (photo: Mary Birago, Unsplash).
The capital of Tbilisi (photo: Mary Birago)

Despite its modest size, Georgia delivers an epic travel experience. The Caucasus Mountains, Europe's highest range, dominate the skyline.

The country also offers a remarkable diversity of landscapes, from subtropical Black Sea beaches to pristine river gorges, cave-hewn monasteries, and rolling vineyards framed by snow-capped peaks. This destination leaves a lasting impression on every traveler.

Best Time To Visit Georgia

Your ideal travel window depends on what you want to experience. For mountain devotees and serious hikers, June through August offers the best conditions, with accessible trails and stable weather at high altitudes.

However, these summer months can bring uncomfortable heat to lower elevations, and Georgia's three main cities - Tbilisi, Kutaisi, and Batumi - can become sweltering.

If you prefer urban exploration and want to avoid peak-season crowds and prices, the shoulder months of May and September are exceptional choices. The weather remains pleasant, and you'll encounter fewer tourists at major attractions.

Winter travel from November to March is less recommended, as most tourism infrastructure shuts down and the High Caucasus becomes largely inaccessible. Winter visitors will find a tourist-free country with hotels offering their lowest rates of the year.

Deciding on Trip Duration

Given the distance most travelers must travel to reach Georgia, anything less than four nights is insufficient. Ideally, plan to spend at least one week in the country. This allows time to explore Tbilisi, travel through the interior regions, and spend at least two nights in the mountain areas.

Gergeti Trinity Church (photo: Deogyeon Hwang, Unsplash).
Gergeti Trinity Church (photo: Deogyeon Hwang)

Getting to Georgia

Nearly all international visitors arrive by air, and connectivity is excellent. Tbilisi's modern international airport handles dozens of daily flights to major European cities and regular connections to the Middle East and Asia.

Near Kutaisi, David the Builder Airport is the country's budget airline hub, offering connections to many Eastern European destinations.

Transportation in Georgia

Public Transport Options

Once in Georgia, you'll need to decide whether to use marshrutky (privately operated minibuses on specific routes) or rent a vehicle. While car rental is more expensive, it offers freedom to explore at your own pace.

The only train route most travelers use is the modern, relatively fast service between Tbilisi and Batumi.

In Tbilisi, the two-line metro system provides efficient city transportation. For areas not served by metro, taxi apps like Yandex, Bolt, and Maxim offer affordable rides throughout the capital.

Domestic flights provide an effective alternative for reaching mountainous regions like Svaneti and Racha, saving many hours of driving on winding mountain roads.

Modern Car Sharing with Getmancar

For travelers seeking flexible transportation without the commitment of a traditional car rental, Getmancar offers a car-sharing solution in Georgia.

This smartphone-based service lets you rent vehicles by the minute, hour, or day, making it ideal for short trips around Tbilisi or spontaneous day trips.

Getmancar operates throughout Georgia with a fleet of well-maintained cars, including Ford Focus models, available through their mobile app.

Drivers must be at least 21 years old, hold a Category B European driving license, and have at least 2 years of driving experience.

Unlike traditional rentals, you do not need to visit an office. Register in the app, locate available cars on the map, and unlock your chosen vehicle with your smartphone. Keys and documents are already inside the car.

The service offers three tariff options: a minute tariff for quick trips under an hour, an hourly tariff for multi-stop journeys, and a daily tariff for extended use.

You can start and end your trips in designated zones throughout the city, and payment is automatically processed through your registered card.

This flexibility makes Getmancar ideal for travelers who want the freedom of a car without worrying about fuel, washing, parking fees, or long-term commitments.

Must-See Attractions

Holy Trinity Cathedral of Tbilisi, a must-see attraction in our Georgia travel guide (photo: Hongbin, Unsplash).
Holy Trinity Cathedral of Tbilisi (photo: Hongbin)

Tbilisi enchants tourists with its historic churches, semi-renovated Old Town, and spectacular city views from the Sololaki ridge, accessible by cable car.

The capital has also gained international recognition in the techno scene, with Bassiani and other venues establishing Tbilisi on the world clubbing map.

For an exceptional day trip from the capital, drive the Georgian Military Highway to Stepantsminda in the High Caucasus. This journey is among the world's most scenic mountain drives. Upon arrival, see the iconic hilltop church contrasted against the snow-capped peak of Mt Kazbek.

The Mountain Experience

Mountain views in Juta, Georgia (photo: Andrew Rusinas, Unsplash).
Mountain views in Juta (photo: Andrew Rusinas)

The highlight for most visitors is time spent in Georgia's extraordinary mountains. Despite their impressive heights, with Europe's highest peak Mt Elbrus, just across the northern border with Russia, these peaks remain accessible.

Regular flights now connect to Mestia in the remote Svaneti region, making quick, affordable trips to the Great Caucasus peaks possible.

Even non-hikers can take the ski-lift and cable car to Hatsvali for panoramic views. Serious walkers will find many hiking options, with the four-day trek to Ushguli village as a memorable route.

Budget Considerations

Georgia remains inexpensive by European standards, though prices have risen as tourism has grown and standards have improved. The country still welcomes backpackers, with family homestays widely available and many hostels in larger cities.

Average hotel prices have increased from around €40 to about €60 (about $47 to $70) over the past decade. Short-term apartments offer varying quality and prices with strong competition among providers.

Food and drink remain affordable, with dinners available for about €10 (about $12) per person throughout most of the country.

Transport offers excellent value unless you choose vehicle rental, which costs more than in most European countries due to limited competition among agencies.

Flights to mountainous Svaneti often cost less than the long marshrutka ride, though summer seats should be booked several weeks in advance.

Cultural Insights and Useful Tips

Georgian Hospitality

A rustic Georgian stew (photo: Luna Wang, Unsplash).
A rustic Georgian stew (photo: Luna Wang)

Georgian hospitality is legendary, and you'll receive warm welcomes wherever you travel. Tourism has provided an economic boost, and almost everyone has some connection to the industry.

When staying in private homes, especially in remote mountain regions, prepare for generous hospitality. Hosts often serve elaborate meals with homemade wine, followed by rounds of chacha and toasts.

Guests may also experience traditional dancing or impromptu performances of Georgian polyphonic singing.

Safety and Security

Georgia is generally a safe country for travelers. The main risk involves traffic accidents, so drive defensively and take care when crossing busy roads.

Note that protests have occurred in Tbilisi since October 2024 following parliamentary elections, so check your country's travel advisories before departure.

While older Georgians typically speak Russian as their primary foreign language, most urban residents under 40 know at least some English.

Teenagers and workers in tourism generally speak English well. Learning a few Georgian words earns appreciation from locals.

Religious Etiquette

Most Georgians identify as Georgian Orthodox Christians and appreciate appropriate dress when visiting the country's ancient churches and cathedrals.

Women should cover their heads, while men must remove hats or caps. Most churches provide smocks, cloaks, and headscarves for borrowing near the entrance.

Visa Requirements

Georgia offers visa-free travel to over 100 nationalities, including citizens of the EU, US, UK, Australia, Canada, Israel, New Zealand, South Africa, and Switzerland.

Travelers requiring visas can apply through Georgia's e-Visa Portal for $20, with processing taking five days.

Quick Reference Guide

Best Months for HikingJune, July, August
Best Months for CitiesMay, September
Minimum Stay4 nights
Recommended Stay7+ nights
Main AirportsTbilisi International, David the Builder (Kutaisi)
Metro CitiesTbilisi
Taxi AppsYandex, Bolt, Maxim
Car SharingGetmancar (available via app)
Family Homestay Cost€15-25 per person/night
Hostel Cost€10-20 per night
Average Hotel Cost€60 per night
Dinner Cost€10 per person
Coffee€1-3
Local Wine (bottle)€2-10
Train Tbilisi-Batumi€36
Minimum Driver Age (Getmancar)21 years
Driving Experience Required2+ years
Visa-Free Nationalities100+ countries
Visa Cost (if required)$20
CurrencyGeorgian Lari (?)

_____

This story was published in partnership with Getmancar.

Conquering the Slush: The Ultimate Guide to Mud Terrain Adventures

Many drivers like a good challenge, which is why they turn to driving on different surfaces for a good thrill. As such, muddy terrain adventures present a unique driving experience full of adrenaline, as the terrain can be quite treacherous, one moment being well-compacted, only to turn into slippery goo the next.

A yellow SUV with mud terrain tires drives off-road in the rain.
Muddy off-roading

Such occasions provoke different reactions in people. Some get excited and laugh, while others break into a sweat. However, they all share the excitement and the pounding of the heart as they overcome the difficult drive with their skills, anticipating what's next.

Of course, this can't be done without a good vehicle that delivers the right amount of power to get out of sticky situations. The right tires also play a part, as without them, you can only get stuck in softer terrains.

Since humans love conquering obstacles, it's no surprise that successful driving in challenging circumstances gives drivers a unique thrill. If you're also interested, let's see what you need to keep in mind before going on such an adventure or a road trip.

Mud Terrain Tires: The Specialized Gear You Need

Besides having a powerful vehicle, drivers need to mount tires that can handle muddy conditions. Since tires need to be durable and aggressive, mud terrain tires are the best choice here. Let's discuss why it's so.

For mud-terrain tires to have firm surface grip, they need a good tread design. Mud tires feature larger tread blocks to provide excellent traction on challenging surfaces.

The widely spread blocks provide an adequate void ratio, improving the tire's self-cleaning capability. In other words, grooves eject mud from the tread area, keeping it clean and allowing the tread blocks to stick to the terrain.

Mud tires benefit from additional elements like mud-ejecting ribs, which further enhance the tire's ability to remove mud and rocks from between the tread blocks.

Moreover, aggressive sidewall details help overcome softer surfaces by providing sideways biting edges. As a result, mud tires guarantee strong forward motion and reduce the risk of getting stuck in mud.

If you think all-terrain tires are also up to the task, then you might be disappointed to learn that they aren't as efficient in deep mud as dedicated mud tires.

We already mentioned that it's all about the tread design, and all-terrain tires are not as aggressive as their mud-terrain counterparts, making them prone to clogging. So, keep that in mind as you drive across the U.S.

The Perfect Fit: Why 315/70R17 Tires Rule the Ruts

Conquering difficult terrain surfaces with your vehicle requires the right tire fit. Besides being a popular tire size, what makes the 315/70R17 perfect for your mud adventures? Let's explore this together.

The 315 mm tire width offers a larger contact patch for consistent traction on softer surfaces. This, combined with the optimized tread pattern, makes these tires perfect for different surfaces, assuring safe off-roading.

With a 70% aspect ratio, this particular tire size is great at maximizing comfort and smoothing the driving experience. In other words, high-profile tires are better at absorbing the shock of driving because of their increased sidewall height and sidewall flexibility, which cushion bumps and uneven surfaces.

The 17-inch wheels hit the sweet spot between small and larger wheels, ensuring good clearance as they allow a taller tire sidewall. This, as we've already said, helps improve comfort levels, as the taller tire sidewalls enhance ride quality.

Last but not least, the R symbol indicates a radial construction. Such construction provides the internal strength and durability needed for tires, enabling them to withstand what off-road adventures throw their way.

In addition, the radial construction enables the sidewalls to flex more effectively, helping the tire better conform to bumpy terrain. This makes them great for off-roading.

Top 315/70R17 Mud Terrain Tire Recommendations

While the 315/70R17 tire size can be found at many online shops, it's important to choose a reliable one with a large selection of tires, competitive prices, and a warranty on its models. Keep an eye on customer reviews to learn which models fit your vehicle.

Furthermore, set a budget in advance to prevent overspending. After all, there are numerous brands out there, both budget-friendly and premium ones, so it's important to set in advance what kind of tires you can purchase.

Speaking of brands, avoid the cheap ones so you don't compromise your safety. Depending on your budget, you can always go with the following brands: Forceum, Accelera, Atturo, Cosmo, Predator, Mickey Thompson, Goodyear, and Cooper.

An SUV driving through a muddy forest track.
Muddy forest track

Essential Mud Driving Techniques

Finding yourself stuck in mud is one of the worst things that can happen to a driver while off-roading. Put the paddle on the gas, and the only thing that will rise is your frustration since you won't be getting anywhere. To avoid such annoyance, what are some tips you can utilize to spare yourself this suffering?

First of all, in case you get stuck in mud, make sure your tires don't spin excessively by stepping on the gas. Shifting between drive and reverse with small throttle inputs will get you out of the predicament. This is also one of the valuable road trip tips that can help you overcome this hurdle.

Make sure to keep a steady speed, since going too fast or too slow won't provide any benefit. Switch to four-wheel drive to make sure all four wheels are actively helping you get out of the mud.

If you're traversing mud trails, drive on elevated surfaces to avoid deeper mud, and follow the tracks created by other vehicles to prevent sinking in soft spots.

Another helpful tip is to reduce tire pressure to 20 psi and turn off the traction control. This makes your tires more pliable, helping you get out of a muddy predicament. A winch and tow cable can come in handy as well, enabling you to pull yourself out of trouble.

Conclusion: Your Next Adventure Awaits

Whether you decide to test the limits of your skills, vehicle, and tires on demanding terrains or go on a relaxing off-road trip, you have to be prepared for these occasions. The right gear will ensure safe travels, including the right driving techniques on challenging terrain.

But since tires are your only contact with the driving surface, it's crucial that you invest in the right type of tires for the job and also the ideal fit for your vehicle. After all, they're your baseline, grip, and salvation in case you end up in deep mud.

This doesn't mean you have to fear off-roading; make sure you have the proper equipment and keep a cool head if you ever find yourself in a sticky situation. After all, we didn't conquer various frontiers only to get stopped by mere mud terrain. So, drive safely and enjoy your adventures.

______

This story is published in partnership with Priority Tire.

Na Pali Coast Boat Tours in Kauai: Our Morning Cruise

The first time you see the 17-mile stretch of the Na Pali Coast on Kauai's northwest shore, it doesn't quite look real. Sheer green cliffs rise thousands of feet straight out of the Pacific. Waterfalls streak down volcanic rock. Deep, folded valleys disappear into shadow. This is why Na Pali Coast boat tours are among Kauai's most sought-after experiences.

The Na Pali Coast as seen from a boat tour.
The Na Pali Coast

Formed millions of years ago by volcanic collapse and erosion, the Na Pali Coast is defined by fluted ridges, knife-edge valleys, and sea caves carved by the Pacific. Today, it's accessible only by boat, helicopter, or a demanding hike along the Kalalau Trail.

It's also one of the most recognizable landscapes in Hollywood. The cliffs have appeared in films like "Jurassic Park" and "Jurassic World," standing in for a fictional island in which dinosaurs roam. They reminded me a little of the views we got on a Kualoa Ranch tour on Oahu, where additional scenes for the franchise were filmed.

We'd flown past them a day earlier during a helicopter tour of Kauai, watching the coastline unfold from above in sweeping, cinematic scale. From the air, the Na Pali Coast felt massive and untouchable. This time, we wanted to spend the morning on the water.

Choosing Among Na Pali Coast Boat Tours

Passengers of a Capt Andy's catamaran cruise take in the scenery.
Passengers are taking in the scenery.

Once you decide to see the Na Pali Coast by water, the next question is how. Several boat tours operate out of Kauai's south and west shores, most departing from Port Allen Harbor in Eleele.

Options range from high-speed raft adventures that zip into sea caves to larger sailing catamarans offering half-day sightseeing cruises with meals.

We booked with Capt Andy's Sailing Adventures, a long-running outfitter at Port Allen Harbor that operates a fleet of rafts and catamarans.

Their lineup includes:

  • Raft cave tours (3 to 6 hours) - Smaller, faster boats that can enter sea caves when ocean conditions allow. More adventurous, and more exposed to motion and the elements (i.e., expect to get wet).
  • Snorkeling sails (5.5 hours) - Tours that combine sightseeing with time in the water.
  • Sunset dinner sails (4 hours) - Afternoon departures with later returns and a more substantial meal.
  • Star Scenic Sail (4.5 hours) - A morning sightseeing-focused cruise with no snorkeling.

We chose the Star Scenic Sail for practical reasons. Raft tours sounded more intense than we wanted, and while seasickness was not guaranteed, it was a consideration. We preferred a morning departure for calmer water and didn't feel strongly about including snorkeling.

The Star Scenic Sail checked those boxes: a light breakfast and lunch included, a larger modern 65-foot catamaran for added stability, and a focus on sightseeing in comfort.

With that decided, we showed up at Capt Andy's in the Port Allen Marina Center at 8:15 a.m. on a Thursday to check in for our 9 a.m. departure. While waiting to walk down to the boat as a group, I used the restroom and applied plenty of sunscreen.

Our Morning on the Water

9 a.m. Departure From Port Allen

View from the deck of Northern Star catamaran.
View from the deck

We boarded the Northern Star at 8:45 a.m. Our Na Pali Coast boat tour had 45 passengers out of a maximum of 49. For safety, every guest is guaranteed a cushioned seat, either on deck or in the indoor cabin.

Much of the crowd found seats along the catamaran's edge, while Kel and I sat at a table near the cabin's entrance.

Breakfast was simple: chunky pineapple muffins, orange slices, and grapes, while reggae, Hawaiian songs, and Jack Johnson played over the speakers. At first, it felt like a laid-back island playlist. Later, it leaned more toward karaoke.

We motored out at about 20 knots, and the early ride was smooth. The crew moved easily around the deck, and an official photographer mingled and took photos (available for purchase later).

It takes about 45 to 60 minutes to reach the start of the Na Pali Coast, and that first stretch gave everyone time to settle in and see how their stomachs handled the motion. The seas were about 4 to 5 feet.

10 a.m. Spinner Dolphins

A pod of Hawaiian spinner dolphins.
A pod of spinner dolphins

About an hour in, the captain slowed the boat. A pod of Hawaiian spinner dolphins appeared. The captain explained that dolphins often sleep in sheltered coastal waters during the day, including mothers with calves.

Spinner dolphins can "sleep swim," resting one hemisphere of the brain at a time while the other stays active. It allows them to keep moving and breathing as they rest.

Watching spinner dolphins on a Na Pali Coast cruise.
Watching the dolphins

What we saw was only the tip of the iceberg. For every dolphin at the surface, the captain said there were likely a dozen more below us.

People quietly shifted around the boat for a better view. We hadn't even reached the Na Pali Coast yet, and I was in awe at the beautiful surroundings and our mammalian friends.

11 a.m. Reaching Ke'e Beach

By late morning, the cliffs of the Na Pali Coast rose straight up from the water in layered green ridges. From sea level, the walls look steeper. Waterfalls thread down rock faces and dump into the ocean.

Mid-morning view of the Na Pali Coast.
Mid-morning views

We made it all the way to Ke'e Beach at the northern end of the coast, about six miles west of Hanalei Bay. The captain said conditions are only calm enough for Capt Andy's boat tours to reach that far north once or twice a month.

Kel and Dave on the boat tour.
Kel and Dave

After turning around, we moved slightly offshore. The sails went up, the engine quieted, and the ride slowed. It felt calmer and more traditional with the wind in the sails.

11:30 a.m. Lunch Under Sail

Sailing aboard Capt Andy's Northern Star.
Sailing aboard Capt Andy's Northern Star

Lunch was served around 11:30 a.m. Earlier in the cruise, the crew asked everyone's preference between cheeseburgers and chicken sandwiches so they knew how much to prepare.

The proteins were grilled on the back of the catamaran. Once you picked up your preference at the back of the boat, you could add coleslaw and beans in the interior cabin.

Grilled chicken and burgers.
Grilled chicken and burgers

Afterward, a crew member came around with a basket of macadamia nut cookies for dessert. It was not gourmet, but it was tasty and well-timed.

Later that day, we traded the simple onboard lunch for one of the memorable meals that made it into my guide on where to eat in Kauai.

In addition to food, the bar was now open, with local beers, hard seltzers, wine, and non-alcoholic beverages available for purchase.

With the sails up and the coastline beside us, this was the most relaxed stretch of the cruise. The cliffs rolled by in folds of green and red rock. Sea caves opened briefly in shadow, then disappeared again.

Noon Return: Wind Shift and Rougher Seas

Four to five foot seas off the coast of Kauai.
Four to five-foot seas

By noon, the sails came down, and the engine resumed. The wind had shifted since morning, and the return leg felt bumpier. Ocean spray splashed across the deck more often. The music picked up again for the final stretch, drifting into familiar top-40 hits.

Around 12:45 p.m., the ride grew particularly choppy, with more splashing and bracing. It was the most physically engaging part of the cruise. Even on a larger catamaran with calm seas, it can still get wet and wild.

Some passengers chose to revel in the saltwater by sitting at the bow (the front of the boat), where they were more likely to get splashed. A couple of guys were totally soaked, but I was grateful to have remained dry.

We returned to Port Allen around 1:15 p.m. Kel and I had seen the Na Pali Coast from above the day before, and now we had experienced it from below as well.

Many tours end in the early afternoon, so it's a great time to explore nearby cafés. Here are some of the best coffee shops on Kauai worth checking out.

The Reality: Noise, Motion, and Seasickness

It's easy to romanticize a Na Pali Coast cruise as nothing but wind in the sails and dramatic scenery. Parts of our morning felt exactly like that. But even on a 65-foot catamaran, you're still on open ocean.

The ride out was smooth, and sailing near Ke'e Beach felt calm. By midday, the wind turned. The return was choppier as the boat worked against the swells.

There's also engine noise to consider. At slower speeds, it hovered around 85 decibels; at faster speeds, with music layered on top, it was closer to 90. It was not overwhelming, but it was loud.

Physically, I felt fine the whole cruise, but a few passengers were visibly seasick. The boat was stable overall, yet this is the Pacific, not a lake.

If you're prone to motion sickness, take precautions before embarking and choose your seat carefully. Morning departures often bring calmer conditions, but nothing is guaranteed.

For me, the movement didn't detract from the experience. The Na Pali Coast is dramatic because the environment is raw. Wind, swell, and current are part of what make the tour exciting.

Helicopter vs. Boat: Two Perspectives

Having seen the Na Pali Coast from both the air and the sea, I wouldn't say one replaces the other. They offer different vantage points.

From a helicopter, the coastline feels cinematic. You see the full sweep at once - knife-edged ridges, hidden waterfalls, and valleys that look unreachable.

From a boat, the experience turns physical. The cliffs feel taller because you're looking up at them. Sea caves open at eye level. You hear waves hitting rock and feel the wind shift across the deck. Plus, the crew feeds you!

Wildlife encounters are another plus. Dolphins and seabirds are part of the experience in a way they aren't from 1,000 feet up.

If you're deciding how this fits into your Kauai itinerary, it comes down to preference.

  • Want maximum perspective and drama? Fly.
  • Want immersion and movement? Go by boat.

The helicopter revealed the architecture of the Na Pali Coast. The boat let us move through it. I was glad we could afford to do both on our vacation.

Who This Tour Is For

A boat tour along the Na Pali Coast of Kauai.
Cliffs tower over a catamaran

Not all Na Pali Coast boat tours are the same, and that's the point. Capt Andy's 4.5-hour Star Scenic Sail is built for a specific type of traveler.

This tour makes sense if you:

  • Want sightseeing without a snorkeling stop.
  • Prefer a larger, more stable catamaran over a high-speed raft.
  • Appreciate a heartier hot meal included.
  • Value wildlife sightings.
  • Prefer a morning departure to a sunset party vibe.

It's relaxed, but you're still on the open ocean. The experience requires awareness and alertness to ensure safety.

It may not be ideal if you:

  • Are highly prone to seasickness (several passengers were uncomfortable, even in fairly calm conditions).
  • Expect a quiet, engine-free sail the entire time.
  • Want to enter sea caves.
  • Prefer an itinerary with the opportunity to go snorkeling.

For us, the Star Scenic Sail catamaran cruise struck the right balance. We'd already experienced the adrenaline of a helicopter flight. This was about seeing the Na Pali Coast from the water in a more relaxed way.

If that's what you're after, a scenic morning sail is a solid choice. If you're chasing speed and sea caves, look at a raft tour instead.

« Previous Page
Next Page »
Dave at Ahu Ko Te Riku on Rapa Nui (Easter Island), Chile.

Hi, I'm Dave

Editor in Chief

I've been writing about adventure travel on Go Backpacking since 2007. I've visited 68 countries.

Read more about Dave.

Footer

back to top

About

  • About
  • Archive
  • Privacy Policy
  • Cookie Policy

Follow Us

Contact

  • Contact
  • Work With Us
  • Submissions

Copyright © 2026 Go Backpacking