Go Backpacking

  • About
  • Travel Tips
    • Accommodations
    • Budgeting & Money
    • Adventure Travel
    • Food & Drink
    • Gear & Gadgets
    • Packing Tips
    • Travel Blogging
    • Travel Insurance
    • Trip Planning
    • UNESCO Sites
  • Destinations
    • Africa
      • Botswana
      • Egypt
      • Ethiopia
      • Morocco
      • Rwanda
      • South Africa
      • Tanzania
    • Asia
      • Cambodia
      • China
      • Hong Kong
      • India
      • Indonesia
      • Japan
      • Laos
      • Malaysia
      • Nepal
      • Philippines
      • Thailand
      • United Arab Emirates
      • Vietnam
    • Europe
      • England
      • France
      • Germany
      • Greece
      • Iceland
      • Ireland
      • Italy
      • Portugal
      • Spain
      • Switzerland
      • Turkey
    • North America
      • Canada
      • Costa Rica
      • Cuba
      • Guatemala
      • Mexico
      • Nicaragua
      • Panama
      • United States
    • Oceania
      • Australia
      • French Polynesia
      • New Zealand
    • South America
      • Argentina
      • Bolivia
      • Brazil
      • Chile
      • Colombia
      • Ecuador
      • Peru
  • Advertise
menu icon
go to homepage
  • About
  • Travel Tips
    • Accommodations
    • Budgeting & Money
    • Adventure Travel
    • Food & Drink
    • Gear & Gadgets
    • Packing Tips
    • Travel Blogging
    • Travel Insurance
    • Trip Planning
    • UNESCO Sites
  • Destinations
    • Africa
      • Botswana
      • Egypt
      • Ethiopia
      • Morocco
      • Rwanda
      • South Africa
      • Tanzania
    • Asia
      • Cambodia
      • China
      • Hong Kong
      • India
      • Indonesia
      • Japan
      • Laos
      • Malaysia
      • Nepal
      • Philippines
      • Thailand
      • United Arab Emirates
      • Vietnam
    • Europe
      • England
      • France
      • Germany
      • Greece
      • Iceland
      • Ireland
      • Italy
      • Portugal
      • Spain
      • Switzerland
      • Turkey
    • North America
      • Canada
      • Costa Rica
      • Cuba
      • Guatemala
      • Mexico
      • Nicaragua
      • Panama
      • United States
    • Oceania
      • Australia
      • French Polynesia
      • New Zealand
    • South America
      • Argentina
      • Bolivia
      • Brazil
      • Chile
      • Colombia
      • Ecuador
      • Peru
  • Advertise
search icon
Homepage link
  • About
  • Travel Tips
    • Accommodations
    • Budgeting & Money
    • Adventure Travel
    • Food & Drink
    • Gear & Gadgets
    • Packing Tips
    • Travel Blogging
    • Travel Insurance
    • Trip Planning
    • UNESCO Sites
  • Destinations
    • Africa
      • Botswana
      • Egypt
      • Ethiopia
      • Morocco
      • Rwanda
      • South Africa
      • Tanzania
    • Asia
      • Cambodia
      • China
      • Hong Kong
      • India
      • Indonesia
      • Japan
      • Laos
      • Malaysia
      • Nepal
      • Philippines
      • Thailand
      • United Arab Emirates
      • Vietnam
    • Europe
      • England
      • France
      • Germany
      • Greece
      • Iceland
      • Ireland
      • Italy
      • Portugal
      • Spain
      • Switzerland
      • Turkey
    • North America
      • Canada
      • Costa Rica
      • Cuba
      • Guatemala
      • Mexico
      • Nicaragua
      • Panama
      • United States
    • Oceania
      • Australia
      • French Polynesia
      • New Zealand
    • South America
      • Argentina
      • Bolivia
      • Brazil
      • Chile
      • Colombia
      • Ecuador
      • Peru
  • Advertise
×
Home

Applying for an ESL Job in China: What to Look for in a Contract

Child

Are you thinking about applying for an ESL job in China? Already got an offer for a teaching contract?

Don't forget to check the details.

While it's undoubtedly an exciting time to be teaching overseas, it pays to check out all the aspects before heading to the airport.

You should read your contract carefully before accepting it.

An ESL contract is much like any other legal contract that you'll need to take seriously.

It's signed by you and your employer and binds you to what's written.

In essence, it's your responsibility to enter a contract that meets your expectations.

If this is your first time teaching abroad, you may not know what to be looking for, so we've provided a set of critical criteria you should be on the lookout for before you accept any ESL teaching position in China.

Similarly, should you decide to enlist in some help, popular services such as Career China will guarantee placement in reputable schools and help guide you through your contract and expectations to help reduce your risk of entering a bad agreement.

Working Hours

The contract should specify the hours you need to work in both classroom and non-classroom settings.

Non-classroom hours include the hours you'll be spending on testing or evaluating students, grading homework, or creating new lesson plans.

Make sure that the exact numbers are written on the contract; if there isn't one, confirm the details with the company before signing the contract.

You may be wondering what the minimum classroom hours should be in ESL teaching.

The standard is around 15 to 20 hours of classroom time and not more than 5 hours for non-classroom time.

Any more than that and you should be paid for the extra hours appropriately.

Moreover, English training institutions should not ask you for more than 25 hours for classroom and 5 hours for non-classroom weekly.

If there's a need for extra hours, then you need to make sure that you are getting a higher rate for them.

Chinese cash

Salary

Your salary should always be enough to meet your personal needs.

It should also be competitive and in line with the current value of ESL teacher salaries on the market.

Asking a local expert or checking online job listings should give you an idea of how much you should be getting for teaching English in China.

You'll also have to consider the region - teaching in Tier 1 cities like Shenzhen, Beijing, Shanghai, and Guangzhou should fetch you a higher salary as compared to the smaller cities because these cities have a higher demand for teachers and have a higher cost of living.

Salaries in public schools can fall in the range of 10,000 RMB up to 15,000 RMB while teaching in private or international schools could get you 16,000 to 24,000 RMB.

Treat this figure as a baseline - if you have more experience and training, then you can and should negotiate for higher pay.

Duration of Contract

Your ESL contract should state the start date and ending date as a teacher.

Standard lengths are ten months for public schools and 12 months for private schools.

When the contract ends, the residency and housing permit usually end as well.

During this time, it will be best to think about whether you wish to continue teaching ESL in China or leaving the country before your residency expires.

Medical Insurance

Your ESL contract should include the terms of your medical expenses.

Most public schools in China offer basic medical insurance for their teachers, i.e., reimbursement for basic hospital fees, etc.

Basic medical insurance changes if a private school decides to hire you. Some companies state a specific amount to pay for medical expenses.

Make sure to check this carefully, as it's a significant factor that shouldn't be taken lightly.

Airfare Reimbursement

Employers may or may not have airfare reimbursement as part of the contract. Travel costs include the airfare ticket from your country to China.

You can check and see if the costs of a travel ticket from China back to your country are included as well.

Generally, this is a set amount that you will be reimbursed regardless of where you are flying or how much it ends up costing you.

Passport

Visa and Permits

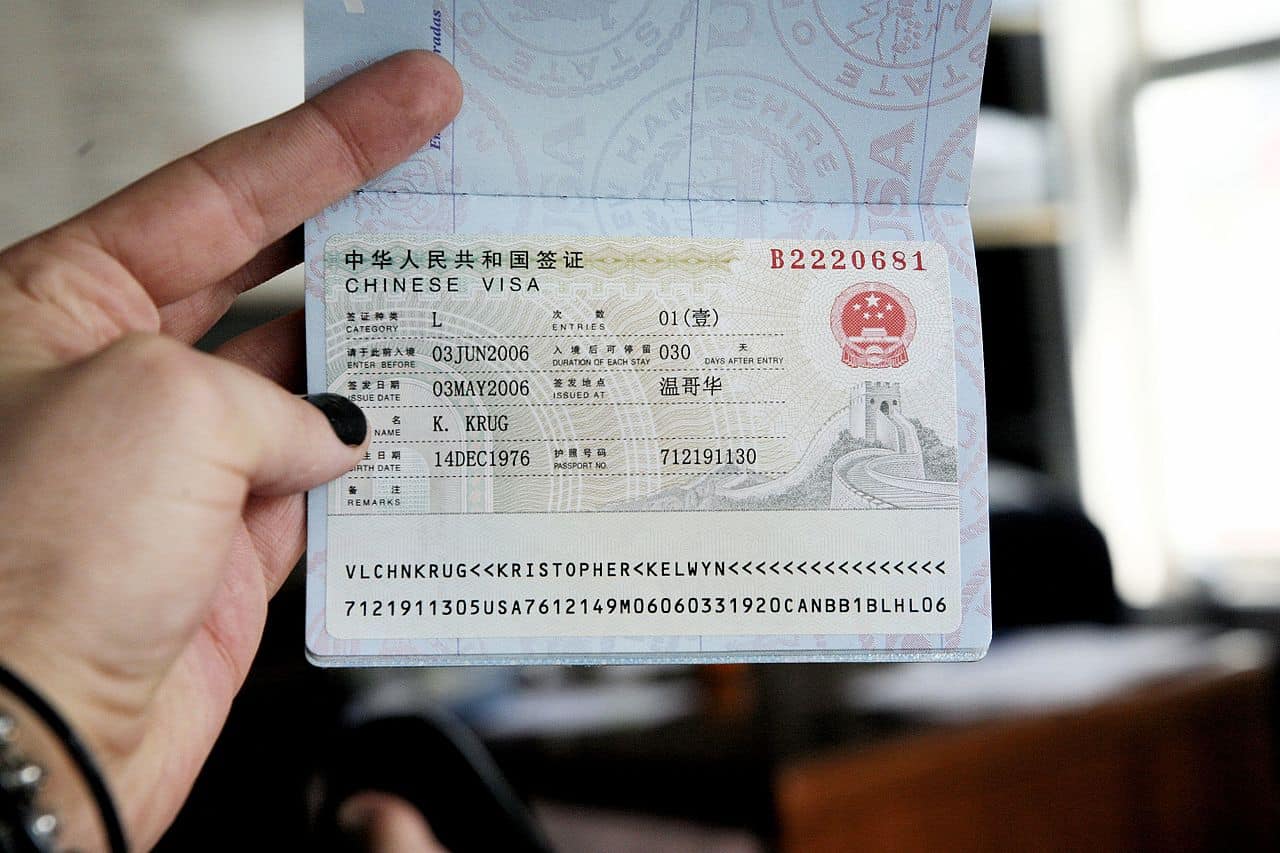
Spend some time going over the contract and check the part where visas and permits are stated.

As a standard, your employer should give you a valid work visa for the duration of your time teaching.

If the contract does not state that you will receive a working Z Visa, then you need to confirm with the school whether they will offer this visa.

If they intend to, then you must get this written in the contract.

If they do not give a working Z Visa, it is in your best interest to move on to an employer that will offer you working status.

Often, employers in China will try to get out of sponsoring your working Z Visa because it is both costly as well as requires lots of paperwork on their end.

What this means for you, if you are not provided a working Z Visa, is that you will be working illegally under a tourist visa.

You can face being sent home if you are caught working on a tourist visa and will need to "exit" the country every 90 days to reset your tourist visa.

If you are not living in a border city such as Guangdong or Shenzhen, this equates to a massive headache for you as the teacher and can be avoided simply if you confirm the Z working visa beforehand.

Holidays and Time Off

As a rule, public schools offer more holidays as compared to private schools.

The trade-off is that you're more likely to be paid less if employed as an ESL teacher in a public school.

Take a look and see if you'll be paid for time off as many Chinese holidays are quite lengthy (some up to 4-5 weeks during the Chinese New Year), especially if you're a public school teacher.

Some may pay you in full during these holidays, others at half a rate, while some won't pay at all.

The bottom line is that you should exercise due diligence and check out all these things before finally agreeing to the ESL contract's terms and conditions.

Being prepared and knowing what to expect is part of the ESL teaching experience!

______

This story was provided by and published in partnership with Career China. 

5 Reasons to Visit Japan's Chubu Region

Japan's Chubu Region
Japan's Chubu Region is full of wonder

It sounds strange, but the most exciting part of my plane ride over to Japan in November was that I didn't know much about the area where I was headed.

Isn't it refreshing to occasionally head to destinations where we don't have a roadmap of how exactly it will be?

Don't you love that feeling when you mention to a friend where you're headed, and all they can respond with is a furrowed brow which suggests that they've never heard of it?

It's entirely possible you've just answered no to both of the above questions, but that's beside the point.

The point I'm trying to make is this - When I got to the Chubu Region in Japan, I was totally blown away by what I encountered. It wasn't just the Izakaya culture either, I promise.

I found a cacophony of reasons that I was happy to be in the Chubu Region (colloquially called Shoryudo), and I thought I ought to share them.

Just as aside, when I'm referring to the Chubu Region, I'm roughly referring to the central area that's sandwiched between East and West Japan and includes highlights like Mt. Fuji, the Olympic city of Nagano, as well as modern and fast-paced Nagoya!

Chubu Region
You'll find views in the Chubu Region that you simply won't find anywhere else.

5 Reasons to Visit Japan's Chubu Region

1. Nature

The nature that I was to experience in Japan's Chubu Region was something to behold.

You've got the majesty of the coastline down in Toba where hot spring culture is in full bloom, and that's juxtaposed with the autumn leaves (also in full bloom, I might add) in nearby Asuke.

What struck me was the attitude towards preservation there. The streets were clean, the forests were well taken care of, and the beaches were all neat and tidy.

I'm far from a biologist, but I'll at least say that it was refreshing to see a region that was conscious of their environmental footprint or, at the very least, interested in preserving their natural surroundings.

Everywhere I went I got the sense that the Japanese people understood what they had with the Chubu Region in terms of nature, but it had been entirely overlooked by those of us abroad.

Hiking, long walks through the forest, pilgrimages, mountain climbing, scuba diving - you name it, they've got it.

Nature in the Chubu Region
Some of the colors were so deep and vibrant; they hardly seemed real.

2. It's Not Overrun by Tourists

It's simple, the fewer people have heard about a region, the fewer tourists are going to be there.

However, my feeling is that international tourists are going to learn that Japan is more than just Tokyo and Kyoto soon.

I distinctly recall being at the Toyokawa Inari Shrine, and the experience was just so much richer since I didn't have to wade through a pool of tourists.

There were a fair amount of people paying their respects, but I certainly didn't see a tour bus of international tourists pull up. In a sense, that made things a lot more special.

I'm not suggesting that you should drop everything and head to the Chubu Region, which would ironically fill it with international tourists (the very thing I'm saying makes the region special), but I am saying that it should at the very least be on your radar.

3. The Food

It takes a big person to admit their bias, so let me just go ahead and admit that Japanese food is my favorite food on the planet.

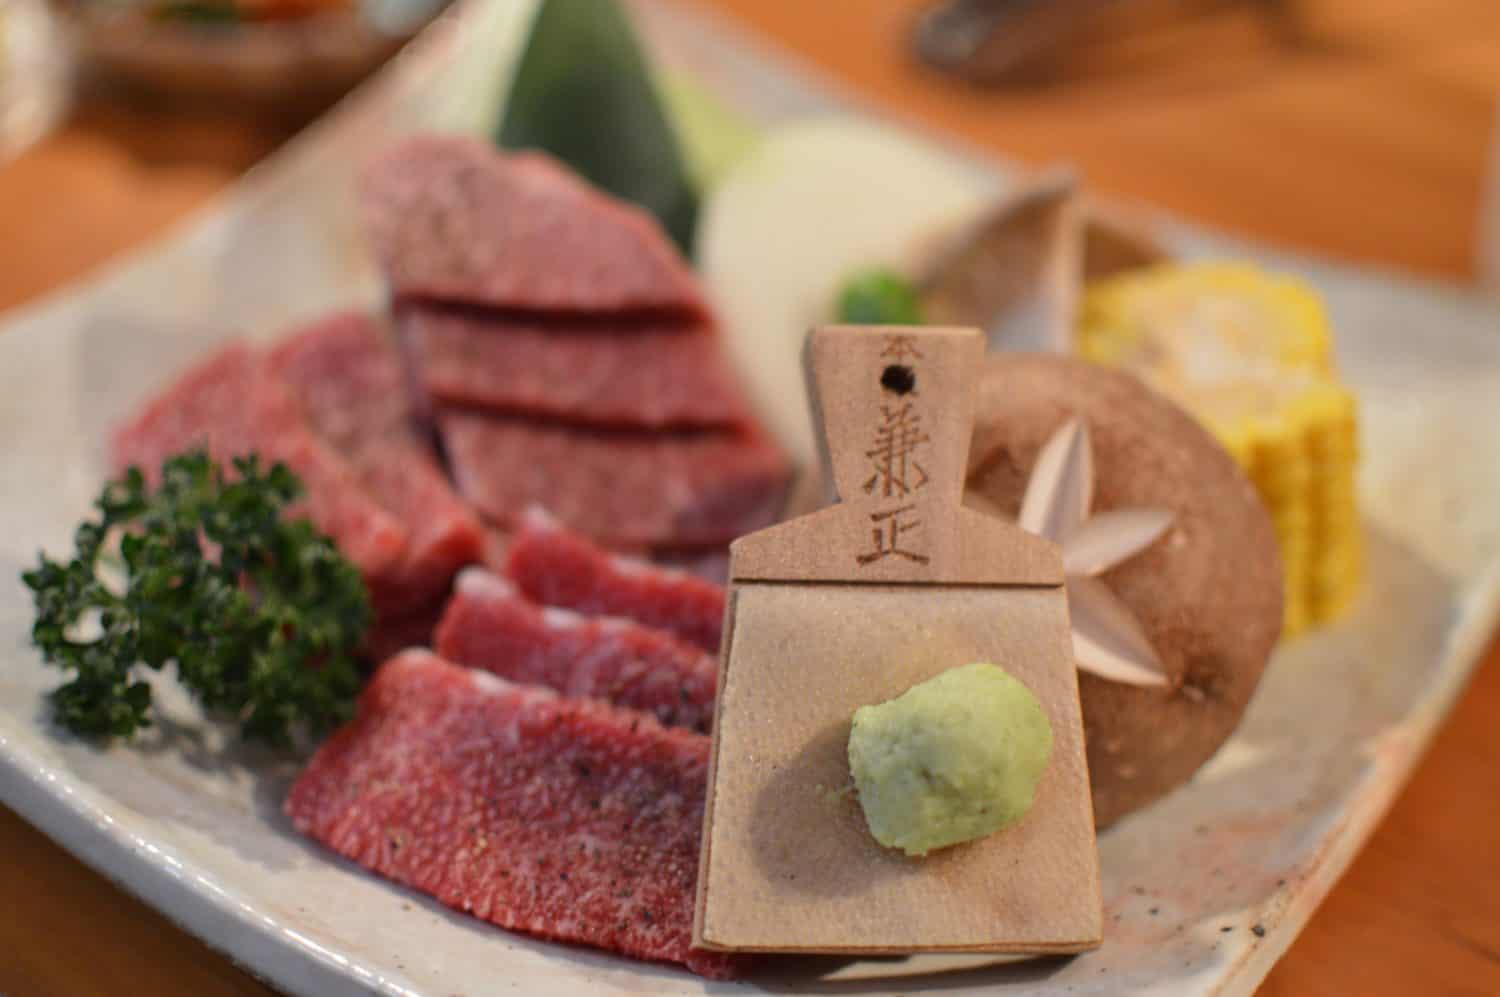
That being said, there was something special about the food in this region. They had a range of Japanese delicacies that had tickled my fancy before, but it was the seafood that blew my mind.

There was one meal in particular where I literally ate five different crab dishes, and that was the meal. How great is that?

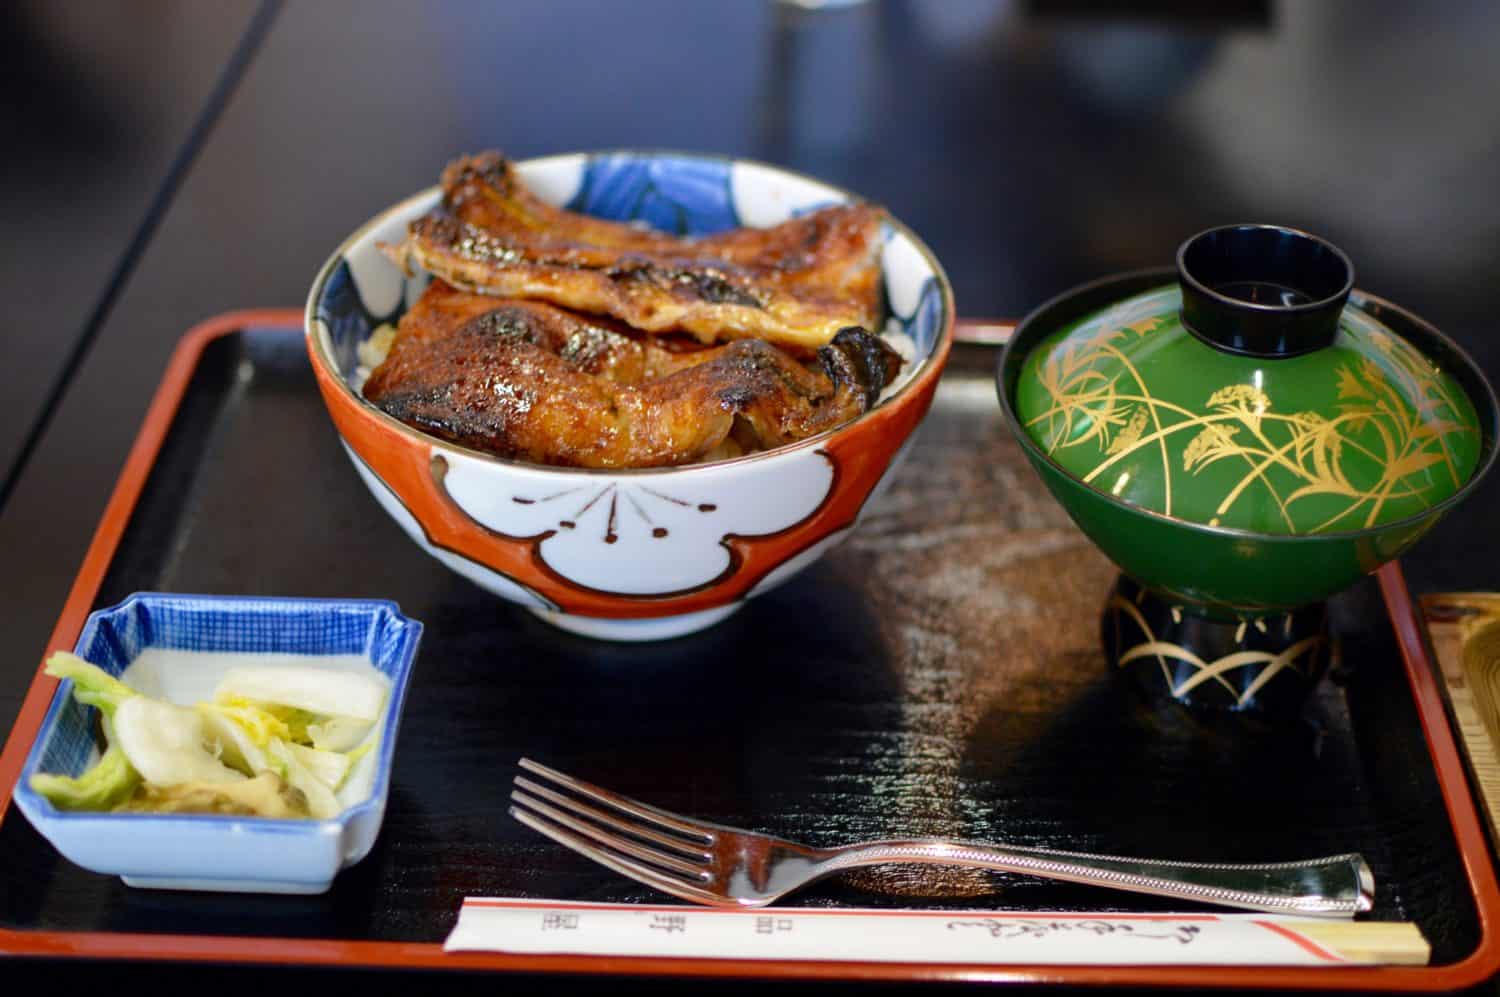
I also had eel on rice which baffled my senses, and fresh oysters grilled over an open fire.

I had more fish than one should reasonably consume in a week, though being reasonable was never my strong suit.

The real beauty is that eating in Japan really doesn't have to be that expensive to be delicious.

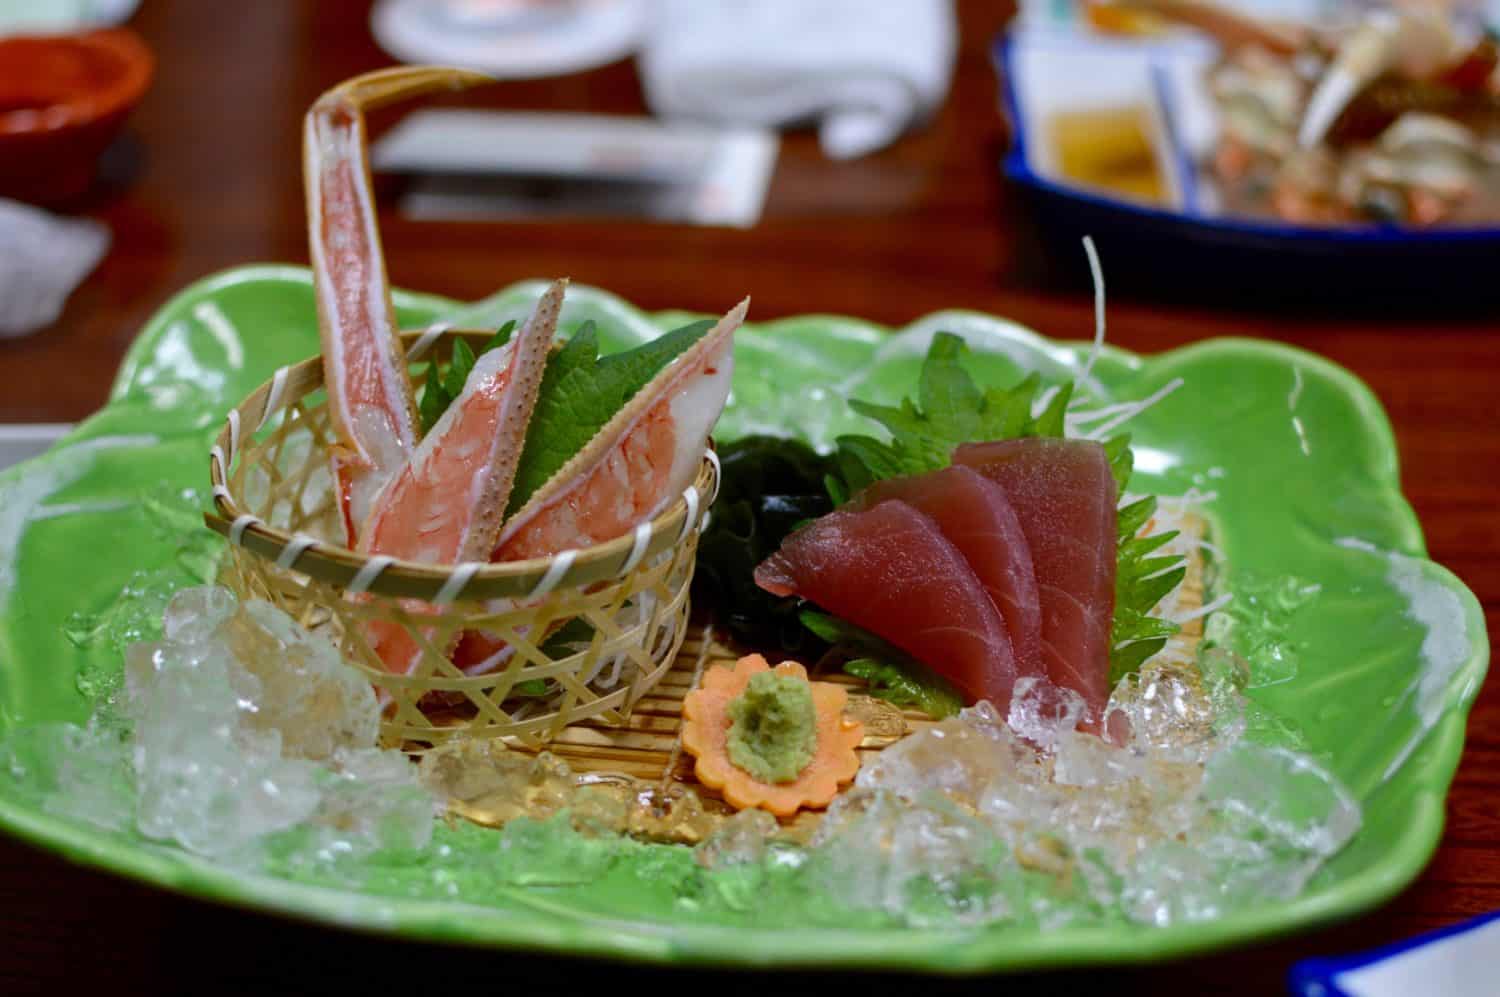
Japanese food
What I wouldn't do to be able to go back in time and eat this crab and tuna sashimi from the Chubu Region once more...

4. The Craftsmanship

I often compare my dexterity to that of a kindergartener, and as such, I was certifiably impressed with the level of care and coordination I saw in the making of some astonishing handmade products.

There was a Japanese papermaking and dying factory I visited in Mie Prefecture that prepared handmade paper with astonishing detail and design. And, in many ways, that was just the tip of the iceberg.

The place where I went from being impressed to being in awe was the handmade candle shop on a small side street of an even smaller town in Aichi Prefecture.

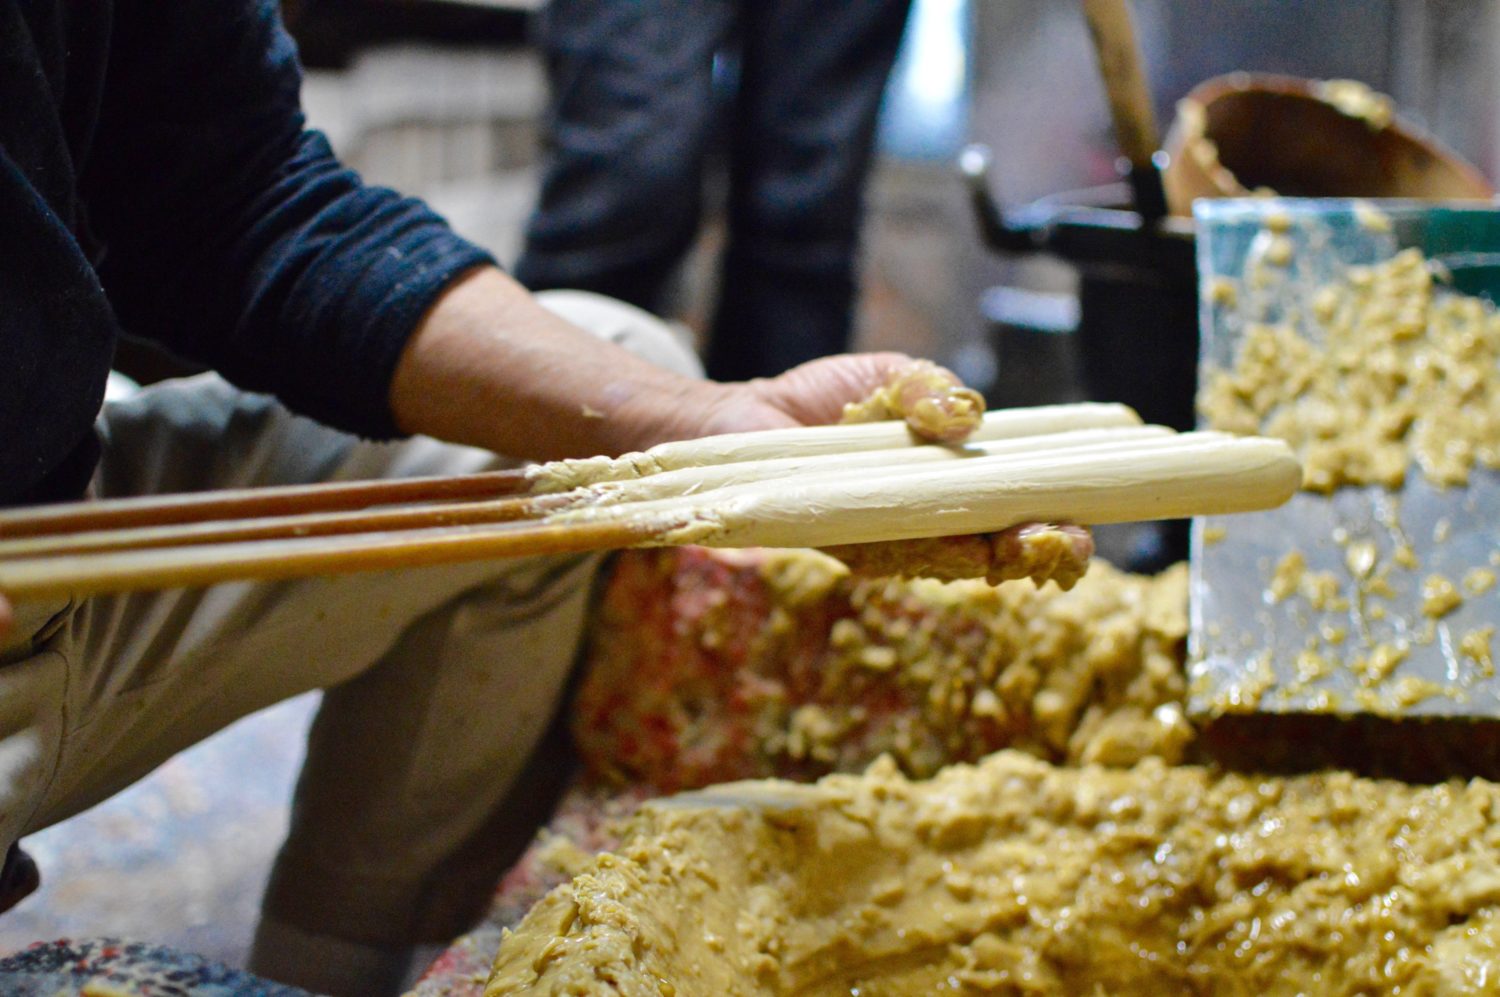
He sat there all day, in front of boiling vats, creating sheer beauty.

Candle maker in Japan
The candle maker quietly goes about his craft in the Chubu Region of Japan

5. The Vibe

When you visit the most populous or famous cities in a nation, I've found that those places can sometimes emanate a self-important sort of vibe. Now, sometimes, it's well deserved - New York is important, London is important, and so on and so forth.

However, in light of that, I often like to check out cities that are outside of that spectrum. With Nagoya, you've got exactly that.

It's the fourth largest city in the country, and it's growing rapidly, both culturally and from a population perspective.

I met people who wanted to show me the time of my life, just because I came to check it out. I'm not sure you'd find that in Tokyo.

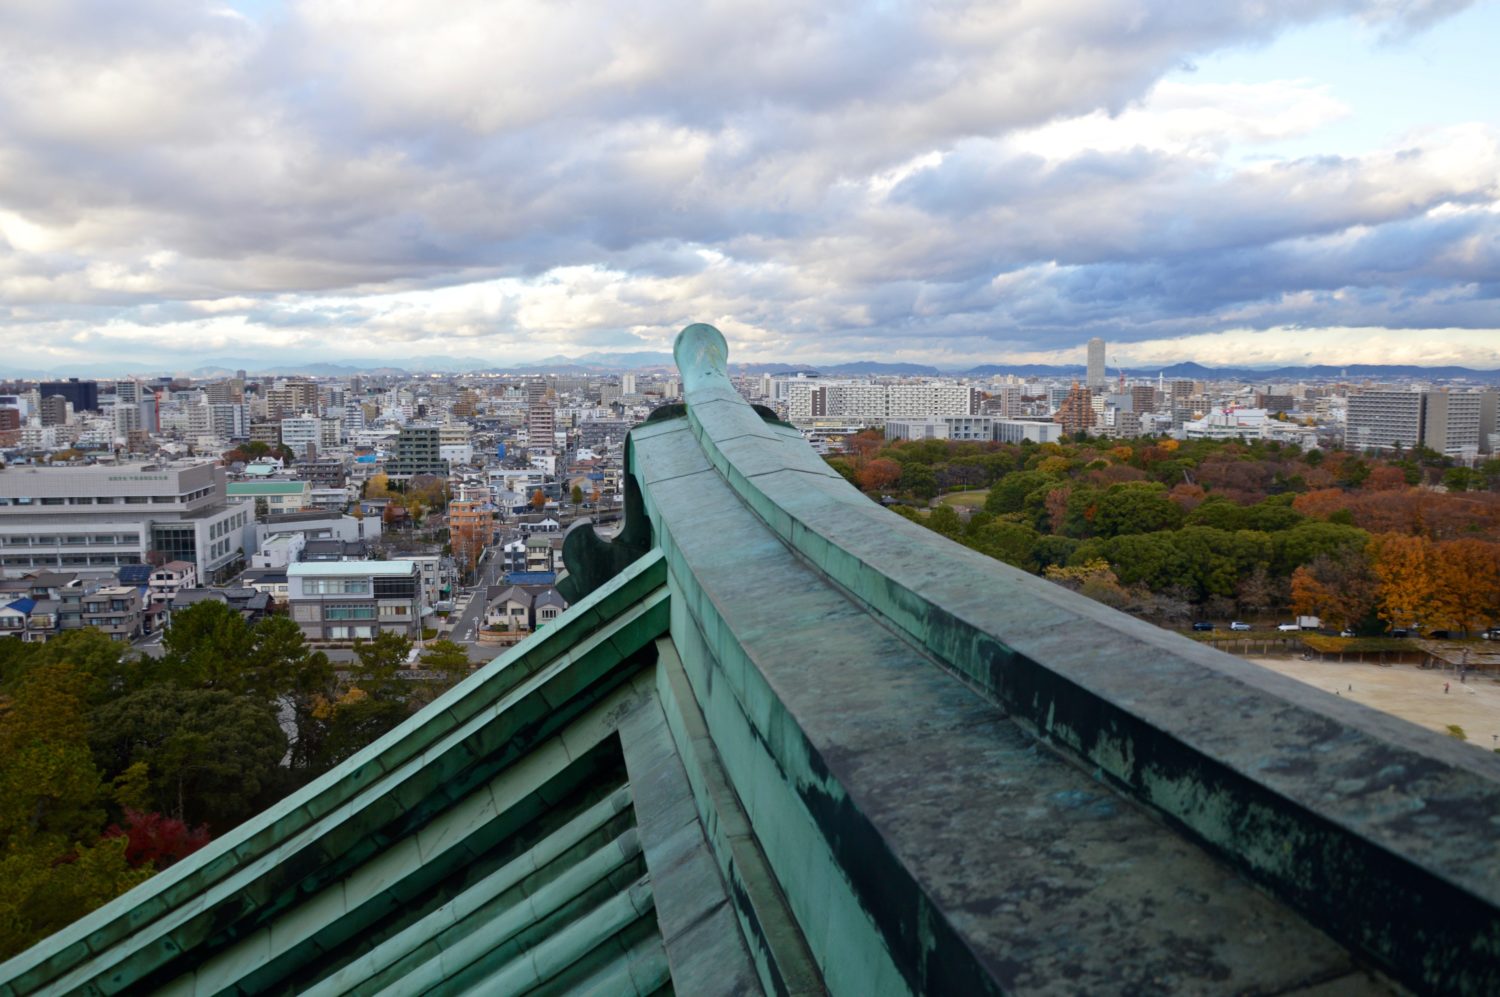
Skyline of Nagoya
The skyline of Nagoya is one of the finest in the Chubu Region of Japan, in my humble opinion.

The moral of the story is that the places that are most popular are not necessarily the most worth going to.

There's no question that Toyko, Kyoto, and other popular cities are regions are well worth the money to visit, but don't forget about the Chubu Region along the way.

There's plenty to see, and plenty of paths that aren't over-trodden, yet are ready for your arrival.


My trip was hosted in partnership with Go Backpacking and the local government of Japan. All opinions are my own. 

7 Reasons To Choose Mexico for Adventure Travel

In early December, I visited ATMEX, Mexico's Adventure Travel conference.

Representatives included Mexican state tourism boards, adventure tour operators, travel agents, sustainability experts, and so much more.

Everyone shared in common, though, excitement and passion for travel in Mexico.

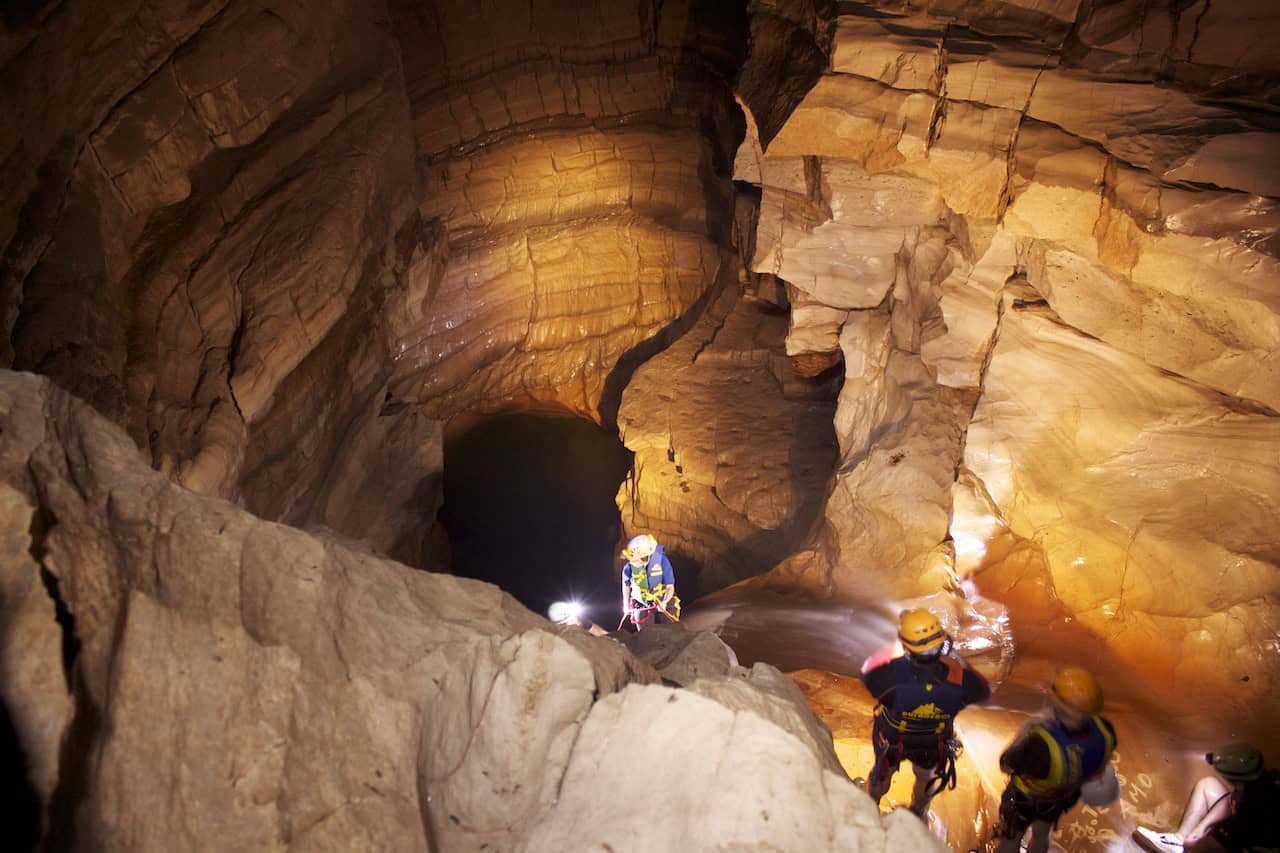
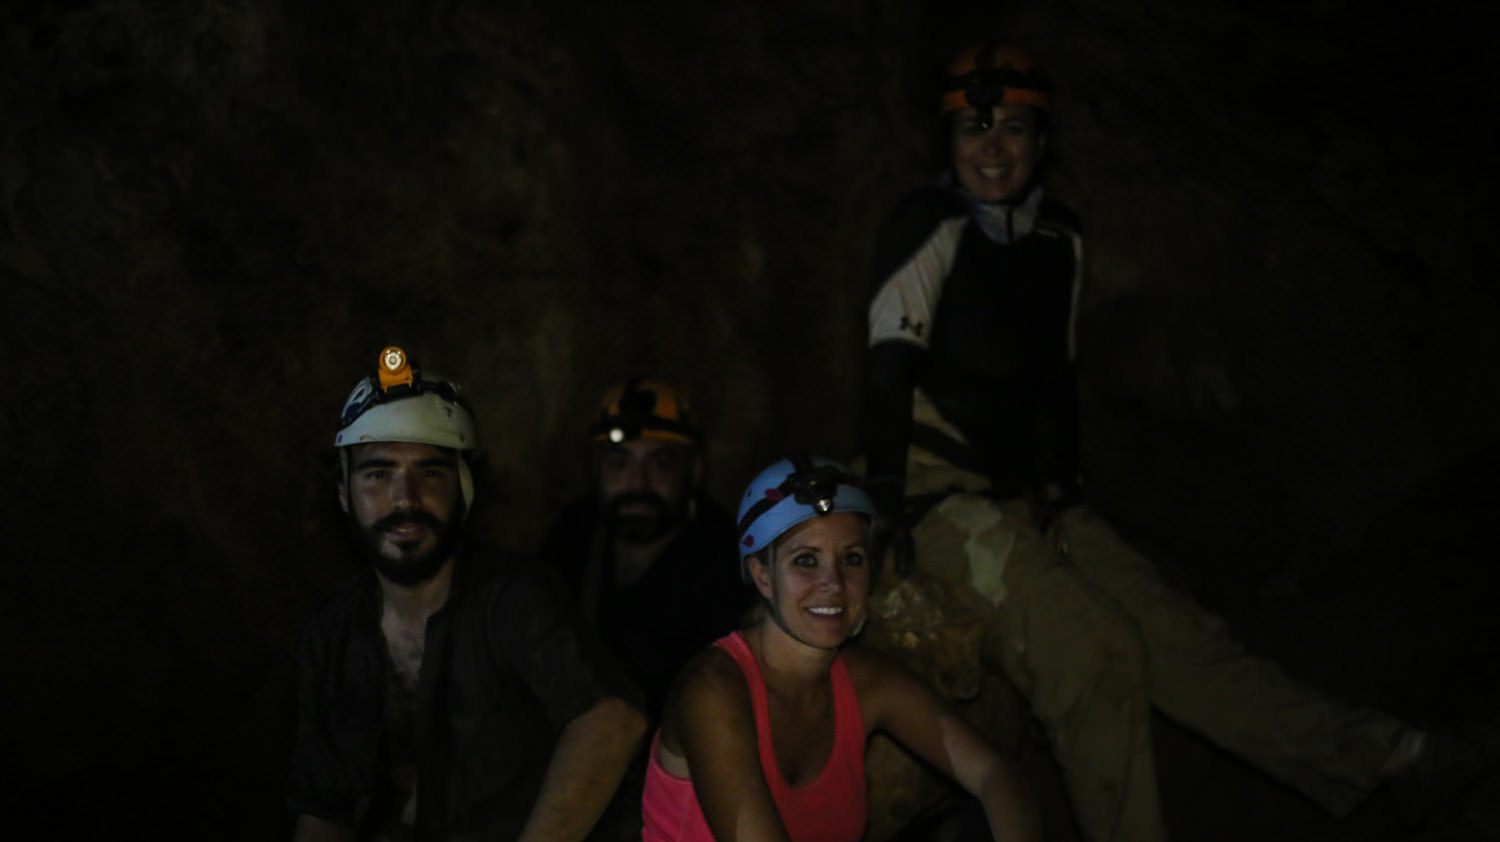
Cave rappelling
Ready for a caving and rappelling adventure in the state of Tabasco

The days preceding the conference were my first experiences with adventure travel in Mexico (though I'm pretty familiar with culinary, cultural, and beach travel within the country), and I couldn't have been more impressed.

Why was I so impressed with adventure travel in Mexico? Why should you choose Mexico as your next adventure destination?

There are a million reasons, but I've narrowed them down for you.

Adventure Travel in Mexico

1. World-class Adventure

Whether you want to go white-water rafting, caving, bouldering, rock climbing, rappelling, surfing, flying, or almost anything else, Mexico's got it.

Because Mexico has such a diverse landscape and environment - including deserts, oceans, lakes, cenotes, caves, karsts, jungles, forests, and so much more -- you can find pretty much any adventure activity within this one single country.

Caving in Chiapas is an example of adventure travel in Mexico
Caving with Petra Vertical

2. Affordable Prices

I'll admit it: adventure hotspots in the Americas are pricey. For many travelers, adventure activities are prohibitively expensive.

BoThenited States and Costa Rica (two of the most popular adventure destinations) tend to have budget-busting prices, limiting many travelers' abilities to participate in all the incredible adventures they'd love to try.

In Mexico, your ability to do adrenaline activities is determined only by the extent of your thirst for adventure, not your wallet.

For example, in Tuxtla Gutierrez, for less than $100, you can get a full day of caving with the top experts in the industry, a whole day of mountain biking through indigenous towns (stopping to experience the culture, of course), or a full day of rappelling into the Sinkhole of Parrots and exploring sinkhole-perimeter trails: all including American-standard safety equipment and training, transportation to and from your hotel, lunch, and English-speaking expert guides.

Related: Why Mexico is the Ultimate Backpacking Destination

Enjoying a quick coffee between landing at Tuxtla Gutierrez Airport and arriving at Tzimbac Adventure Parkoffee in Chiapas, Mexico
Enjoying a coffee between landing at Tuxtla Gutierrez Airport and arriving at Tzimbac Adventure Park

3. Convenient Logistics

Transportation doesn't seem like a big deal in choosing an adventure destination until you've come off a thrice-delayed flight with two connections and now need to take a chicken bus.

Trust me, convenience is critical when reaching your destination, being ready to take on an adventure, and making the most of potentially short vacation time.

To get to two of the biggest adventure hubs in Mexico (Tuxtla Gutierrez or Villahermosa), you likely need two flights: an international flight into Mexico City and then a domestic flight to your destination.

From the airport, you can take an Uber or registered taxi to your hotel or hostel or arrange a pick-up with your accommodation.

From there, have a meal or coffee, maybe a shower or quick nap, and then get started exploring!

There's not much jet lag to get over (if any), no long bus rides, no shuttles, and no complicated connections. Does it get easier than that?

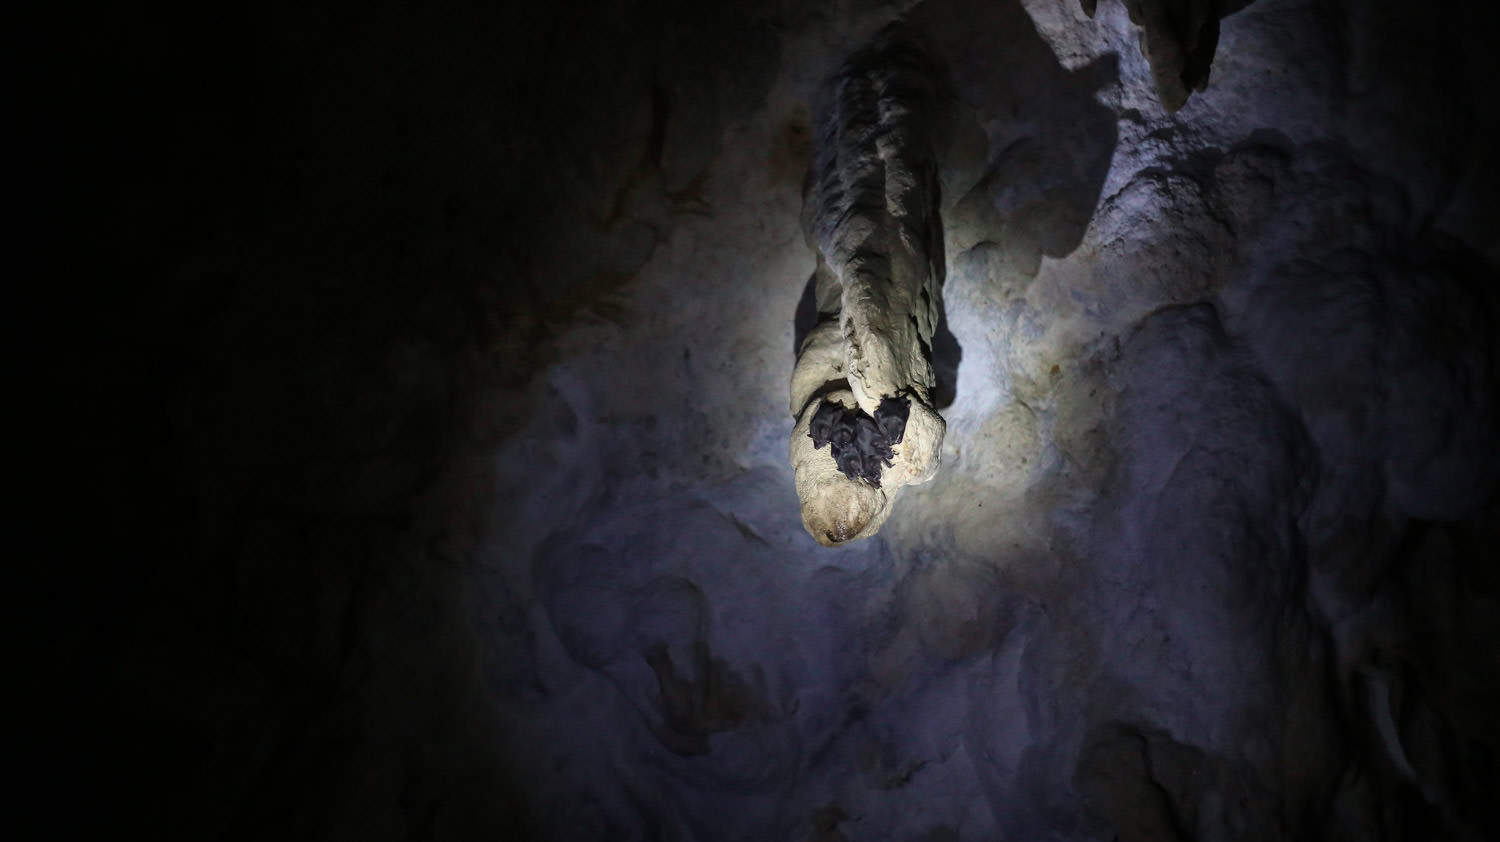
Bats in Kolem Chen Cave, another opportunity for adventure travel in Mexico
Bats clustered on the Kolem Chen cave ceiling

4. Ecotourism Opportunities

If you want to experience adventure without nature, you might as well go to a rock-climbing gym.

Mexico takes ecotourism adventures to the next level with some of the world's most biologically diverse ecological communities.

You've got an aptly named Parrot Sinkhole in Chiapas, an otherworldly firefly gathering in Tlaxcala, baby turtles on the beaches, the Monarch butterfly migration to Michoacan, all kinds of whales of the coast of Baja, the MesoAmerican reef (the second largest barrier reef in the world) off the Caribbean coast, bats in so many caves around the country, and endless other incredible animal and nature-encounter opportunities.

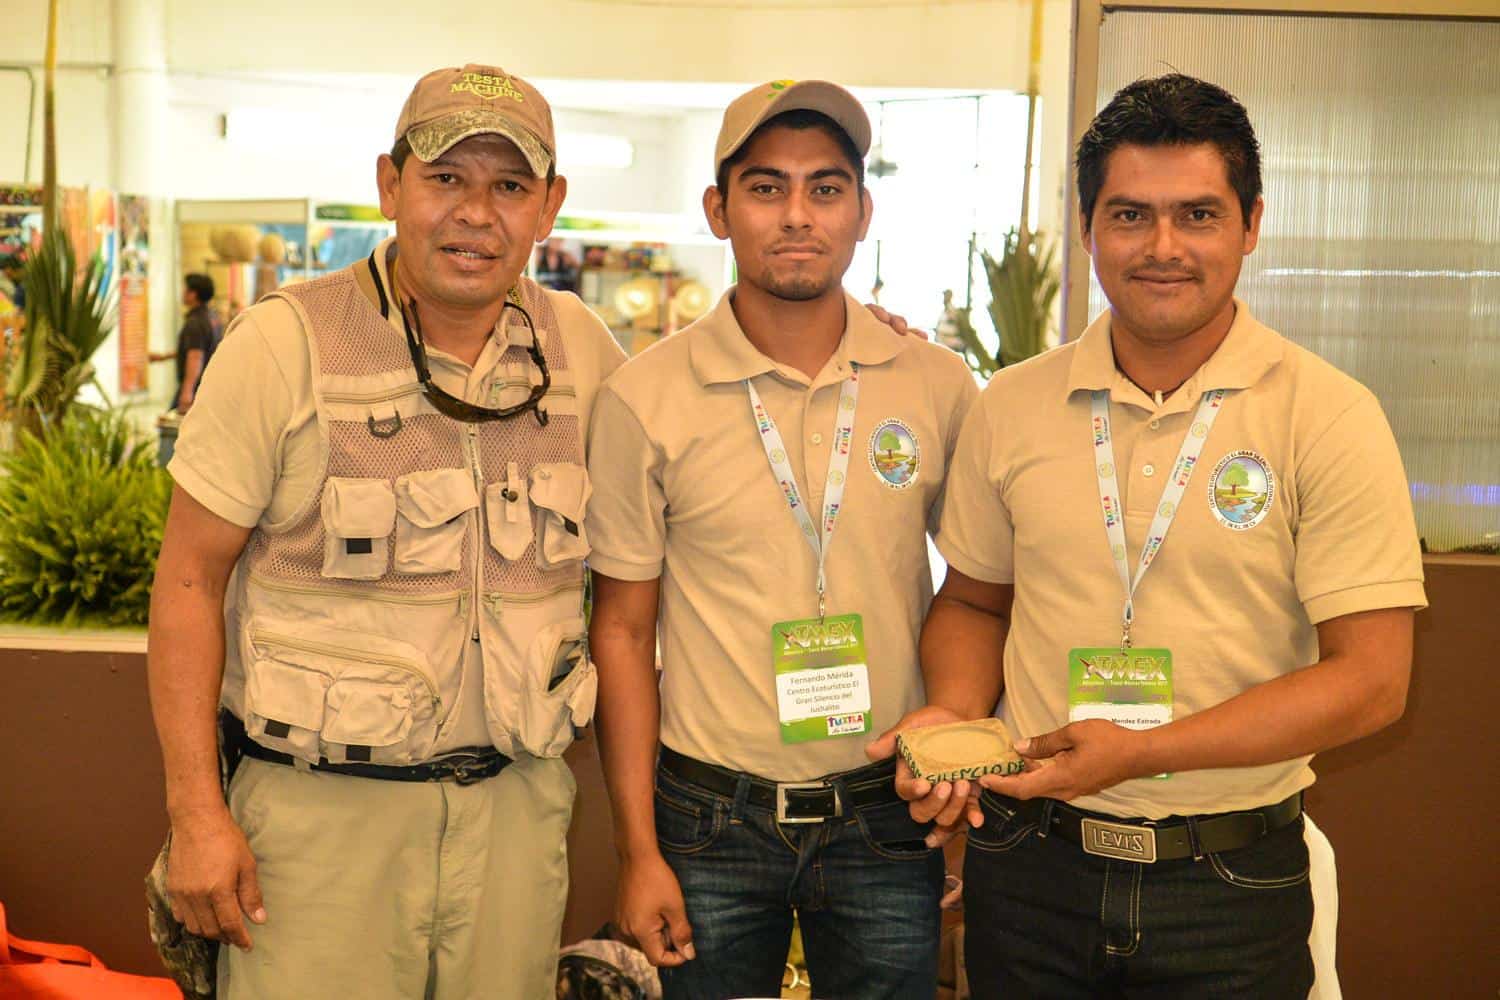
Representatives from a new Ecotourism Center under construction: El Gran Silencio del Jushalito

5. Sustainability Focus

Mexican adventure tour companies are increasingly aware of environmental impact and are involved in sustainable endeavors.

Exxi organizes trash collection on its routes to preserve the natural beauty and integrity of the trails and is committed to recycling.

RED Travel Mexico supports a nonprofit providing sustainable employment opportunities while protecting species and habitats in priority conservation areas.

Even ATMEX itself is carbon neutral, including a marked emphasis on fewer printed documents.

Many smaller communities traditionally left off the tourism trail realize the importance of and potential opportunities presented by ecotourism.

This is prompting them to better care for the environment and establish ecotourism centers and lodges.

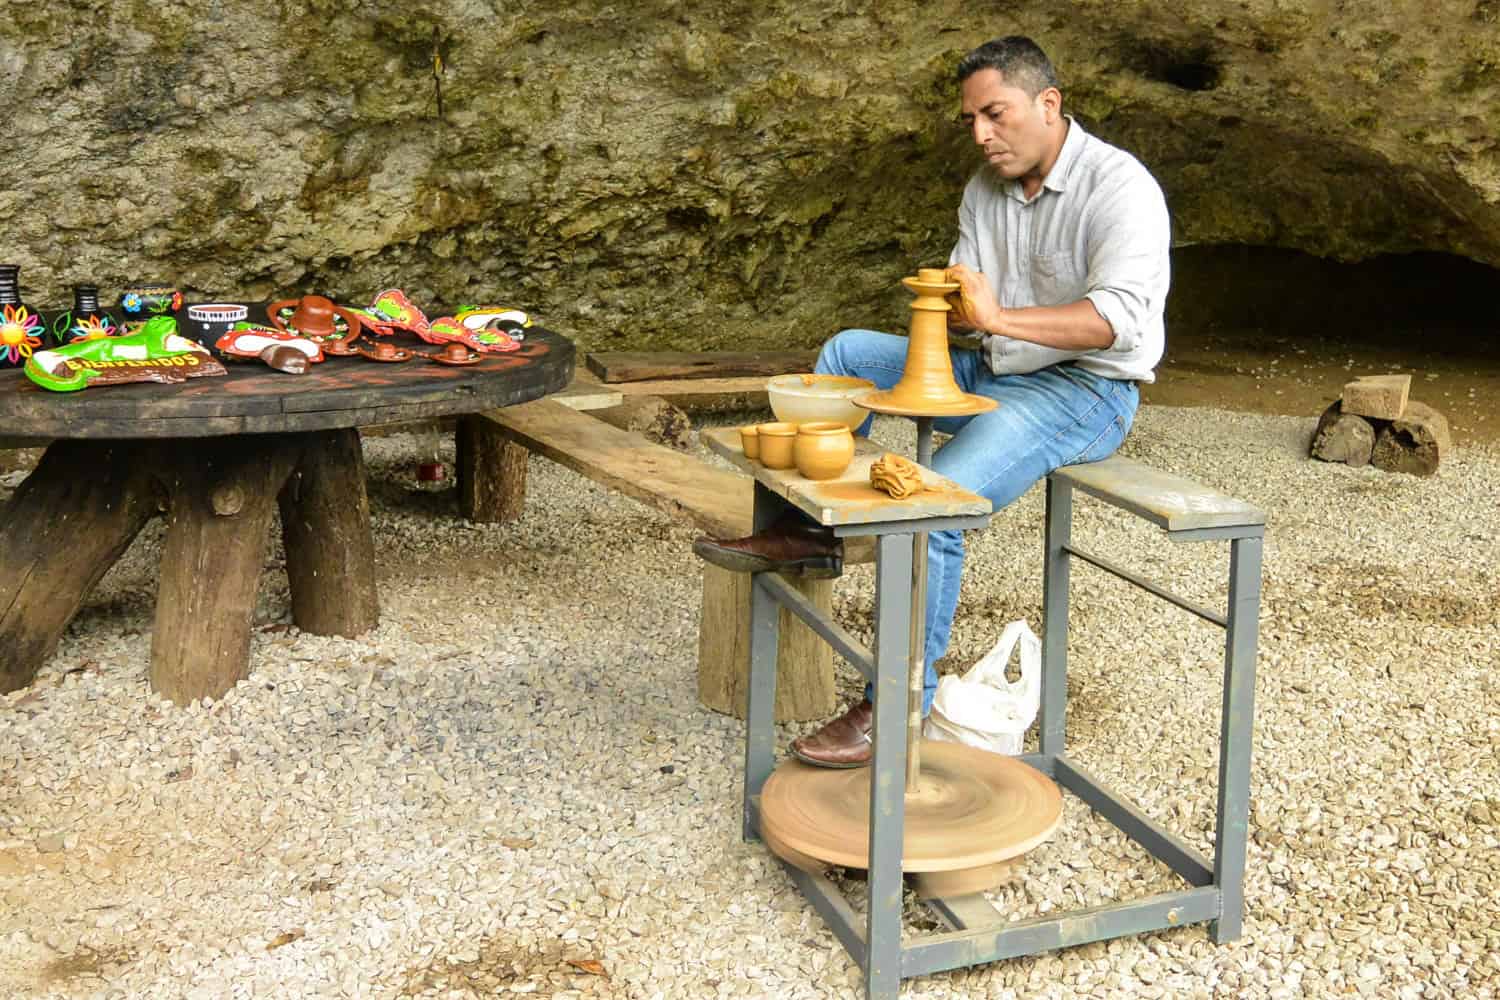
A potter from Chiapas demonstrates the traditional technique of foot-powered, hand-thrown pottery

6. Cultural Contact

An adventure trip to Mexico won't be isolated from the incredible culture.

Whether you're dining on exquisite Mexican cuisine, hanging out in a town's plaza during your free time, or experiencing diverse styles of dancing: Mexico is a cultural hotspot, and you'll be able to enjoy it all without skimping on the adventure.

The current trend in Mexico's tourism is a renewed focus on culture.

Most adventure trips and tour operators include cultural contact as an integrated aspect of any tour, from scheduling lunch in a "Pueblo Magico" to using guides who grew up in the area and can share their perspectives.

Related: Fun Things To Do in Cabo San Lucas

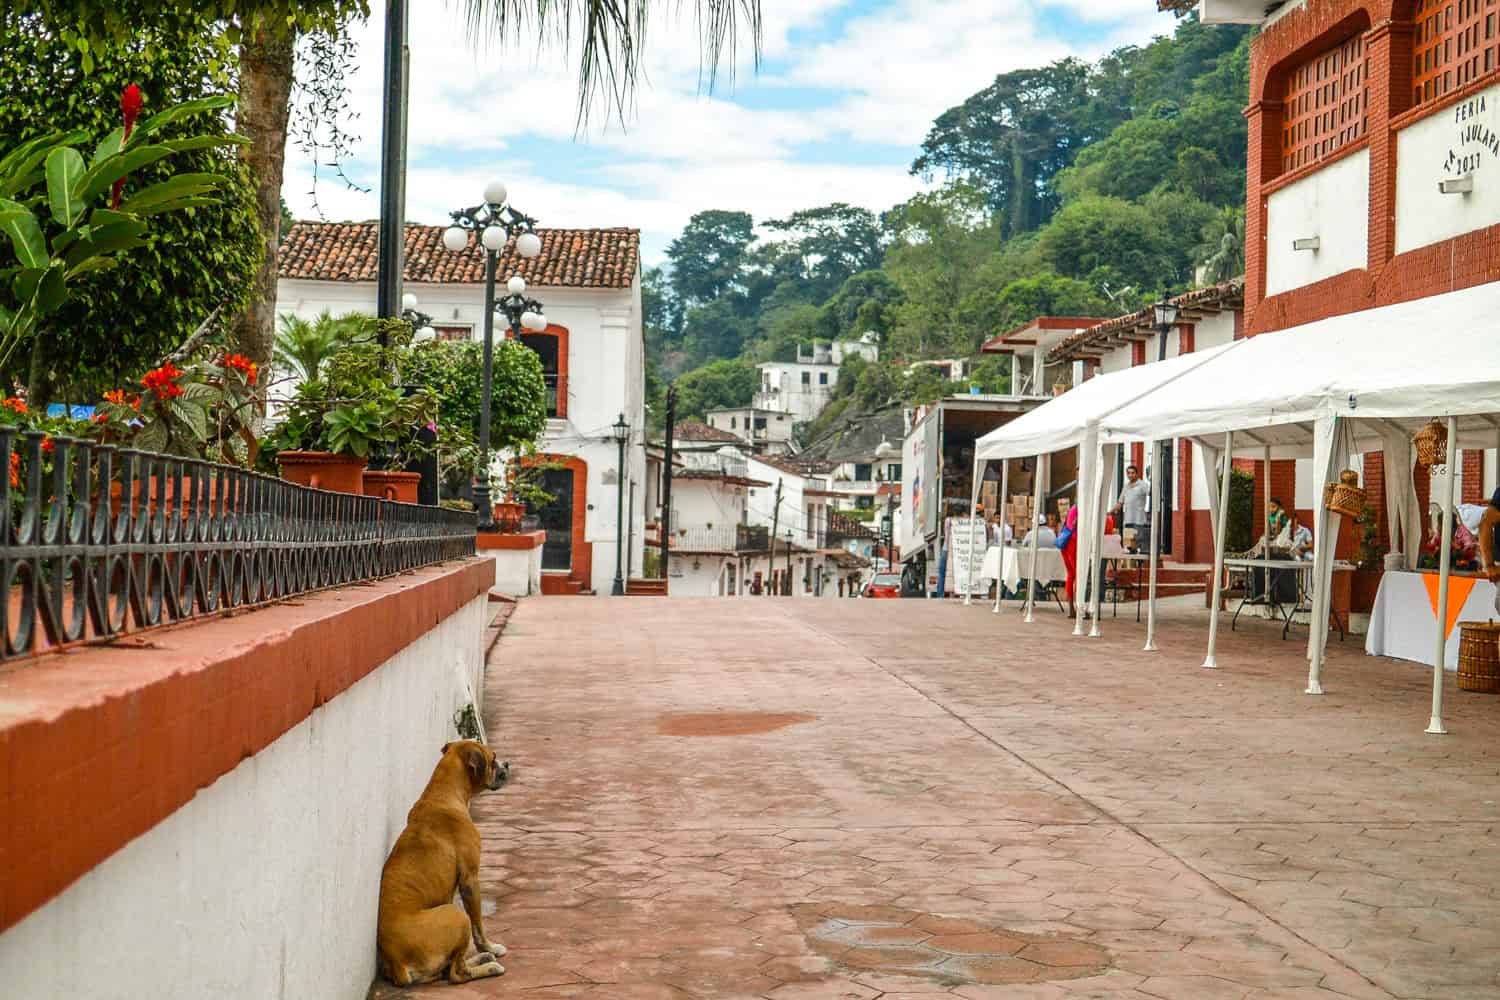
"Pueblo Mágico" Tapijulapa near Kolem Chen
"Pueblo Mágico" Tapijulapa

7. Storytelling

What the heck does adventure have to do with storytelling?

Aside from having a great story to tell afterward, of course?

One of the unique trends in Mexican tourism now, in my opinion, is the emphasis on storytelling.

Rather than just doing something (taking a bike ride, charging down a zip line), guides share the story behind it: the area's history, details of the impact on the local community, and any meaning behind the activity.

When visiting the Parrot Sinkhole, I learned how the pit was created and how the community developed the ecotourism initiative as a symbiotic relationship between the land and the locals.

Before and after exploring Kolem Chen cave, we visited the nearby "Pueblo Mágico" (Magic Town) of Tapijulapa to see local handicrafts, hang out in the town square, and enjoy a traditional meal, providing context and an understanding of the culture that the cave is housed in.

This storytelling aspect creates a more profound and memorable experience and a connection between the visitor and the place (and its people) that extends far beyond a day trip activity.


My trip was hosted in partnership with Go Backpacking and ATMEX. All opinions are my own. 

Fort Collins Brewery Tour: A Taste of Colorado's Craft Beer Scene

Fresh from my night alone in a wilderness yurt, I made the scenic two-hour drive east from State Forest State Park for a Fort Collins brewery tour.

The second hour of the drive on Route 14 was fun as the highway swerved through the winding Poudre Canyon along the Poudre River, where I would be going fly fishing the following day.

I checked into a private room at the charming and historical Fernweh Inn & Hostel; a former B&B turned hostel.

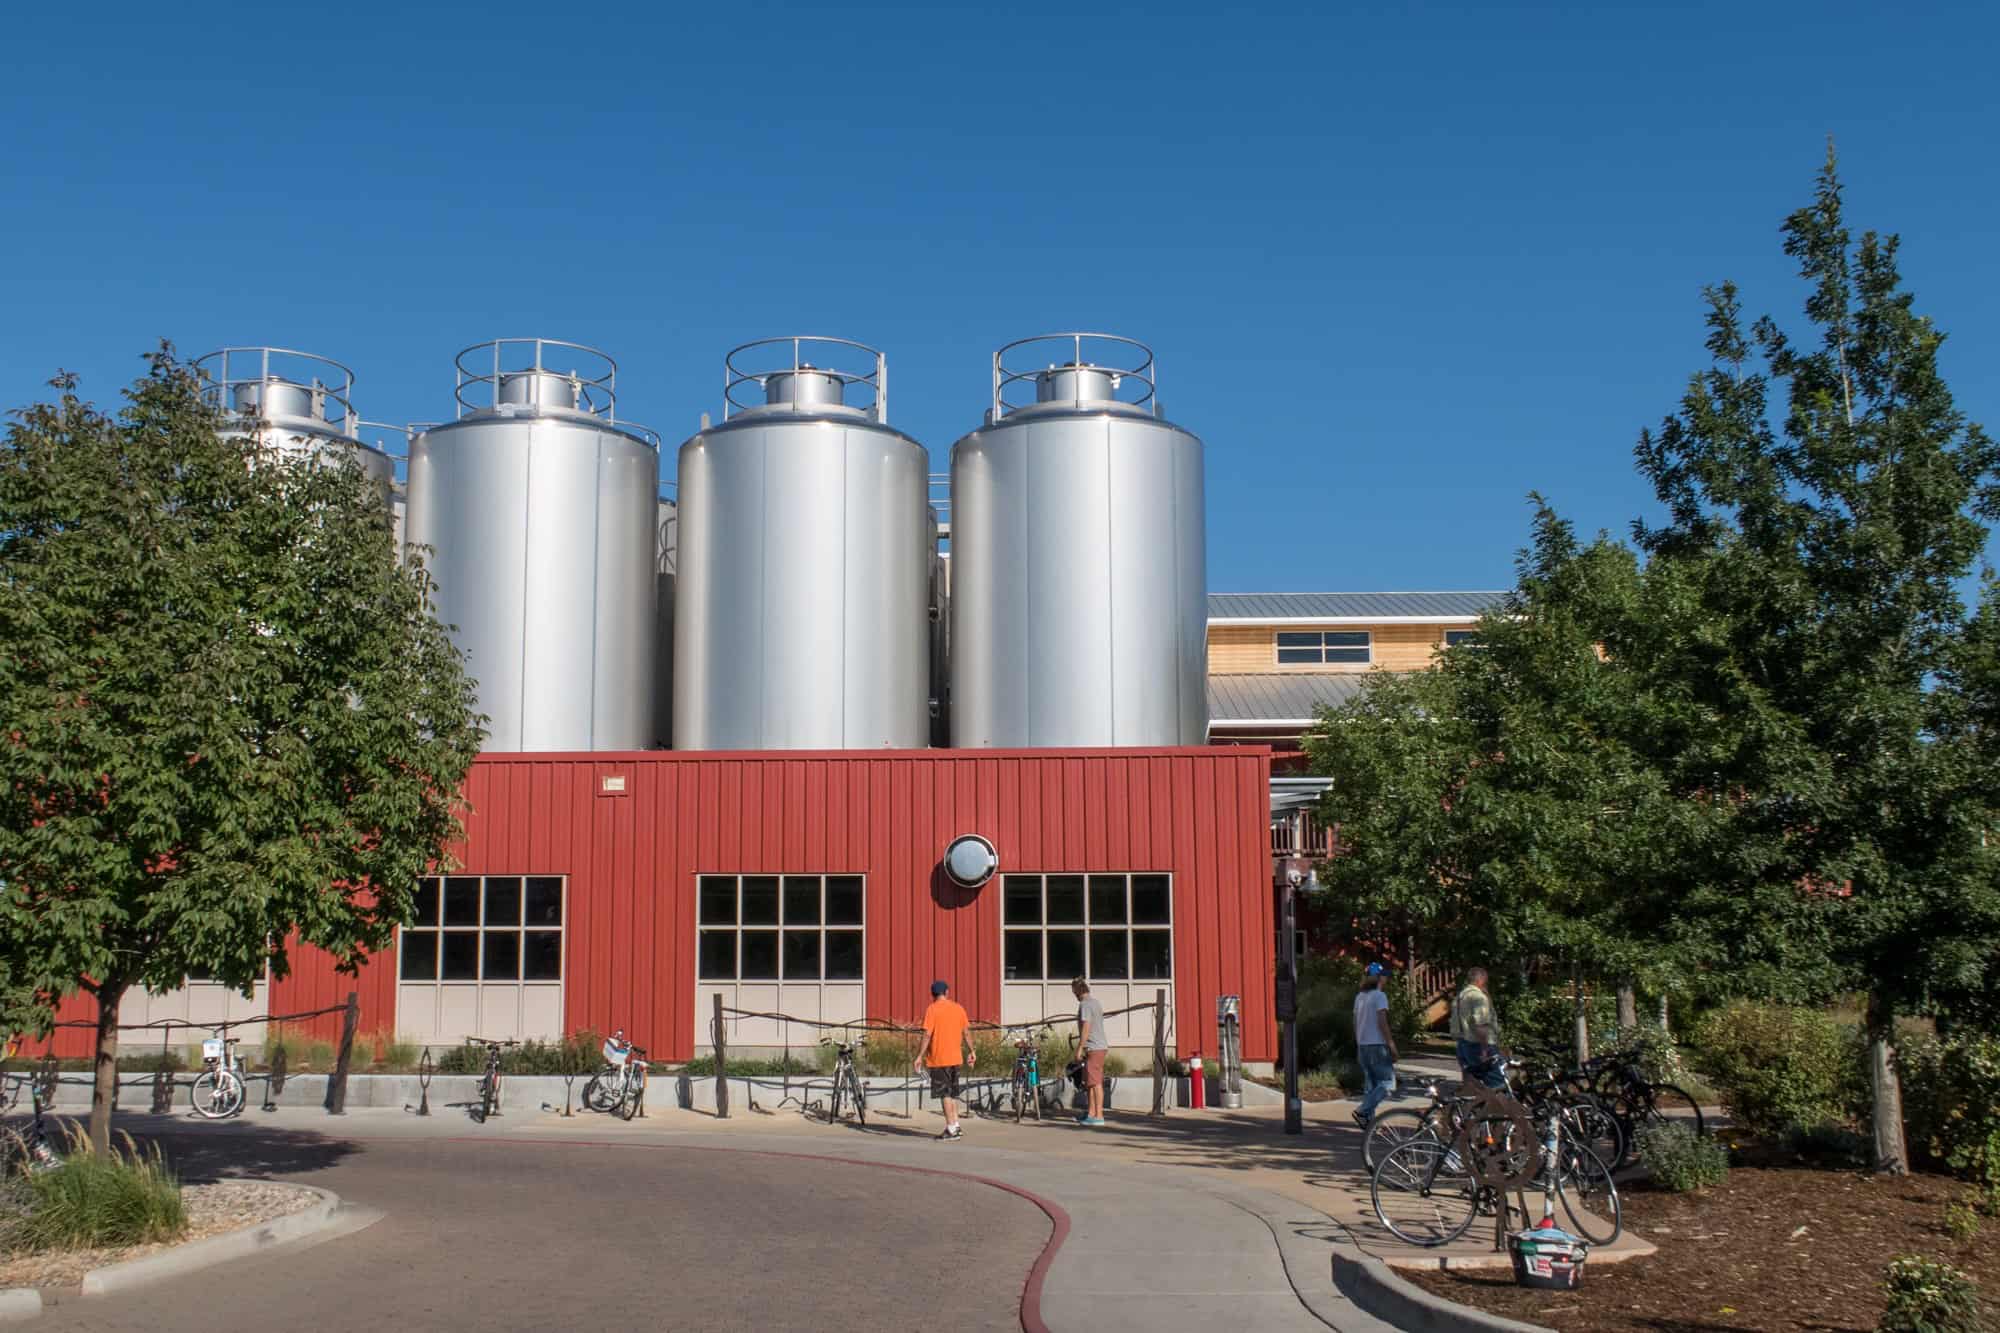
Entrance to Odell Brewing Co., the first stop on my Fort Collins brewery tour.
Entrance to Odell Brewing Co.

My room featured a queen-size bed, bunk bed, bay window, and an antique tub in the en-suite bathroom. Being in a warm, comfortable house after a night in the yurt felt wonderful.

Once I was settled, I met Kelsey, the vibrant hostel owner, Katy from Visit Fort Collins, and Bob, the owner of Beer and Bike Tours.

After quickly determining what size bike I needed, we took off on an afternoon bicycle brewery tour to visit three of Fort Collin's 21 microbreweries.

Breweries

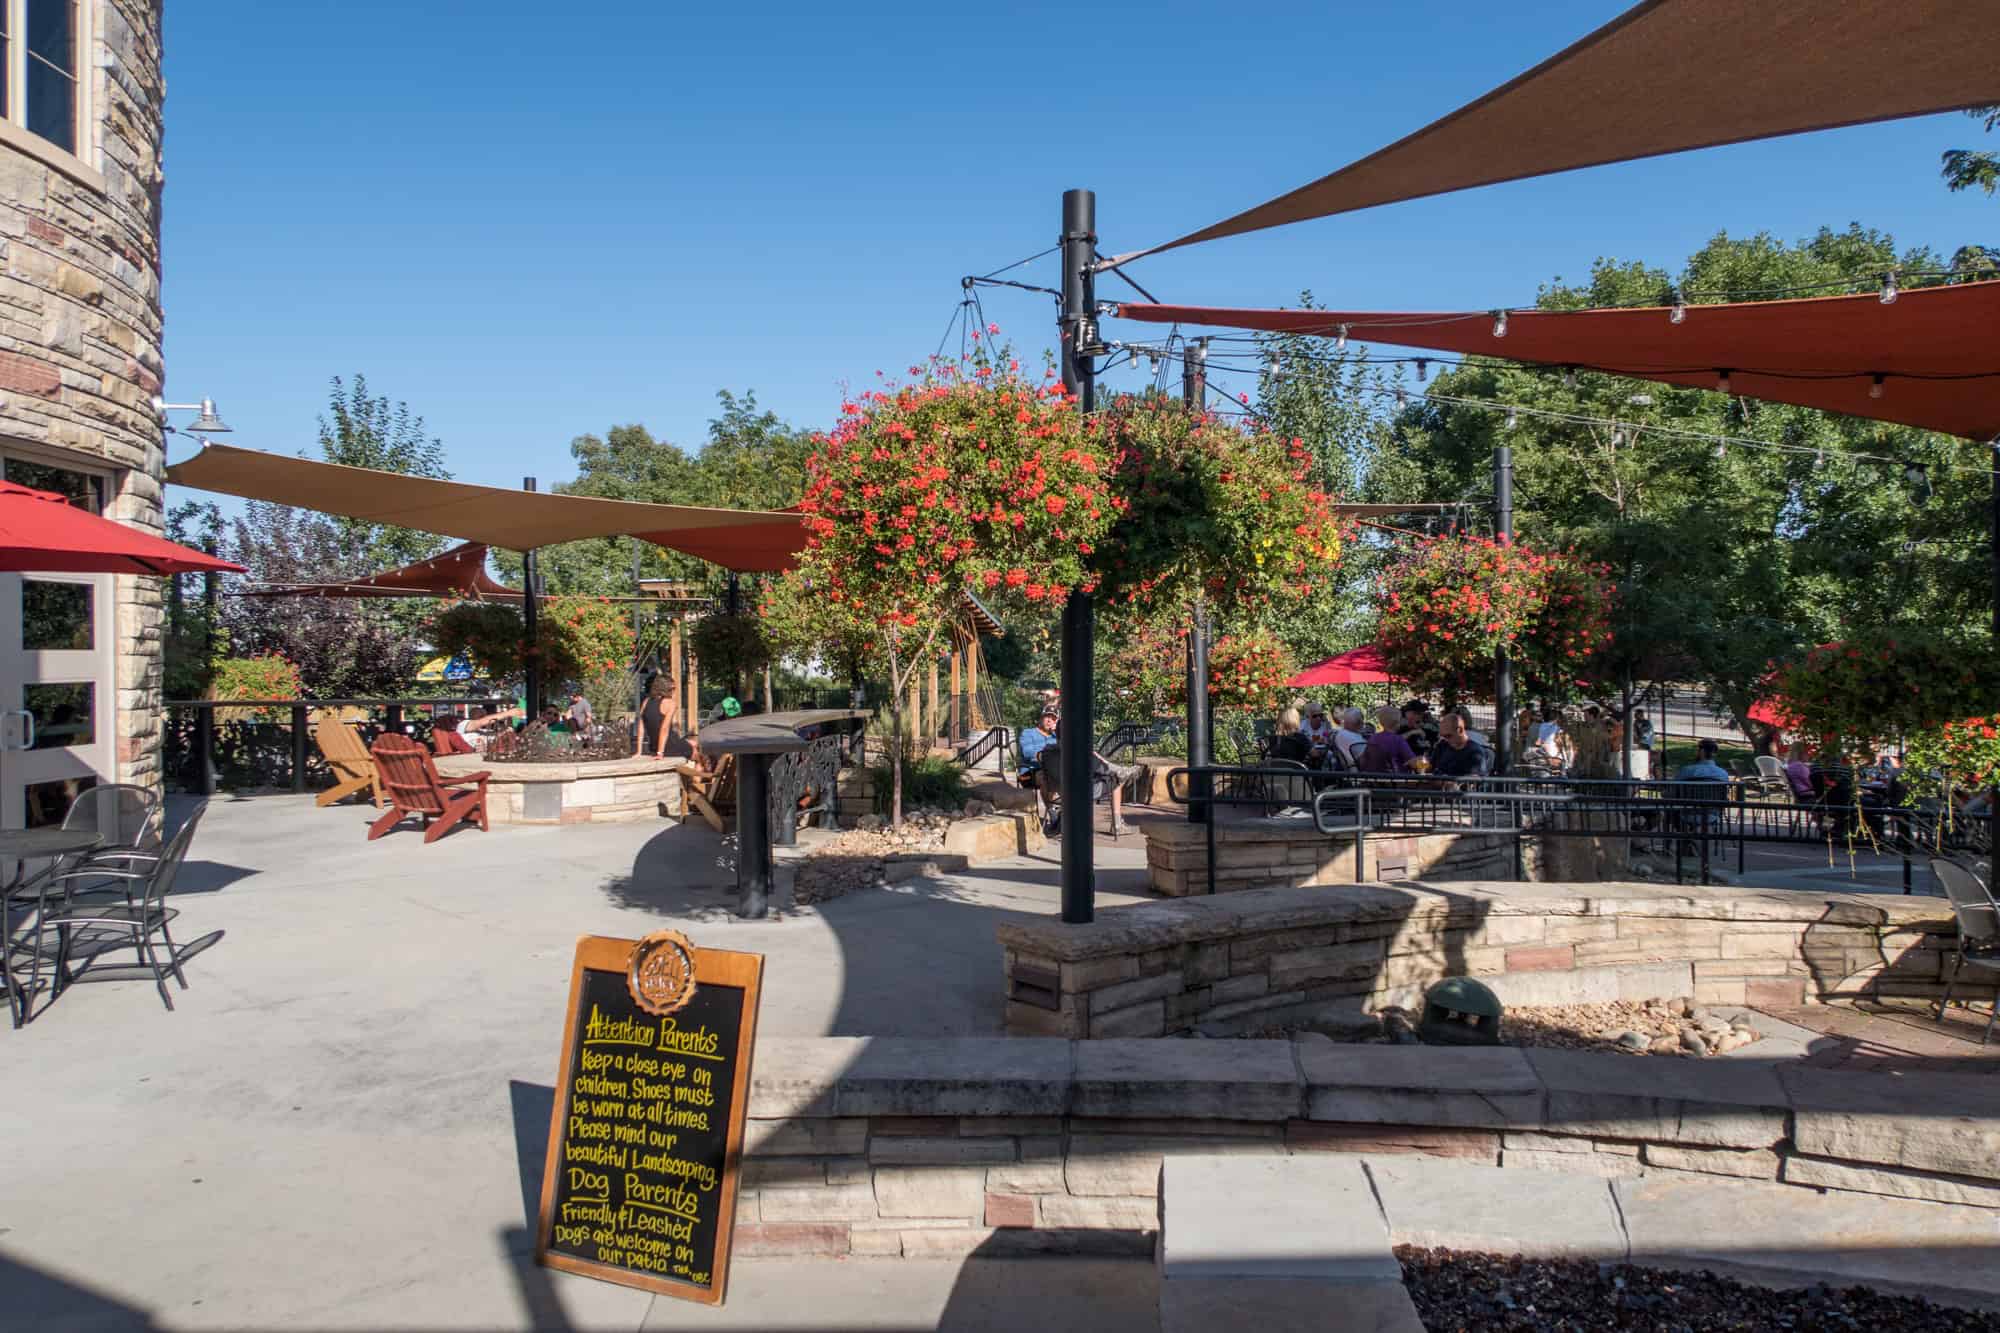
Beer garden at Odell Brewing's
Odell Brewing's beer garden

Odell Brewing Co.

It was a leisurely ride from the hostel to our first brewery, Odell Brewing Co., the first craft brewery to open in Fort Collins in 1989. The original brewery was in a 100-year-old grain elevator nearby.

However, when they outgrew it, they built their current facility, which features a spacious indoor tasting room and a gorgeous outdoor beer garden.

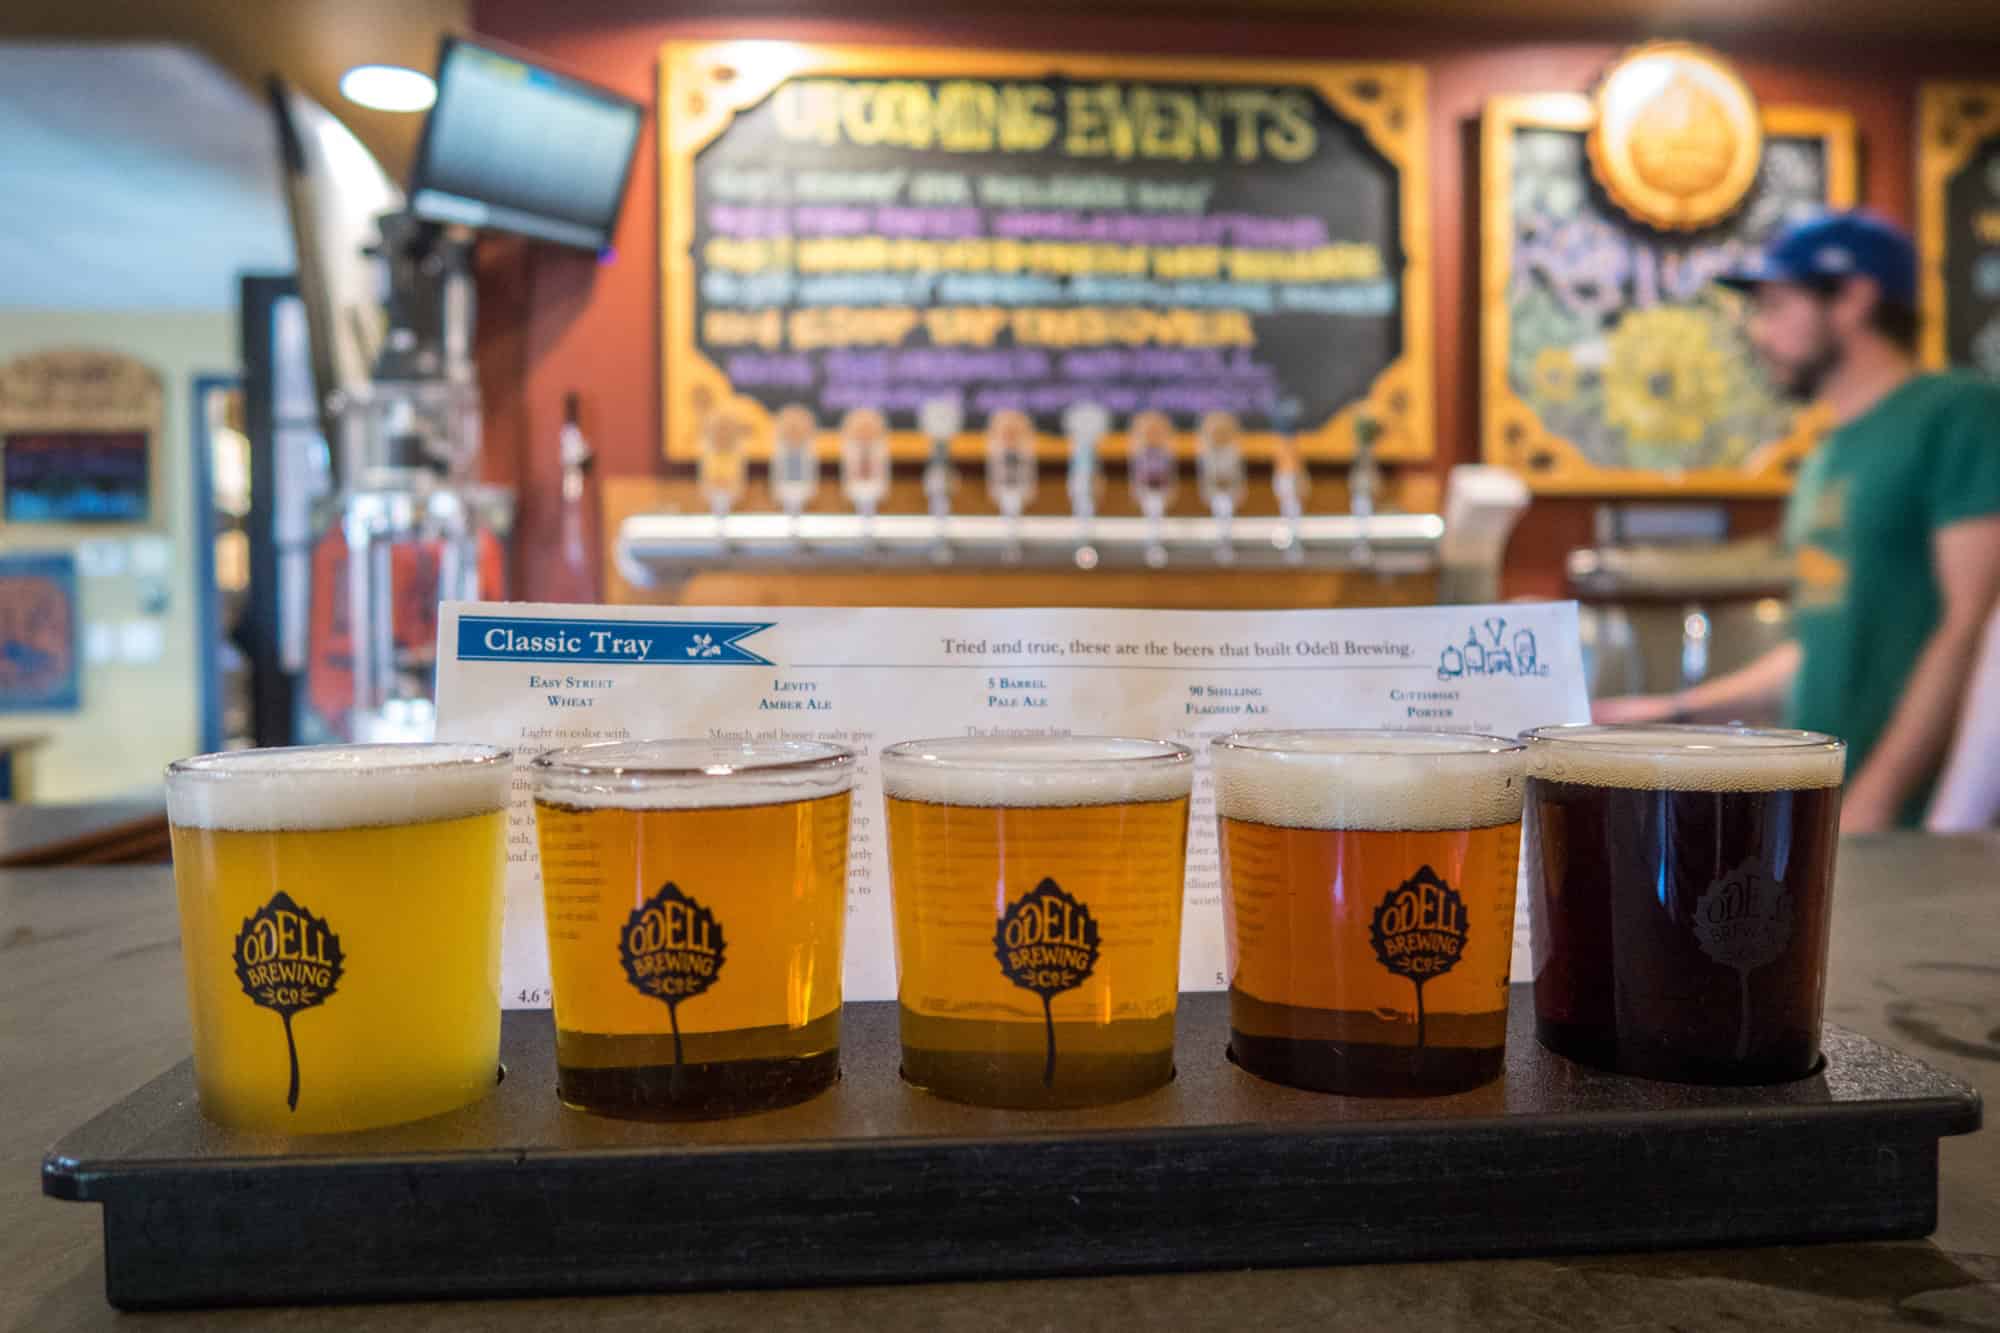
Odell Brewing beer flight

I ordered the Classic beer flight, featuring the beers that helped build Odell Brewing Co. into the USA's 34th largest brewer.

From left to right in the photo above, I tasted their:

  • Easy Street Wheat
  • Levity Amber Ale
  • 5 Barrel Pale Ale
  • 90 Shilling Flagship Ale
  • Cutthroat Porter

I prefer medium to dark beers, so the Flagship Ale and Porter were my favorites.

As we were sipping beers and enjoying the beautiful weather, Katy mentioned that everyone in town enjoys visiting Odell's beer garden. I could see why!

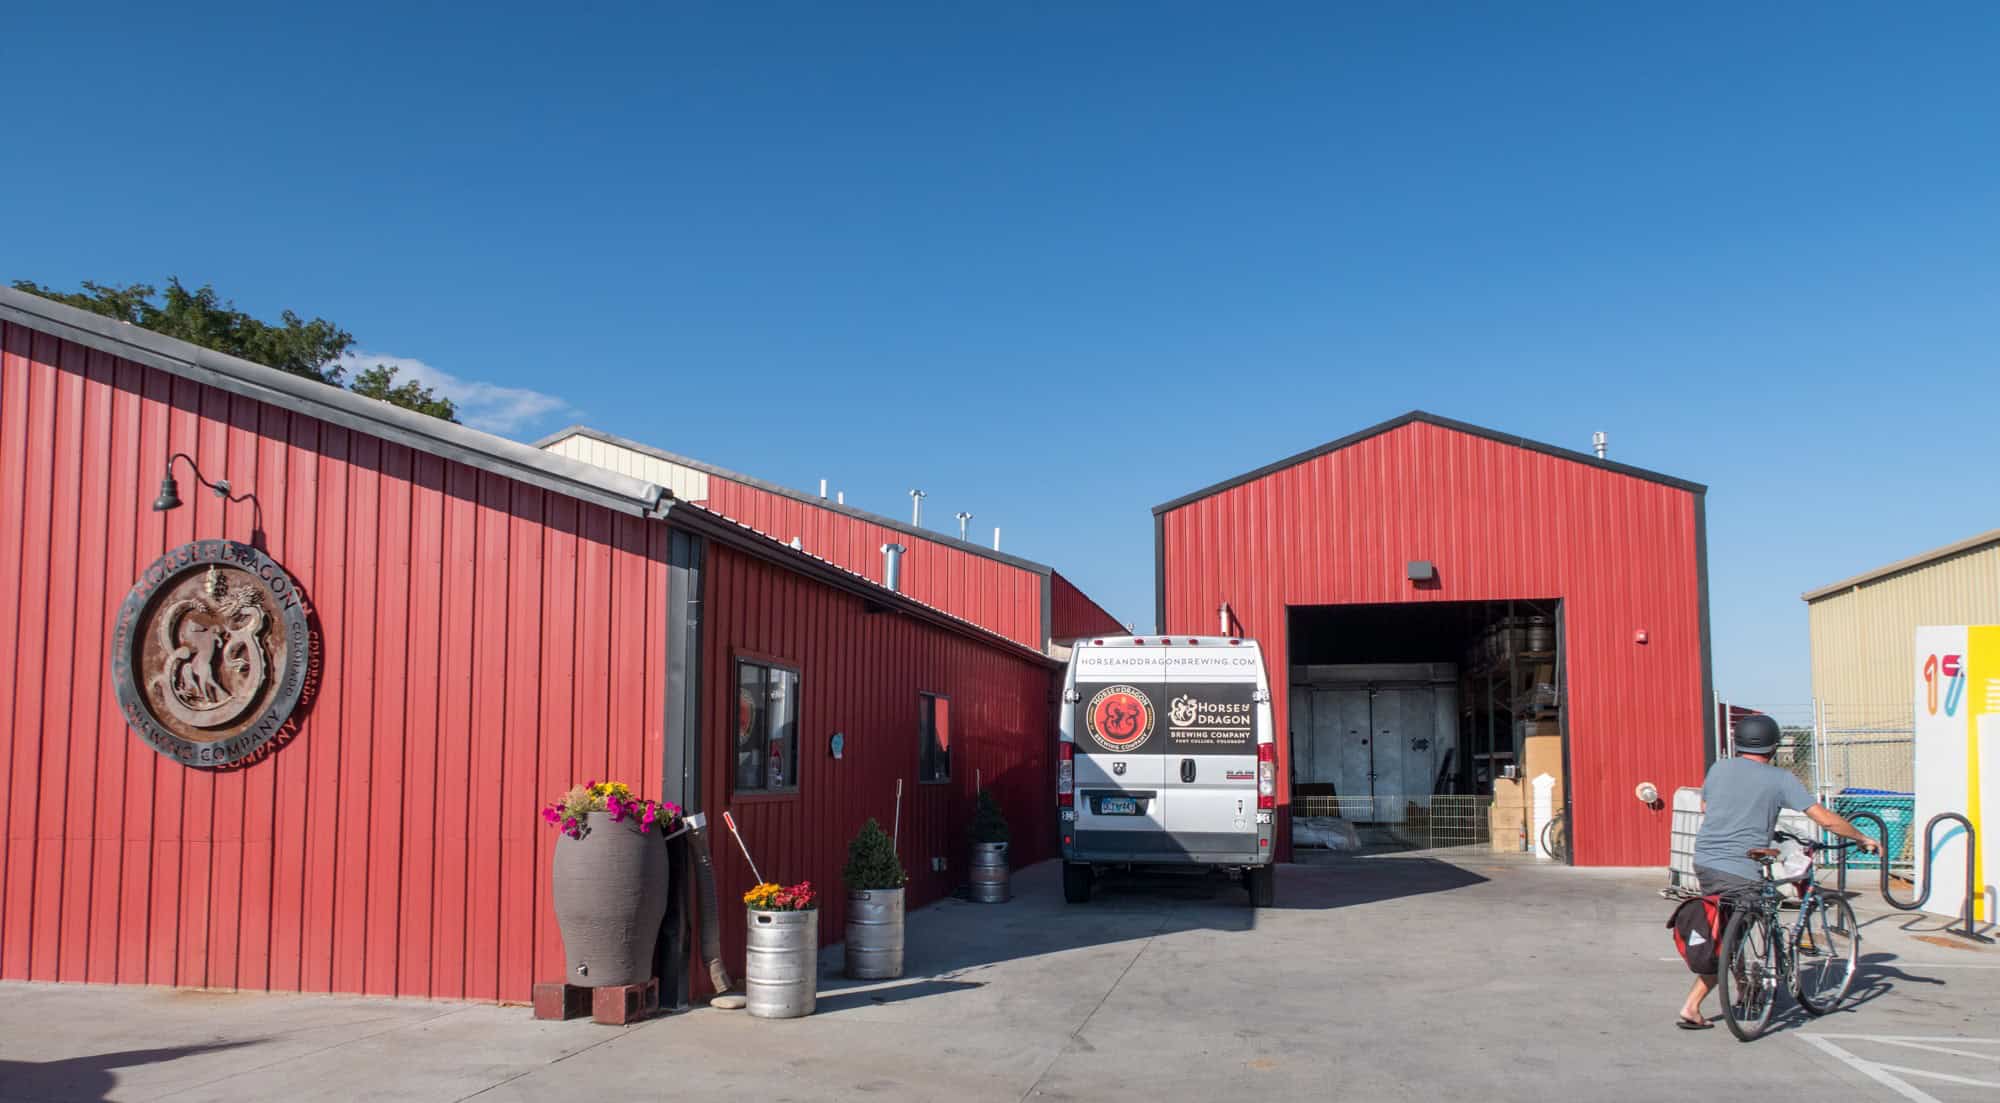
Horse & Dragon Brewing Company, our second stop on the Fort Collins brewery tour
Horse & Dragon Brewing Company

Horse & Dragon Brewing Company

Feeling a slight buzz from my first tasting of the day, we cycled over to the nearby Horse & Dragon Brewing Company.

Opened by husband and wife duo Tim and Carol Cochran in May 2014, it's one of the newer breweries. And they've found an immediate following for their beers.

Carol was at the brewery when we arrived, and we immediately connected over having lived in Colombia (her in Bogota, me in Medellin).

The Horse & Dragon Brewing Company was another stop on the Fort Collins brewery tour.
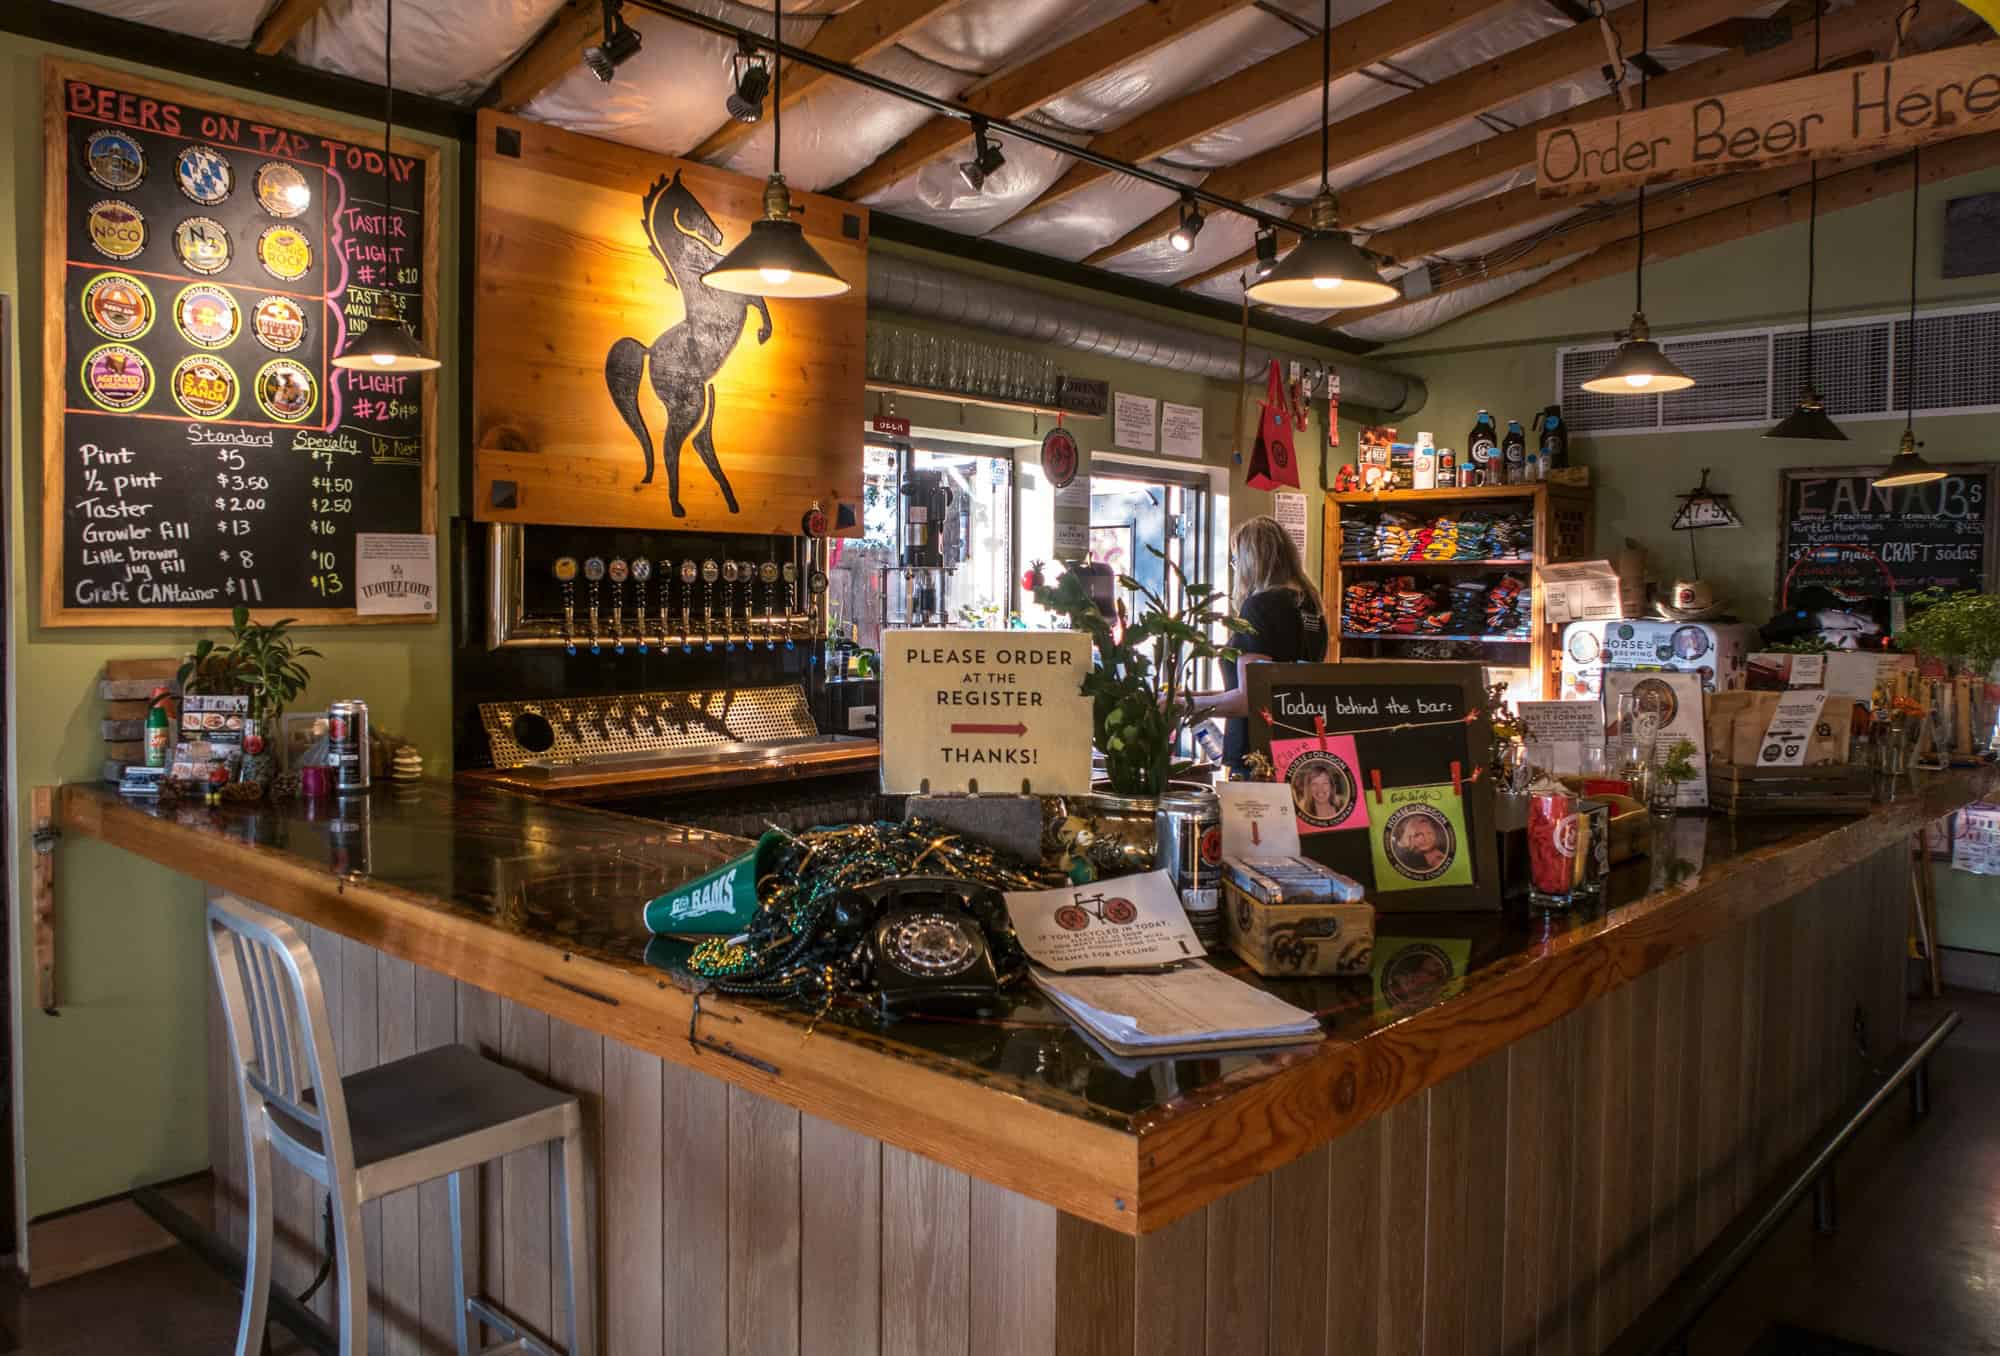
The bar

In addition to immediately liking Carol, I loved the tasting room vibe, which felt warm and friendly.

I ordered a six-beer flight, including:

  • Atta Boy Jon (Marzen)
  • Old Tom's Rye (dark rye ale)
  • Whistle Blast (honey brown ale)
  • Sad Panda (coffee stout)
  • H&D N2 (stout)
  • H&D carbonated (dark chocolate stout)

It was quite a lineup! My favorite was the H&D N2 stout, as I preferred the nitrogenated stout vs. carbonated, which would explain why I became an immediate fan of Guinness when I first tried it.

Carol also took the time to give me a quick tour of the brewery. The room where the beer is made was adorned with flags, including Colorado, the USA, and Colombia.

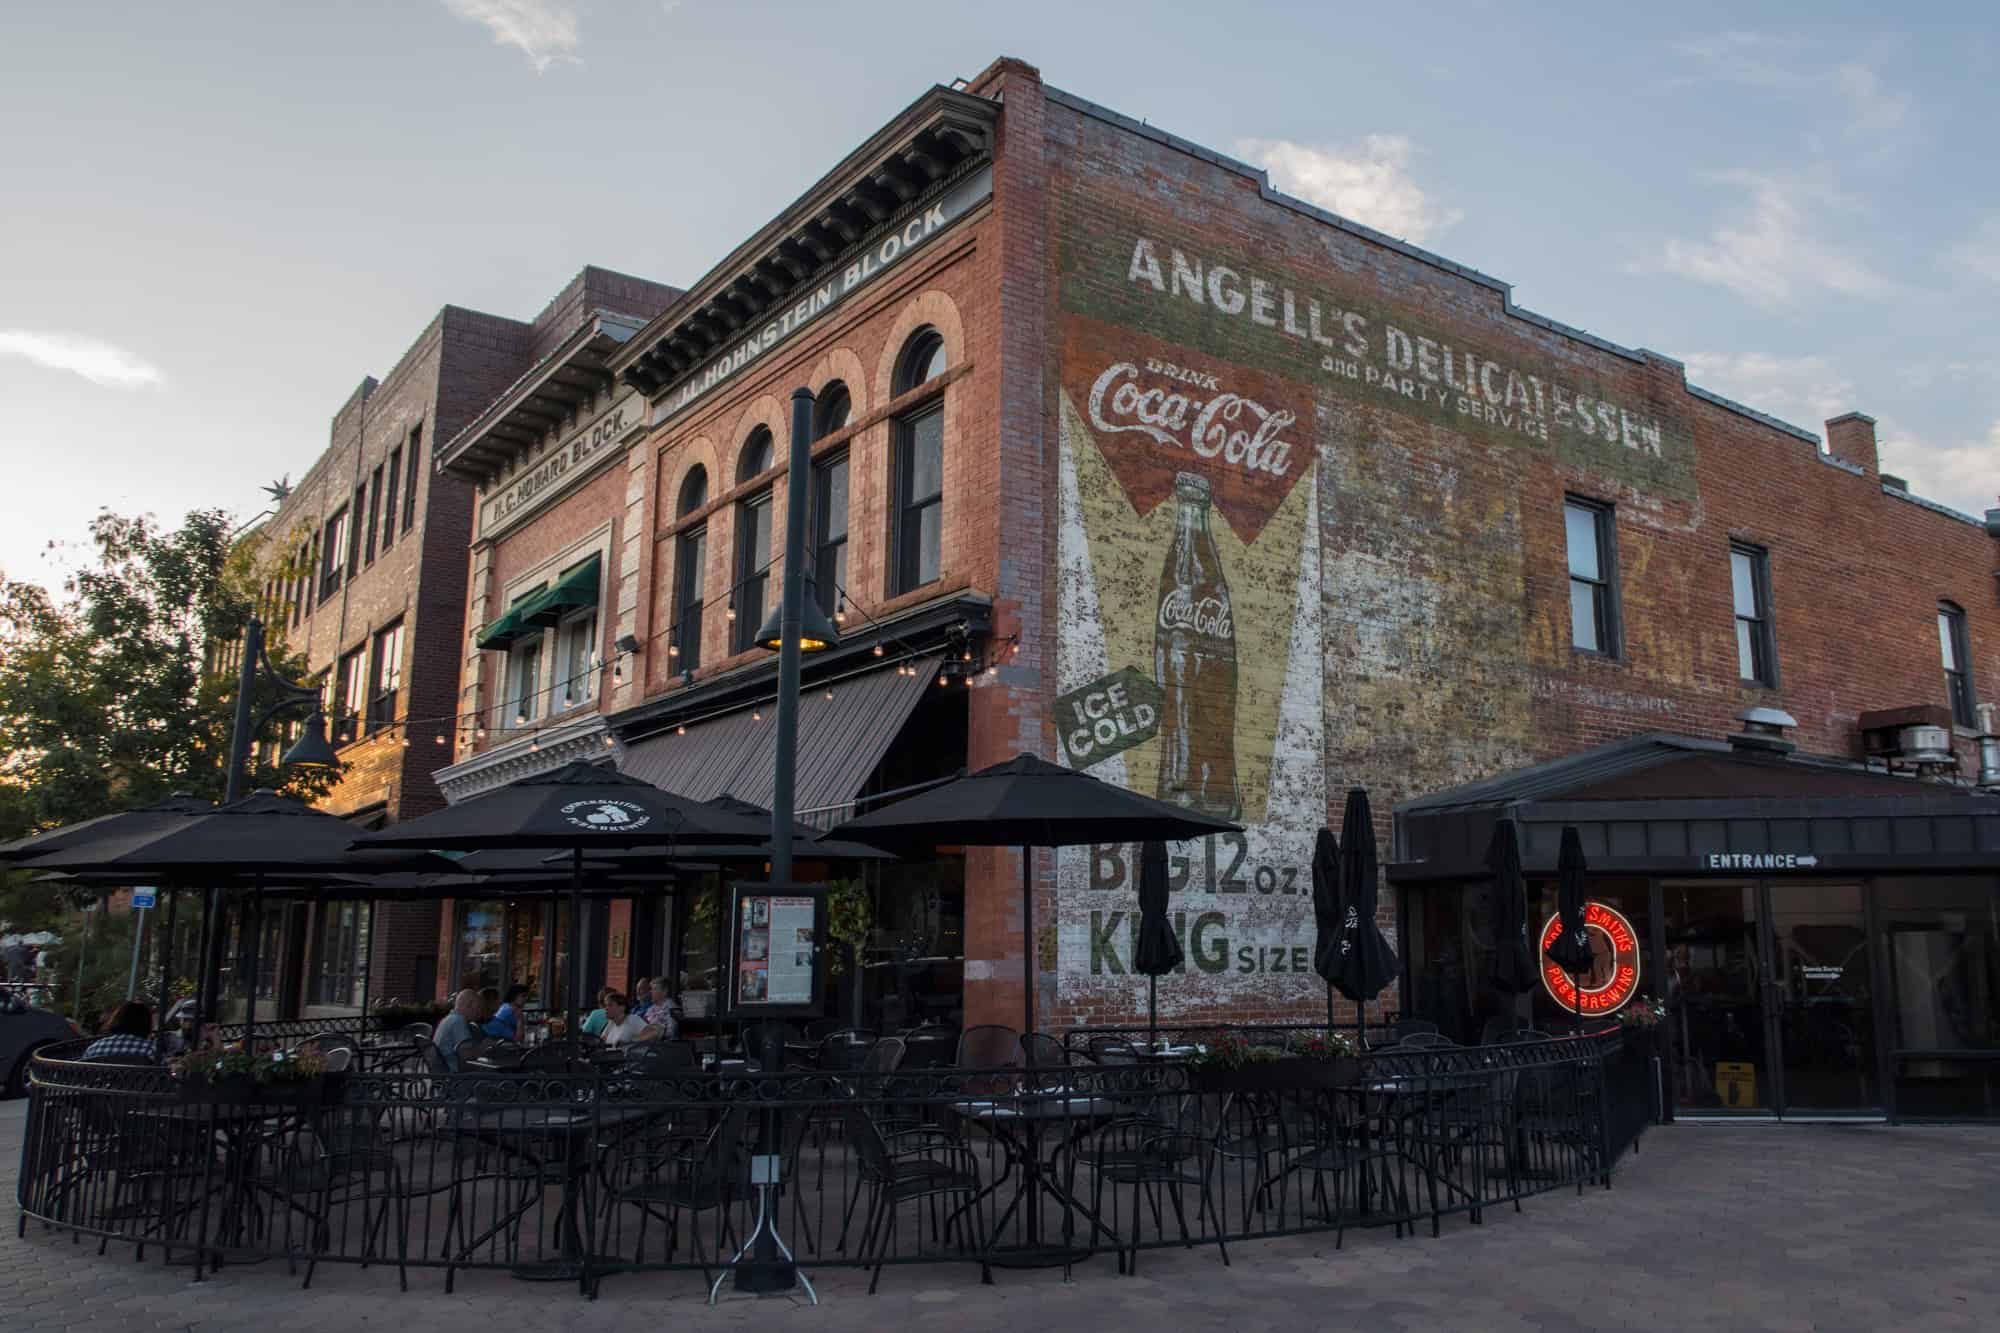
Outside Cooper Smith's Pub & Brewing
Cooper Smith's Pub & Brewing

Cooper Smith's Pub & Brewing

As the sun was setting on our boozy afternoon, we made our third and final stop of the Fort Collins brewery tour at Cooper Smith's Pub & Brewery. Like Odell's, Cooper Smith's has been a staple of Fort Collins since 1989.

I tasted a few more local beers before demolishing a much-needed Baja burger topped with goat cheese, poblano pico, guacamole, and chipotle sauce with sweet potato fries.

It was as delicious as it sounds, the perfect way to end my first afternoon in Fort Collins.

Related: Famous Breweries Around the World

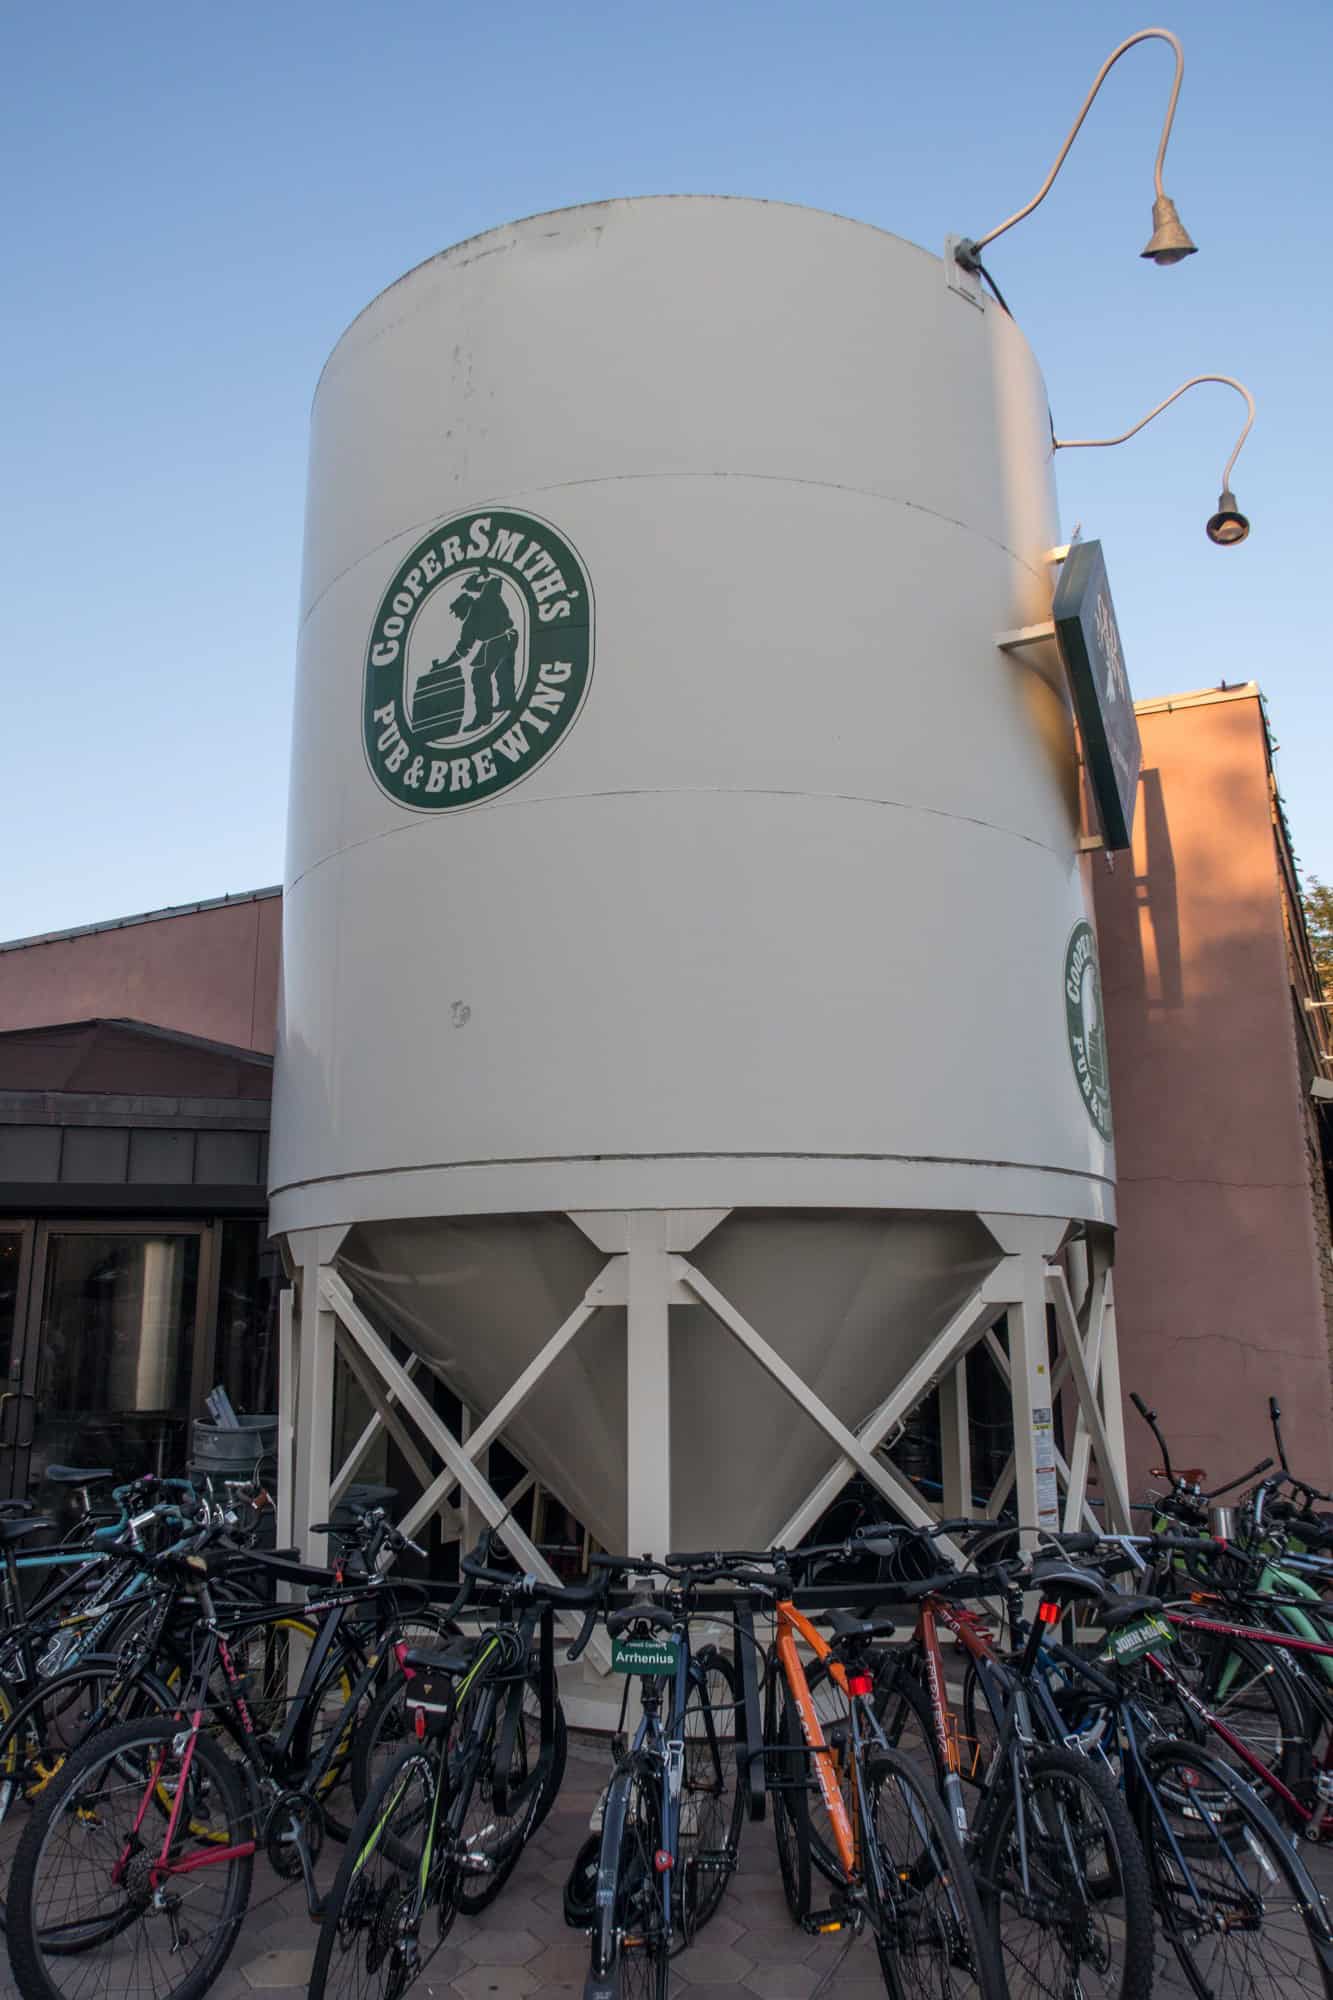
Cooper Smith's Pub & Brewing
Bikes locked up outside Cooper Smith's Pub & Brewing

Final Thoughts

Overall, my Fort Collins brew cruise was precisely the experience I was looking for, a fun and leisurely introduction to the city and its craft beer scene.

The tour costs $50 per person on weekdays and $65 per person on the weekends and includes a Raleigh cruiser bike, helmet, lock, local guide, and brewery tours when available.

Participants pay for their beers, helping to ensure they only drink as much as they want.

In addition to Fort Collins, Beer & Bike Tours offers cycling tours across Colorado of varying durations and internationally in Japan and Germany. Plus, they do custom group tours too!

______

My tour was courtesy of Beer & Bike Tours and organized as part of my trip hosted by the Steamboat Springs Chamber Resort Association and Visit Fort Collins.

The Toyokawa Inari Shrine: A Treasure of Japan

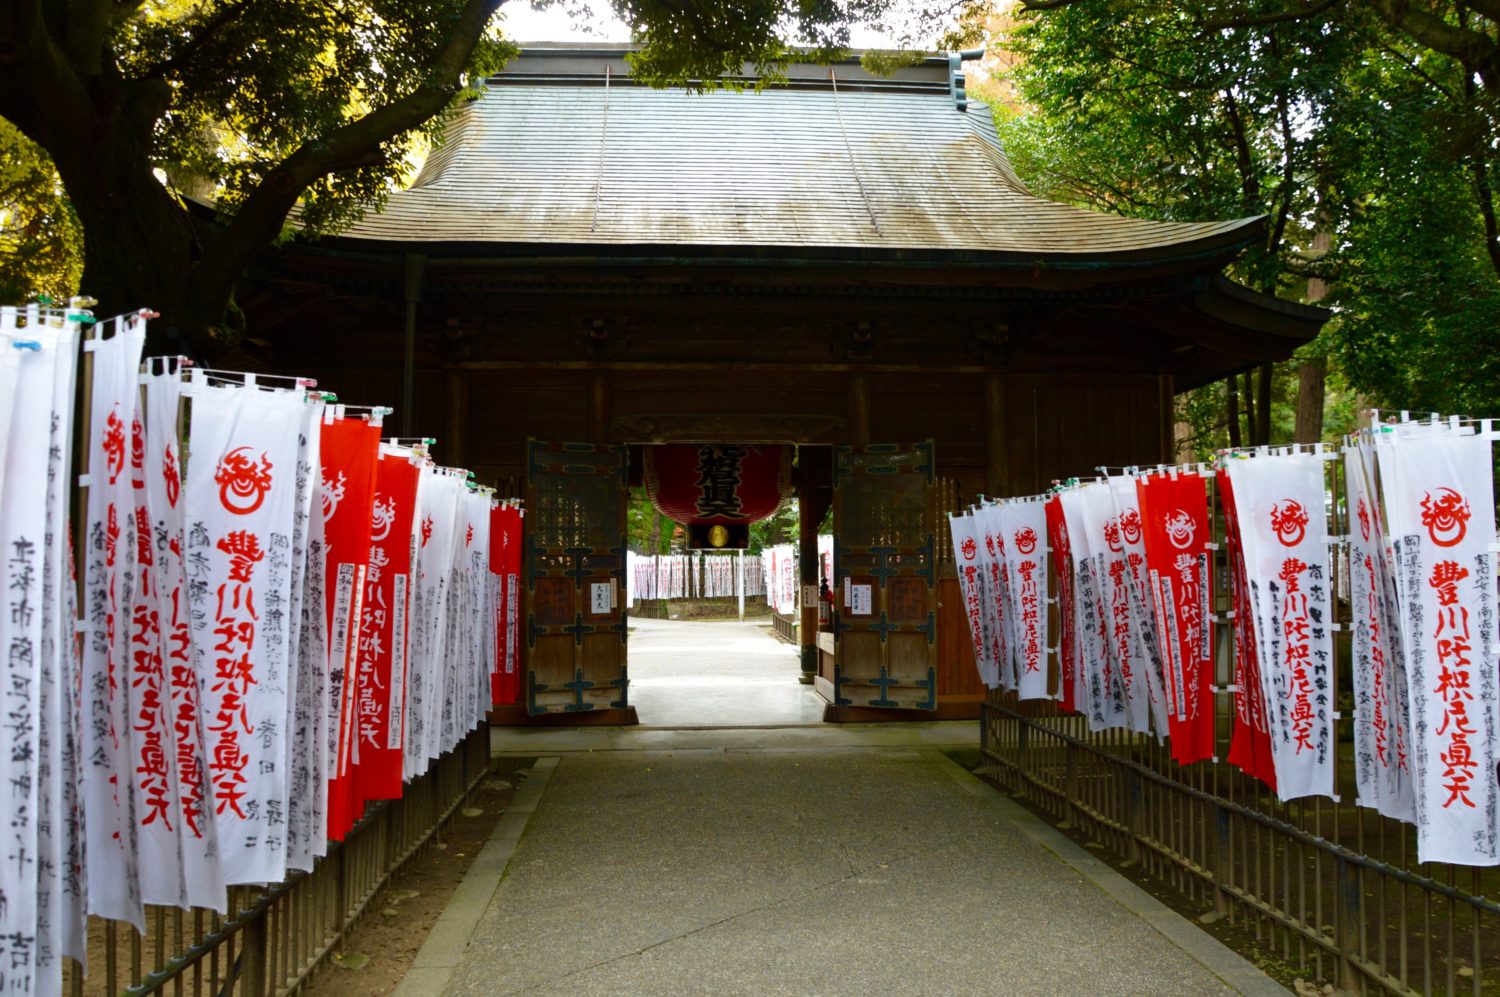
Toyokawa Inari Shrine
The fox plays a prominent role at the Toyokawa Inari Shrine

When I first stepped foot on the grounds of the Toyokawa Inari Shrine, the local tour guide smiled, looked me in the eye and proudly noted that "you could fit two Tokyo baseball stadiums" within its confines.

However, the actual size of the shrine area wasn't its most notable feature. What was most apparent, almost immediately, was the presence of stone foxes.

On the trip through Central Japan (known as Shoryudo or the Chubu Region) thus far, I'd witnessed striking examples of natural beauty, and visited breathtaking castles, but this was another beast entirely - quite literally.

I've visited Japan on three separate occasions, and visited more shrines and temples than I'm even comfortable estimating, but never had I seen a place like this.

I don't want to in any way generalize, but, historically speaking, the rules for what constituted true aesthetic beauty could be narrow in Japan.

I'd argue that this prevented much experimentation in the construction of Buddhist shrines and temples.

What makes the Toyokawa Inari Shrine unique is the way it evolved to truly become one of a kind, a jewel among Buddhist temples and shrines.

Toyokawa Inari Shrine
The Toyokawa Inari Shrine is widely considered to be one of the most important in the nation.

The History of the Toyokawa Inari Shrine

Tokai Gieki is the name of the Buddhist priest who founded what would end of becoming one of the three most important Inari shrines in the nation.

The other two famed Inari shrines are the Yutoku Inari Shrine in Saga and the Fushimi Inari Shrine in Kyoto.

For context, a significant number of shrines in Japan are considered Inari shrines, which are, on the most basic level, shrines dedicated to the Shinto god Inari Okami.

This god's spirit form (or kami) is said to be that of the fox, which is how we came to see the thousands of foxes begin to take their place on the premises.

Like many significant places of worship in Japan, the boundaries between Buddhism and Shintoism are very blurred.

In fact, I've spoken personally to many Japanese people of many generations, and most that I've talked to don't see a reason for there to be a great distinction.

Their attitude is very much that Shintoism and Buddhism meld together harmoniously, and that both feed into a holistic approach that reaps the benefits of the rich, spiritual life.

Many of the buildings we see today have been rebuilt at one time or another, but there are still structures in the complex that are original, and dating back to the middle of the 16th century.

Toyokawa Inari
There's much to explore at the Toyokawa Inari Shrine

Diving Deeper into the Tradition of the Toyokawa Inari Shrine

This shrine, in particular, is noted for its "success rate" in prayers answered.

There are tales going back to ancient times of Japanese warriors who came to Toyokawa Inari, prayed for victory, and were graced with decisive battles.

That being said, generally speaking, the god Inari is actually much more famous for being a god who listens closely to prayers on success, mainly for business. That makes this shrine one of the most popular around for the New Year.

If you're on a strict budget (or very strict budget) it may be worth popping by, just to see if you just might change your luck and be able to extend your trip!

Tourists aside, though, Japanese come by regularly to pray for fertility, a boost for their company or enterprise, or a particularly good harvest for their respective agricultural interests.

I'm not overstating how important this is either - some six million people visit each year.

The Hill of Foxes (Reiko-Zuka)
The Hill of Foxes (Reiko-Zuka) is truly something to behold.

The Hill of Foxes (Reiko-Zuka)  at the Toyokawa Inari Shrine

This area, to me, is by far the most intriguing, and really what makes it worth the visit from a photographer's perspective.

You must be thinking, as I was - where did all these foxes come from?

The answer that I got from the guide was one that I wasn't necessarily expecting, but one that allowed me to appreciate the Toyokawa Inari Shrine even more. It also explains why some are brand new, and some nearly have a layer of moss.

I mentioned before that this shrine is famous for people coming to pray here, largely for worldly success. Well, if someone comes here to pray, and their prayers are answered, it's customary to buy a fox and place it here.

When you look at this "Hill of Foxes" at Toyokawa Inari from that lens, this place becomes even more special. What you're looking at is the tangible evidence of dreams come true.

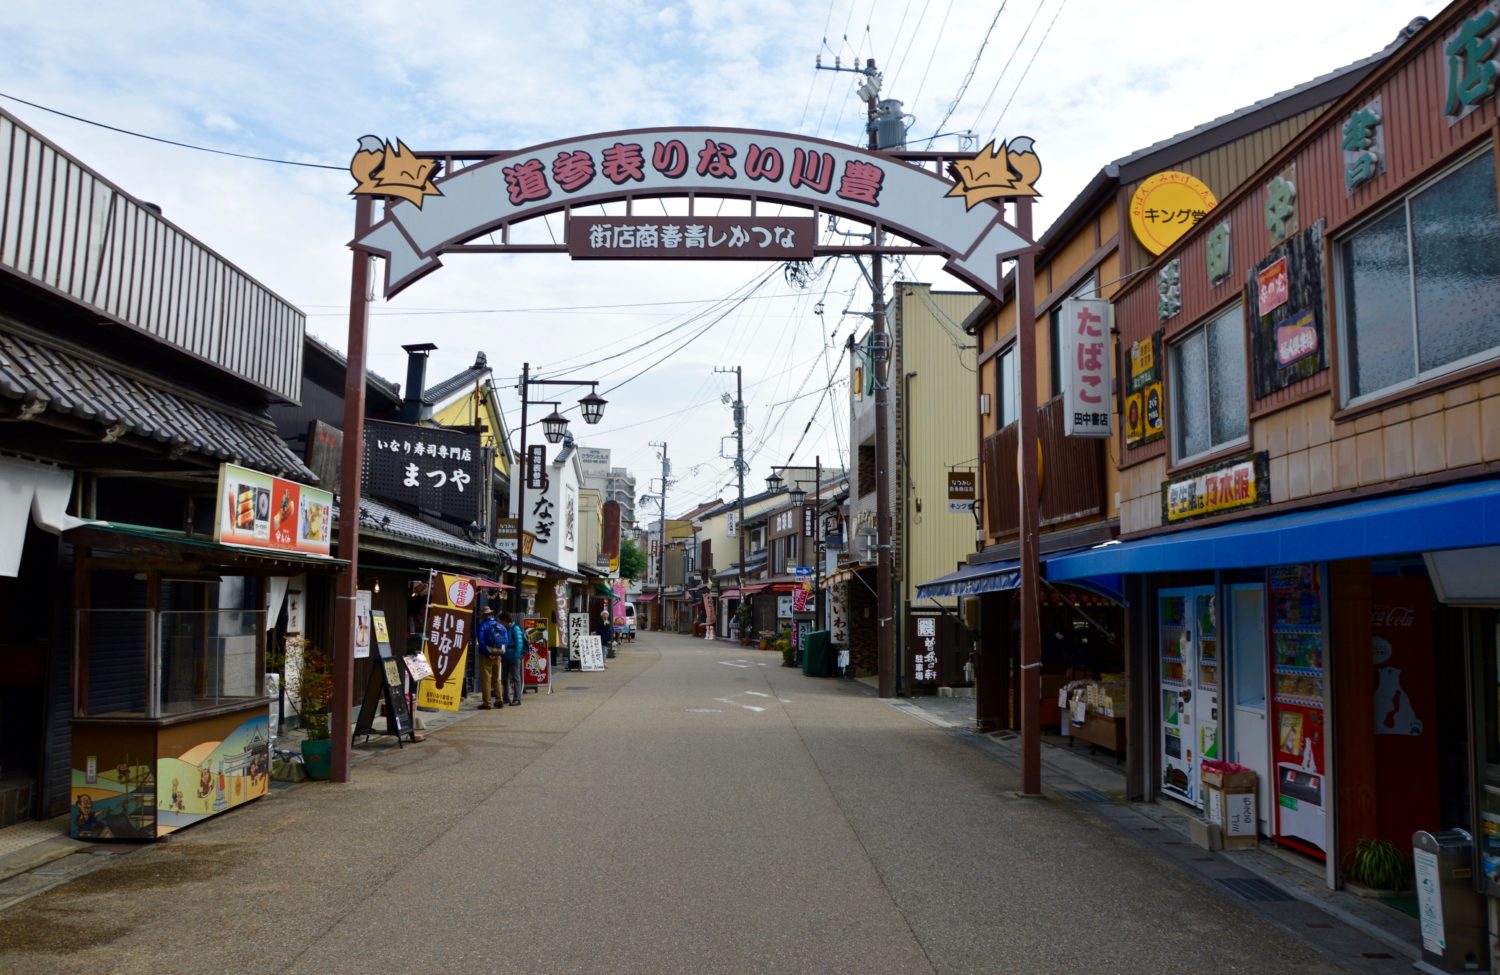
Toyokawa Inari
Right across from Toyokawa Inari, there's a great local neighborhood for food and shopping.

What You Need to Know about Toyokawa Inari

This trip to Toyokawa Inari doesn't have to be expensive in the slightest, which is how any visit to a Buddhist or Shinto shrine should be.

The entrance is completely free (though you may want to have a few coins to serve as an offering).

To get to Toyokawa Inari, simply go to Meitetsu Toyokawa-Inari Station, and it's less than a five-minute walk.

This shrine is located in the city of Toyokawa, which is technically in the gorgeous Aichi Prefecture.

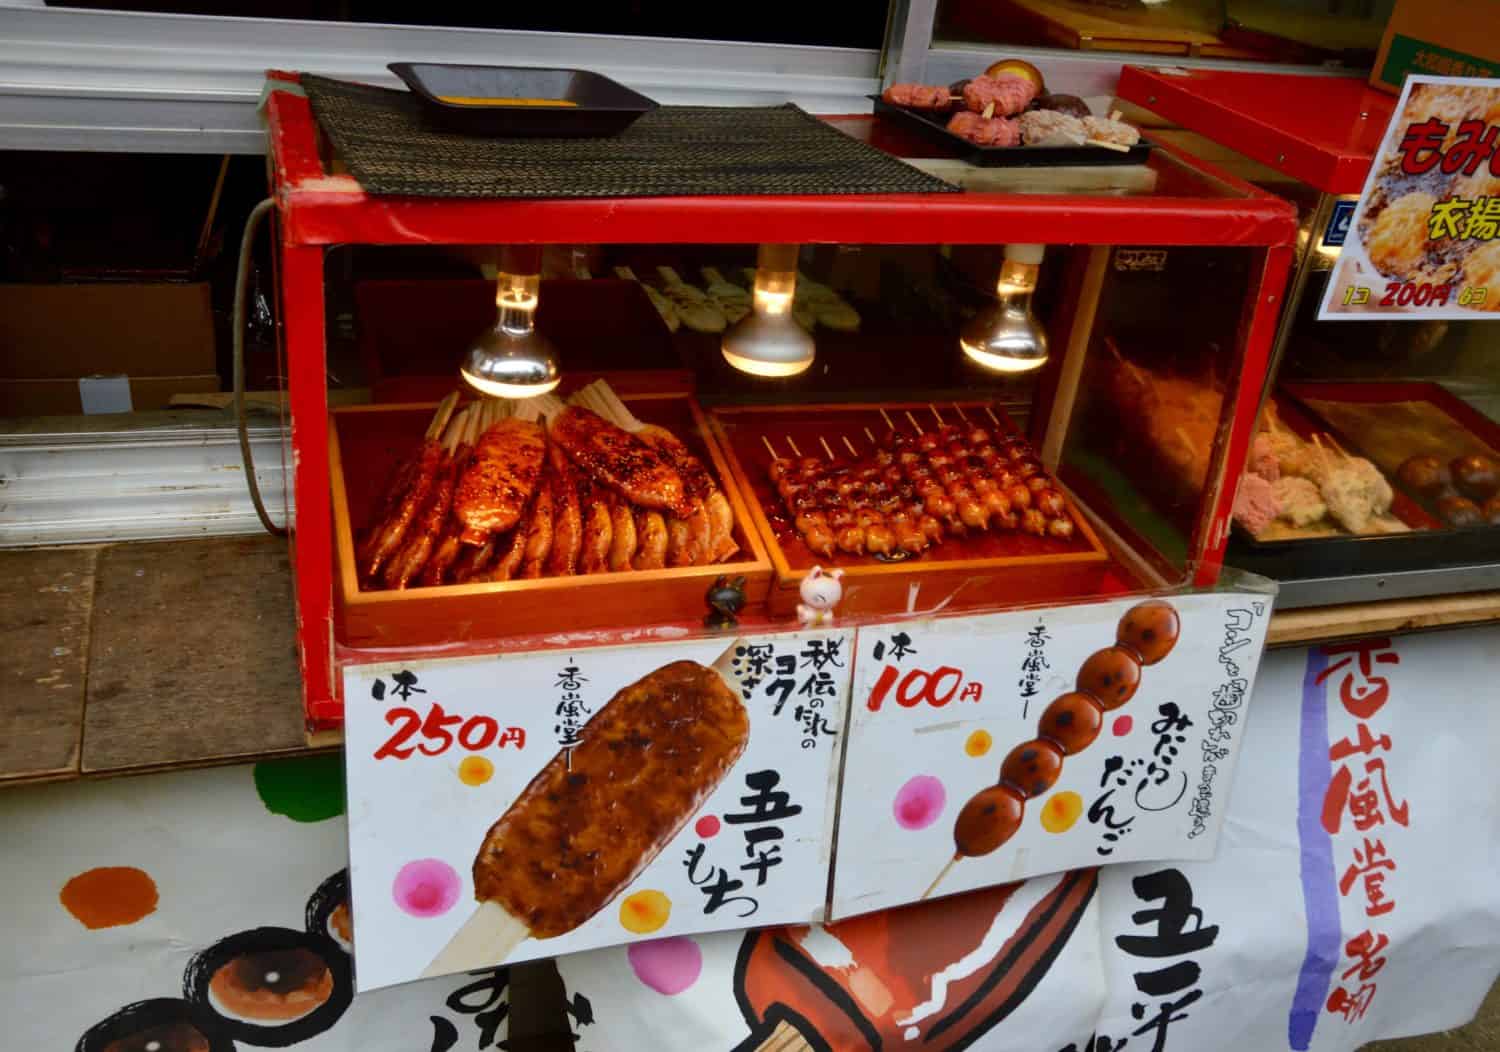
My number one recommendation would be to schedule time to go across the street to the local vendors. There you'll find stellar food, and some fox/Inari related souvenirs that are worth sticking in your luggage, and not too pricey.

The whole point of visiting the Chubu Region is to change things up a bit as far as your traditional trips to Japan which may just include cities like Tokyo and Kyoto.

So head to the Toyokawa Inari Shrine, but don't forget to have a particular request in mind when heading there. Who knows, you may just end up adding a fox or two to the shrine yourself.


My trip was hosted in partnership with Go Backpacking and the local government of Japan. All opinions are my own. 

Belize by Land: Discovering the Ruins, Wildlife, and Culture

Actun Tunichil Muknal
Entrance to Actun Tunichil Muknal cave (photo: Antti T. Nissinen)

“Oh! You’re going to Belize! You must be so excited to go diving.”

Anyone who has ever booked a trip to Belize has probably heard something like this. And it makes sense: Belize is one of the top diving destinations in the world. With clear waters, abundant coral reefs, and of course, the “Big Blue Hole,” it’s easy to see why.

Unfortunately, because the water gets so much attention, people who don’t dive, or just aren’t all that interested in being in the water, often don’t consider Belize travel because they are afraid there won’t be much for them to do.

The truth is, though, that even if you never set foot in the water, you can easily fill your time in Belize with unique and exciting experiences.

So, before you cross Belize off your list of potential vacation destinations, consider these alternatives to diving and snorkeling.

Explore Maya Ruins

Belize was a center of the Maya civilization, and multiple archaeological sites throughout the country offer a fascinating glimpse into this ancient culture.

In northern Belize, the Lamanai Archaeological Reserve is the largest and most famous of the Maya sites.

The site itself is in the jungle on the banks of the New River, and you’ll need to take an hour-long boat trip up the river to reach the site.

The trip is worthwhile, though, as there are still more than 900 structures standing, including several temples, as well as a museum. Climb to the top of High Temple for panoramic jungle views.

You can find Maya ruins in other areas of Belize as well. If you are staying closer to the touristy Cayo District, you aren’t far from San Ignacio, home to several ruins and archaeological sites.

Among them is El Pilar, one of the country’s largest sites that was only discovered in 1993 and is still being explored.

In San Ignacio, you can also explore caves featuring remnants of Maya civilization — including skeletal remains.

Cockscomb Jaguar Preserve
Cockscomb Jaguar Preserve (photo: Larnie & Bodil Fox)

Wildlife Encounters

Sea life aren’t the only creatures you'll encounter in Belize. With its lush forests and diverse landscape, Belize is home to a wide variety of flora and fauna — and plenty of ways to see them.

If you are interested in birds, Belize is a birdwatcher’s paradise, with more than 300 species to spot.

While the Crooked Tree Wildlife Sanctuary near Belize City and the jungle areas in the north of the country offer the greatest diversity of avian life, with a pair of binoculars and some patients, you can spot exotic birds just about anywhere.

If you prefer your animal encounters on the ground, visit the Belize Zoo, just outside of Belize City.

Formerly a refuge for wildlife that had been used in documentaries, the zoo now features more than 150 species.

All of the animals have either been orphaned, were former pets, or were born at the zoo.

The zoo isn’t the only place to see Belize’s native wildlife.

Hiking in the Cockscomb Basin Wildlife Sanctuary, also known as the Jaguar Preserve, offers plenty of chances to see wildlife in its usual habitat.

The Mountain Pine Ridge Forest Reserve is another favorite hiking spot – and its higher elevation offers a nice refreshing respite from the tropical heat in the jungle.

This reserve is well-known for rivers, pools, and waterfalls, including Hidden Falls (also known as Thousand Foot Falls) a popular spot for hikers.

Soak Up Some Culture

The unique mix of cultures that comprise Belize makes it one of the most diverse countries in the world — and creates a unique culture that is well worth learning about and exploring.

Belize City offers insight into the history and culture of the country and its people.

Visit the Museum of Belize, housed in an old prison, to learn about Maya, colonial, and pirate histories, or check out the Old Belize Cultural and Historical Centre, which has its own private beach.

Just walking through the streets of Belize City, you’ll encounter architecture that hints at various stages of the nation’s history, as well as find shops, galleries, and restaurants.

Of course, even if you don’t dip your toes in the warm Caribbean waters of Belize, you can still relax on the white sandy beaches in the shade of palm trees. But if you want to see more of this country than what is underwater, try some of these activities instead.


This story was brought to you in partnership with Anywhere.com.


Kolem Chen: Facing Fear in Tabasco's Epic Cave

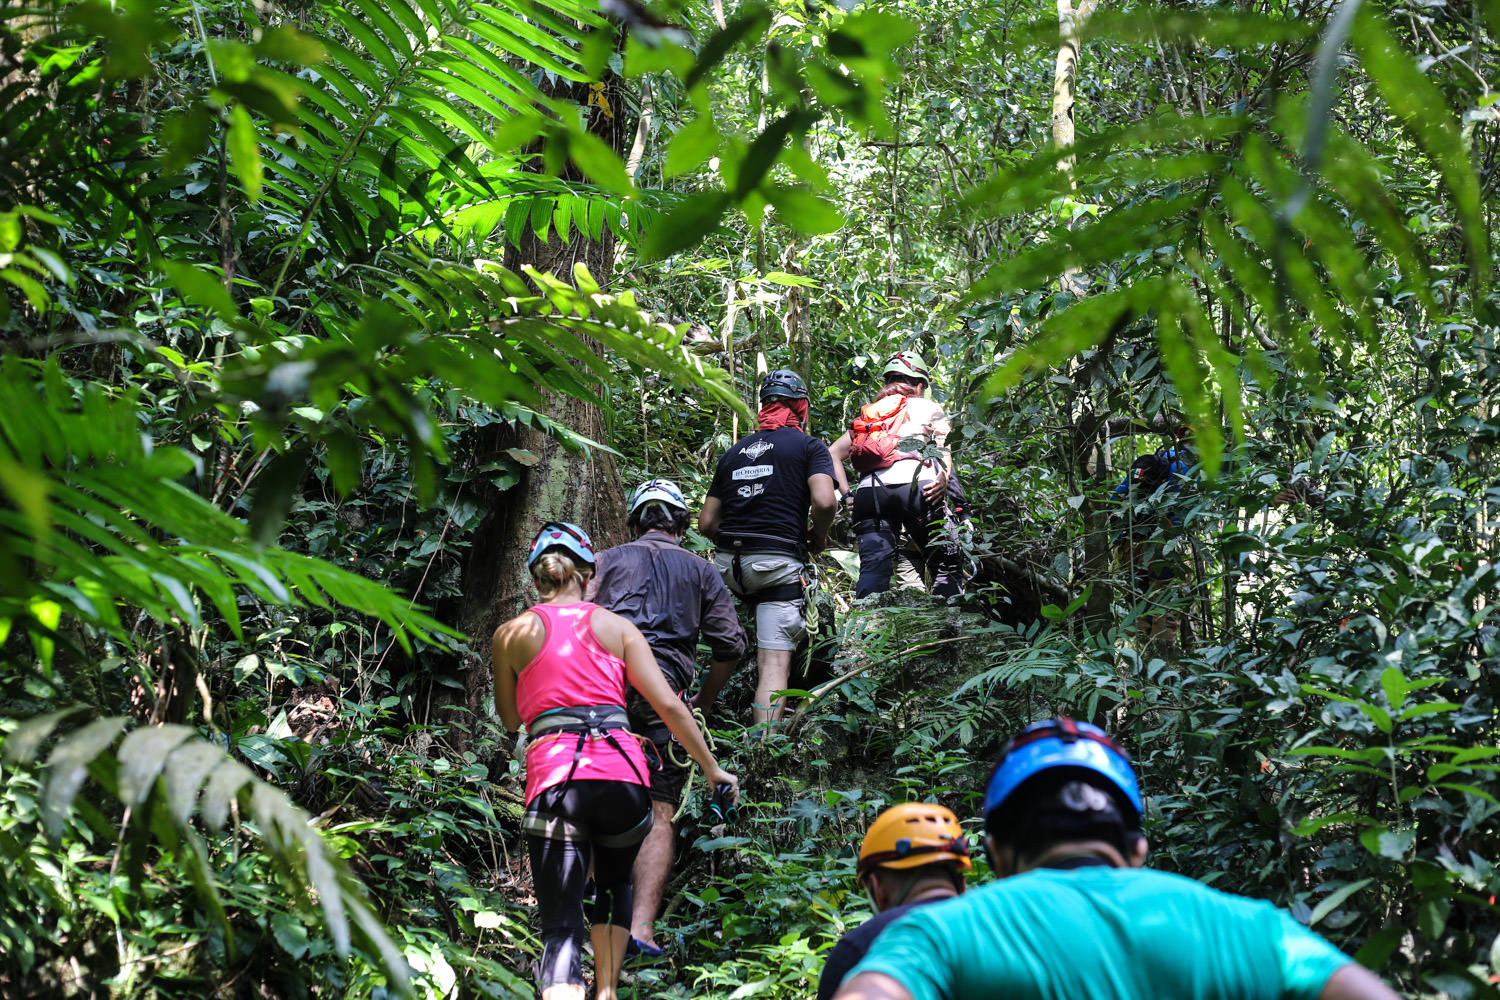
Hiking up to the top of Kolem Chen Cave
Hiking to the cave entrance

After experiencing Chiapas, I continued to Tabasco, the Mexican state that has pretty much nothing to do with the famous American hot sauce of the same name.

What I found surprised me.

Tuxtla Gutierrez, Chiapas, may be Mexico’s reigning Capital of Adventure… but Villahermosa, Tabasco is no snooze, either!

I was psyched to learn that within an hour’s drive of Tabasco’s capital, adventure-hungry travelers could be deep in nature: hiking, rappelling, mountain biking, and so much more.

Kolem Chen, an explorable cave of epic proportions (it means “Big Cave” in the indigenous Ch’ol language), is also conveniently located within Tabasco.

So, on my visit to Villahermosa, I opted for a Day of Adventure exploring the dark (and sometimes creepy-crawly-filled) reaches of the cave with Jungla Experience: rappelling down its sheer cliffs, and crawling through its tightest spaces.

I’m scared of the dark, of weird insects, of heights, and of tight spaces – what better opportunity to explore not only a cave but also these fears?

Let’s get started!

Kolem Chen in Tabasco, Mexico
Descending into the cave entrance for the first rappel

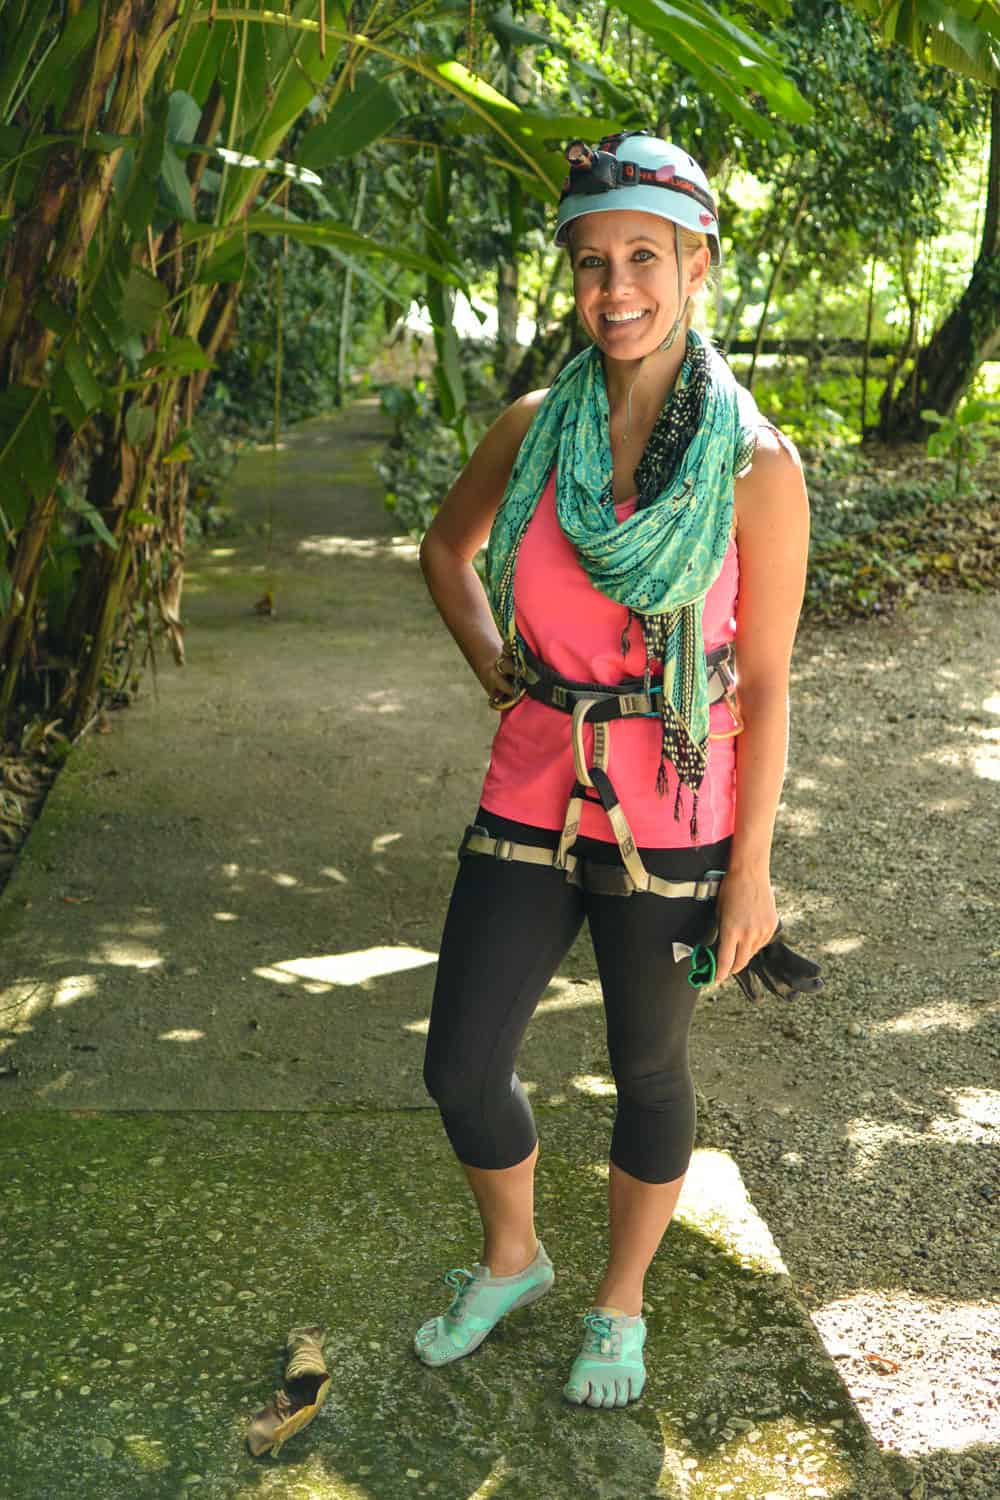
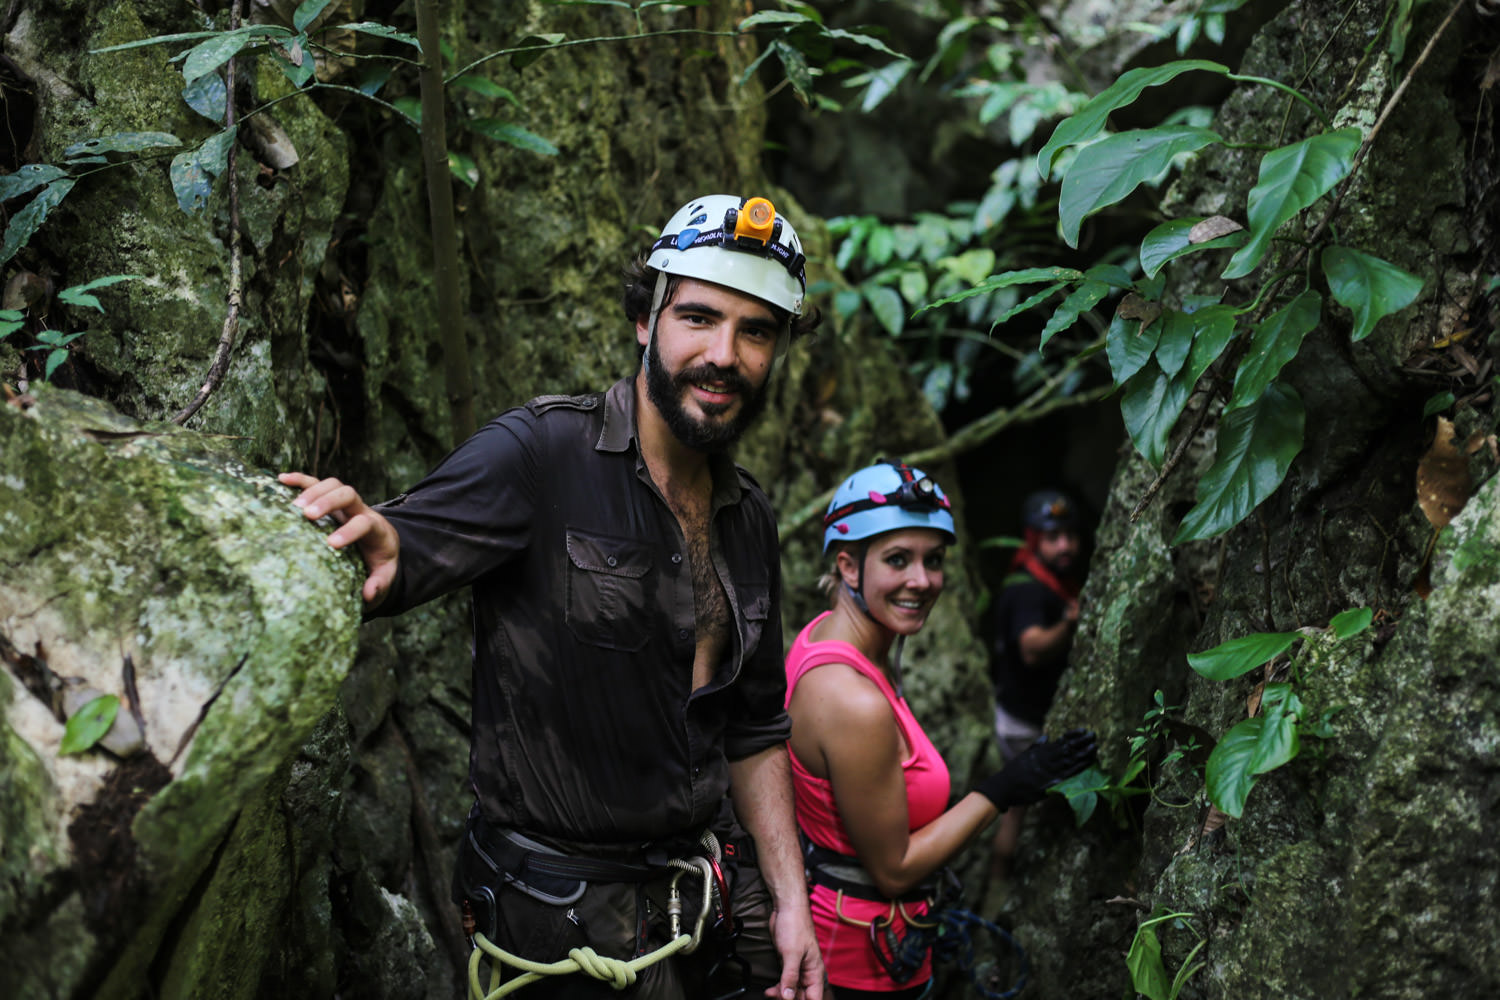
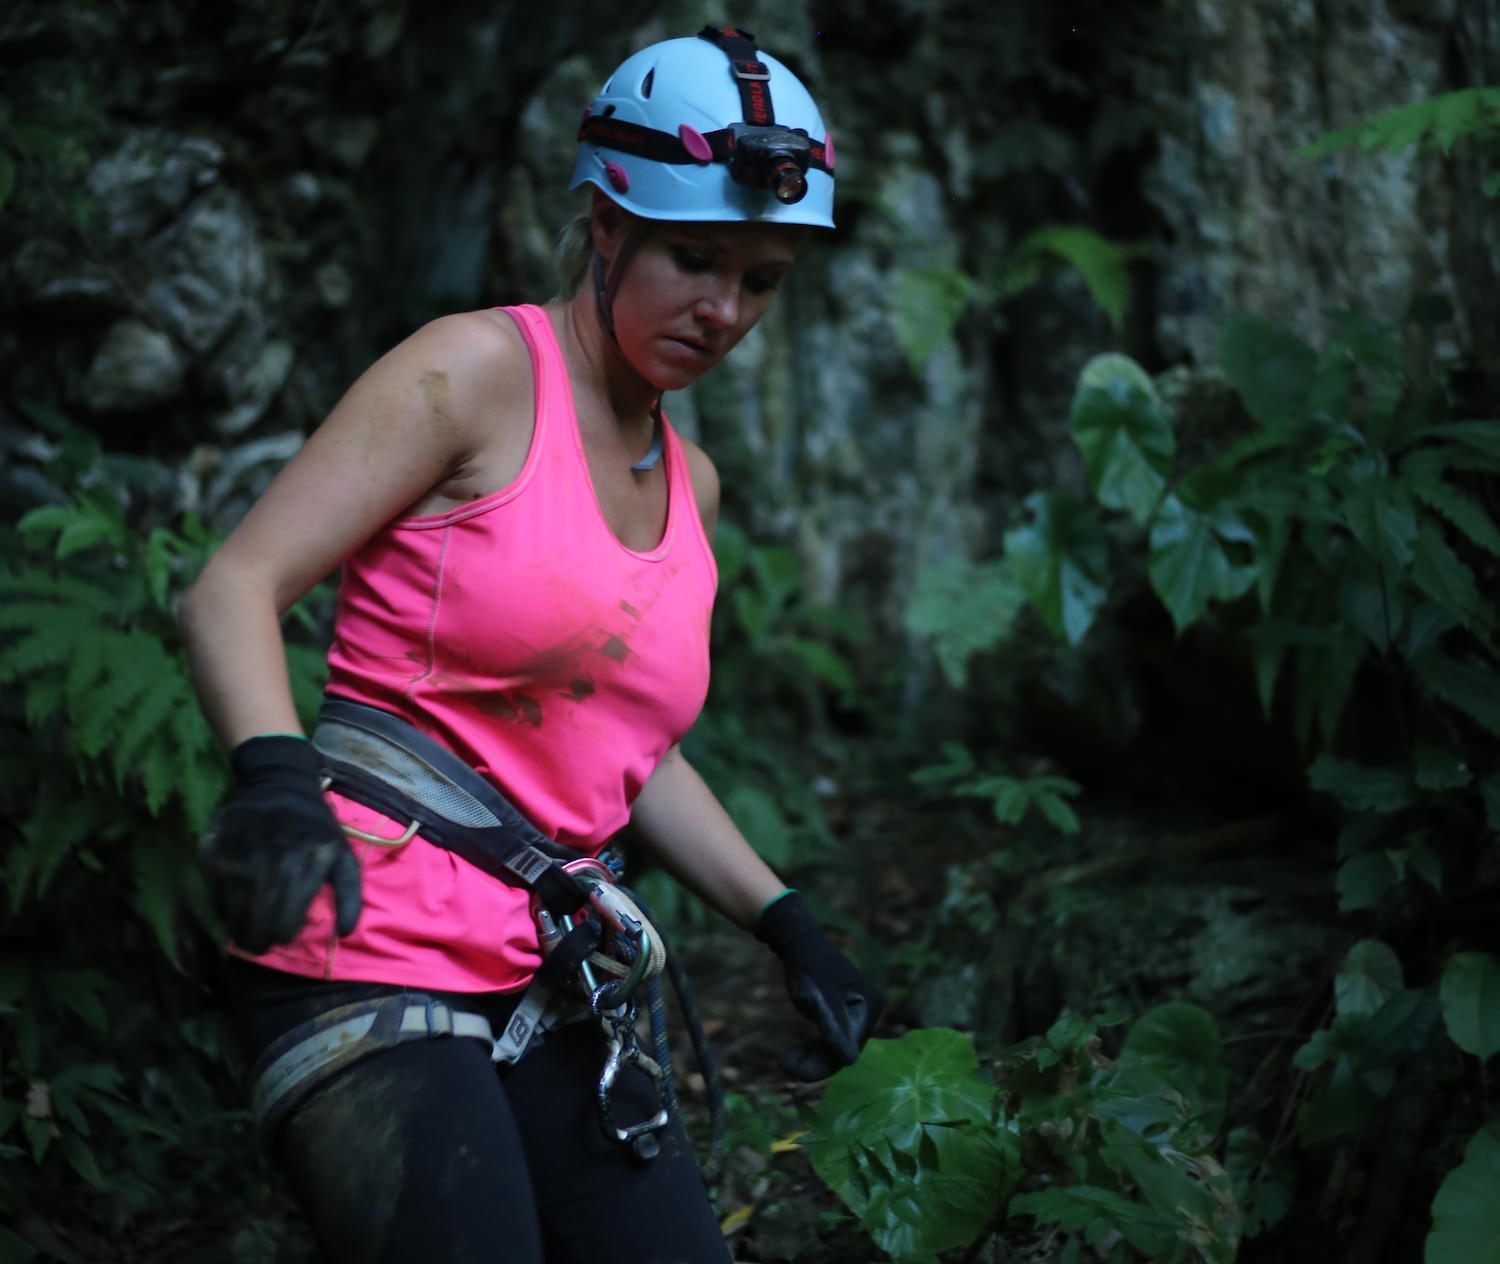
Along with my group, I got suited up for the adventure in a helmet (complete with the very necessary headlamp) and harness.

The guides double-checked everyone’s equipment to make sure it was fitted correctly, we took a few photos, and we were off!

First, our group needed to hike to the top of the cave.

I’m not going to lie; it was pretty tough.

After we’d climbed up a few hundred cement stairs, I thought we were done.

Nope! We’d just reached the entrance, and needed to continue up through the jungle.

The hike was difficult both in the environment (humidity and heat) and physically (the path was steep and required focus).

Luckily, it was short, less than 20 minutes or so, though it felt like longer.

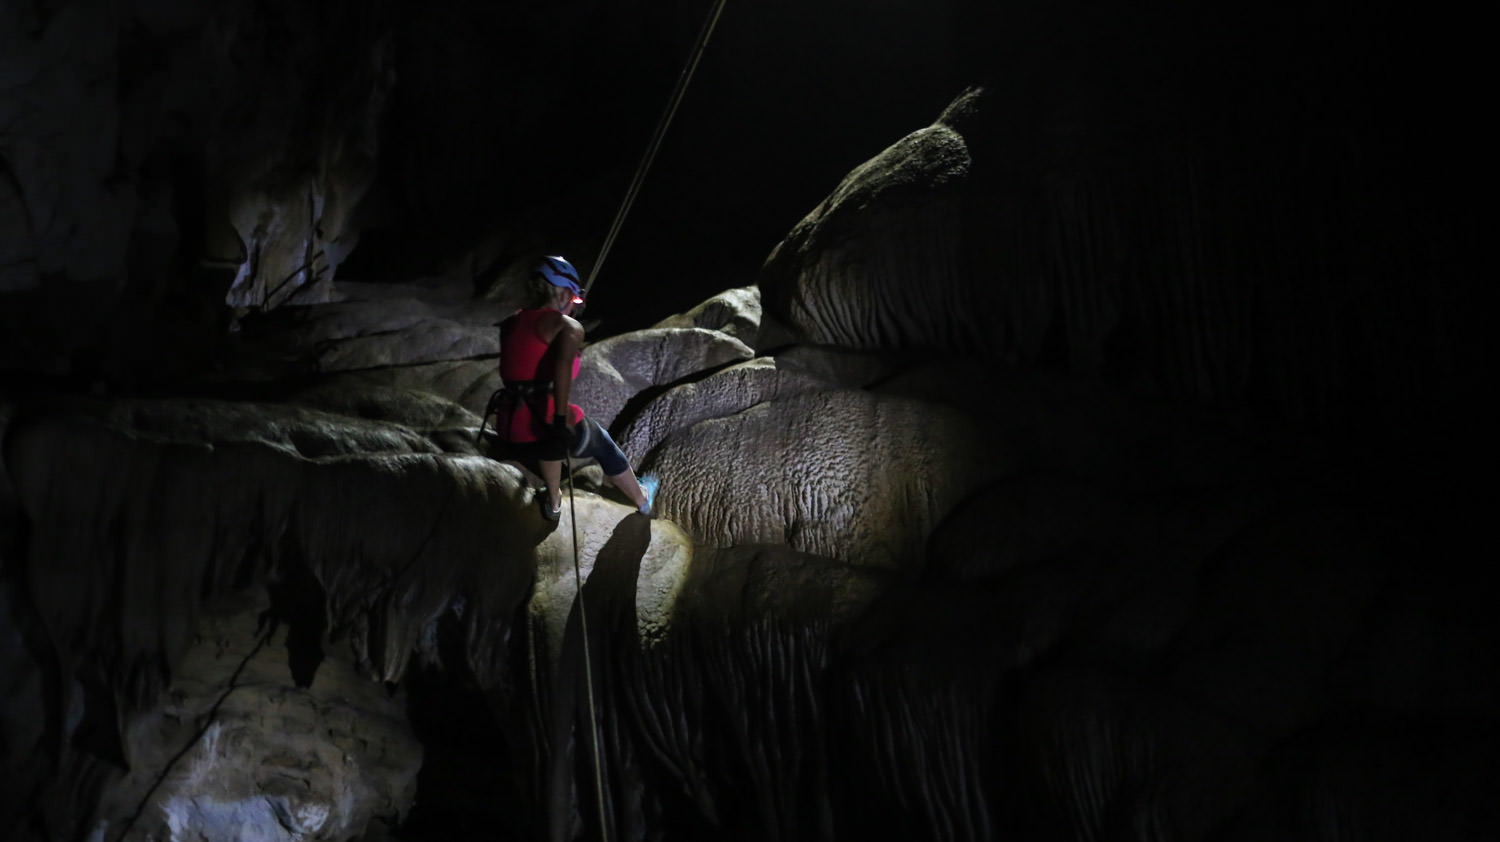
Rappelling in Kolem Chen Cave
Rappelling down a cliff

At the entrance of the cave, we jumped right into the swing of things, with a rappel to the next level of the cave.

I don’t know about you, but my first rappel of the day is always my most nerve-wracking.

I think the movement is a bit counterintuitive (leaning back, having your “weak hand” free or only loosely holding onto the rope, keeping your legs fairly straight) and it can take the first go to get used to the rhythm and motion again and feeling confident.

Fortunately, the rappel instructors at Jungla were both patient and experienced (and Ramon speaks perfect English, appreciated at any point where I felt nervous and couldn’t think through my Spanish), and I got right back into the groove.

If you’ve never been rappelling before, this would be a great place to start!

As our group made our way through the cave, we stopped to look at bugs adapted to the strange environment, to consider the calcification of the walls, and to see the slow formation of stalactites and stalagmites.

In total, there were four big rappels (several broken up by a level section), a section of crawling, and a rope ladder at the end, taking about five hours from start to finish.

Enjoying the darkness

Aside from the adrenaline activities, it was rejuvenating to spend time in the silence and isolation of the cave.

Turning your headlamp off and sitting in complete and utter darkness needs to be experienced to be understood.

It feels a bit trippy and a bit disorienting… in a good way.

It’s all too easy to get stuck in a rut and routine of the daily grind, and doing something new is one way to break out of the doldrums.

There’s nothing like experiencing the blackness and silence of a cave to make you appreciate the sights and sounds of your life.

Bats in Kolem Chen Cave
Bats clustered on the cave ceiling

We ended our cave adventure by walking out through a bat cave, the little guys flittering above us, slowly growing more active as daylight began to die down.

Bats, like caves, are too often vilified and feared.

A single brown bat can eat up to 1,000 mosquitos per hour, so maybe think about saying thanks, instead of squealing, the next time you come across one.

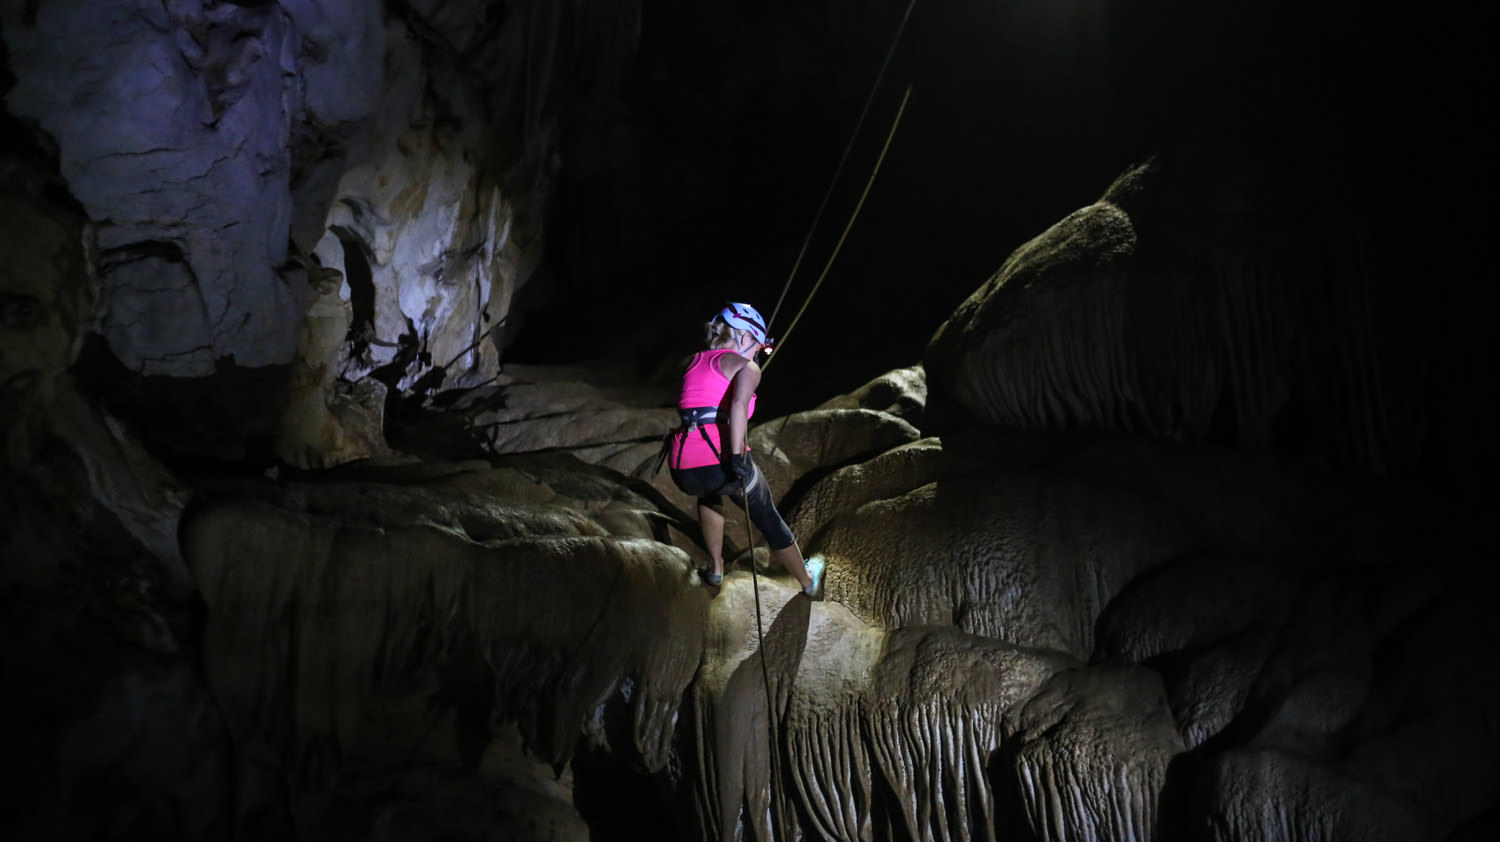
Rappelling in the dark
Rappelling down through the dark and unknown with my headlamp to light my way

Fear grows in the unknown and thrives in misunderstanding.

Exploring what makes you scared (like, say, spending time in the dark by rappelling through bat-filled caves) provides an incredible opportunity to replace fears with understanding and appreciation, and maybe even allows you to discover a new hobby.

Kolem Chen Cave
Exiting the cave and the adventure

What fears will you be exploring next?


My trip to Kolem Chen in Tabasco was hosted in partnership with Go Backpacking, Jungla Experience, and ATMEX. All opinions are my own. 

All photos credited: Jungla Experience


Things to Do in Nagoya: Japan's Incredible Nagoya Castle

Nagoya Castle
Nagoya Castle

In many ways, Nagoya is a city too often overlooked when it comes to travel in Japan - people just aren't thinking about things to do in Nagoya, or what to see in Nagoya or the concept of "Nagoya sightseeing" at large.

Internationally (and domestically), Nagoya doesn't quite have the clout. Take my case, for example.

I had been to Japan twice (to see Tokyo and Kyoto) without ever thinking about the Chubu Region, or visiting the city of Nagoya.

Yet, in late October of this year, I explored the Chubu Region with fervor and began to discover its beauty and charm.

In the Chubu Region, often called the "Heart of Japan," there's plenty of natural wonders to go around.

While Nagoya isn't necessarily a place that is known for its nature, I felt it was worth recognizing, and in particular, Nagoya Castle.

In its heyday, Nagoya Castle was revered across the land, and as famous as any castle in Japan.

When you're thinking about what to do in Nagoya, the first thing to come to mind has to be Nagoya Castle.

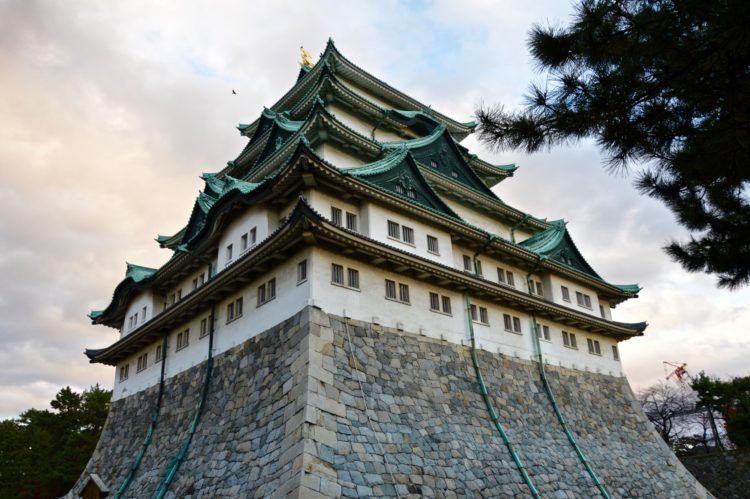
Nagoya Castle
Nagoya Castle was the heart of one of the most important castle towns in the Edo Period

What You Need to Know About Nagoya Castle

Japan doesn't have to be expensive. That's something to think about when you're considering what to do in Nagoya.

Nagoya Castle is no exception to that rule either, as a full adult ticket will only cost you 500 yen (which is less than $5).

Free tours are also offered every day at 1 pm by the Aichi Goodwill Guides Network (AGGN). You can meet them at the East Gate of Nagoya Castle.

The regular hours are 9:00 am - 4:30 pm, and it's open each day, except December 29th to January 1st.

You'll most likely be heading from Nagoya Station. From there, take the Higashiyama Subway Line towards Sakae Station, then finally change to the Meijo Subway Line.

Your last destination will be Shiyakusho Station, and it shouldn't cost you more than around $2 (240 yen) to get there from Nagoya Station.

Nagoya Castle is just a three-minute walk from Shiyakusho Station.

Nagoya Castle
Nagoya Castle pays respects to the intriguing history in many ways

The History of Nagoya Castle

Japan has an illustrious history, from the food to the established cultural traditions and dramatic, intense wars and battles.

From the extensive documentation, it's easy to see that the castle town, known as Nagoya-juku, played a prominent role in Japan's history, especially in the Edo Period.

This castle town was important because of where it was situated on the established trade routes of the country, especially the Tokaido route, which linked Kyoto and Tokyo.

The first edition of the castle comes to fruition in the early 16th century, but it was abandoned shortly after that.

In the 17th century, it decided that Nagoya Castle ought to be rebuilt in such a way that Nagoya Castle (and, by proxy, the castle town) can become the new capital of the Owari Province.

It's important to note here that the castle isn't going to be one main fortified building, but more like a community of strong, aesthetically pleasing buildings within fortified stone walls.

In some ways, beauty was as important as strength. Stunning palaces needed to be built to entice important people passing by on trade routes to stop for a visit, and they needed to impress.

The 19th century was not kind to Nagoya Castle. The castle was defeated and pillaged in the latter part of the century, and to cap it all off, an earthquake struck before the turn of the century, causing significant damage.

In the 1930s, ownership transferred over to the government, and it became a respected public space, but, of course, World War II ended all that. Sadly, almost everything was destroyed in air raids.

What we see today is not original but a marvelous reconstruction, yet it's impressive by any standard.

Hommaru Palace
Hommaru Palace

Nagoya Castle's Hommaru Palace

The Hommaru Palace, on the castle grounds, was widely considered to be the most impressive example of castle architecture in modern Japan.

Currently, it is in the process of being rebuilt to give an accurate portrayal of its former glory, but its nearing completion.

The large building that we think of as being the "castle" itself is known as the "donjon," but that wouldn't necessarily be fitting to host dignitaries, so having a palace of this stature was crucial.

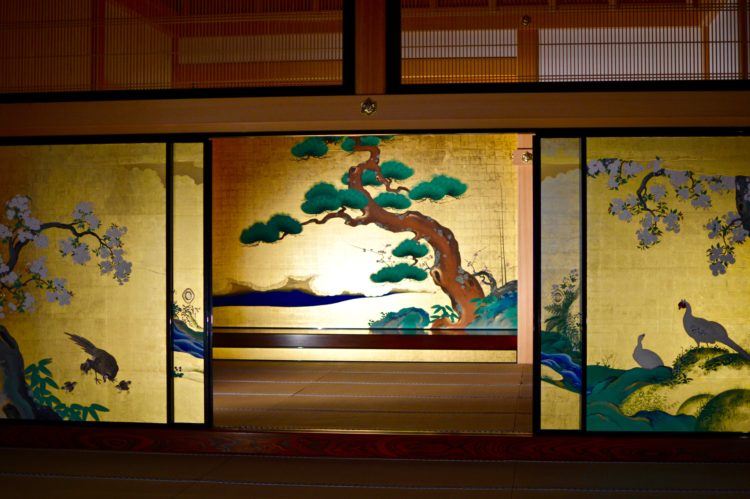
It was considered to be the palace to end all palaces for many reasons. What it is perhaps most famous for is the gold walls all over the palace, which have been brilliantly recreated.

The gold walls were removed and stashed away for safekeeping during World War II if the castle was destroyed, which sadly did occur in 1945.

The walls are adorned with paintings from the Kano school, which is the most respected and influential Japanese painting school, lasting some 300 years.

It is lavish, glorious, and a must-see if you're visiting Nagoya Castle, or thinking about what to do in Nagoya.

Though, I think it's worth noting that, for me, the exterior offers the wow factor, especially from a photography perspective.

Nagoya Castle

Nagoya Castle Today

Today, Nagoya Castle is very much a "place to be" in the city, whether you're looking for history, or to walk off the sake from the previous night's wild karaoke affairs.

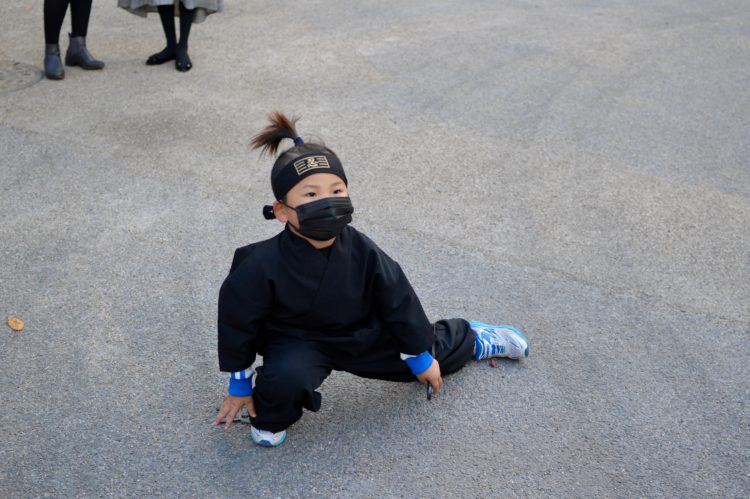
In truth, it can be what you want it to be, even if that means wearing your most elegant ninja attire.

In all seriousness, Nagoya Castle is a place to spend a few hours and get a feel for what a prominent Japanese castle is all about.

The idea of the "castle" was profoundly engrained throughout Japanese history, so it's the ideal opportunity to dive into the culture.


My trip was hosted in partnership with Go Backpacking and the local government of Japan. All opinions are my own. 

Tuxtla Gutierrez: Mexico's Adventure Capital

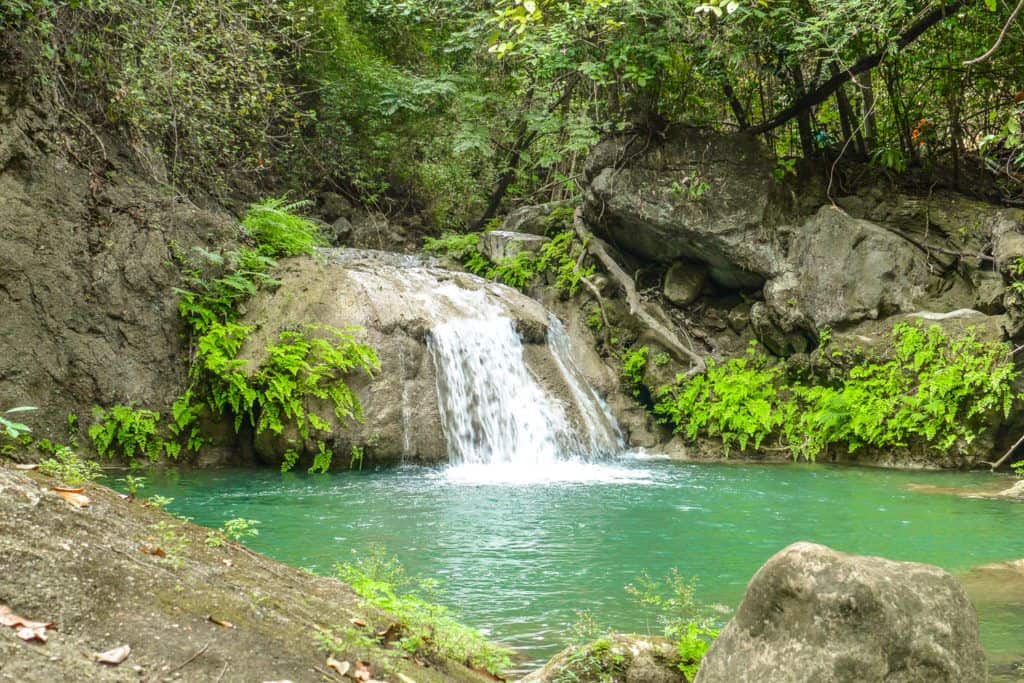
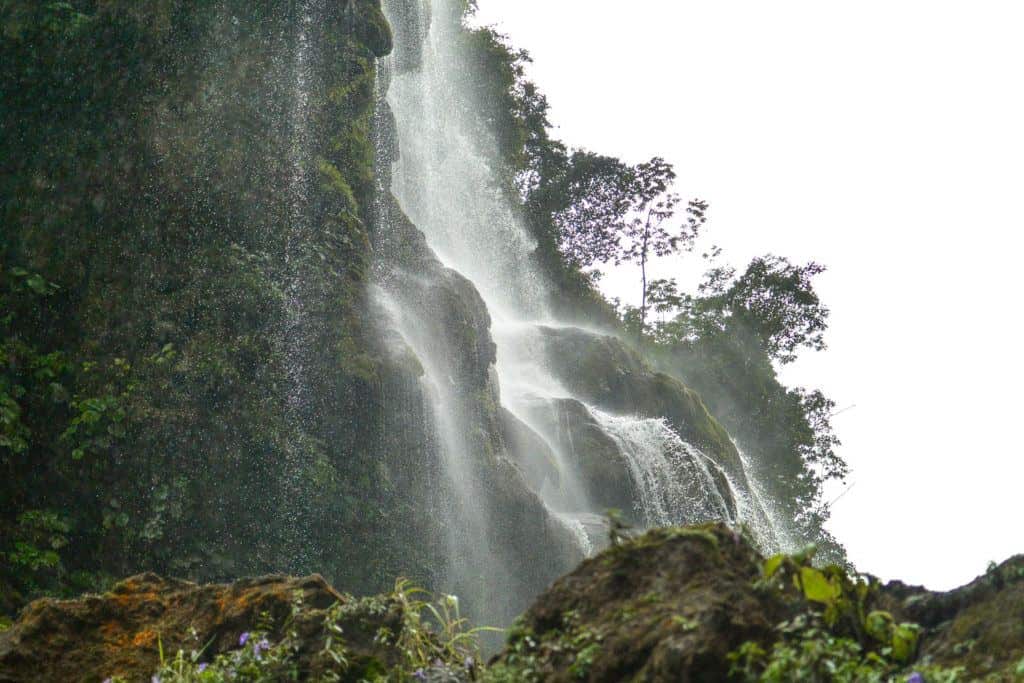
Waterfall in Tuxtla Gutierrez, Mexico

There's a common misconception that Mexico is all about beaches. I even fall prey to this assumption, and I live here.

I'll admit, when planning a domestic trip, I first think of Tulum, Puerto Escondido, Baja, Puerto Vallarta, Isla Mujeres: beaches.

Don't get me wrong; there's nothing wrong with beaches (especially not in Mexico), but this diverse country has SO much more to offer than white sands and turquoise seas.

Each of the 32 states has a little something different going on, as I learned firsthand on my trip to lush green Chiapas, home of Tuxtla Gutierrez, Mexico's capital of adventure.

I've been living in Mexico for two years, and I always thought I had to leave the country to get my adrenaline fix.

Now I know: there's no need to fly all the way to South America or to overpay for the same activities in Costa Rica if you're after adventure.

Tuxtla Gutierrez is just a short flight (or two, with a potentially awesome layover in Mexico City) away from almost any major airport in North America, and the activities come with the same safety standards, adrenaline, and beautiful surroundings, but at a fraction of the price.

Boat ride

Whether you're into hiking, rappelling, bouldering, mountain biking, caving, flying, or so much more: Tuxtla Gutierrez is the place for you.

Trust me. I sampled it ALL over five action-packed, adrenaline-fueled days of adventure.

What follows are my favorite adventure activities in Tuxtla Gutierrez.

Sima de las Cotorras rappel

Rappelling

The unique landscape surrounding Tuxtla Gutierrez makes it the perfect jumping-off point for rappelling adventures, with cliffs and karst formations galore.

Never tried rappelling? Now is the best time to start!

Sima de las Cotorras

Translated literally as the Parrot Sinkhole. This unique formation (140 meters deep and 160 meters in diameter) is located inside the El Ocote Biosphere Reserve and was created by tectonic and erosive forces wearing away at the integrity of the limestone until it eventually collapsed.

Today, the forest at the bottom of the sinkhole is inhabited by a variety of birds, including hundreds of parrots.

Sima de las Cotorras rappel
Hanging out above the sinkhole

Aside from the ecological interests, it is the perfect formation for dropping yourself down via rappel.

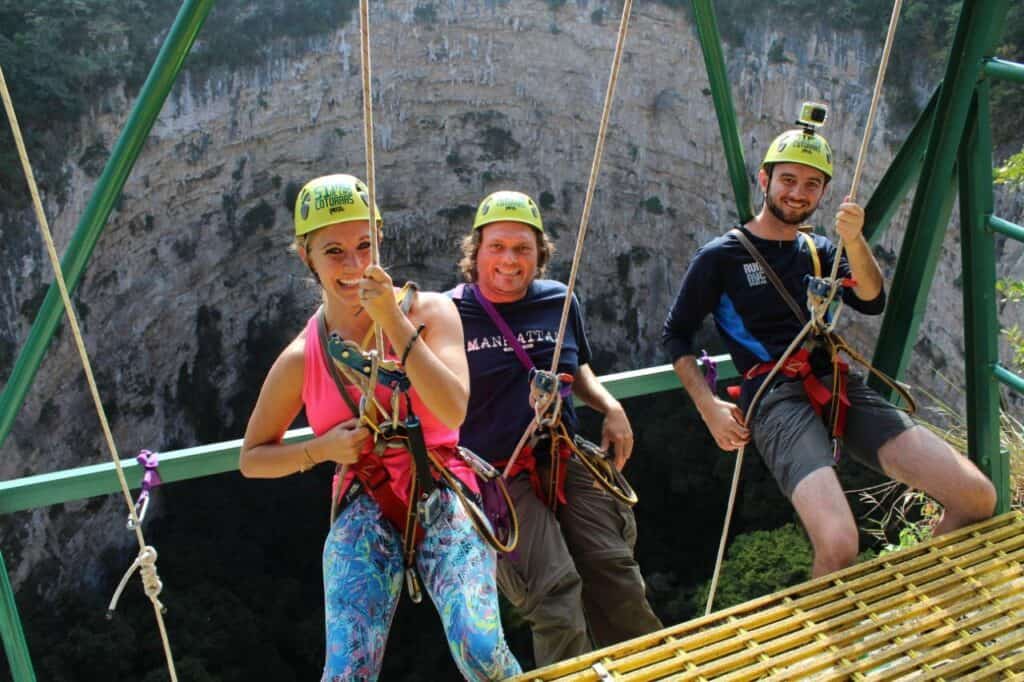
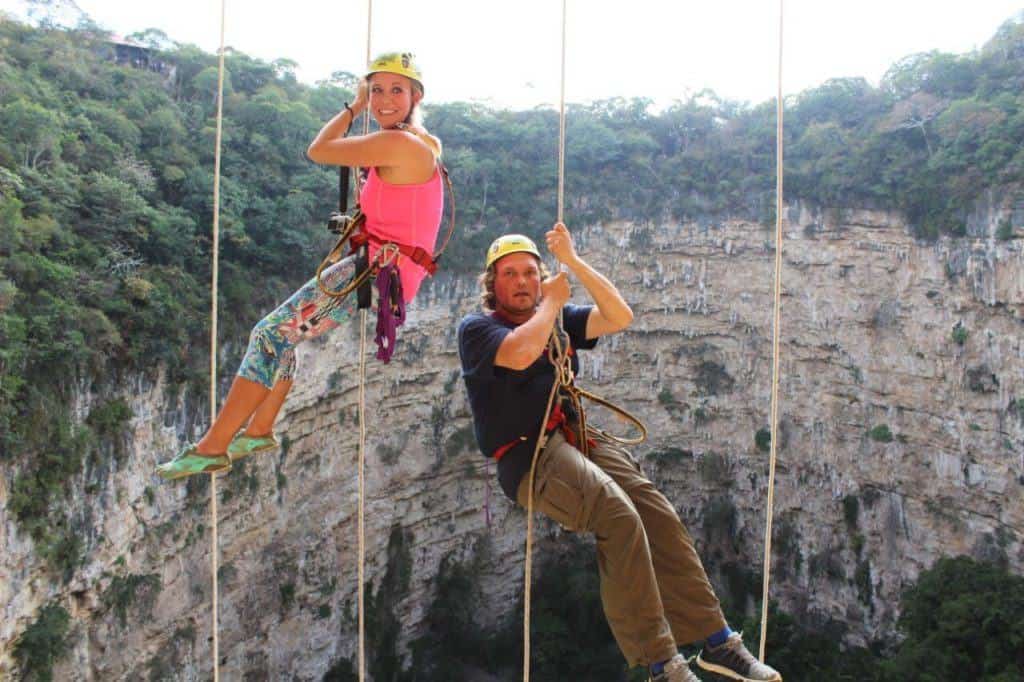
It was my first time rappelling without using my legs to push-off of a cliff, and I have to admit I found it pretty terrifying and exciting just dangling into nothingness.

If you time your visit right (check with the guides for correct season and time of day), you can rappel during the parrots' return or departure, placing yourself in the midst of a whirlwind of hundreds of birds.

I visited Sima de las Cotorras with guides from Ecoexperiencias Chiapas.

Tzimbac Adventure Park

Tzimbac Adventure Park

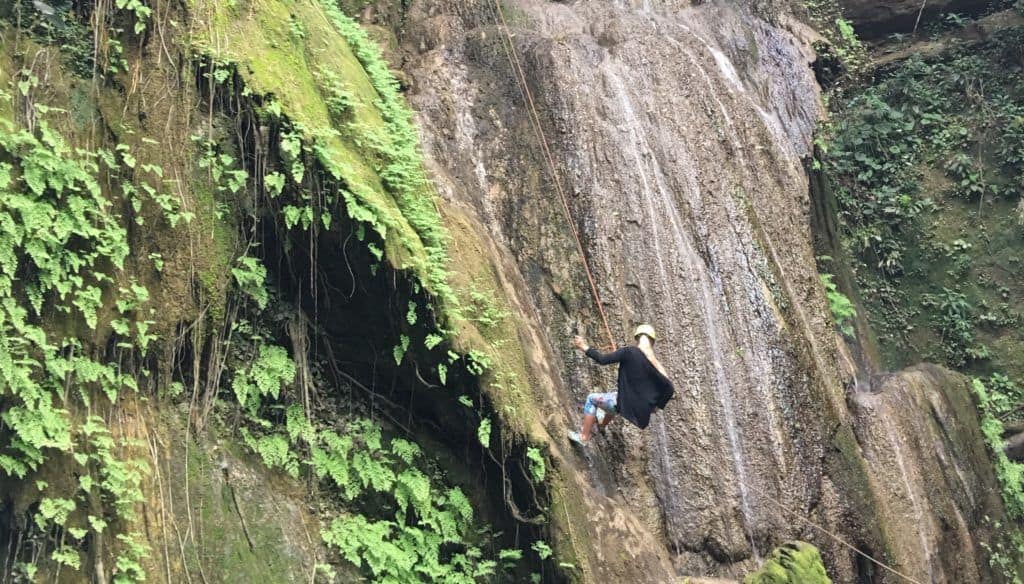
Tzimbac Adventure Park offers a variety of eco-adventures just a short drive from downtown Tuxtla Gutierrez, including waterfall rappelling.

Never tried it? There's nothing like rappelling down a waterfall, with the greenery of the forest surrounding you, the sound of the water rushing filling the area. Adrenaline rush!

I visited Tzimbac with guides from Ecoexperiencias Chiapas.

If you want to get EXTRA adventurous with your rappelling, do it inside a cave!

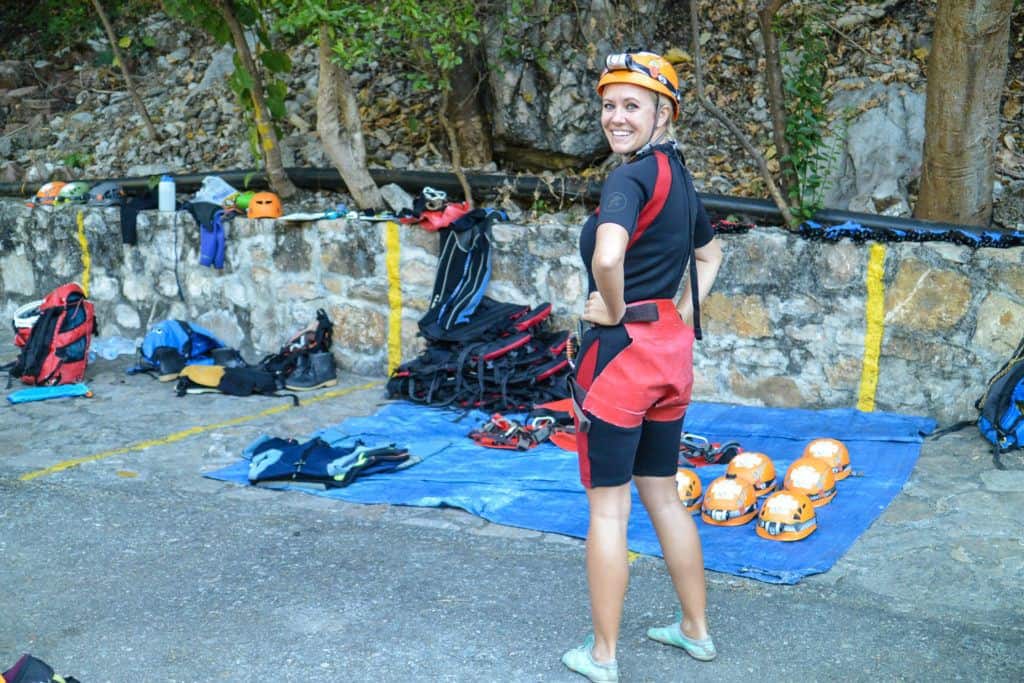
Gearing up
Gearing up

Caving

There are a variety of caves open for guided exploration around Chiapas (and the nearby states).

Whether you call it spelunking, potholing, speleology, or just good ol' caving: strapping on some gear and getting messy in a cave is just fun!

Chorreadero Waterfall

Even if you've been there, and done that concerning caving, this is something special.

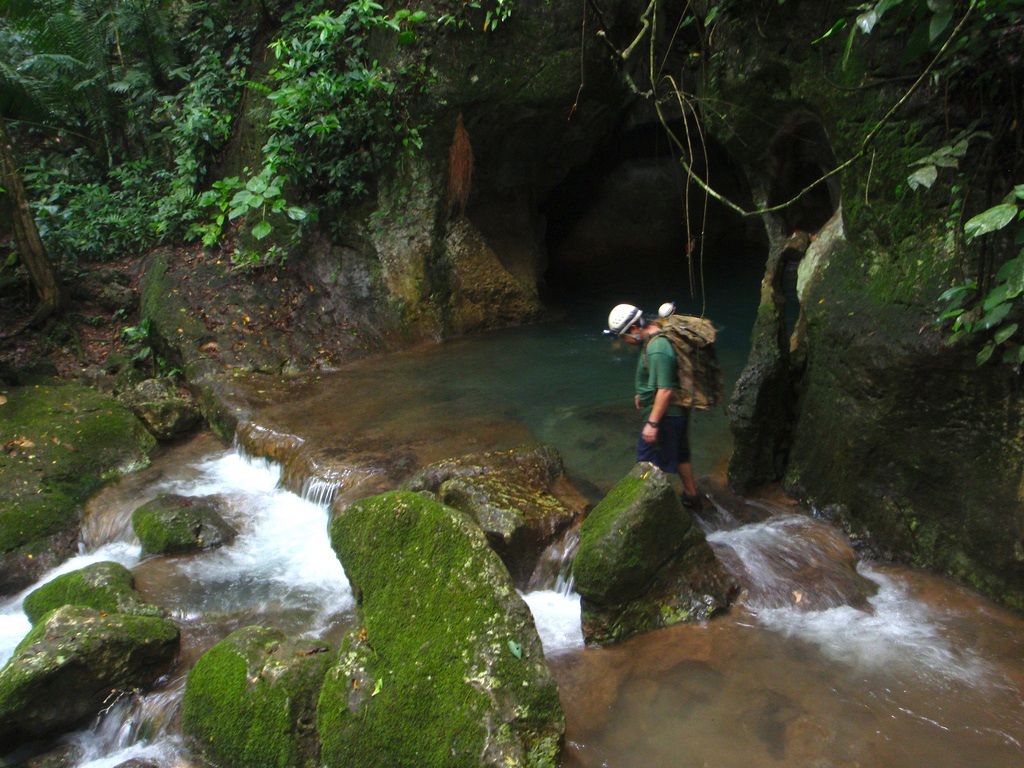
Take your caving up a notch by exploring a cave with a river running through it, like the Chorreadero Waterfall cave.

Because of this unique attribute, I was able to cliff jump into pitch-black pools (after a guide tested the depth, first, of course), rappel down both wet and dry cliffs, swim through an underground river, and slide down small (and not quite-so-small) waterfalls.

If you have worries about caves in general or tight underground spaces (like me!), the Chorreadero Waterfall could be a great place to try to challenge your fears.

The cave is spacious; I didn't once feel even slightly squeezed in.

If you have a medical condition or intense claustrophobia, though, speak to one of the guides BEFORE booking.

I visited Chorreadero Waterfall with Petra Vertical.

Aguacero Waterfall
Aguacero Waterfall

Hiking

One of the things to keep in mind about hiking around Chiapas is that going with an experienced local guide is ALWAYS the best choice.

The rocky, bouldered terrain means you'll frequently be scrambling over huge rocks and near cliffs, sometimes needing a rope to either pull yourself up or gently rappel down.

It's an absolute blast, and way more interesting than a typical flat walk, but you don't want to risk injury or a fall doing it alone, especially as cell reception isn't too great in case of an emergency.

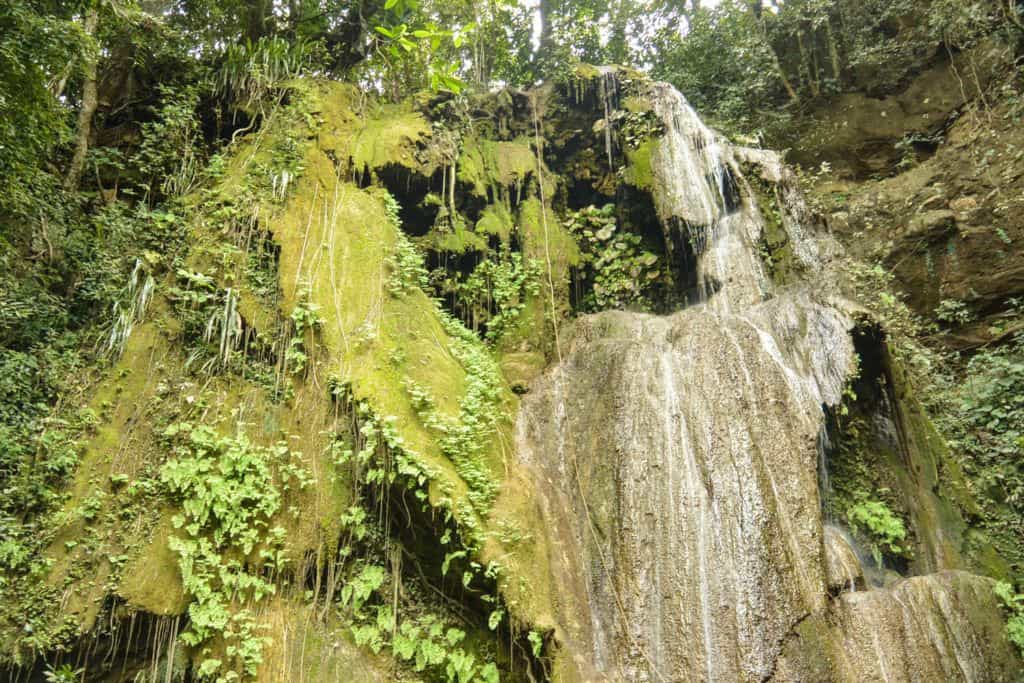
Aguacero Waterfall

The Aguacero Waterfall hike is one of my favorites, for the not-so-surprising ending.

This fairly straightforward hike (that includes a section of supposedly 700 steps: feels like less going down, feels like more going up) offered incredible views and the BEST reward at the finish... an enormous waterfall!

Have you seen Fern Gully?

This place is Fern Gully come to life.

There were locals overnight and day camping at the bottom and seems to get more popular as the day goes on, so showing up early would be essential for anyone who wanted a secluded experience.

I visited Aguacero Waterfall with guides from Ecoexperiencias Chiapas.

Cañada Muñiz
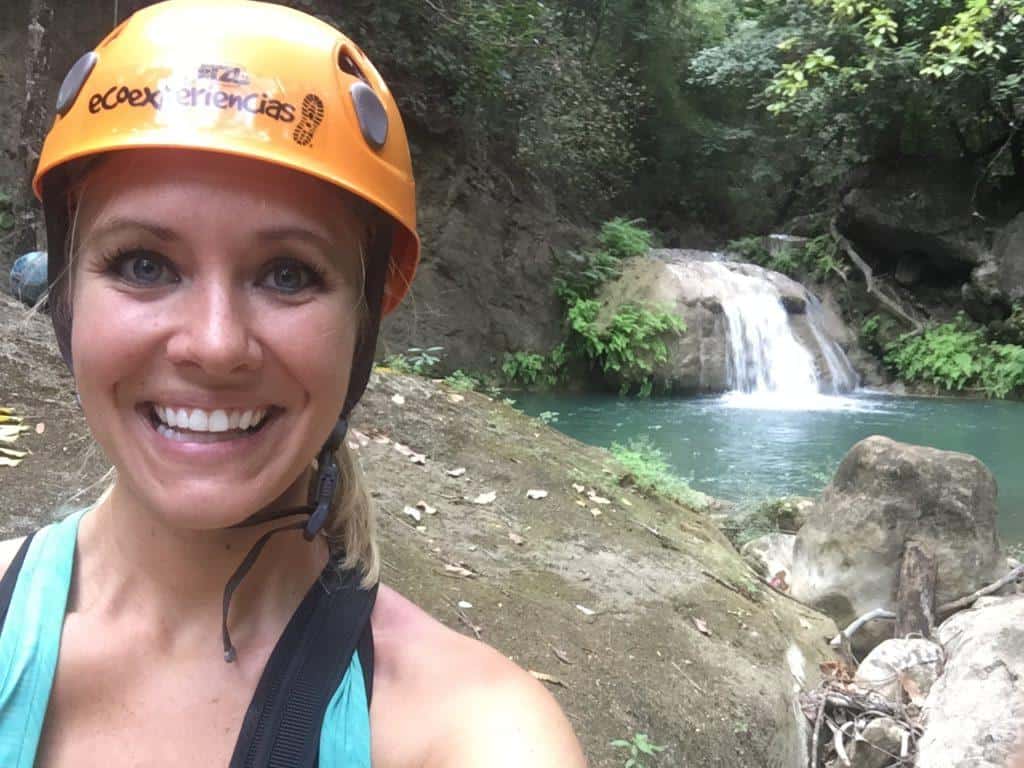
All smiles

Cañada Muñiz

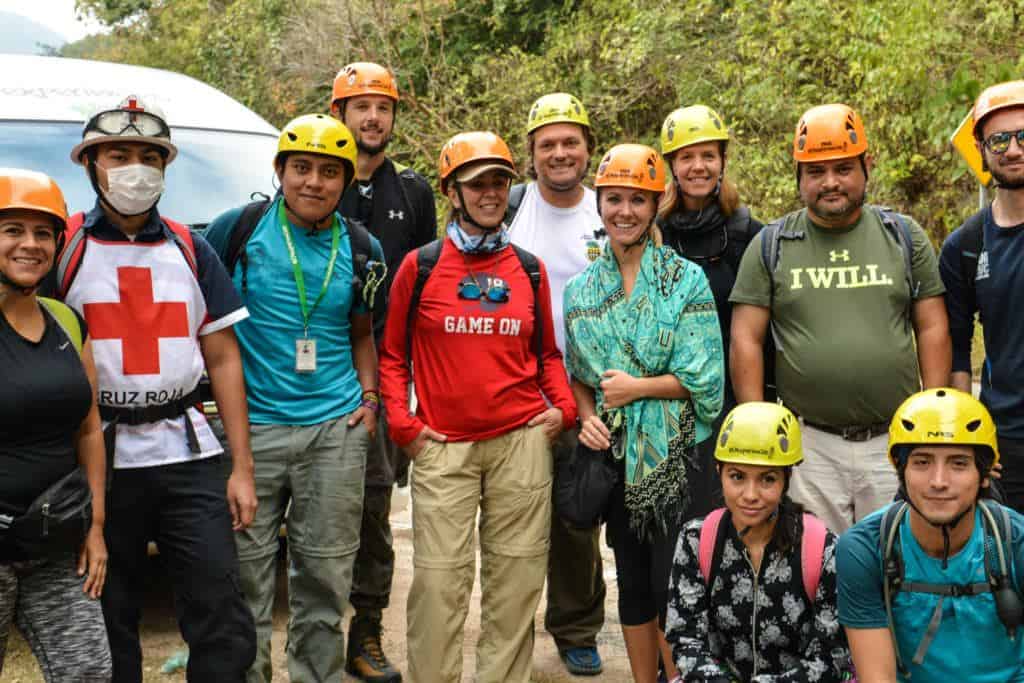
This five-hour hike from the road to the Sumidero Canyon river was one of the more difficult I've undertaken.

You KNOW it's going to be a hard hike when you're asked to put on a helmet, and there's a Red Cross paramedic accompanying your group!

It required climbing over boulders, using a rope to balance while walking down a cliff face, and a lot of time in the stream (I was thankful for my Vibram shoes that can get wet without getting slippery).

At various points, I encountered biting ants and somehow disrupted a wasp's nest, resulting in sharp stings all along my backside.

Still, it was honestly worth it for the incredible views and intense natural experience.

I visited Cañada Muñiz with guides from Ecoexperiencias Chiapas.

Tzimbac Adventure Park

Tzimbac has more than rappel adventures, offering hikes through the expansive property.

I was able to see enormous spiders (eek!) and some birds, as well as interesting rock formations and a lot of greenery.

I visited Tzimbac with guides from Ecoexperiencias Chiapas.

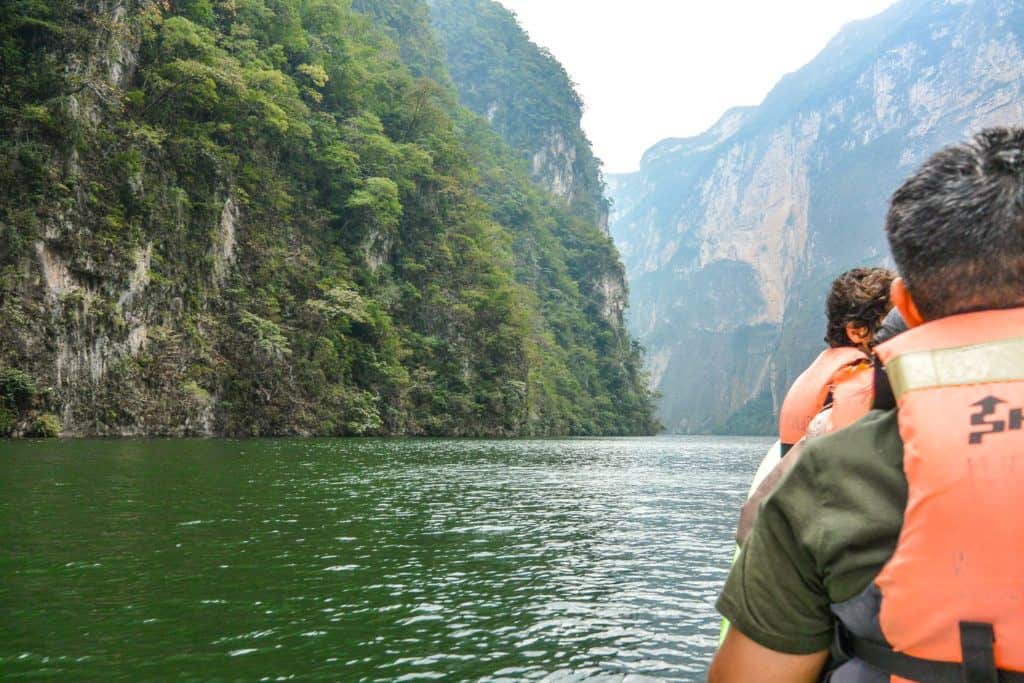
Sumidero Canyon
Sumidero Canyon

Mountain Biking

The hills of Chiapas make for an intense biking experience (quite different depending on if you're going up, or down) with some fantastic views.

Sumidero Canyon

I went for a 16km road bike ride along the Sumidero Canyon.

I'm not the best biker in the world (blame these short stubby legs of mine), so having periodic viewpoints like the one below located along the route as excuses (er, reasons) to stop and take a break to admire the view was much appreciated.

I visited Sumidero Canyon with guides from Enbiciando and Ecoexperiencias Chiapas.

Flying

I'm not a big plane fan.

Aside from being afraid of the dark, the underground, deep water, heights, spiders (and probably a few others I'm forgetting), I'm terrified of flying.

I'm on a flight at least a few times a month (for several years now), but I still can never sleep the night before.

I've found that one of the best ways to conquer (or at least, lessen) fears is through understanding and experience.

What better way to work on a fear of flying than to jump in an ultralight plane?

Ultralight flying

Valle Bonito

I visited the Valle Bonito flight club to experience ultralight flights for my first time.

Full disclosure: I didn't go up on a flight this time because darkness had arrived.

I did, however, get to see and touch the plane, and watch flights take off and land from up close.

At this unique flight club, you can take ultralight flights, or even learn to fly one yourself with the help of certified aviation instructor "Chino."

I visited Valle Bonito: Club de Vuelo with Richie "Chino" Gomez

How about it - when will you be visiting Mexico's capital of adventure?


My trip to Tuxtla Gutierrez was hosted in partnership with Go Backpacking, Tuxtla Gutierrez Tourism, and ATMEX. All opinions are my own.

North Fork Canadian Yurt: My Night Alone in the Colorado Wilderness

Fall foliage in northern Colorado

I'd never spent a night alone in the wilderness for all my travels, including high-altitude treks in the Himalayas and camping in the Okavango Delta. That was the challenge awaiting me in northern Colorado: to hike one mile with everything I needed for a night at North Fork Canadian Yurt.

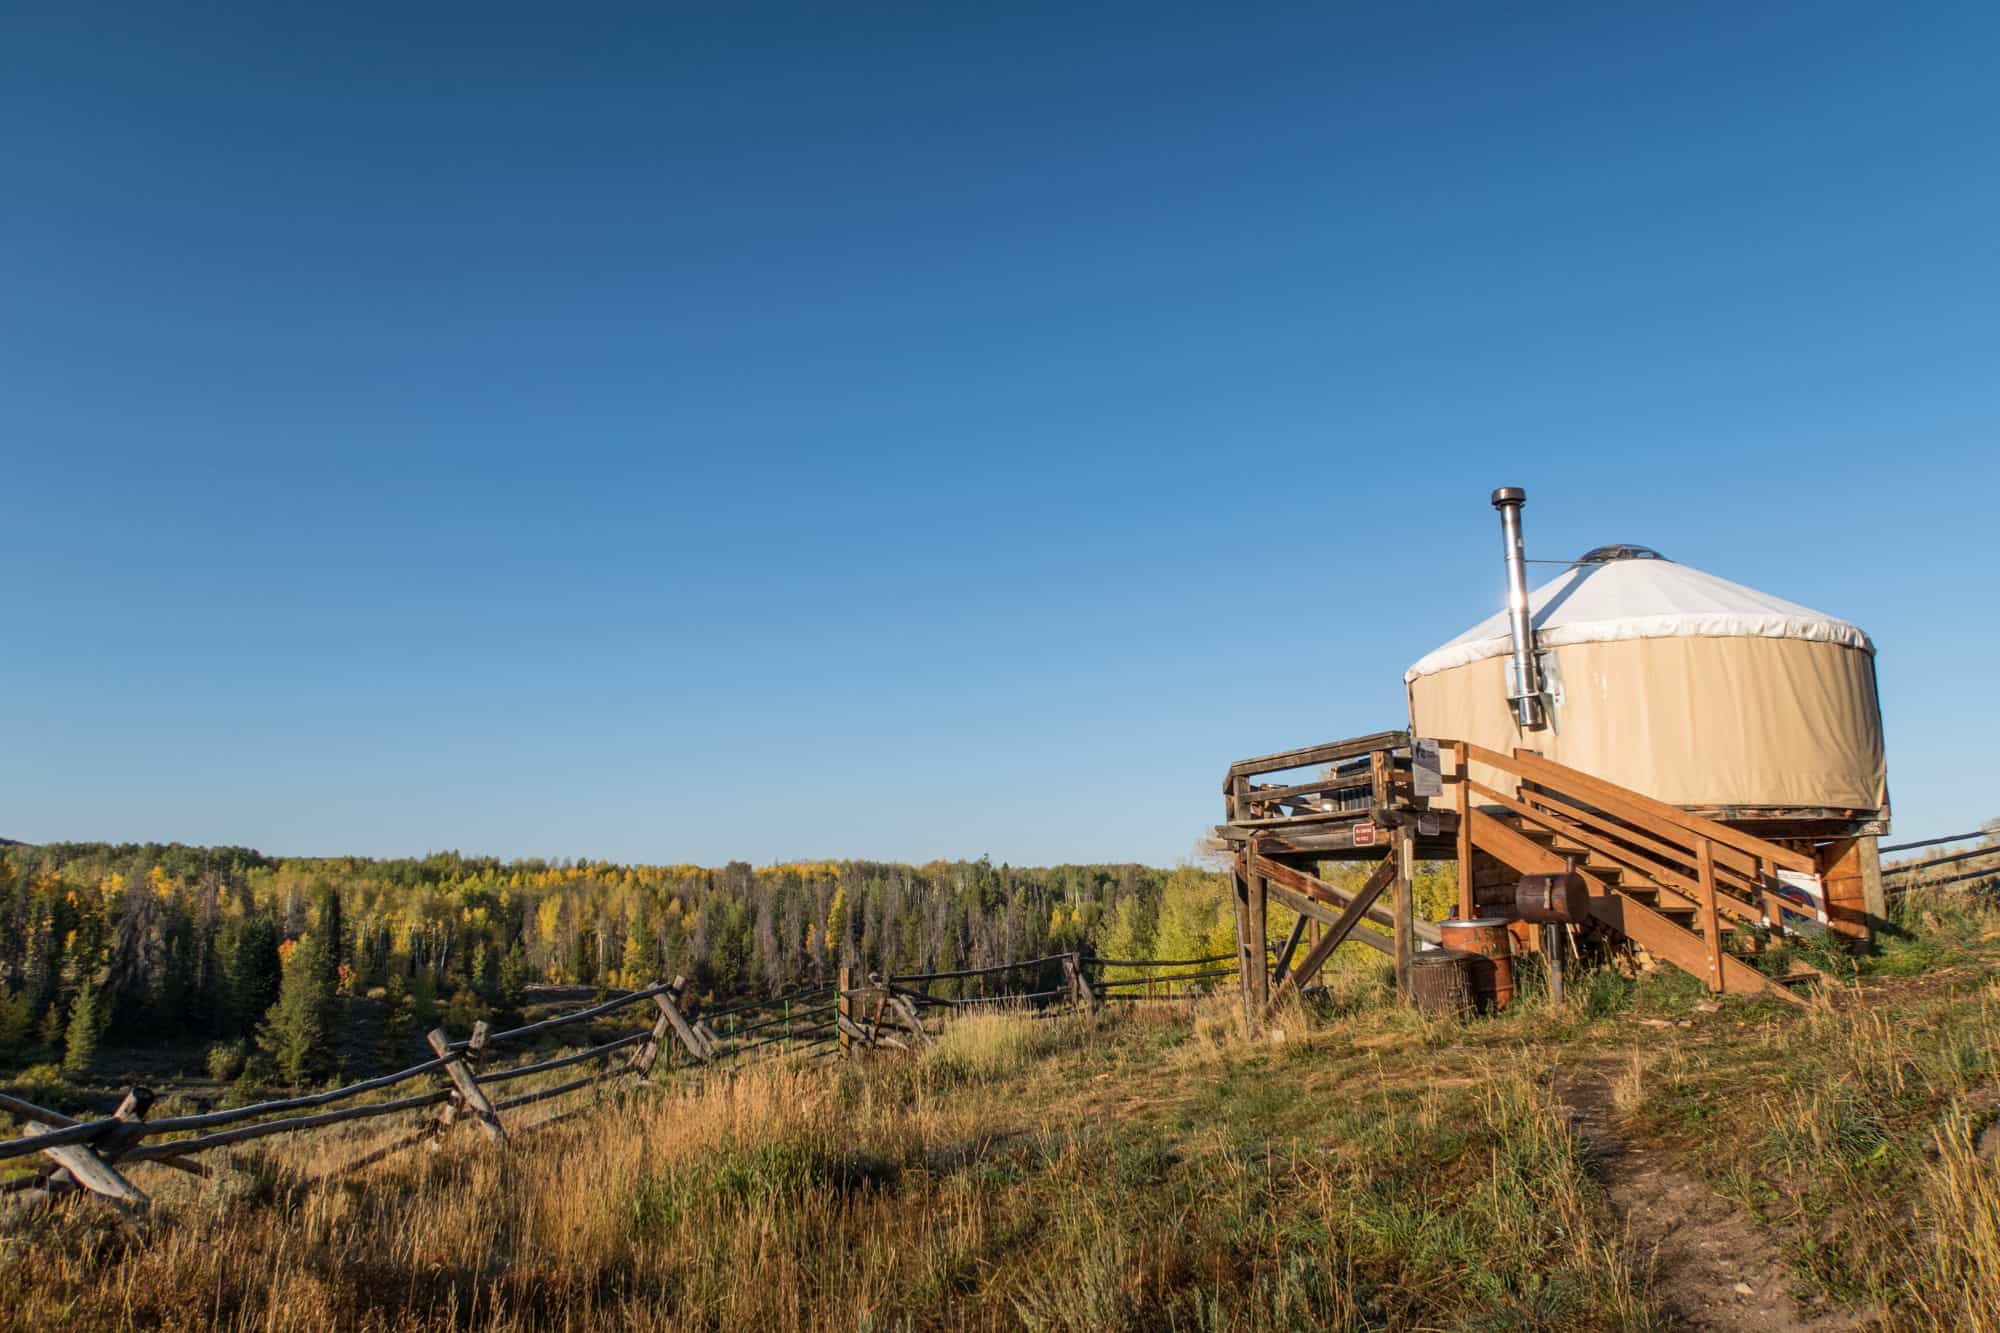
Situated at the edge of State Forest State Park, at an altitude of 8,800 feet (2,682m), this yurt is one of many owned and operated by Never Summer Nordic.

Yurts, for those not familiar, are traditional circular shelters used by the nomadic tribesman of Mongolia.

Yurt Experience

Supplies

To prepare for my midlife wilderness adventure, I picked up the following before leaving Steamboat Springs:

  • 5-6 liters of bottled water
  • Snacks (nuts and cookies)
  • Two delicious sandwiches from Backcountry Delicatessen
  • A cheap backup flashlight should my Petzl headlamp stopped working
  • Demo sleeping bag and air mattress from Big Agnes (nightly temps were in low 30s Fahrenheit)

The yurt has a wood stove. However, I'd learned the hard way trekking in Nepal that it's better to be too warm than too cold.

Related: Packing for a Fall Trip to Colorado

North Fork Canadian Yurt
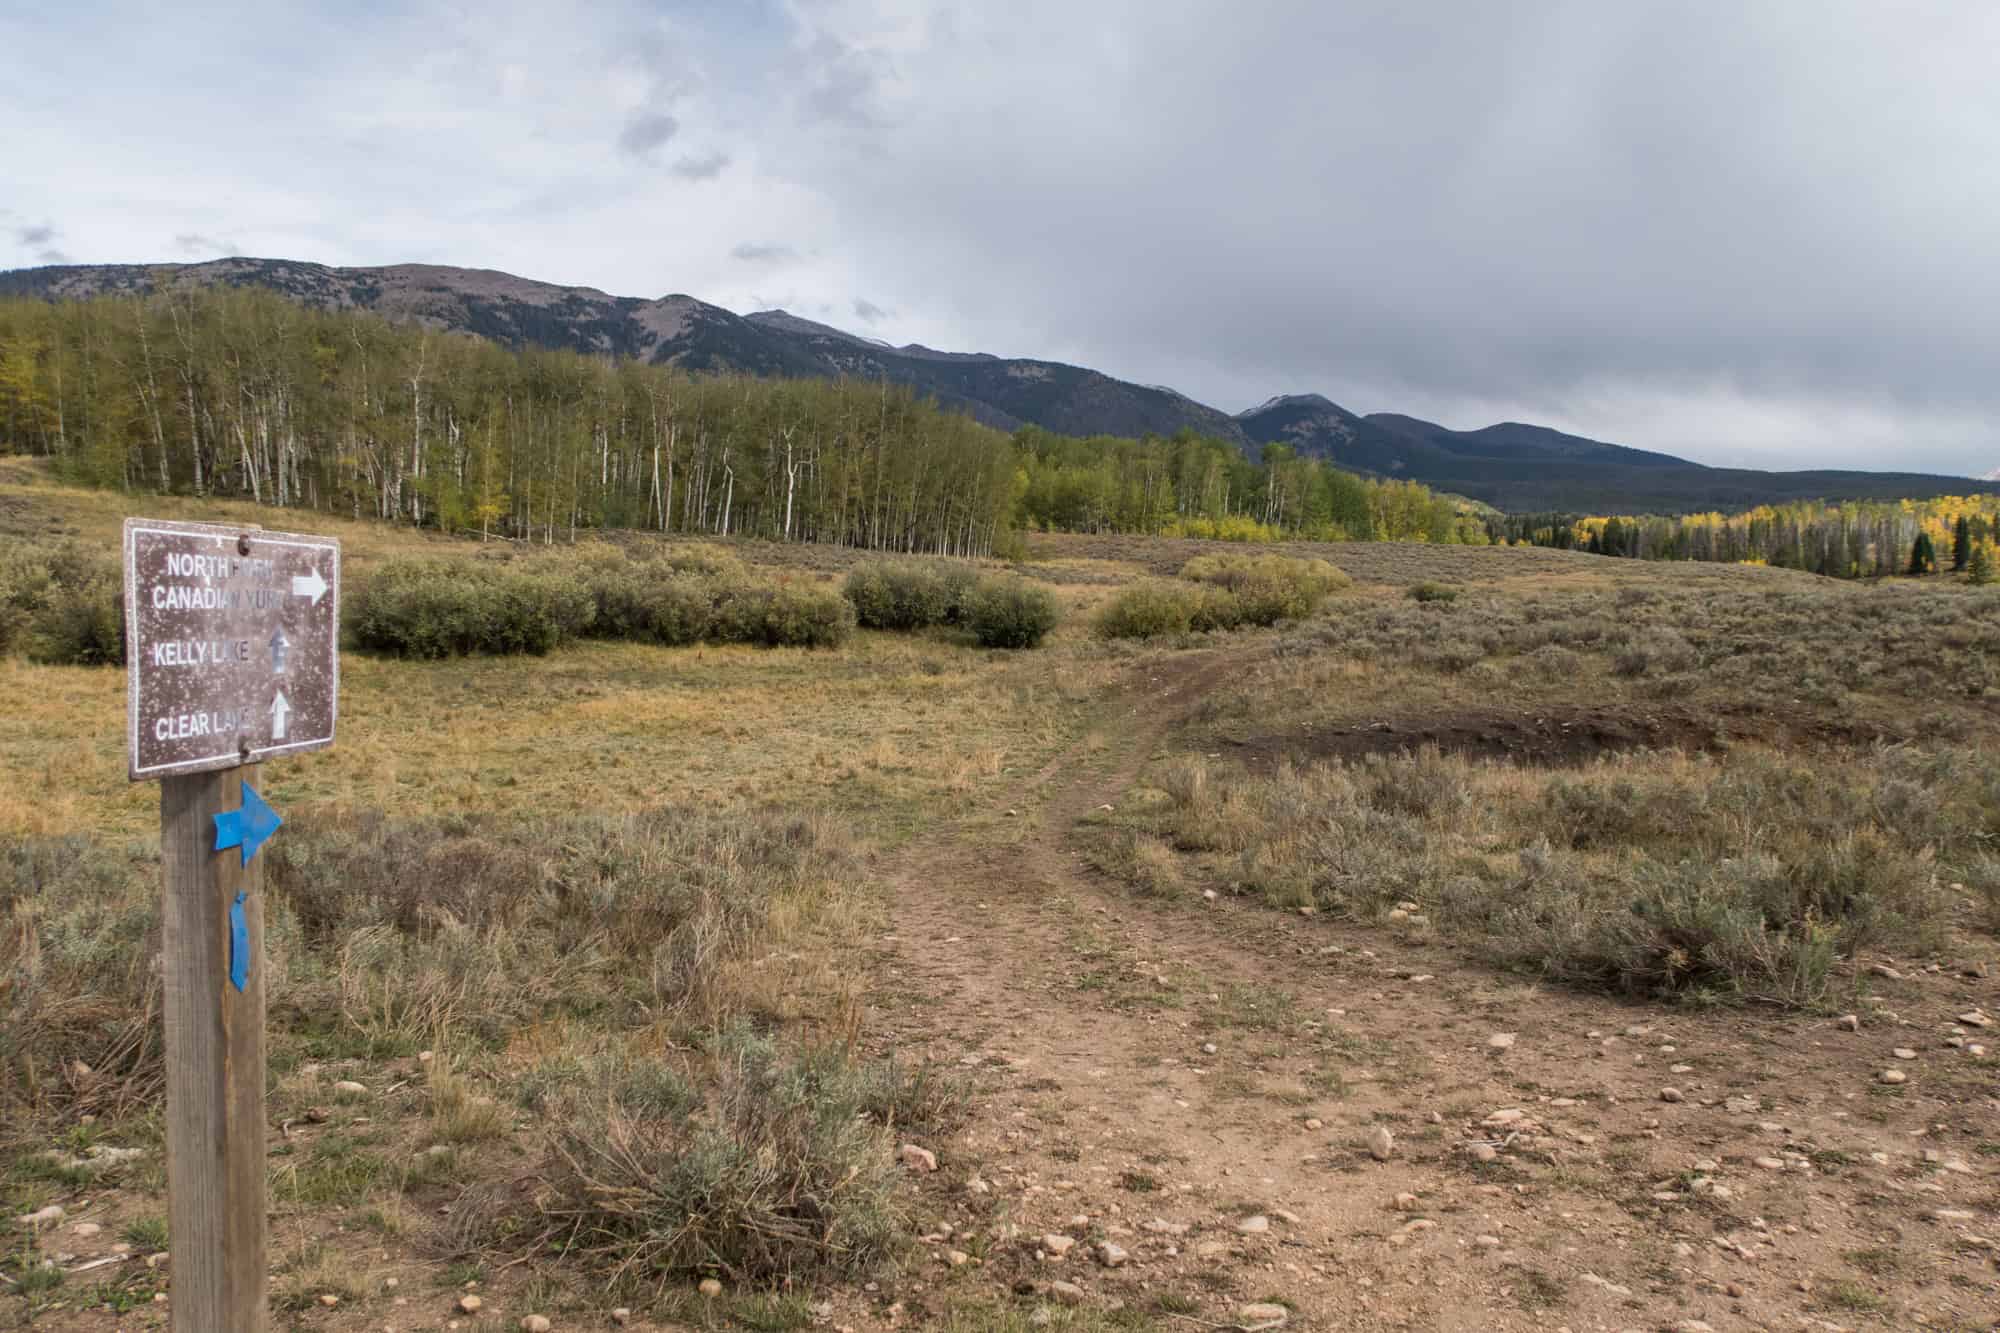
A sign points hikers toward the yurt and nearby lakes

Getting to North Fork Canadian Yurt

The scenic drive from Steamboat Springs took about an hour and a half, starting with Route 40 leading southeast out-of-town and then veering northeast on Route 14.

The entrance to the park was marked from Route 14. At an unmanned gate, I stopped to fill out a vehicle pass for my Jeep rental.

Parking overnight cost costs $10. I left the cash in a sealed envelope that's provided.

It was a beautiful, flat 8.5-mile off-road drive from the gate to reach a roundabout used as a parking lot and campsite.

A signpost marked the reserved space by the restroom for guests staying at the yurt.

Nervous I was about to leave any sense of modern civilization behind, I took some solace in seeing campers and hunters around, should an emergency arise.

It'd begun to drizzle, so I put on a fleece and my Clothing Arts jacket, gathered my supplies for the night, and began walking down an old logging road now closed to vehicles.

It's a 1.1-mile hike over the mostly flat ground to reach the yurt; however, given all the water I was carrying and the 8,800-foot elevation, it took me 30 minutes.

I stopped several times to take photos and catch my breath.

North Fork Canadian Yurt

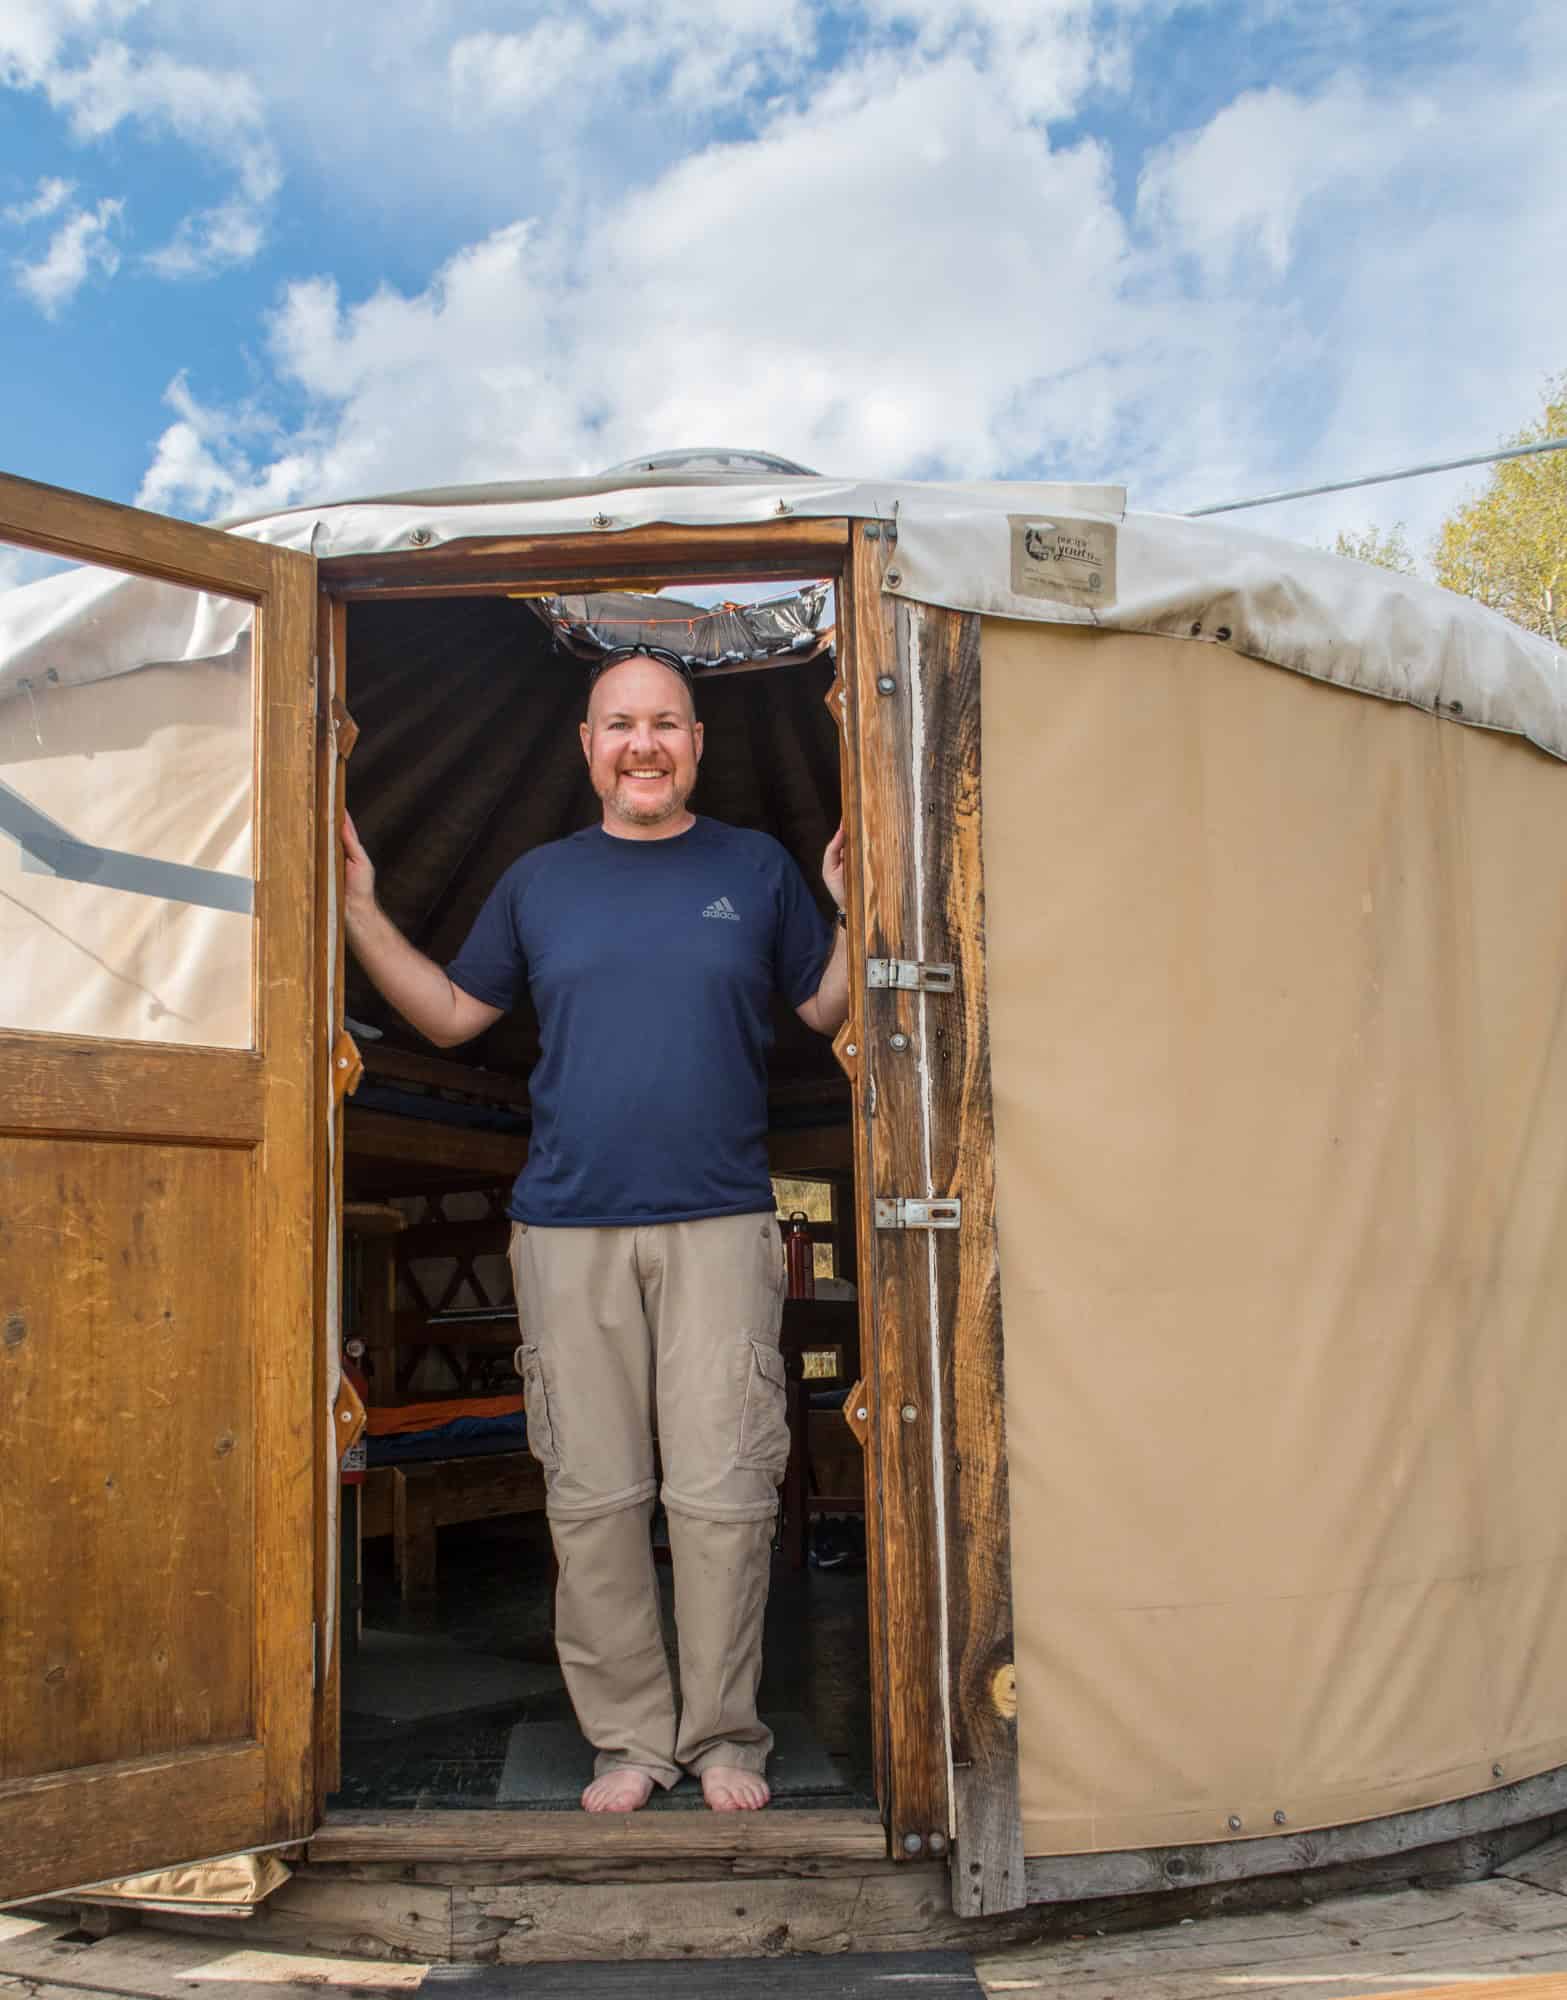
Arriving at the Yurt

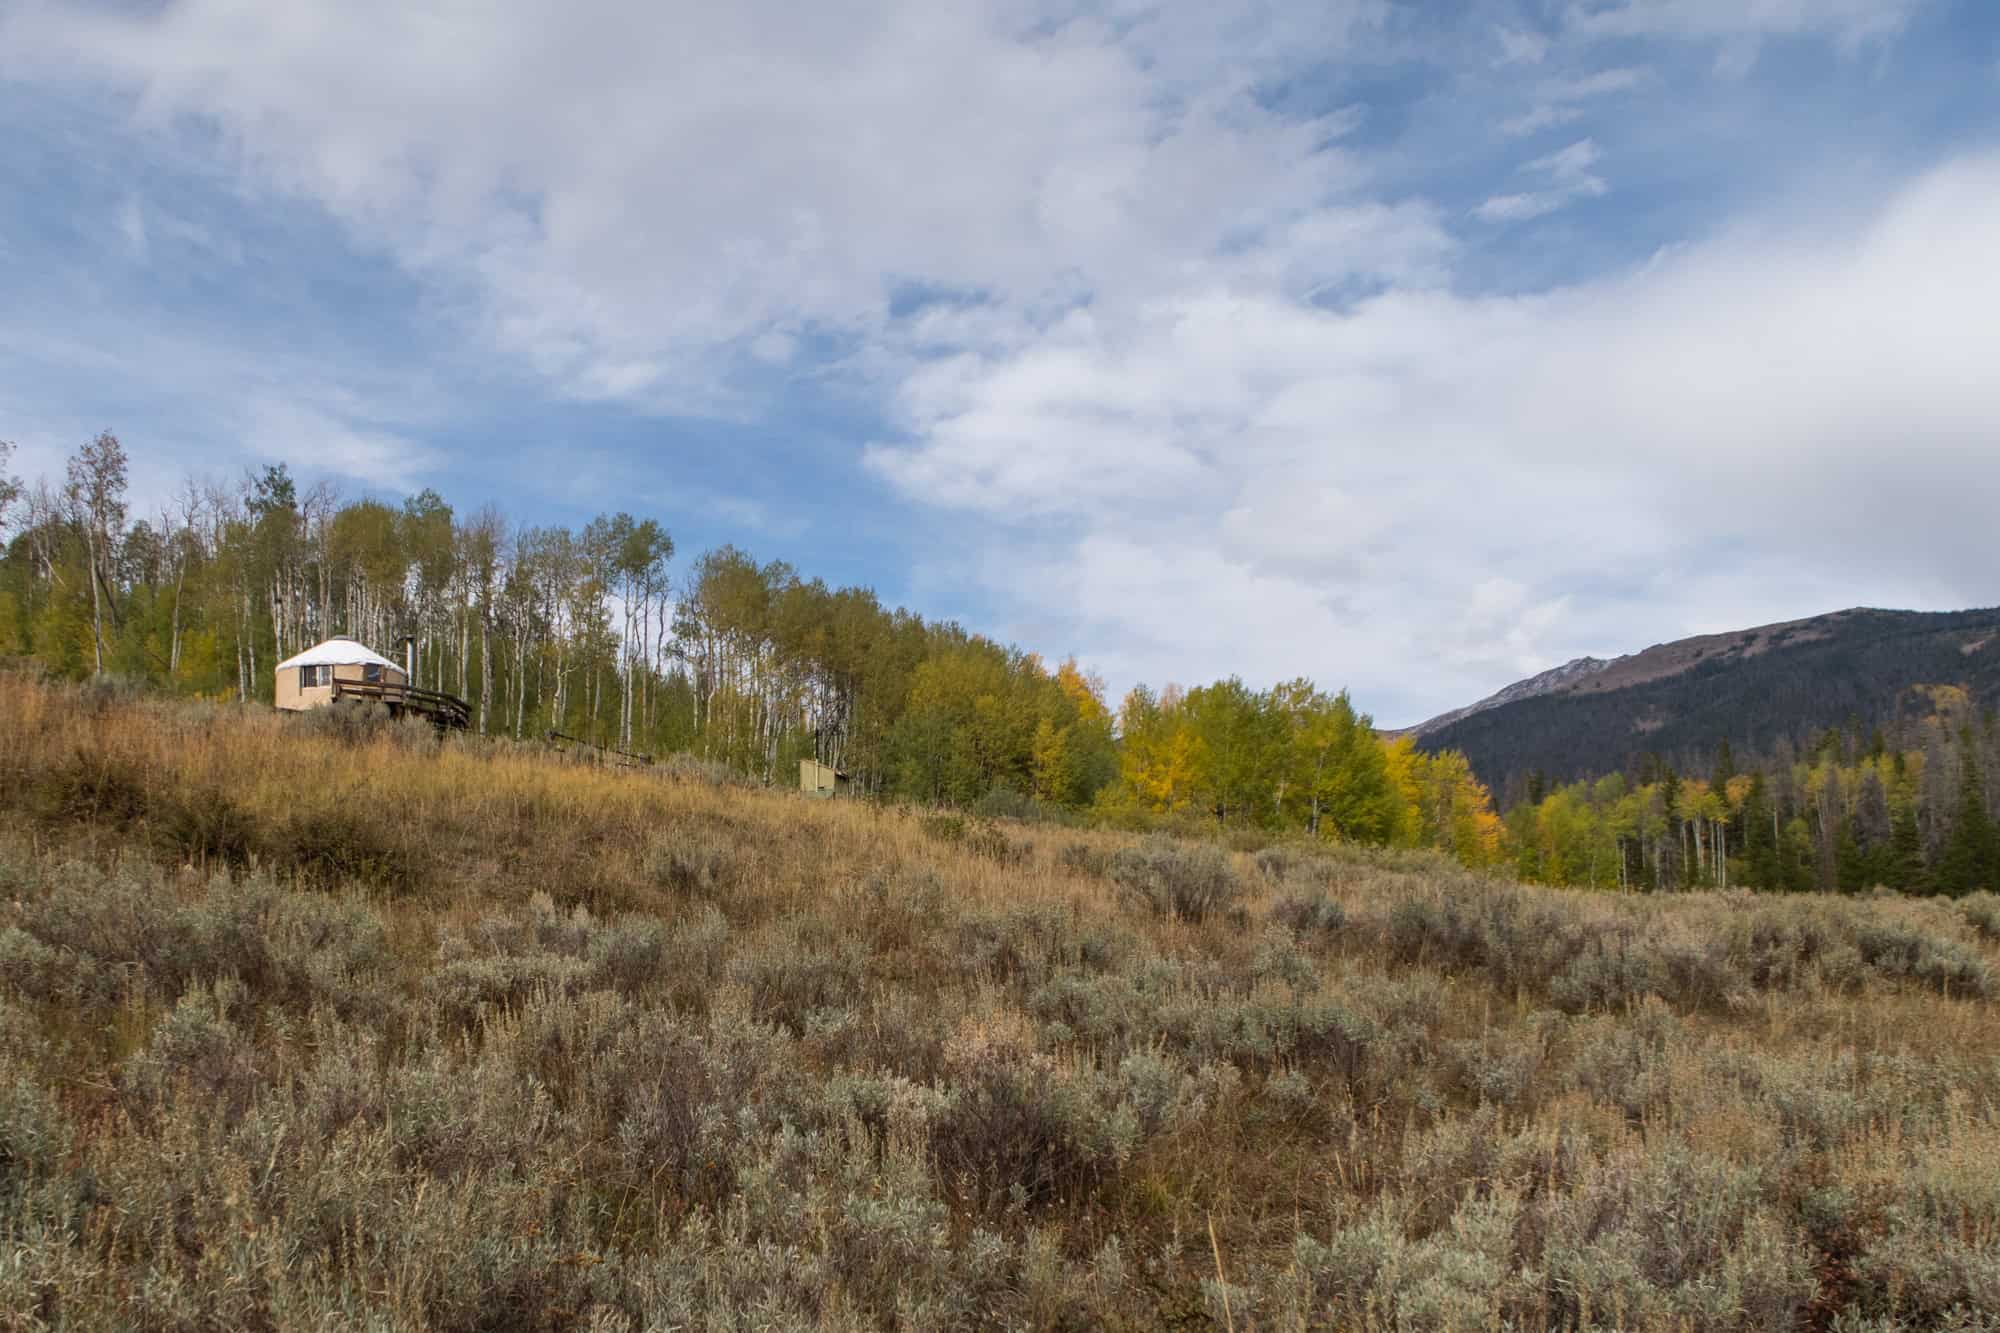
The North Fork Canadian Yurt is perched on a small hill, offering terrific views of the surrounding landscape and the Never Summer Mountain range.

I opened the metal gate to the property and surveyed the exterior of my abode.

The yurt is elevated, leaving plenty of room for firewood and a propane tank underneath.

A wooden deck with benches offers guests the option to sit outside and enjoy the views.

And a small outhouse sits just inside the wood fence encircling the property.

As I walked up to the yurt's staircase, I was greeted by a large sign offering instructions on how to behave if you encounter a bear.

I knew I was in moose country, and moose can be aggressive, but my anxiety shot up another level when I realized there were bears around too!

I quickly read the advice, which included what to do in the event you come eye to eye with a bear:

"Back away slowly while facing a bear."

"Speak softly to the bear and try not to show fear."

"Fight back if a bear attacks you. Use rocks, sticks, binoculars, or any object that may be available."

I briefly wondered whether anyone could speak softly and fearlessly to a wild bear before trying to put the thought of one approaching the yurt's flimsy front door out of my mind.

Related: Fly Fishing in Colorado

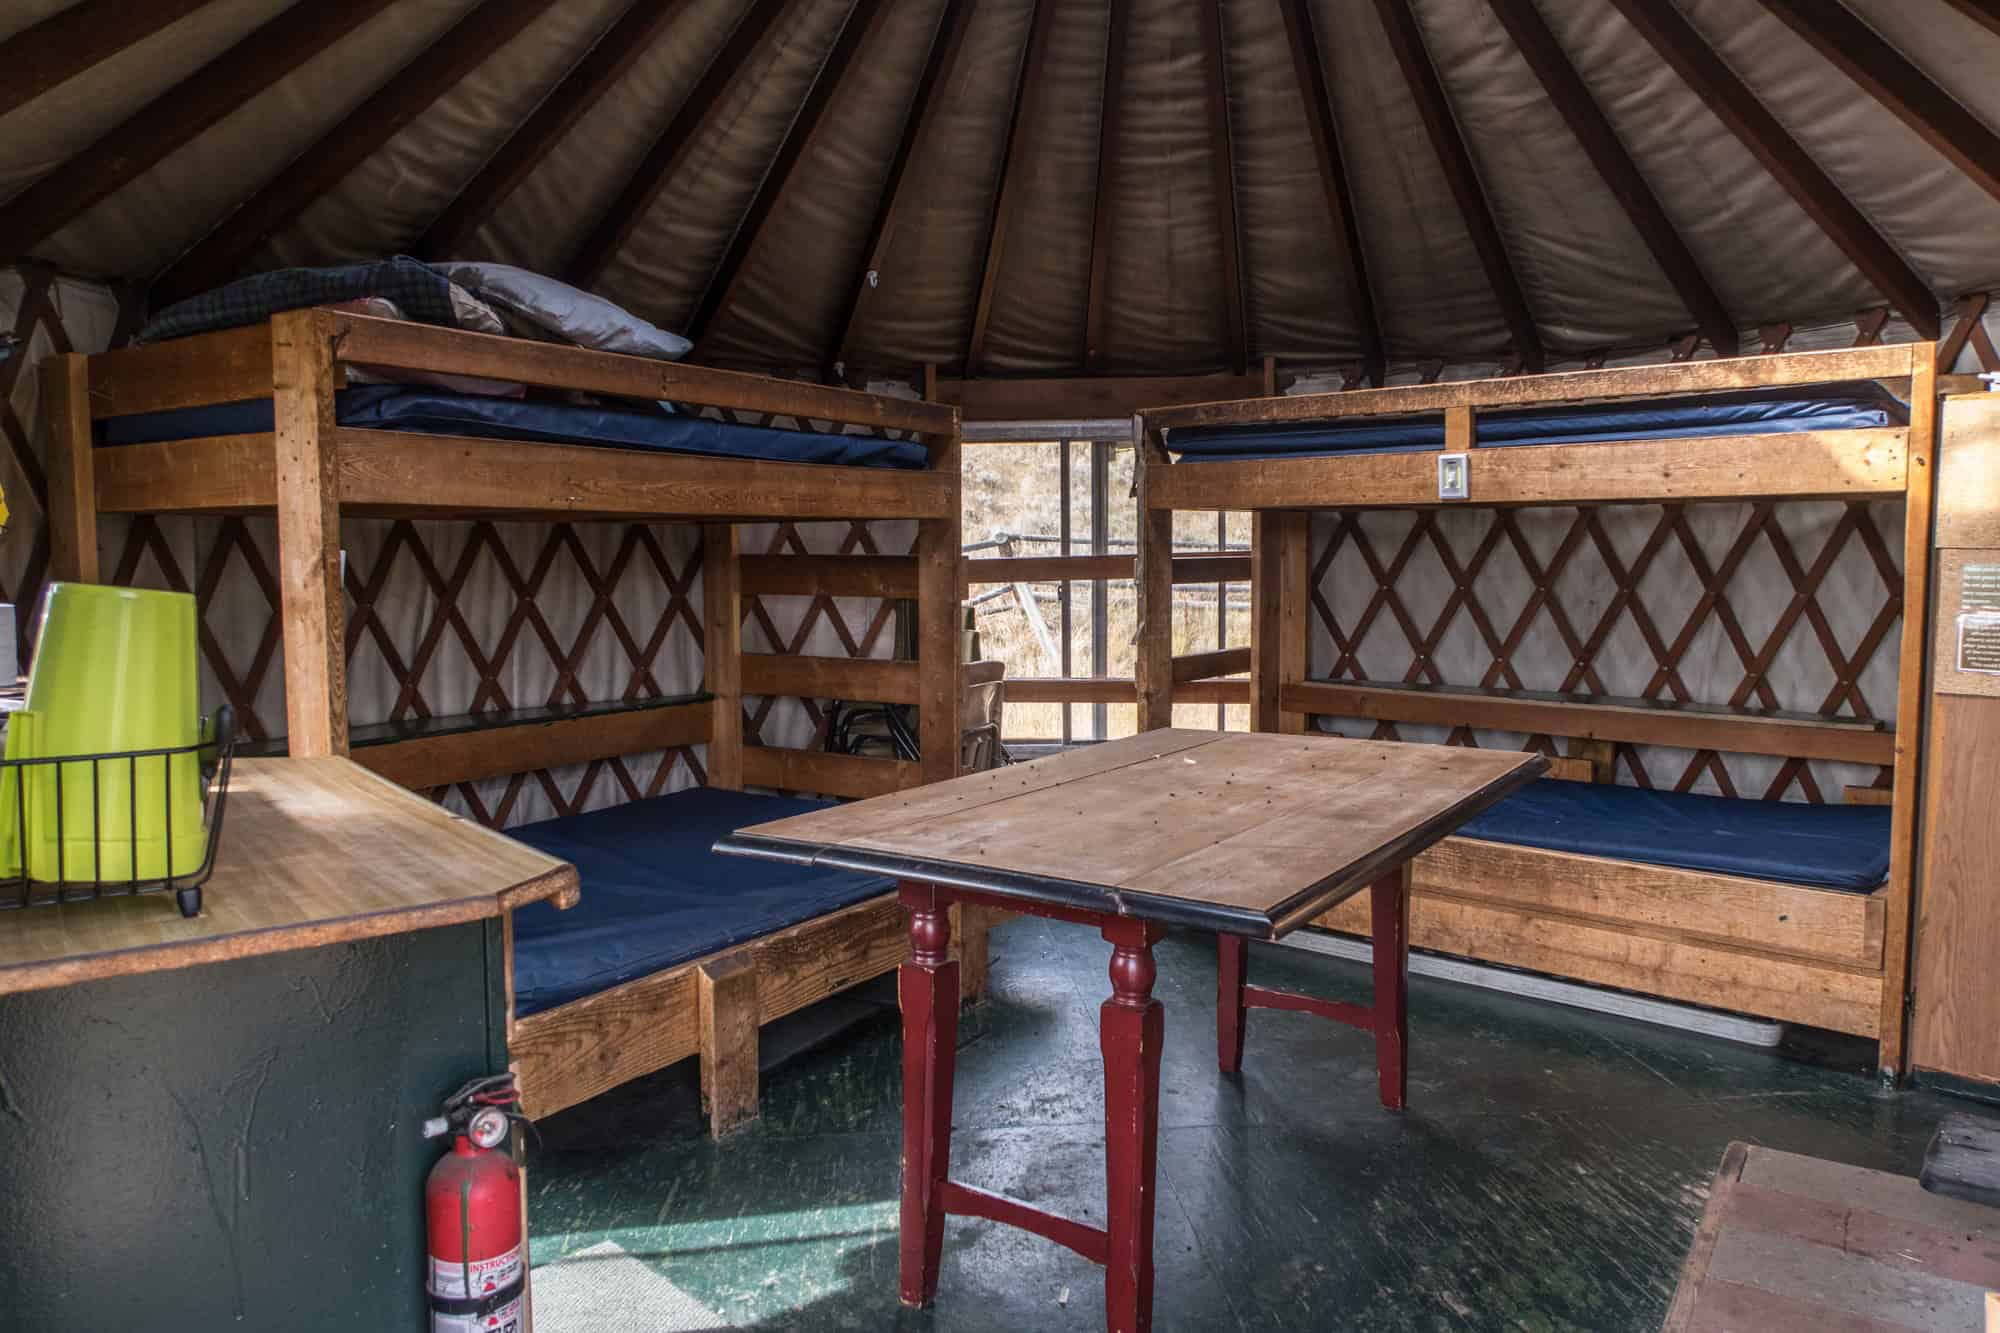
Bunk beds inside North Fork Canadian Yurt
Bunk beds

Accommodations

A few days earlier, upon confirming my booking with Never Summer Nordic, I'd received the combination to the door lock.

I spun the little wheels to the numbers provided, and it opened with ease. Inside, I took stock of my accommodations for the night.

Two sturdy wooden bunk beds with mattresses, a dining table, a gas stove for cooking, a wood stove for keeping the place warm, and plenty of matches, paper, kindling, and logs of varying sizes.

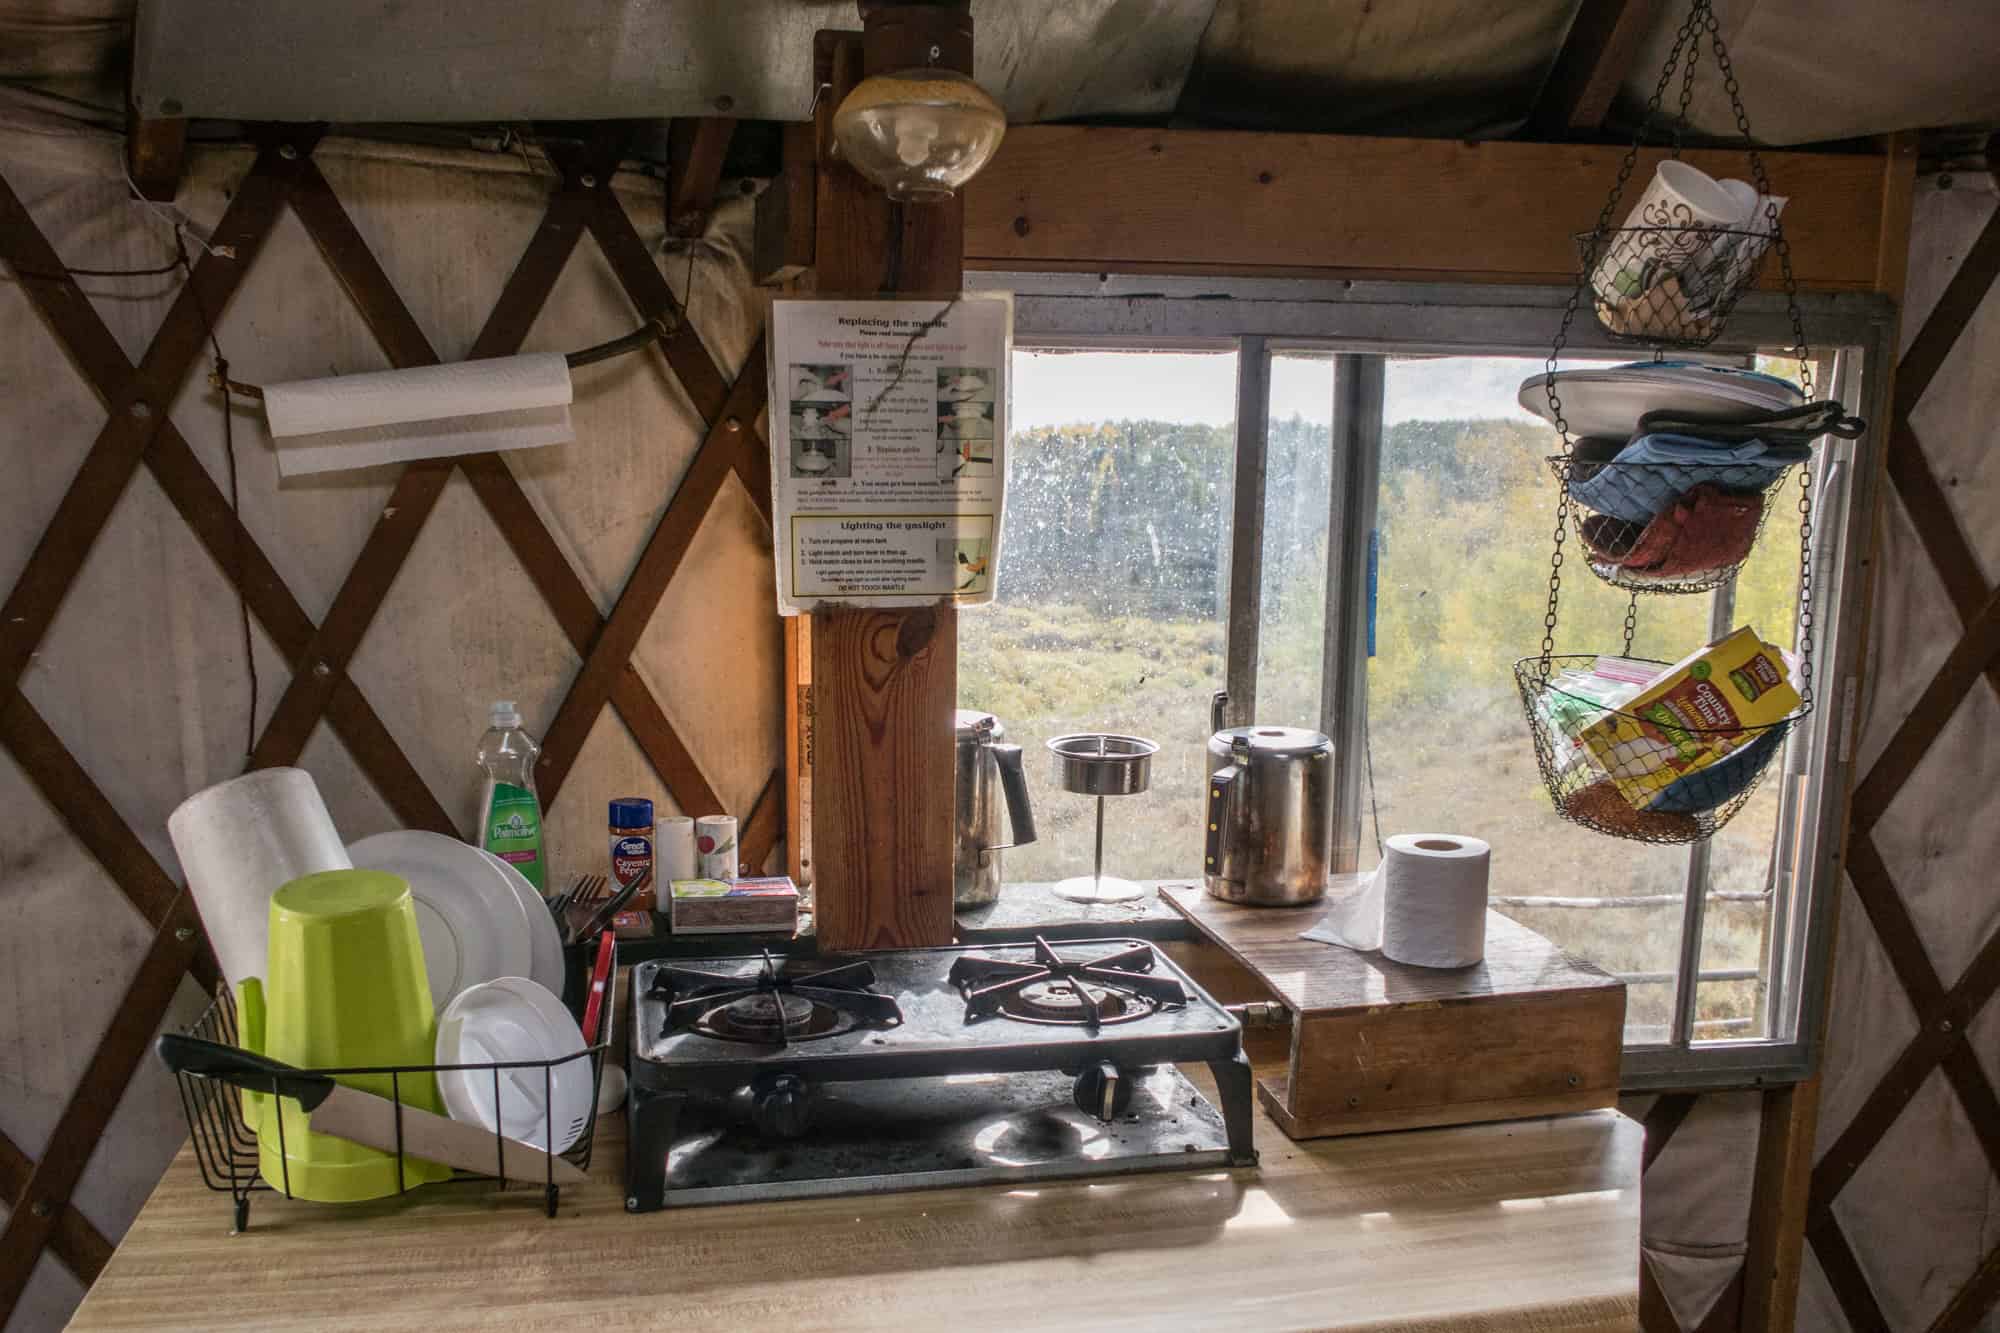
Kitchen with gas stove

As I was only staying for a night, I'd already decided to pack my meals, eliminating the need to turn on the propane gas and cook. That said, instructions were posted in the kitchen to do so.

I'd been told there's a stream about 100 meters away for collecting water to purify. However, I figured it'd be easier to carry in my drinking water.

Guests must take everything they bring with them out when they leave, which means carrying out the empty plastic bottles (and all trash) when I go.

I'd forgotten to bring a plastic bag for used toilet paper, but as it turned out, I didn't need any during my short stay.

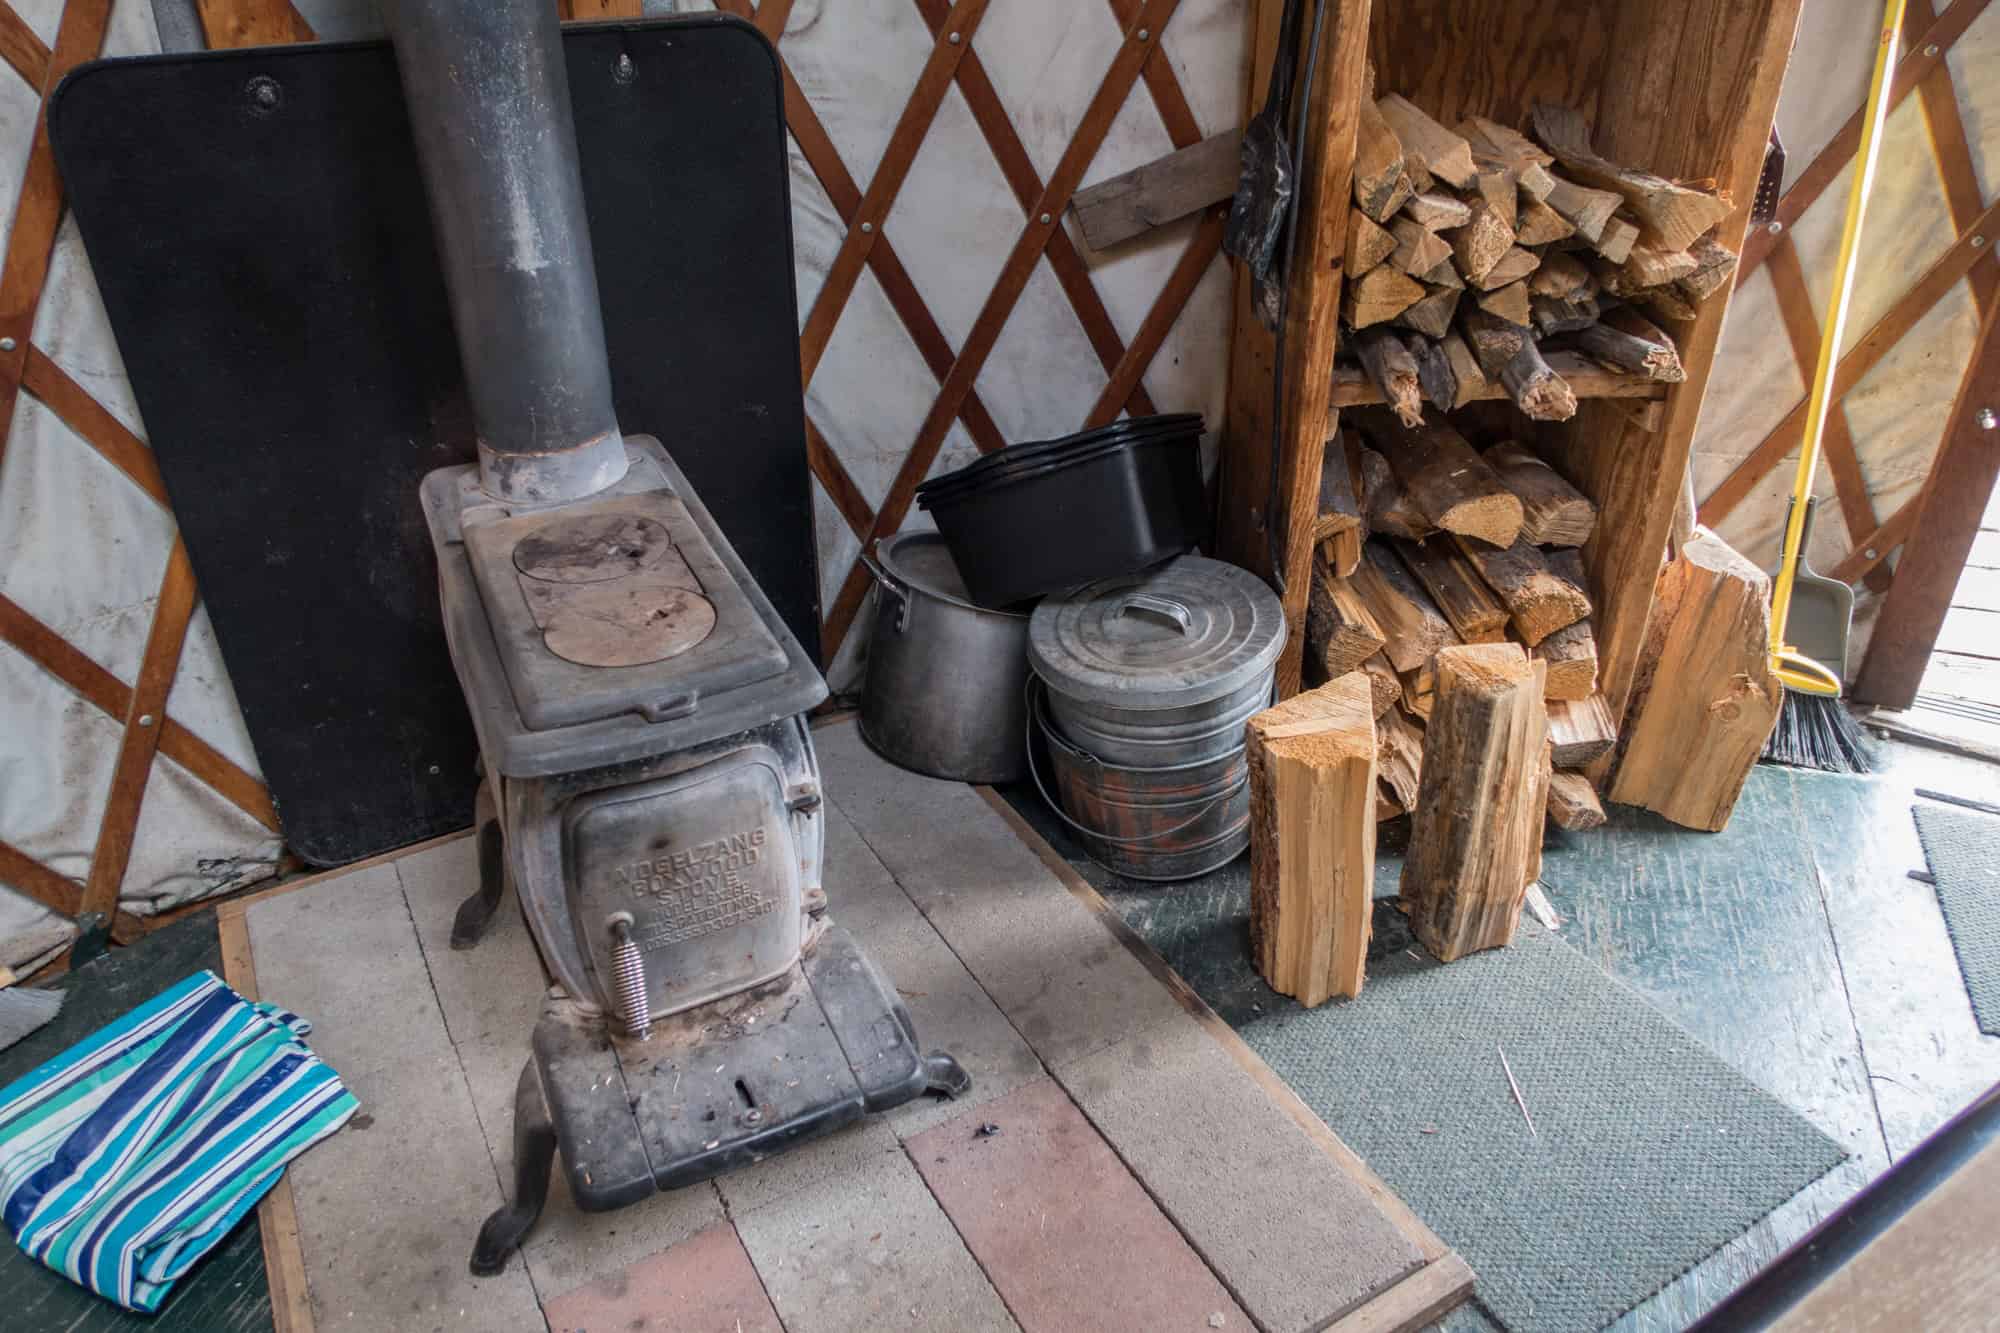
Wood stove and lumber
Woodstove and lumber

The Wood Stove: A Source of Warmth

Instructions for starting a fire were posted as well, and as it was already 3 pm, I wanted to get one going.

The sun goes down earlier in the mountains, and I also told myself if I had trouble, I'd still have time to hike back to the car.

Once I crumpled up some newspaper and small pieces of wood, I lit it up. Boom! I had a fire crackling to keep me warm and comfortable.

There's an art to keeping a wood stove going in a way that makes efficient use of the wood. It's based on how much air you allow in through the flue.

I'm not sure how well I was doing, though. The stove had a voracious appetite for wood, and I found myself feeding it a new log or two every hour.

Initially, the yurt warmed up too much, so I cracked the windows open to allow fresh air in.

By early evening, though, the windows were closed again as I tried to preserve all the heat I could.

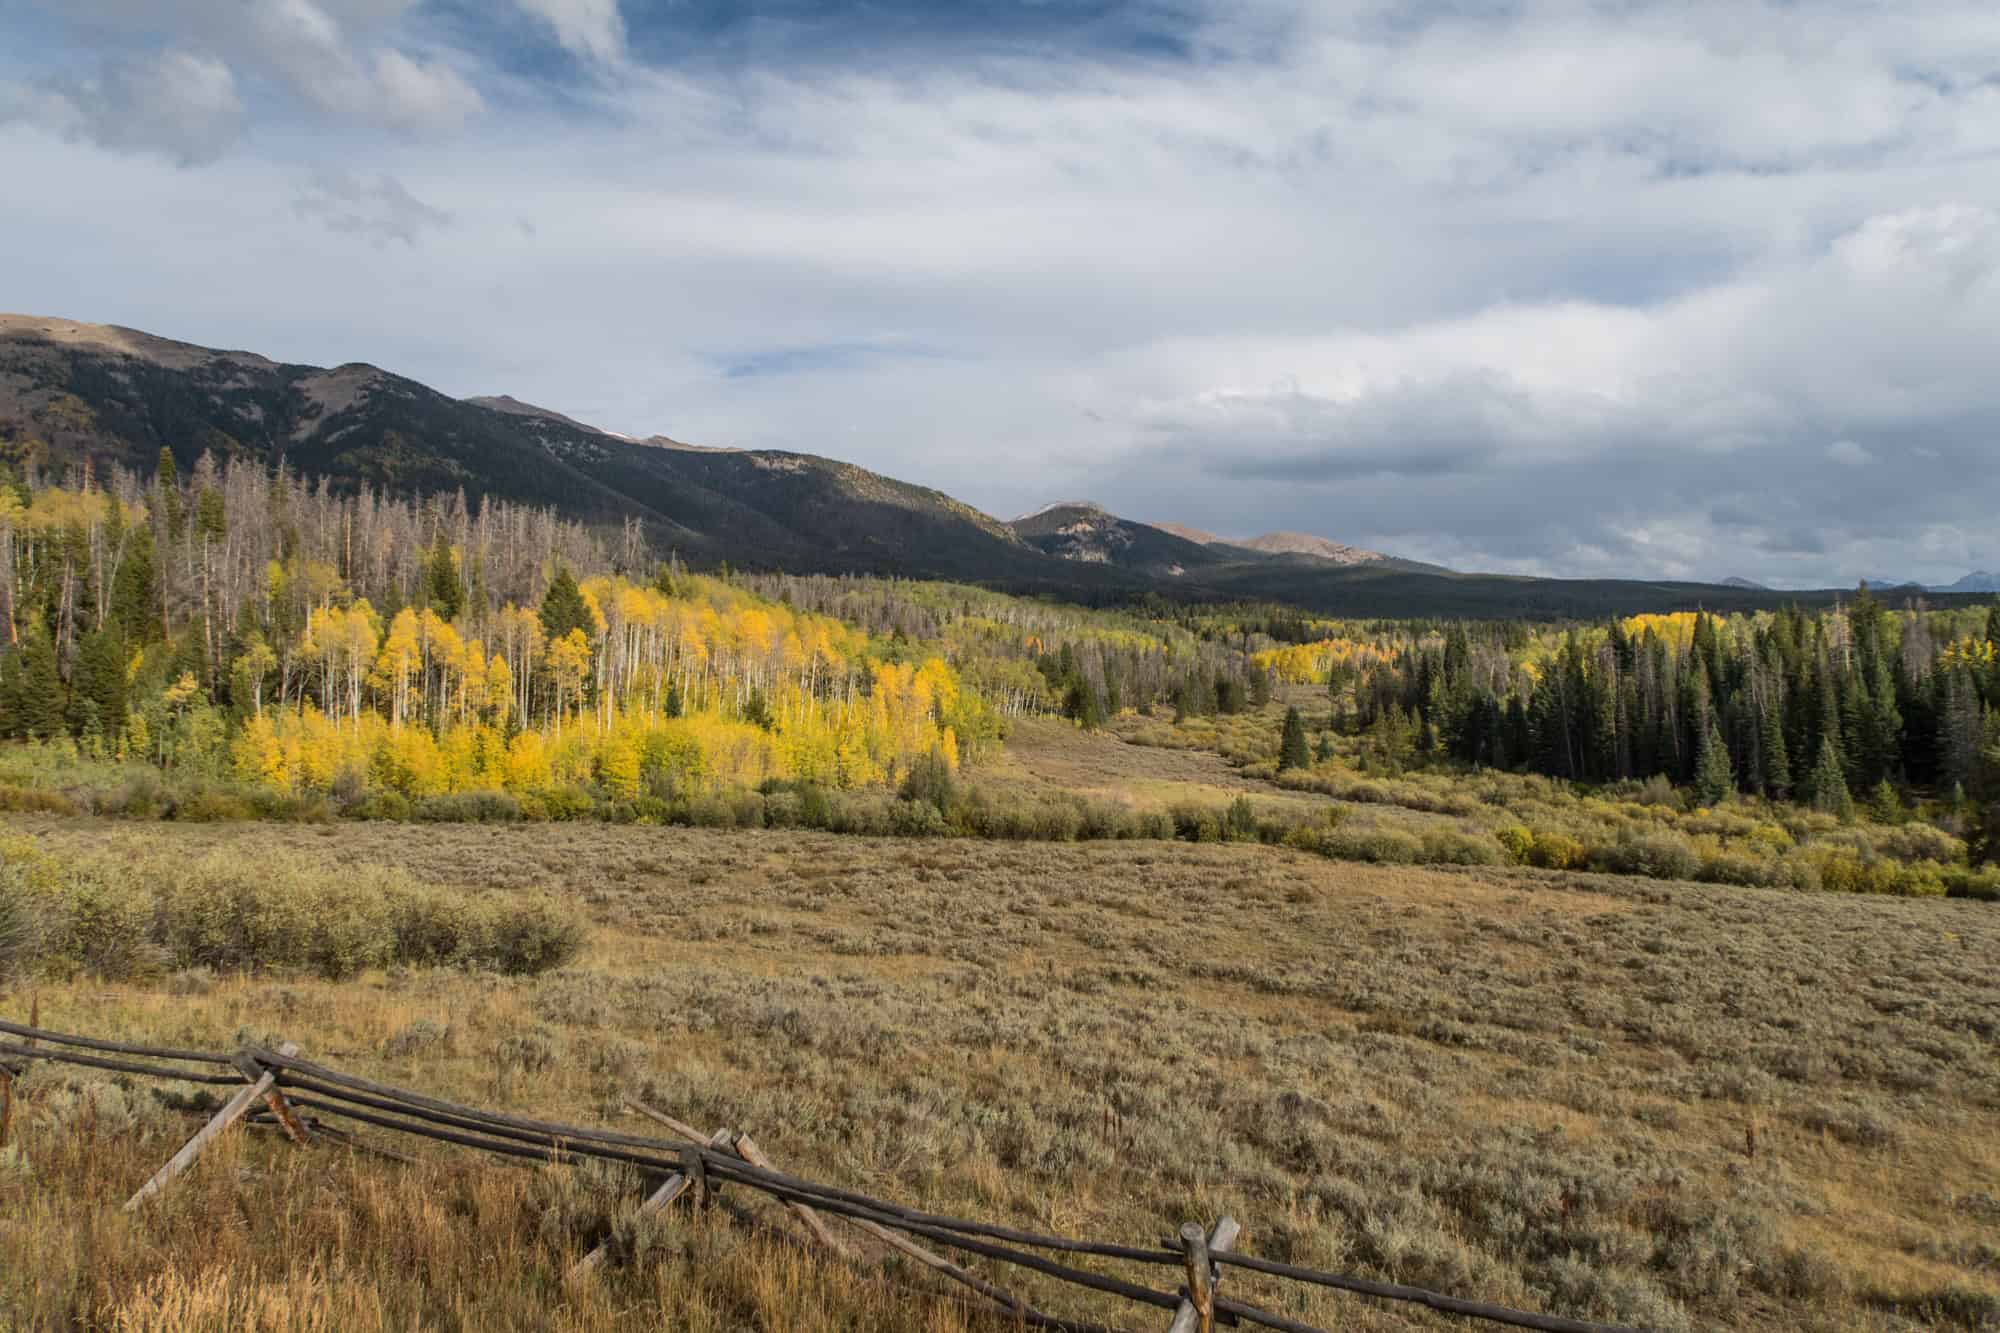
View toward the Never Summer Mountains
View of the Never Summer Mountains

I spent the few hours of daylight that afternoon staring out at the fall foliage, taking photos, and enjoying the silence.

The leaves of select trees were a bright yellow, but the entire landscape turned to gold as the sun began to set.

Along with keeping the fire going, I was drinking a lot of water to stay hydrated, leading to frequent trips to the outhouse.

The rule of thumb is a liter of water per day for every 1,000 meters of altitude.

Given the possibility of encountering a bear and not wanting to leave the fire unattended, I didn't go on a hike.

I suppose that was by design, but I was already pushing my boundaries well beyond what was normal for me, so I was okay with the tradeoff.

Selfie
Yours truly making time for a selfie

My nerves were high being out there by myself. I had trouble relaxing.

I had everything I needed, including shelter, fire, water, and food; however, I didn't have mobile internet access, only the intermittent ability to send brief text messages.

It sounds silly typing this now; however, at the moment, my mind was feasting on my insecurities.

I responded by telling myself it was only one night. I'd make it through okay, and feel proud of myself and animated by sunrise.

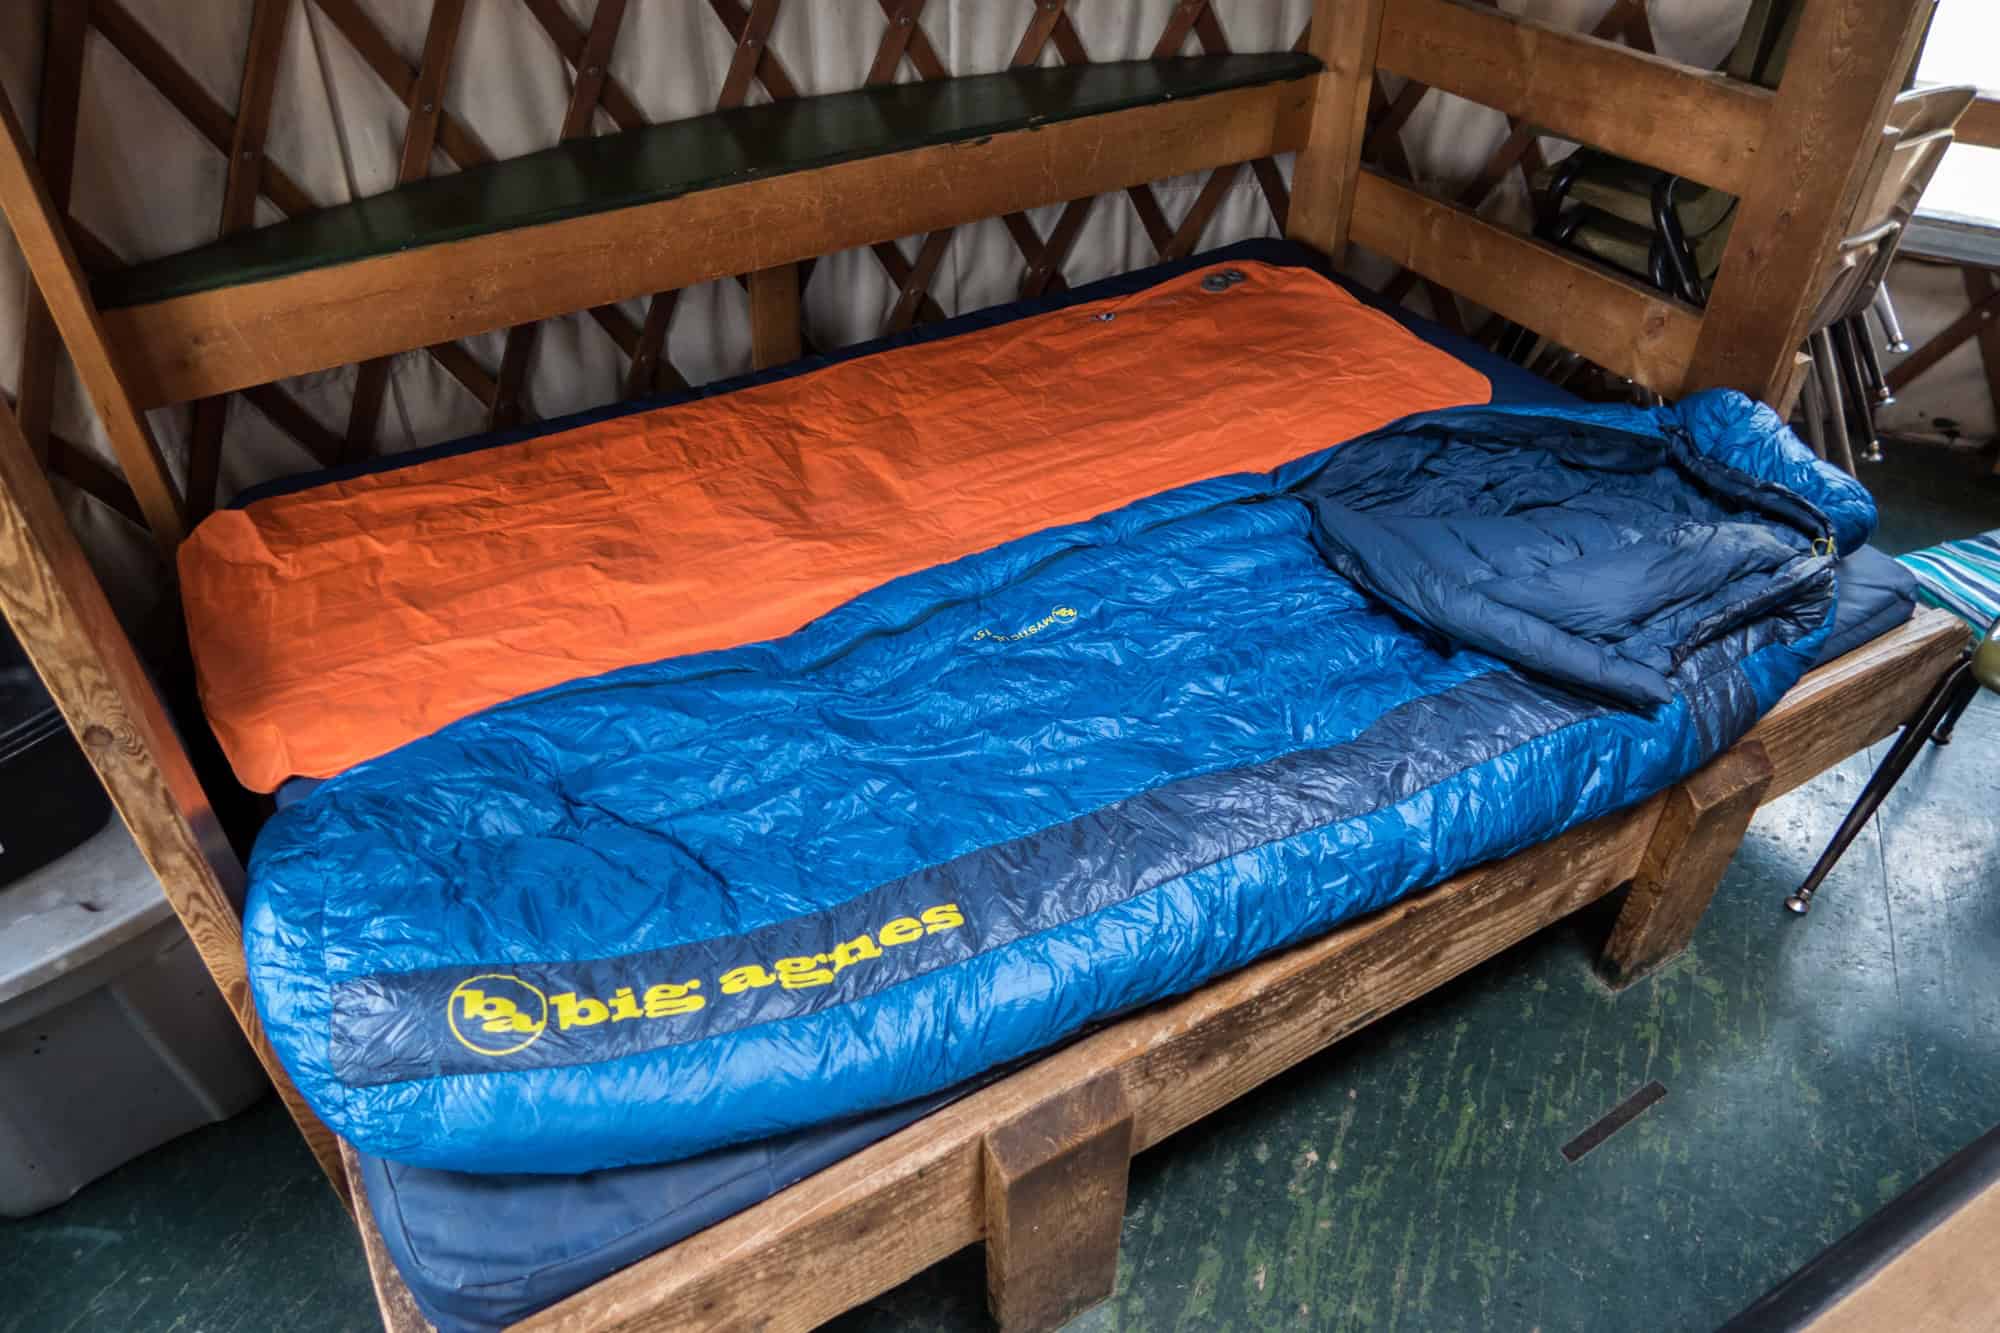
Big Agnes sleeping bag and air mattress

In addition to learning the importance of a warm sleeping bag in the mountains, I've also learned there's not much to do at night.

Given I was alone, that took having a conversation off the table.

I passed the hours tending to the fire, writing in my journal, reading an ebook on my phone, and listening to music.

And, of course, as I worked my way through the 5-6 liters of water I brought, I was going to the outhouse almost as often as I was feeding wood to the fire.

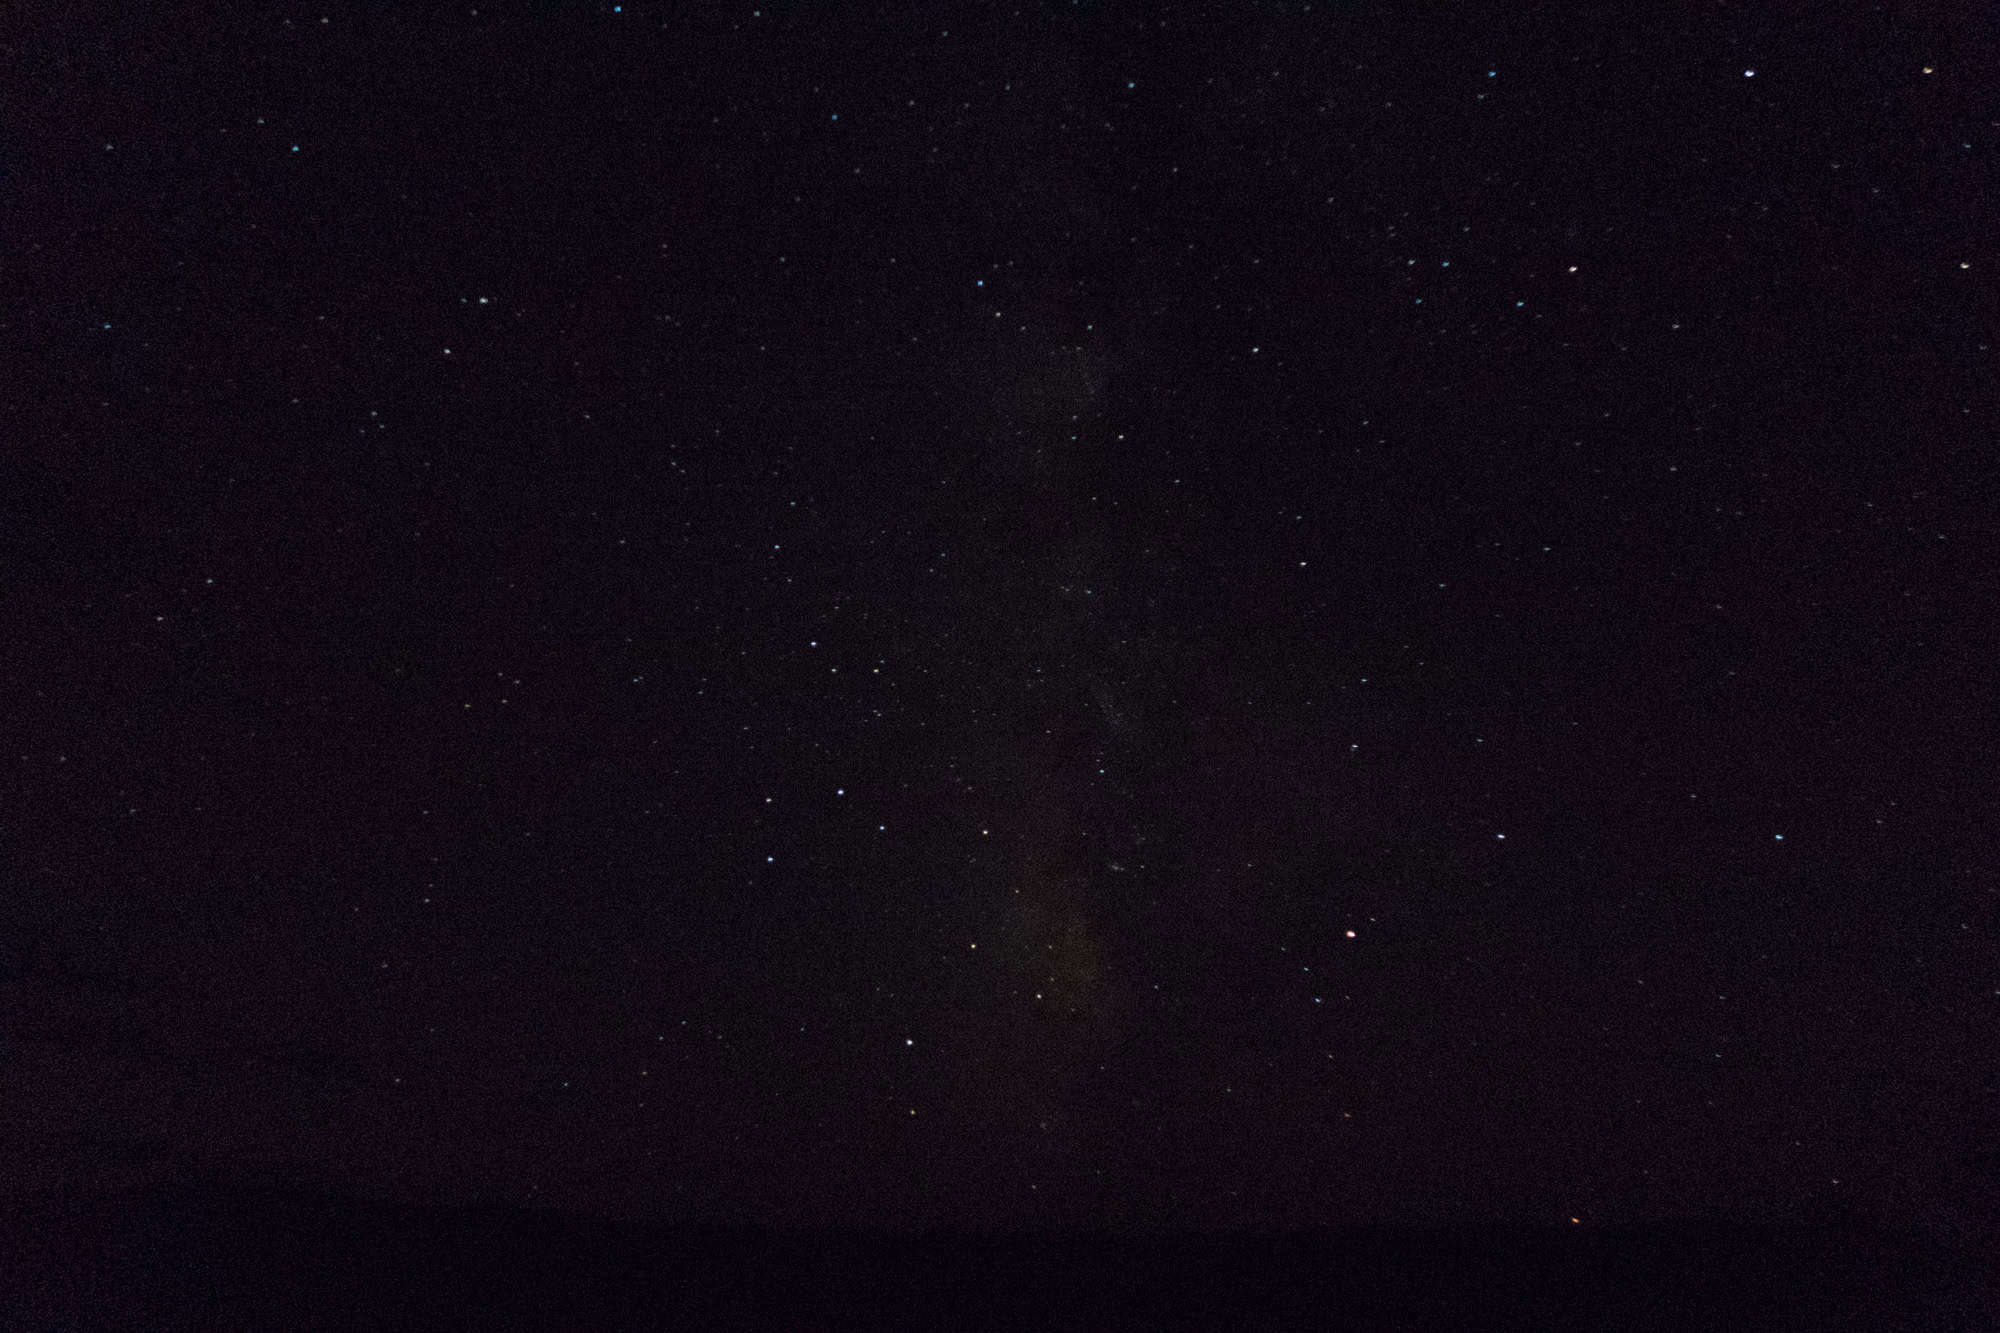
The Milky Way
The Milky Way was visible to the naked eye

Starry Night

I could not fall asleep as I desired to keep the fire going, so the yurt was as warm as possible.

Every time I needed to pee, I'd put on my headlamp, step out onto the deck, and scan the perimeter.

It was pitch black, and I was looking for the glow of animals' eyes, a trick I'd learned on safari in South Africa.

Despite the grunting of some animals I'd heard, probably moose in the distance, I didn't see any glowing eyes peering back at me during my trips to the toilet.

What I did see, when I switched off my headlamp and craned my neck up, was one of the brightest, most beautiful night skies of my life.

The stars looked huge, and it was clear enough to see the Milky Way with the naked eye.

I didn't have a tripod, so I settled for merely pointing my Canon G7X point skyward. The photo above doesn't do it justice.

This night's sky ranked up there with what I'd seen in the Annapurna region of Nepal and the Atacama Desert of northern Chile.

At 3 am, my body's wish for sleep outweighed my anxieties, and I drifted off to sleep.

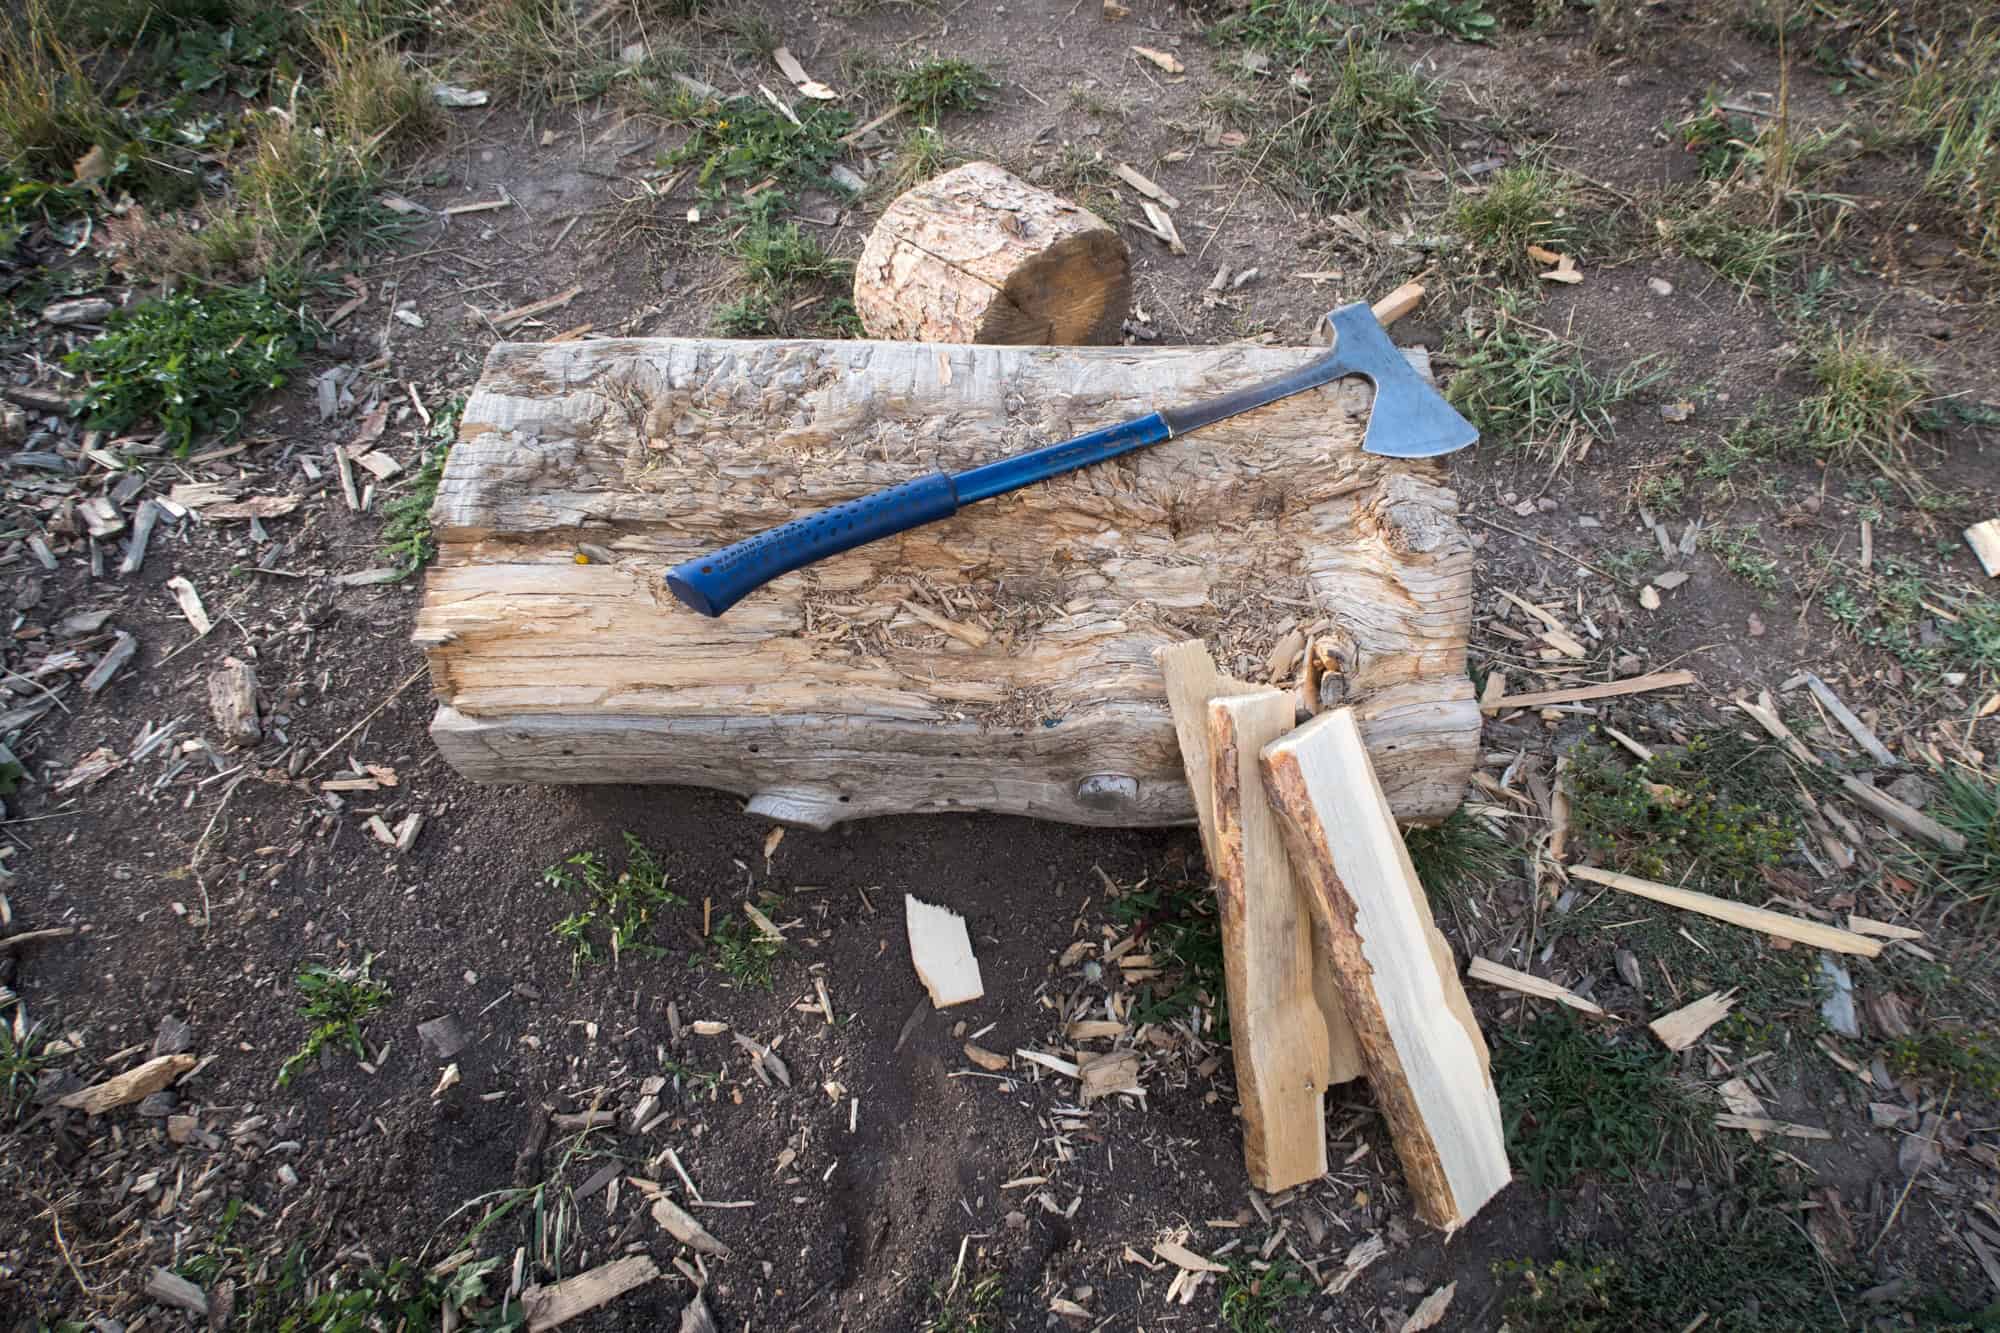
Chopping firewood
Chopping firewood

Sunrise

When I awoke three hours later, around 6 am, the first thing I noticed was how much colder it was inside the yurt.

The fire had been reduced to a few embers, and I was thankful to have been inside a sleeping bag.

Eagerly anticipating the warmth of the sun, I had a bite to eat and began packing up my belongings.

I had to replace the wood I'd used, so I carried up some of the pre-chopped logs from under the yurt.

To make smaller kindling, I also tried my hand at chopping some wood myself.

I'd started to split a log, and the ax was wedged in the top half, so I raised the thing, ax attached to log, and slammed it down on the massive log used for chopping.

The wood immediately splintered in two, with one of the pieces flying up and grazing my right cheek.

That explained why the rubber handle of the ax has the warning to wear goggles!

Related: 7 Reasons to Visit Kyrgyzstan

North Fork Candian Yurt at sunrise
North Fork Canadian Yurt at sunrise

Hiking Out

With the wood restocked, my stuff packed, and the sun rising, I swept the floors, closed the flue on the woodstove, and closed the combination lock on the yurt's door.

Hiking back to my car, I felt triumphant.

I'd challenged myself to spend a night alone in the wilderness, in bear country no less, and survived.

____

My stay at the North Fork Canadian Yurt was courtesy of Never Summer Nordic and organized as part of my trip hosted by the Steamboat Springs Chamber Resort Association and Visit Fort Collins.

Autumn in Japan: The Colorful Town of Asuke

The Town of Asuke, Japan
The Town of Asuke in Japan's Chubu Region

When you mention aloud that you're heading to Japan, people's' minds instantly shift to visualizing the neon flashing lights of Tokyo, or perhaps the orange "torii gates" of Kyoto, but I can't imagine many people rush to think about little Asuke, and, by proxy, autumn in Japan.

That's not altogether surprising when considering that Asuke is a town that finds itself humbly sitting in the Aichi Prefecture, well off the beaten trail for many tourists internationally, but coveted and adored domestically.

Japan boasts a population of some 127 million, and less than 10,000 of said number live in Asuke.

This makes Asuke the ideal place to escape the often crowded cities and find a sanctuary from fast-paced, tech-savvy modern Japan.

Beyond that, this is one of the quintessential towns to truly take in autumn in Japan. If you're in Japan in November (or even late October or early December), then Asuke is a must-see.

To put this in perspective, the town's population is less than 10,000, and it's home to over 4,000 robust Japanese maples.

You can imagine what sort effect it has when you've got nearly half as many of these astounding trees as people.

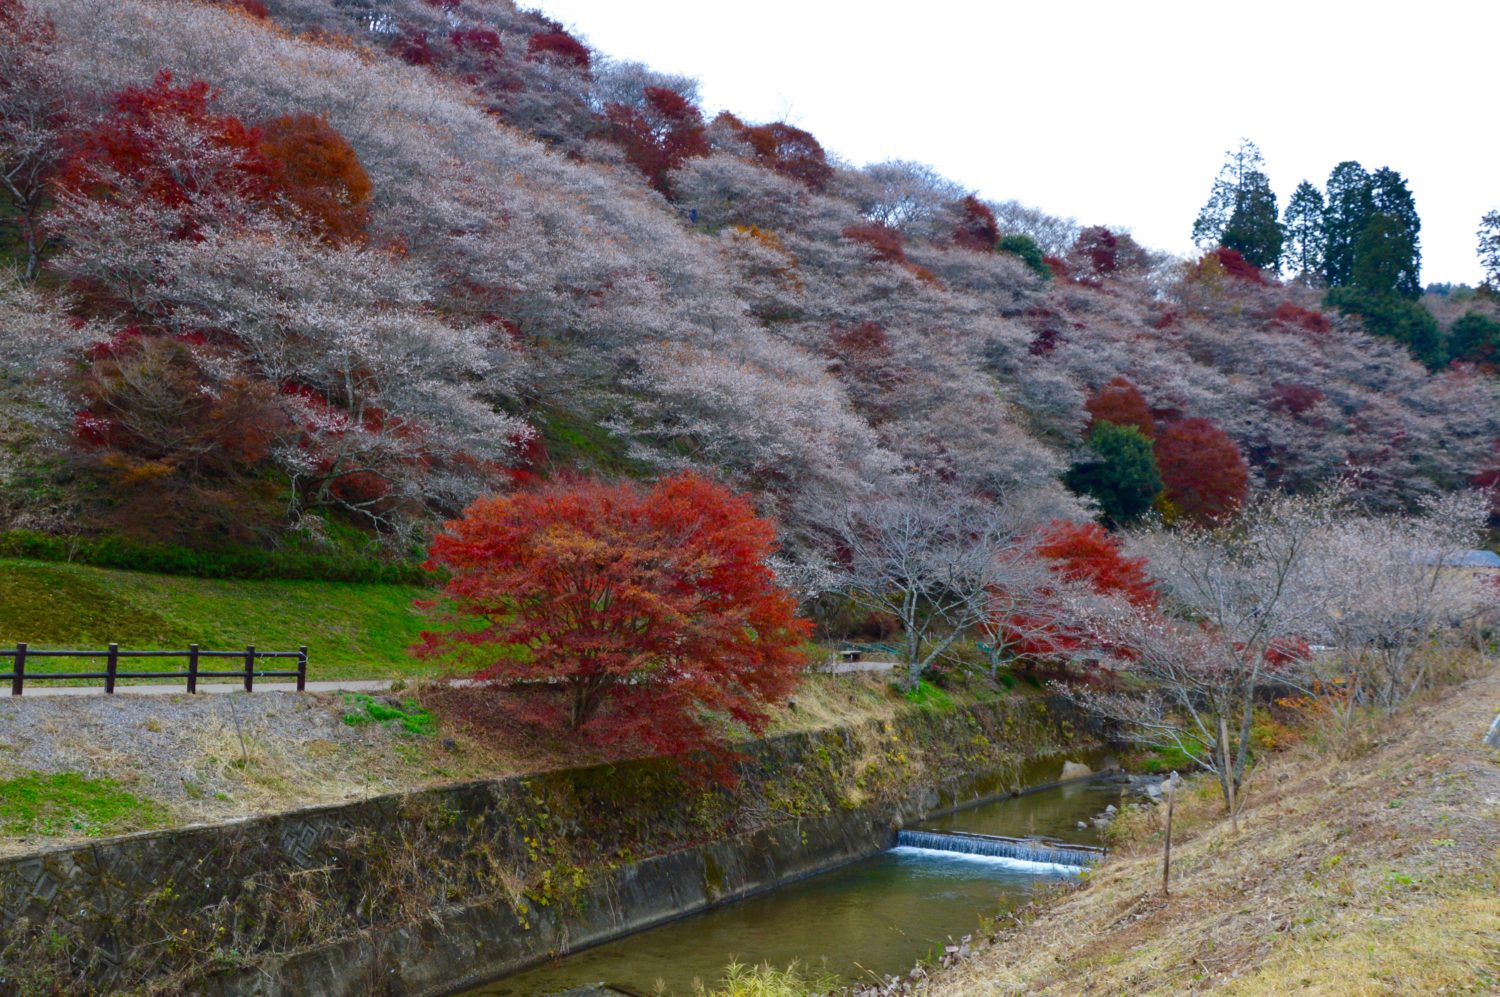
Autumn in Japan, and the colorful leaves of Asuke
The famous autumn leaves of Asuke, Japan

How to Get to Asuke, Japan

As with any country, it always makes sense to try to visit a place in a way that fits your budget, whether that be extremely strict, or just generally conscious of allowing your money to go as far as it can.

First, before you get too deep into the planning process, it's worth noting that researching Asuke may not get you as far as researching Korankei.

Korankei, also known colloquially as Korankei Gorge, is the area in which you can find Asuke and the Taigetsukyo Bridge which is widely considered to be the quintessential autumn view, though there certainly are other views which rival it.

The first step is to find your way to either Toyota or Nagoya as these are the two closest cities nearby. Nagoya is likely your safest bet.

One thing to note about Nagoya is that Japan is in the midst of a tourism push for its fourth largest city.

As such, a slew of direct flights are being launched between Nagoya and a handful of American cities.

It's worth your time to check your preferred method of finding cheap flights, as flying into Nagoya could be less expensive than flying into Tokyo, Kyoto, or other Japanese cities.

If you happen to be renting a car, the drive should be an hour or less.

However, the standard route which would be easy and affordable would be to take the subway to Akaike, which is on the Tsurumai Line.

You'll then aim for the Meitetsu Toyota Line, and get off at Josui.

Finally, get the Toyota-city bus to the stop "Toyota Welfare Hospital - Asuke."

The whole journey should be less than 1500 Yen, which is less than $15.

Asuke, Japan
Asuke has housed the weary feet of many travelers over the years

Exploring Asuke

Asuke, historically speaking, was a place that people would stop on their travels to pray for further safe passage.

Indeed, there's a festival on the third weekend of March where people pray for strong legs for travel or a pilgrimage they are going to set out on.

Asuke was a common ancient stop between Nagoya and Okazaki as well as Nagoya and Nagano.

The area has been known for hundreds and hundreds of years as a place to stop to appreciate autumn in Japan, so it's not surprising that those with tired legs would choose to rest here for a moment over other towns in the area.

The story goes that the head priest of the local temple began planting Japanese maples along the water in the early 17th century, and the locals adored them so much, they started planting their own.

Asuke isn't all history though, they've got fantastic, cheap street food on offer that could satisfy any palate.

Street food in Asuke
Asuke's street food was on par with anything found in larger towns and cities nearby

The Views from Asuke Castle

Wandering around the town of Asuke and the surrounding forest is an opportunity to be cherished. But, to get the full effect of fall in Japan, it's essential to get an aerial perspective.

To do this, head towards Asuke Castle, which is a short walk up the hill, and well worth the walk.

It only boasts about 100 visitors a day, so you'll have plenty of space to get photographs clear of people, something not easily done in Japan.

Asuke Castle is excellent because it's not a monolithic reconstruction like other Japanese castles.

It's wooden, simple, and pragmatic with a functional design that's easy to appreciate from the outposts to the stronghold.

Asuke Castle, Japan
Asuke Castle sits high above Asuke offering unparalleled views of the area.

The castle itself is intriguing, but there's no question that the real prize is the ability the thousands of Japanese maples.

Again, I'd recommend, if possible, to visit this area of Japan in November or near to November to take in the full breadth of the view.

High up above the town, you'll see the reason so many people in Japan come from far and wide to witness what this region has to offer, but you'll be undoubtedly curious about why this isn't more well-known to the world.

As I arrived at the top, I took my camera off my shoulder and began to set up for the shot. I looked up and was just taken aback.

I put my camera back into my bag, took a deep breath, and gazed through the mist over the trees.

Asuke Castle in Autumn
The views from Asuke Castle are unforgettable in Autumn

It seemed futile to scramble for a photo without first truly recognizing what it was that I was photographing.

I took another breath, got the camera back out and snapped the shot that I wanted for myself, but also to show the world that visiting Asuke isn't a side-trip or a forgotten note on a trip between cities, it is a trip unto itself, and one that may be more memorable than anything else you do.

_____

My trip was hosted in partnership with Go Backpacking and the local government of Japan. All opinions are my own. 

Steamboat Springs, Colorado: Fall Scenes

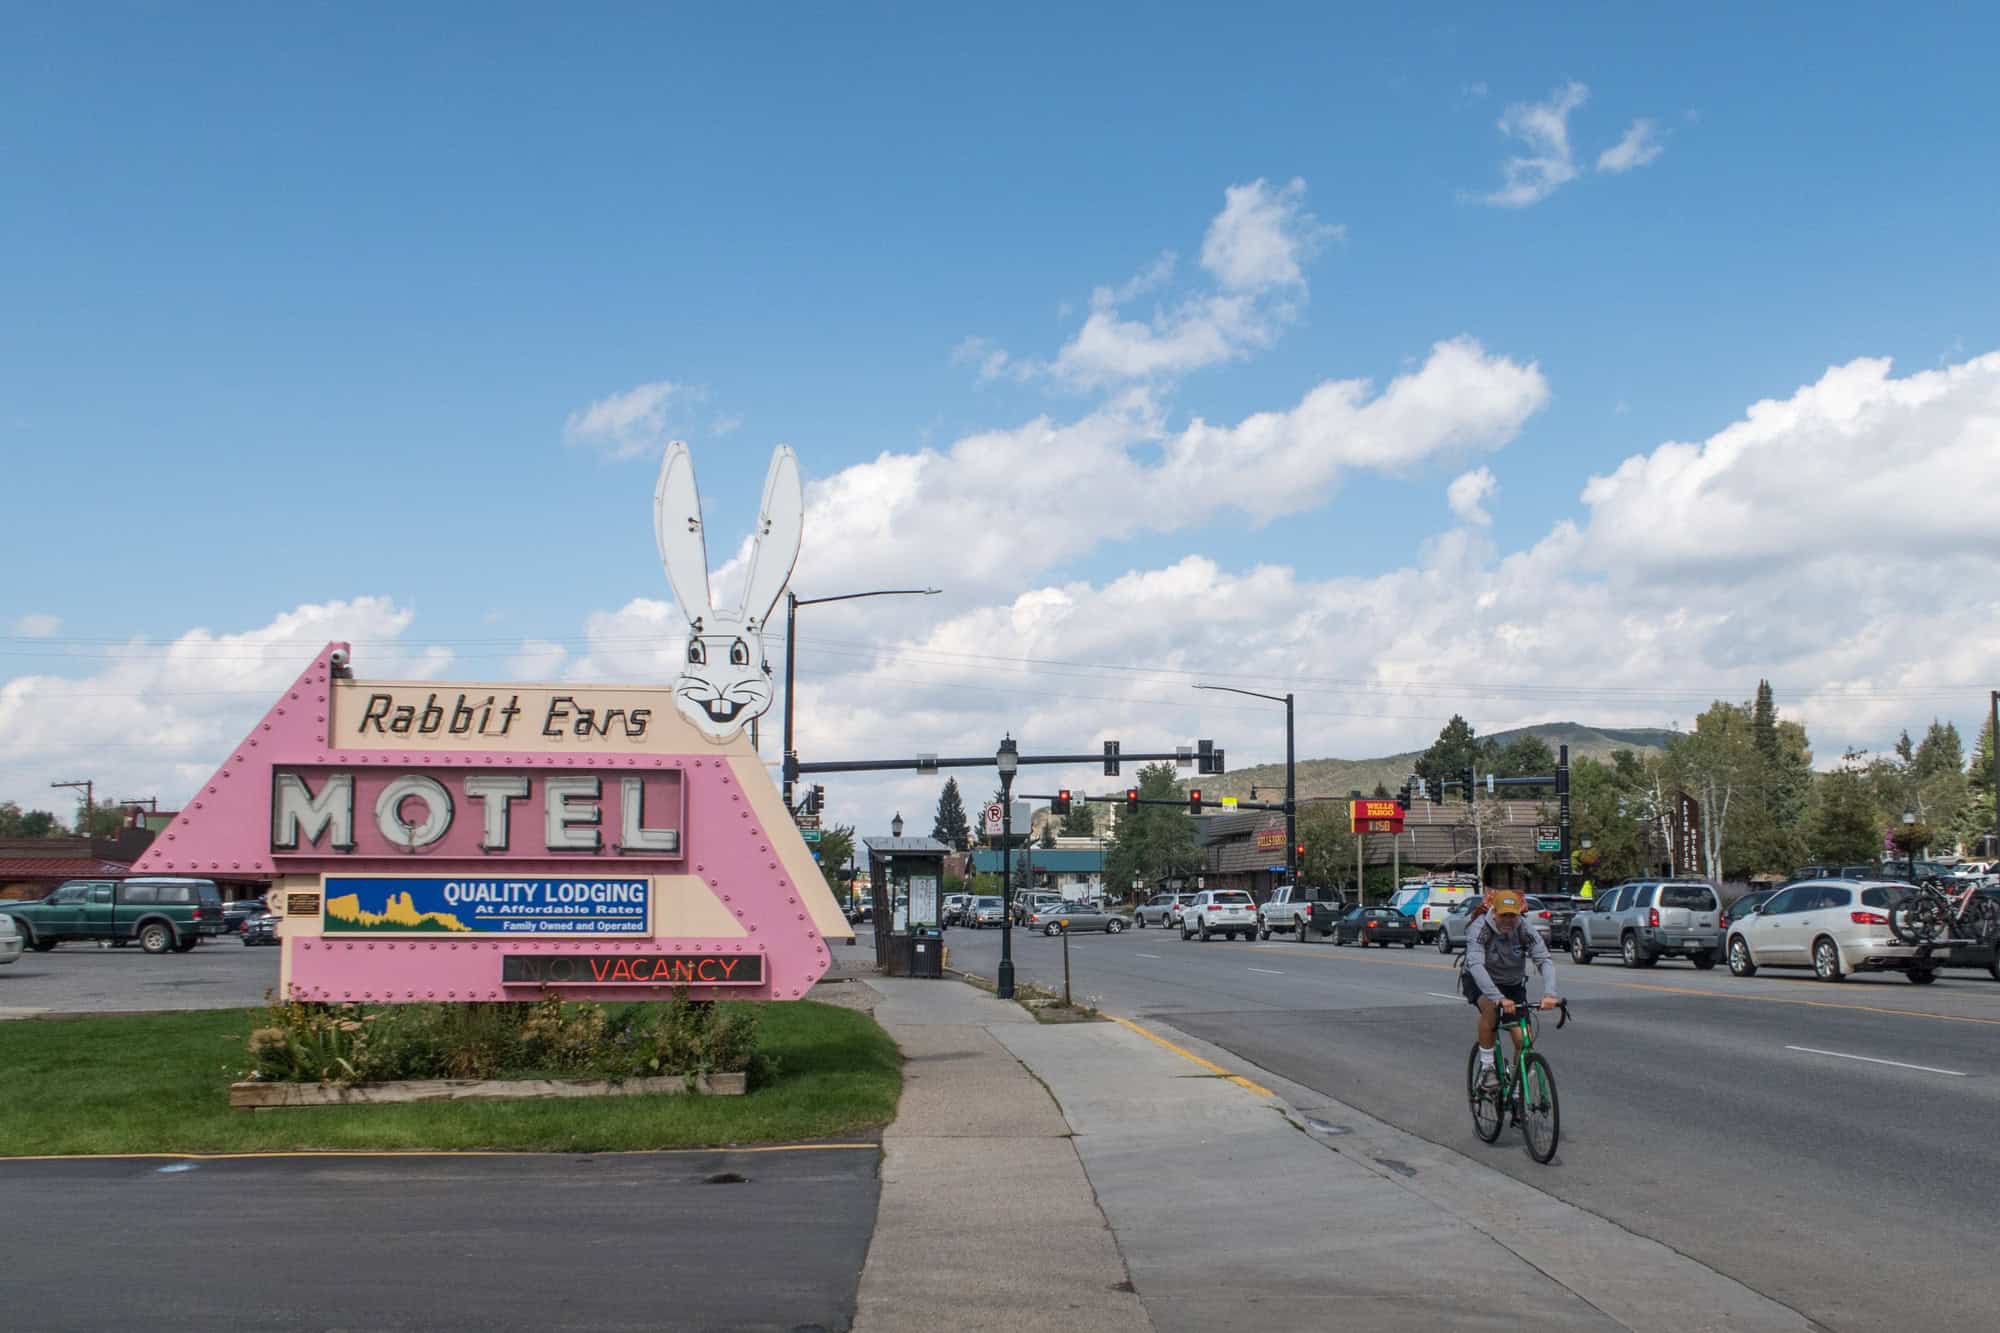
Rabbit Ears Motel
The iconic pink sign for the historic Rabbit Ears Motel (where I spent two nights) greets new arrivals in Steamboat Springs.
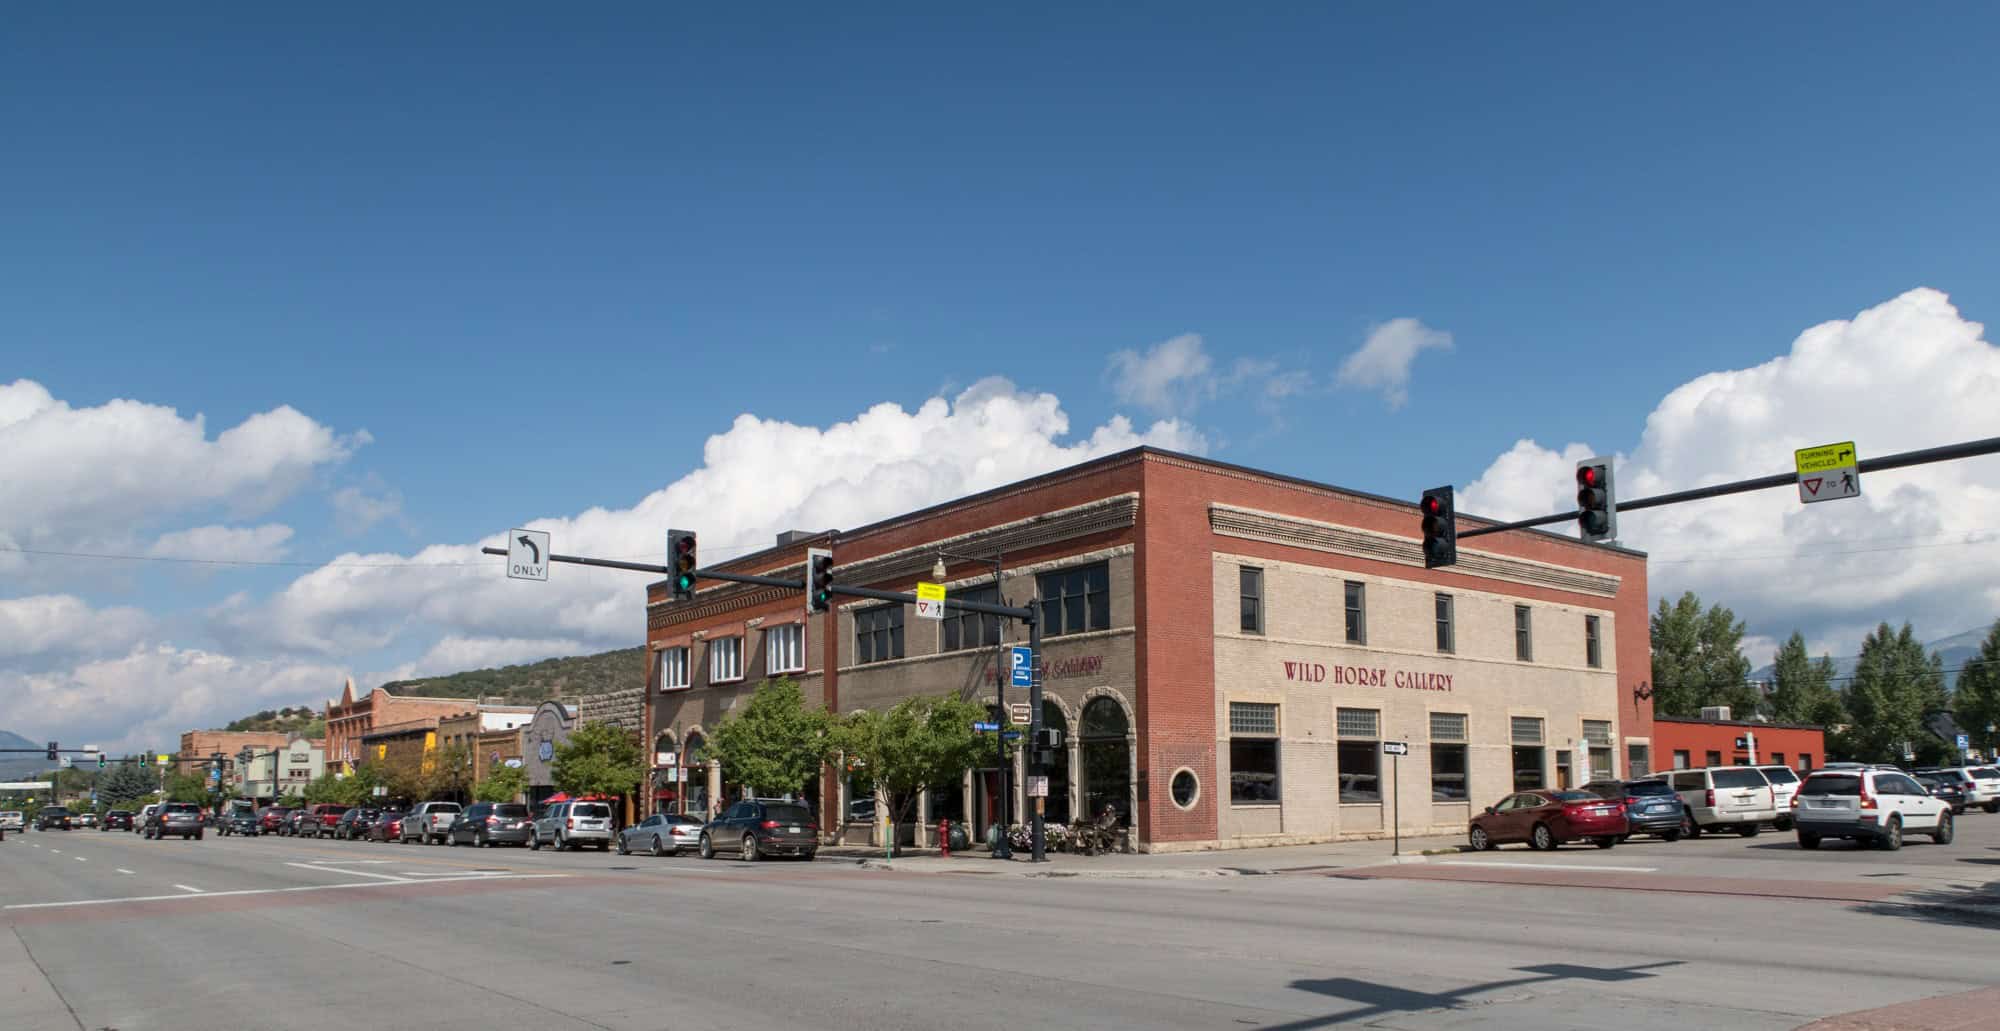
The main street running through Steamboat Springs, Colorado
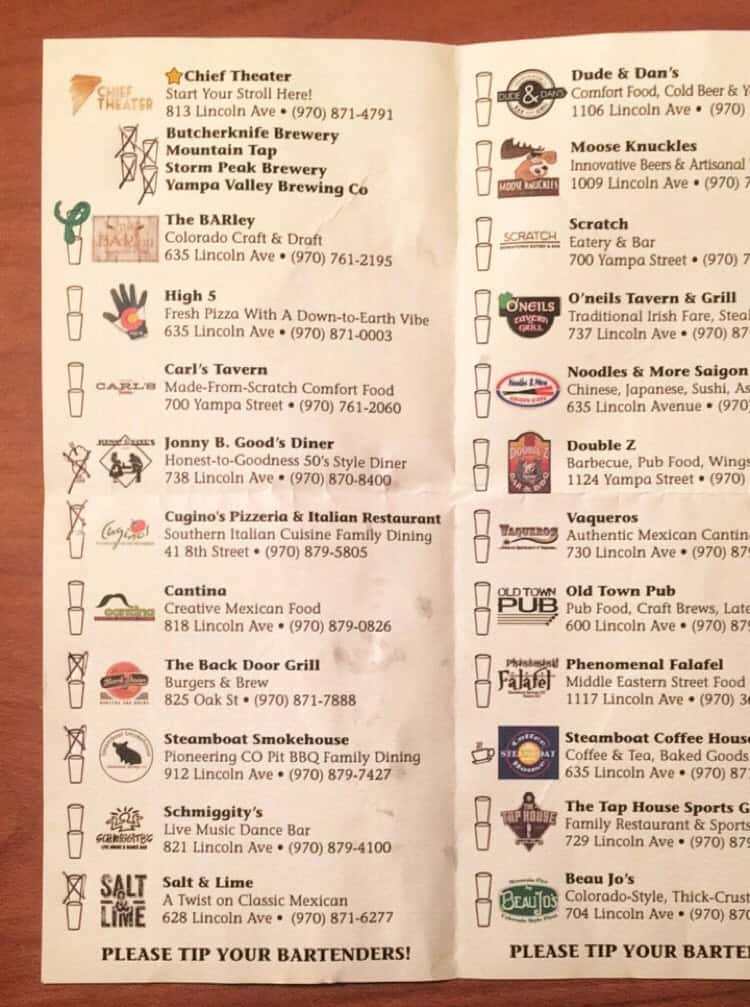
Lincoln Avenue, the main road running through town, is lined with bars, restaurants, shops, and galleries.
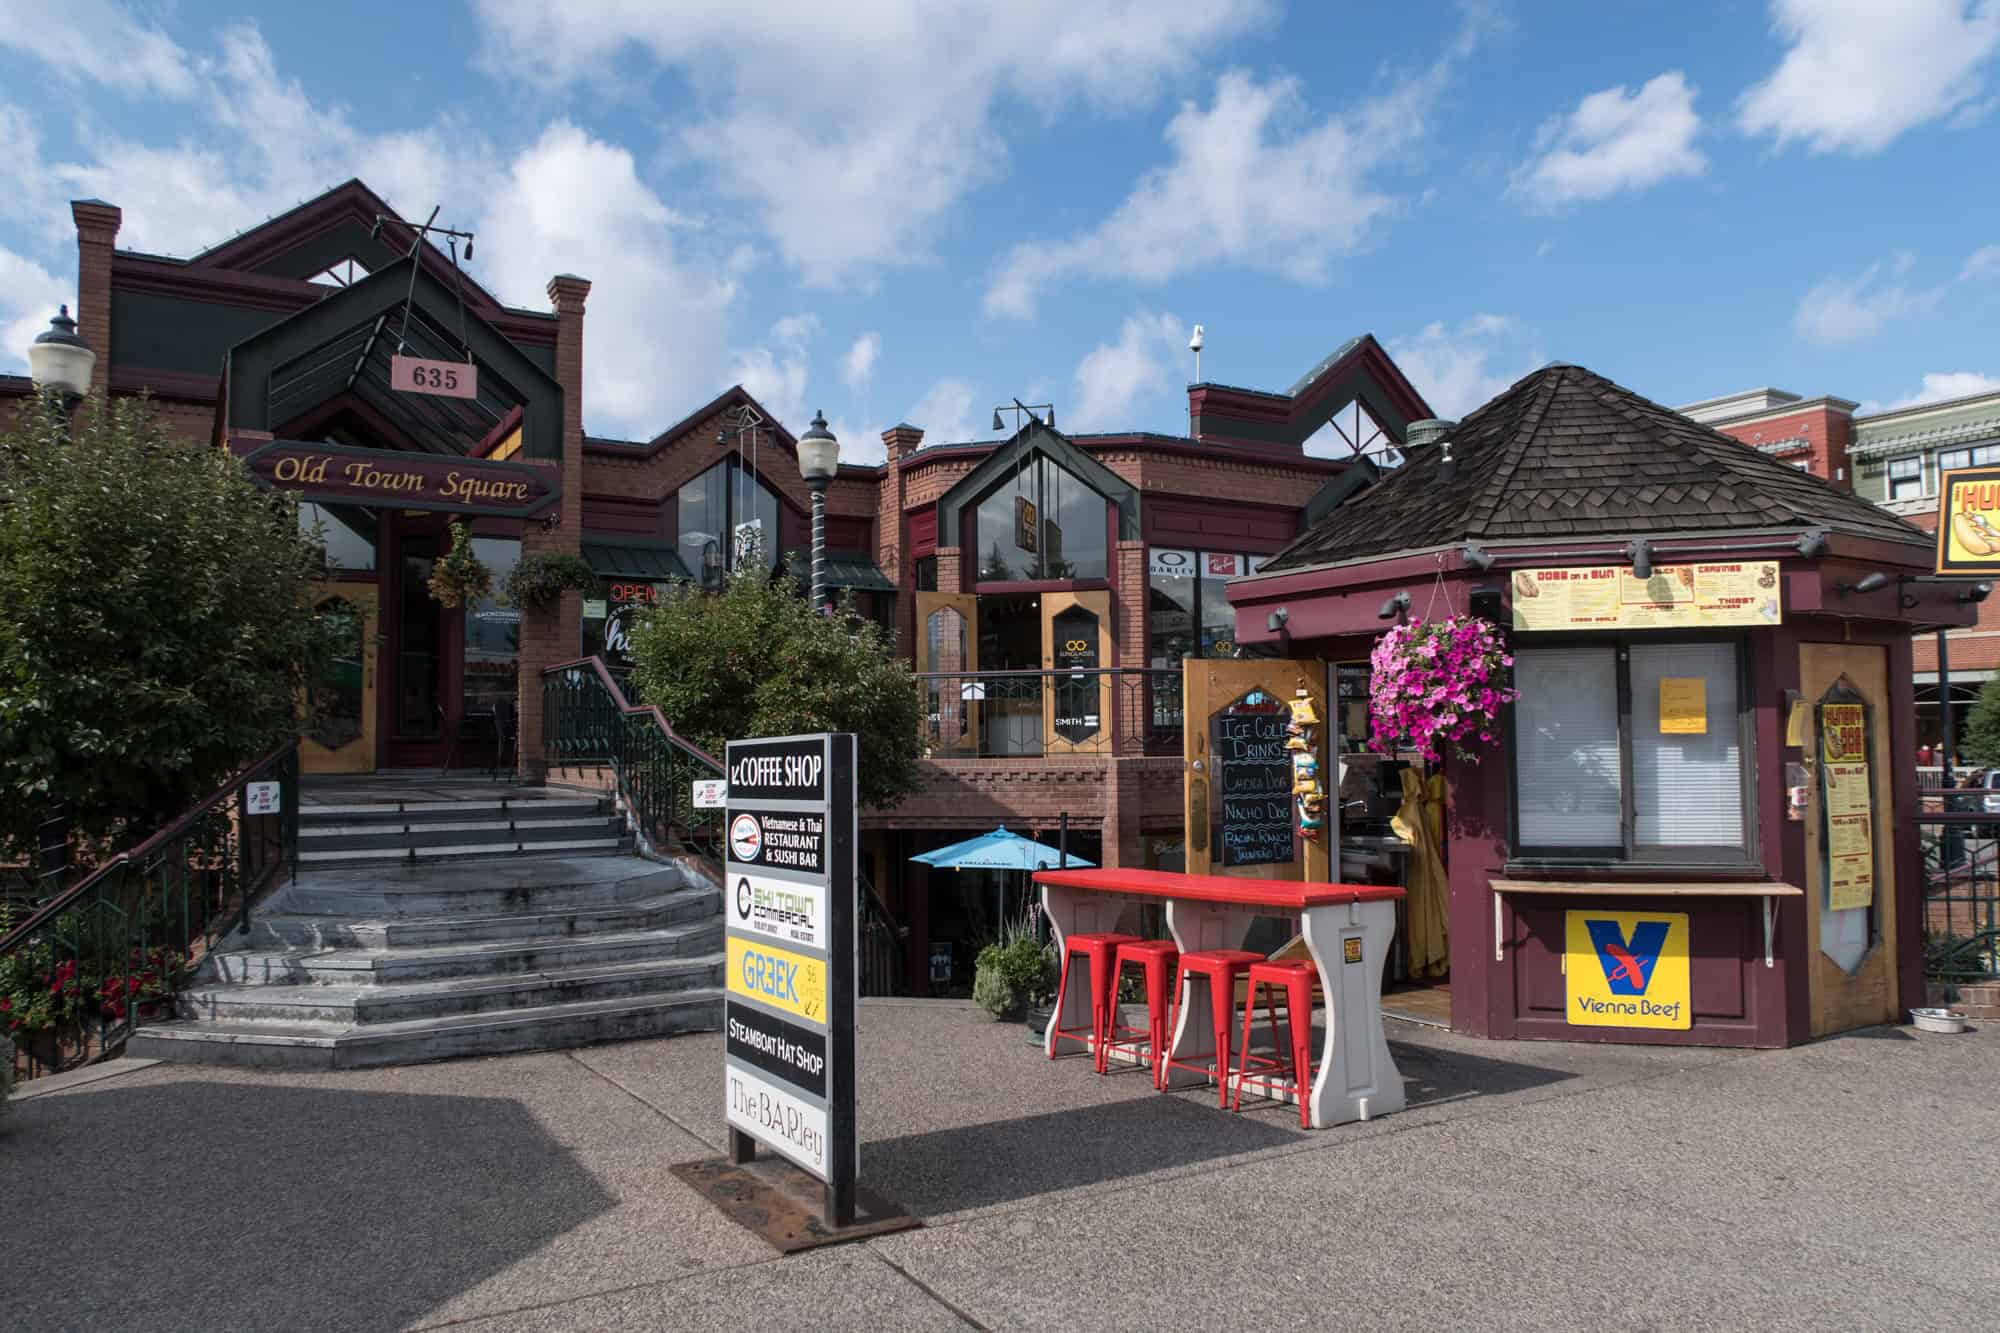
Shops and restaurants in downtown Steamboat
Shops and restaurants
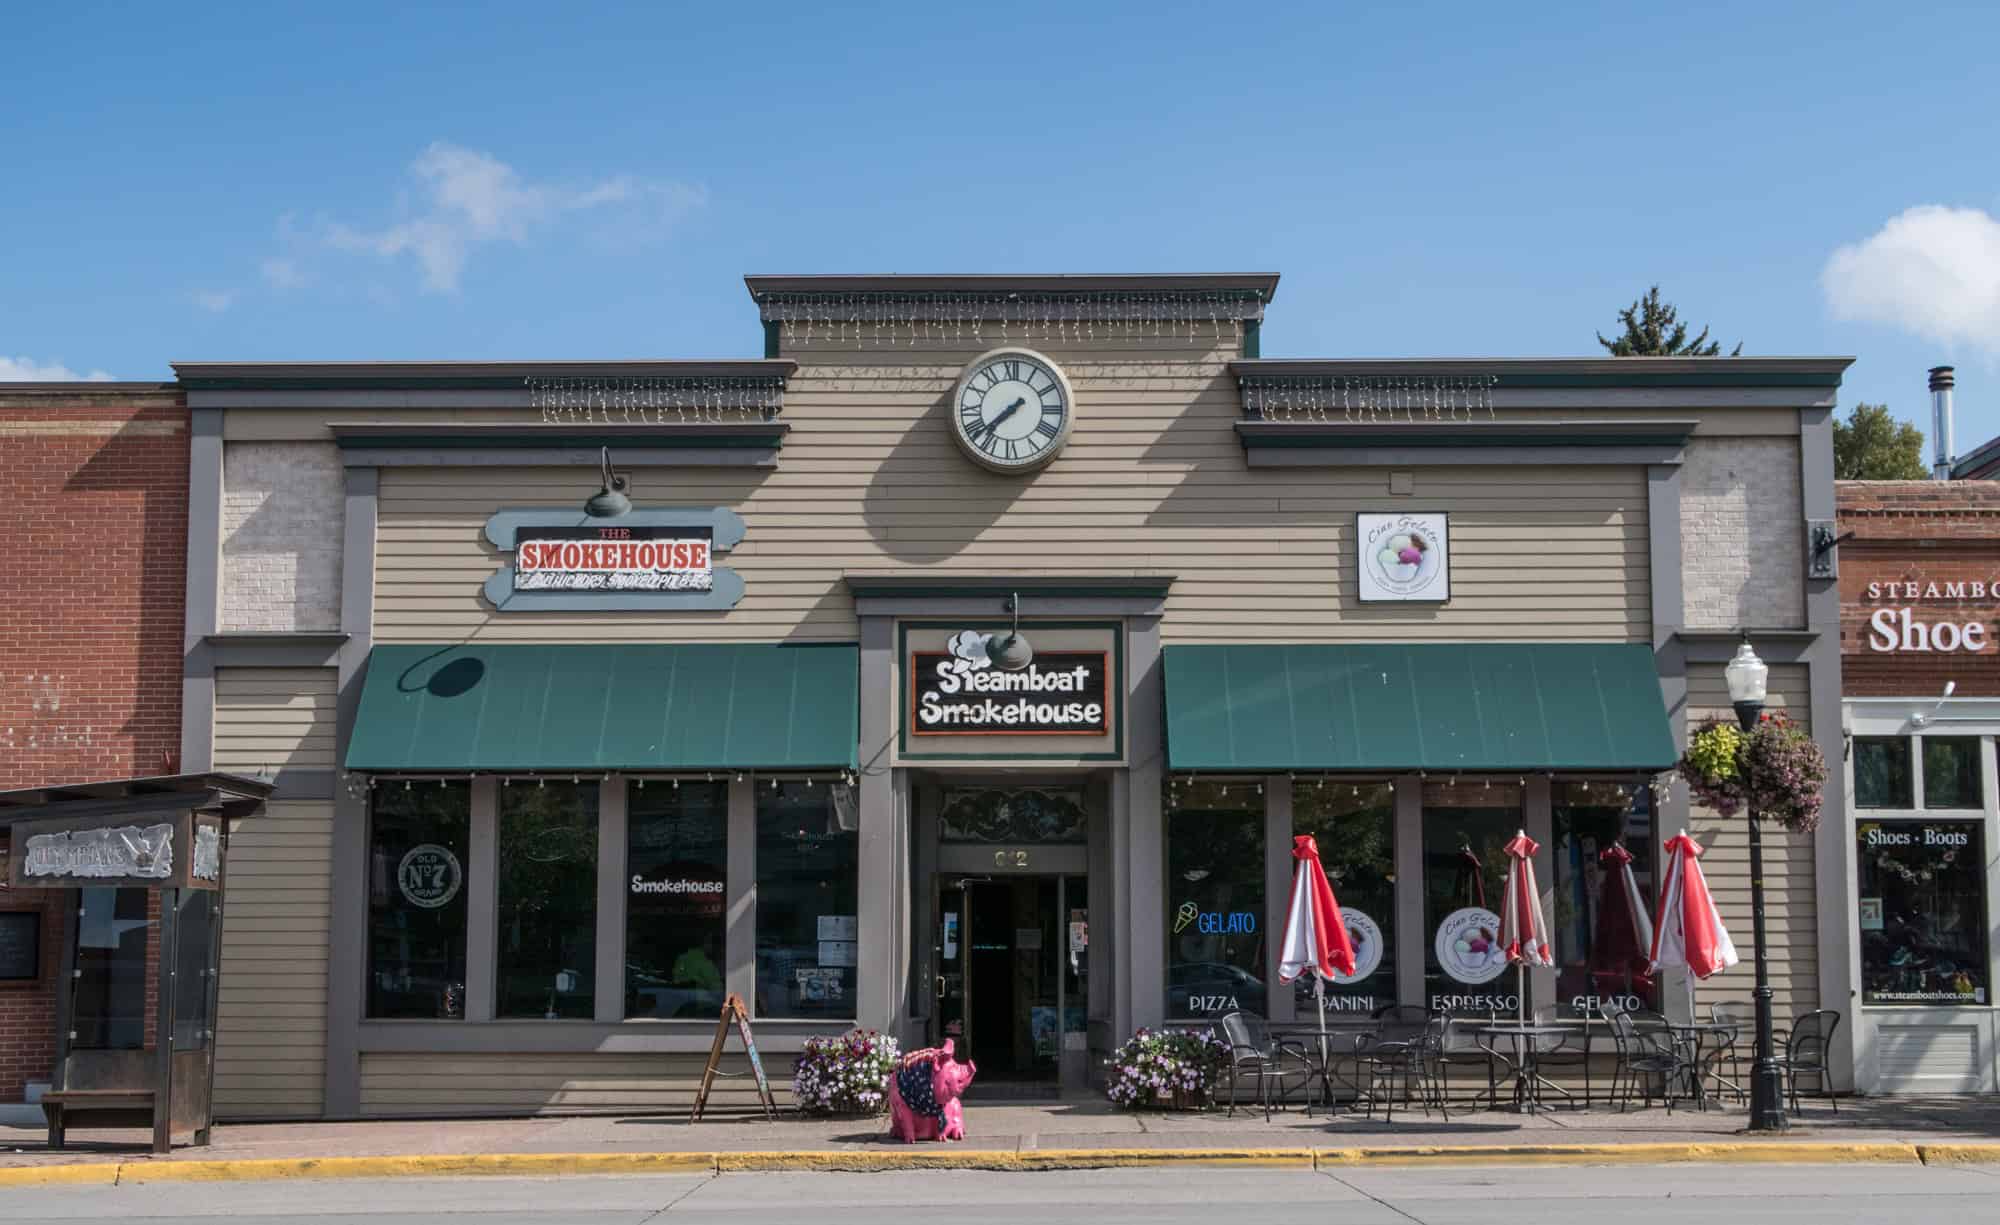
Steamboat Smokehouse restaurant
The Steamboat Smokehouse restaurant and a gelato shop.
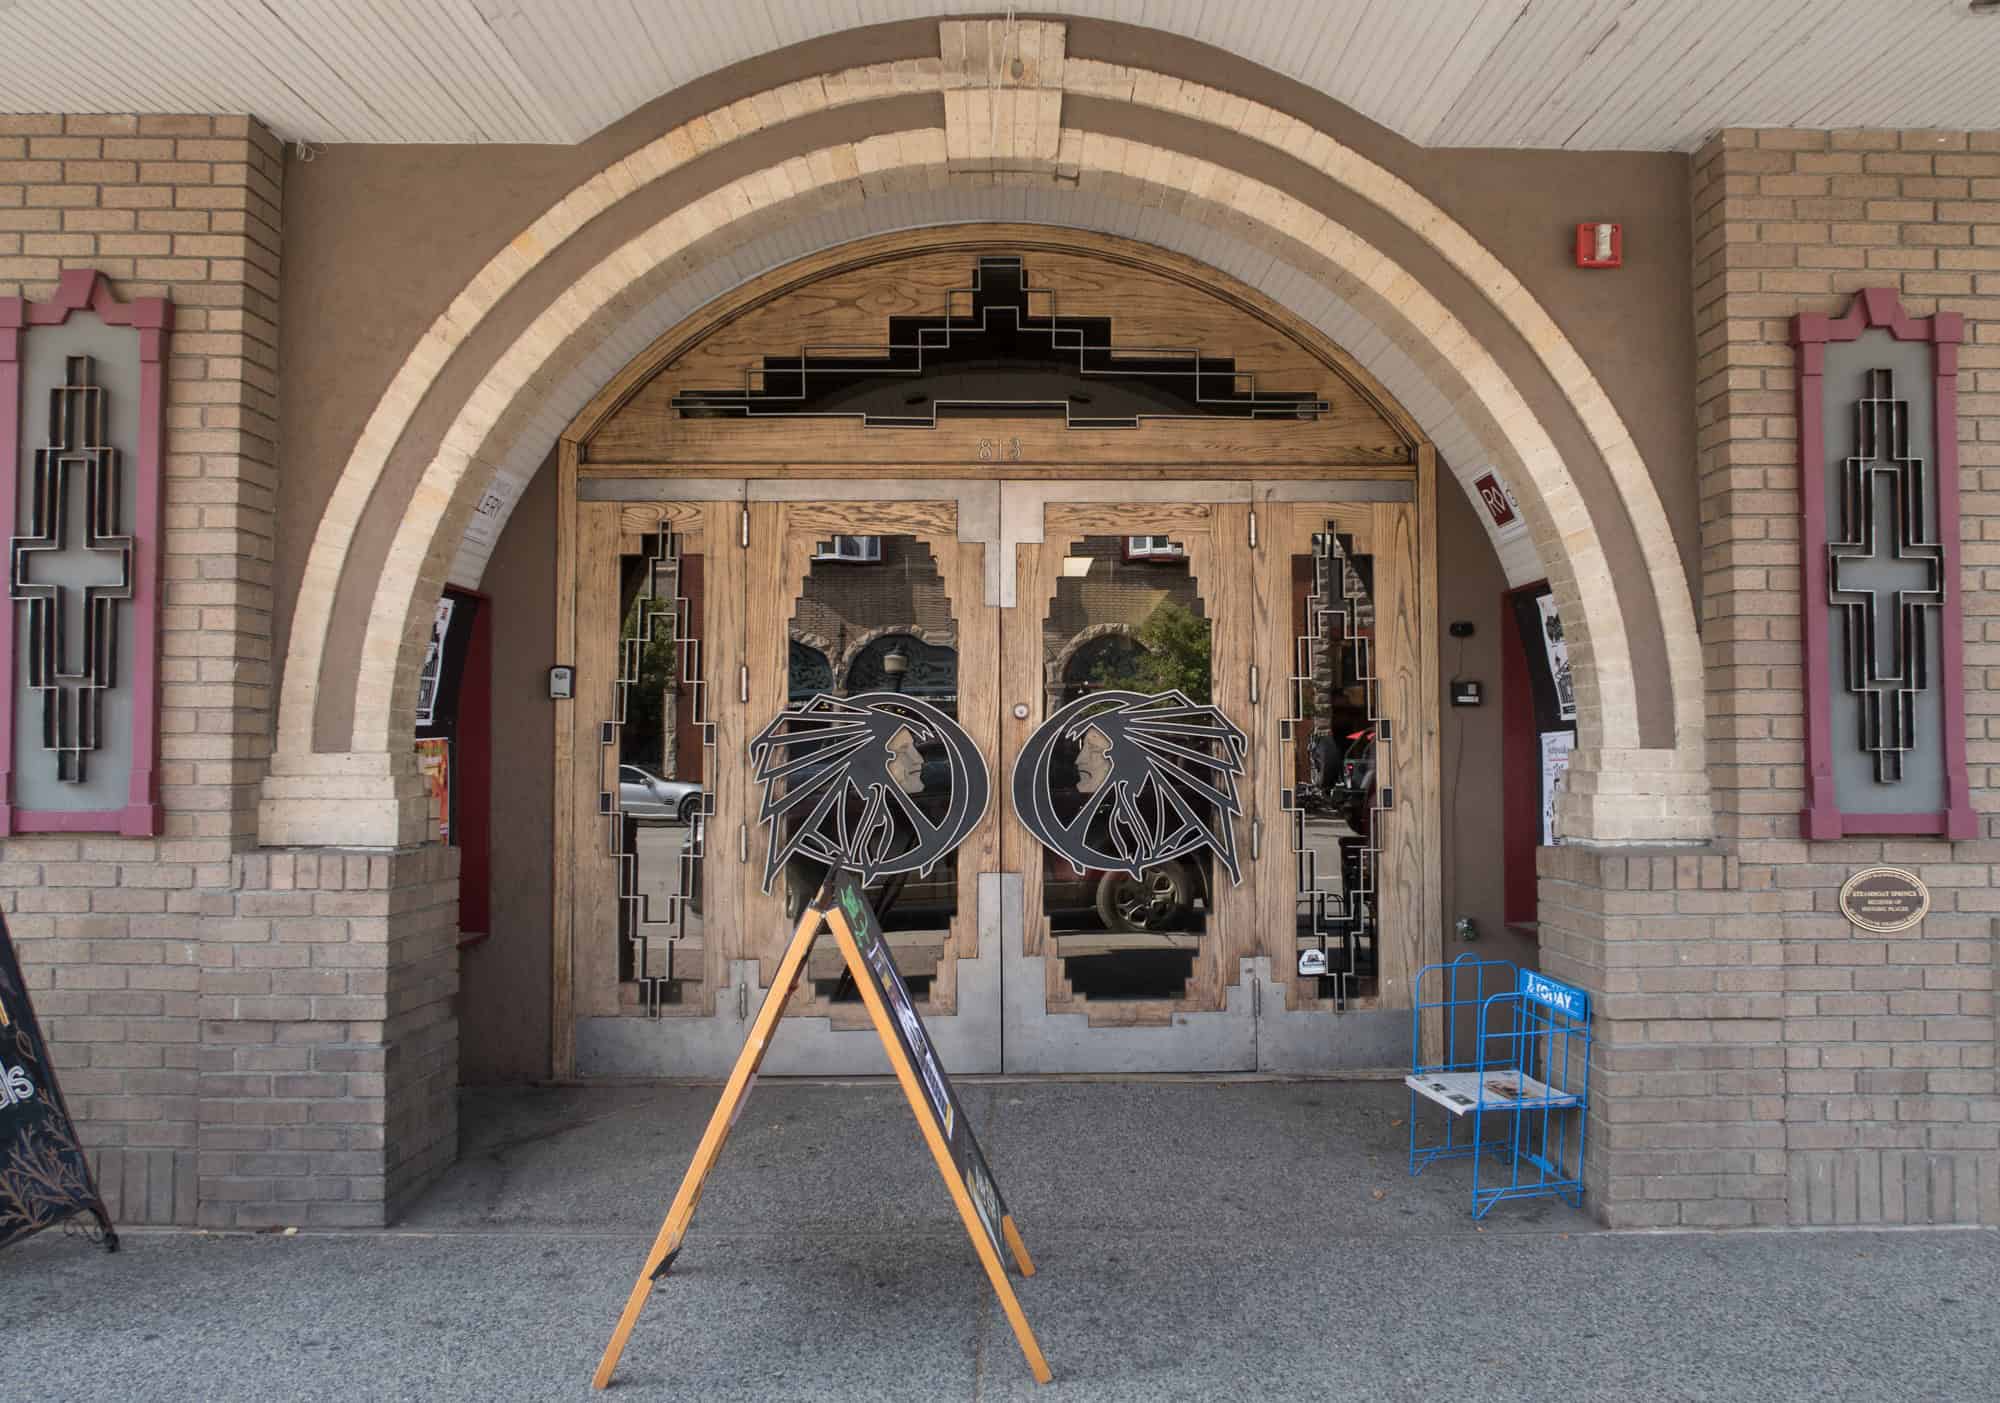
Chief Theater
Entrance to the Chief Theater, which shows movies as well as hosts concerts and special events.
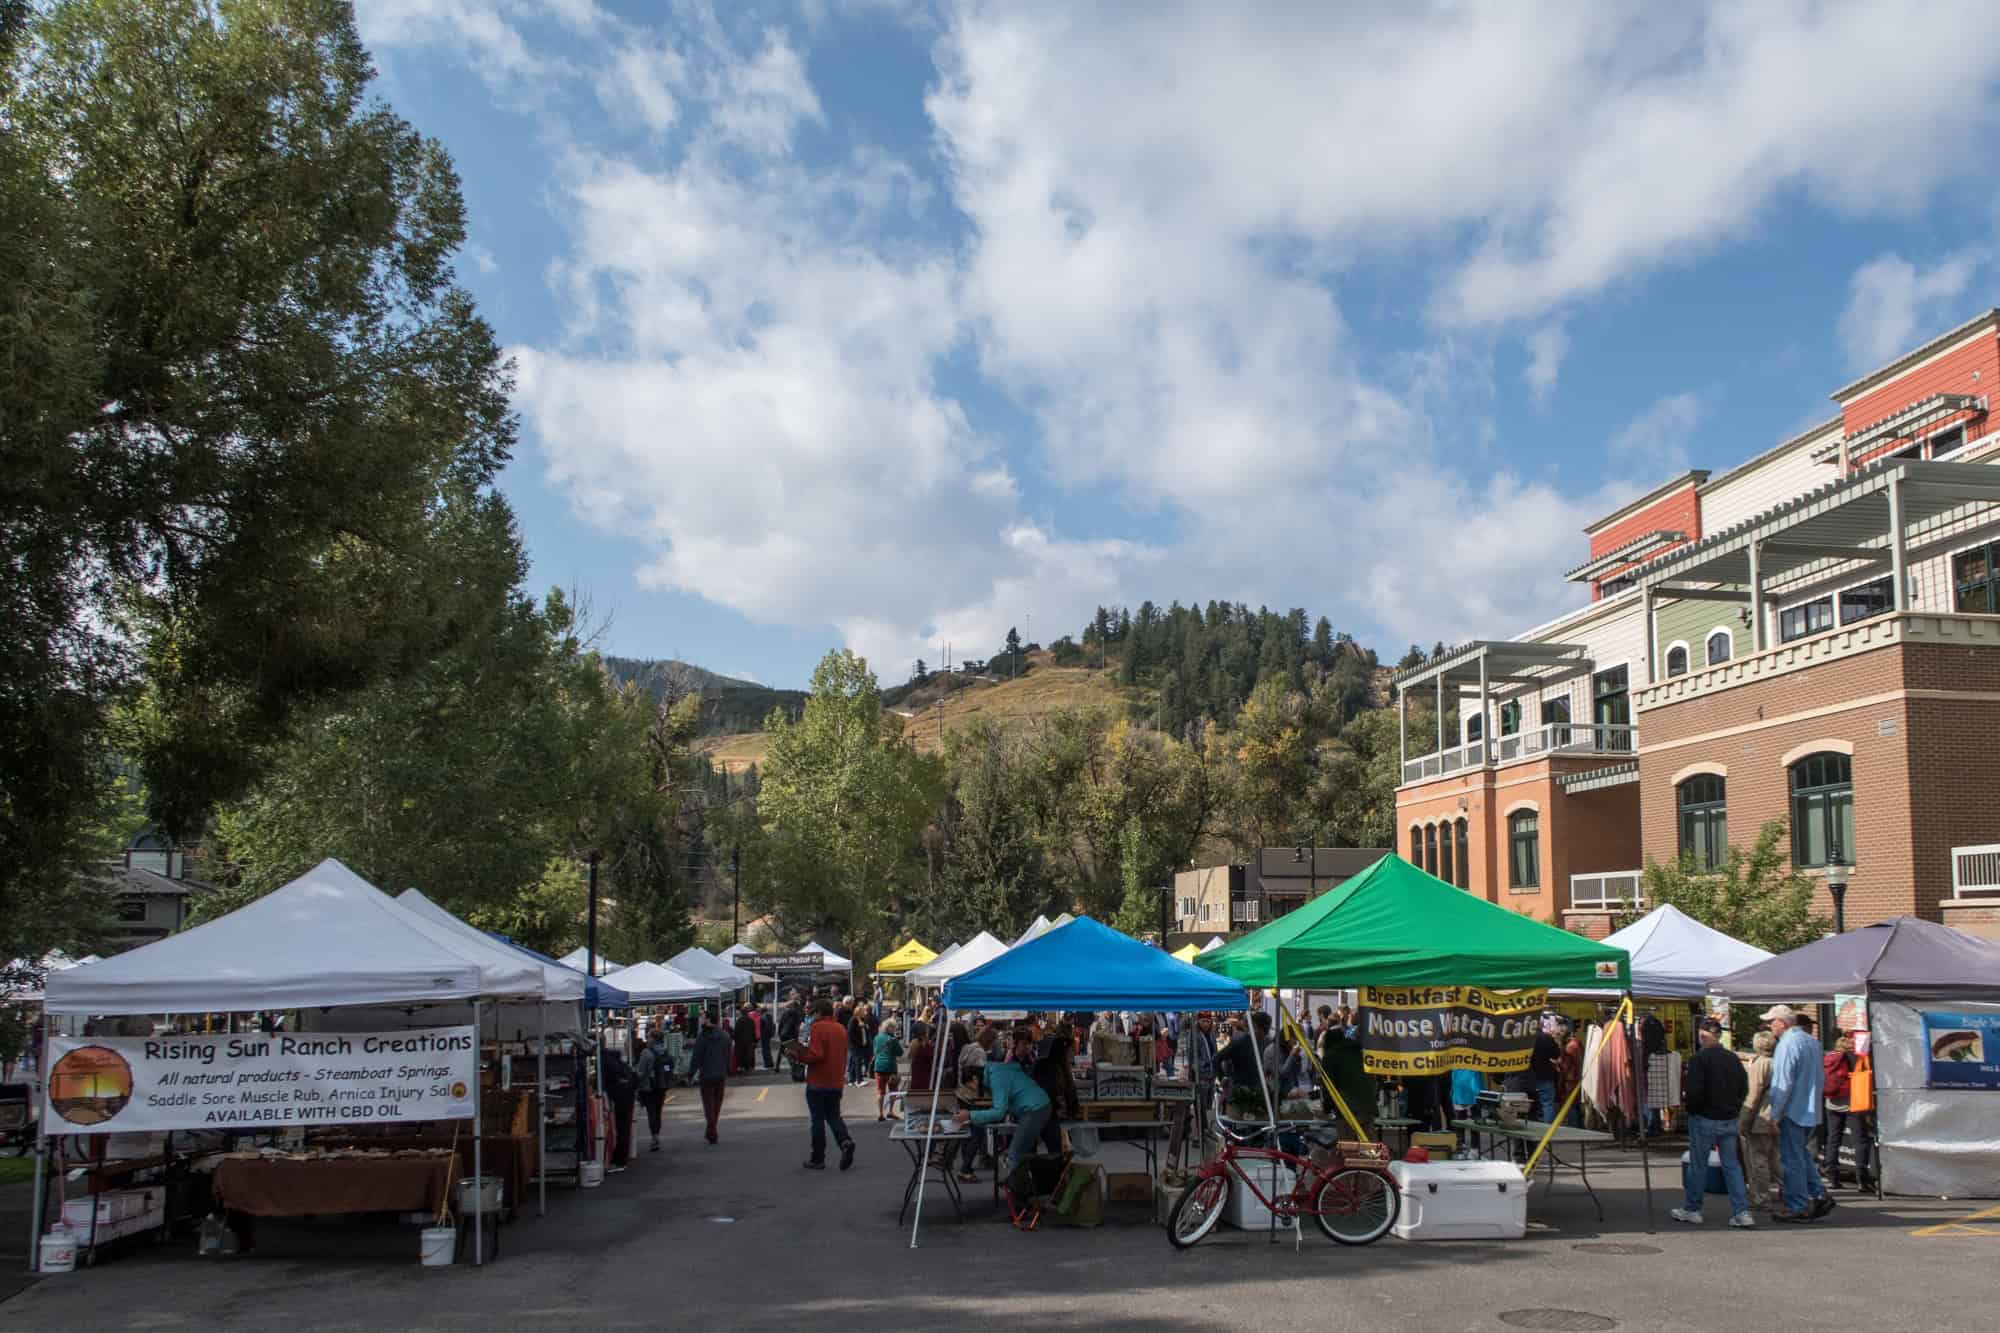
Steamboat Springs Farmer's Market
The last Farmer's Market of 2017. In the background, the hill is used for Olympians to train for ski jumping.
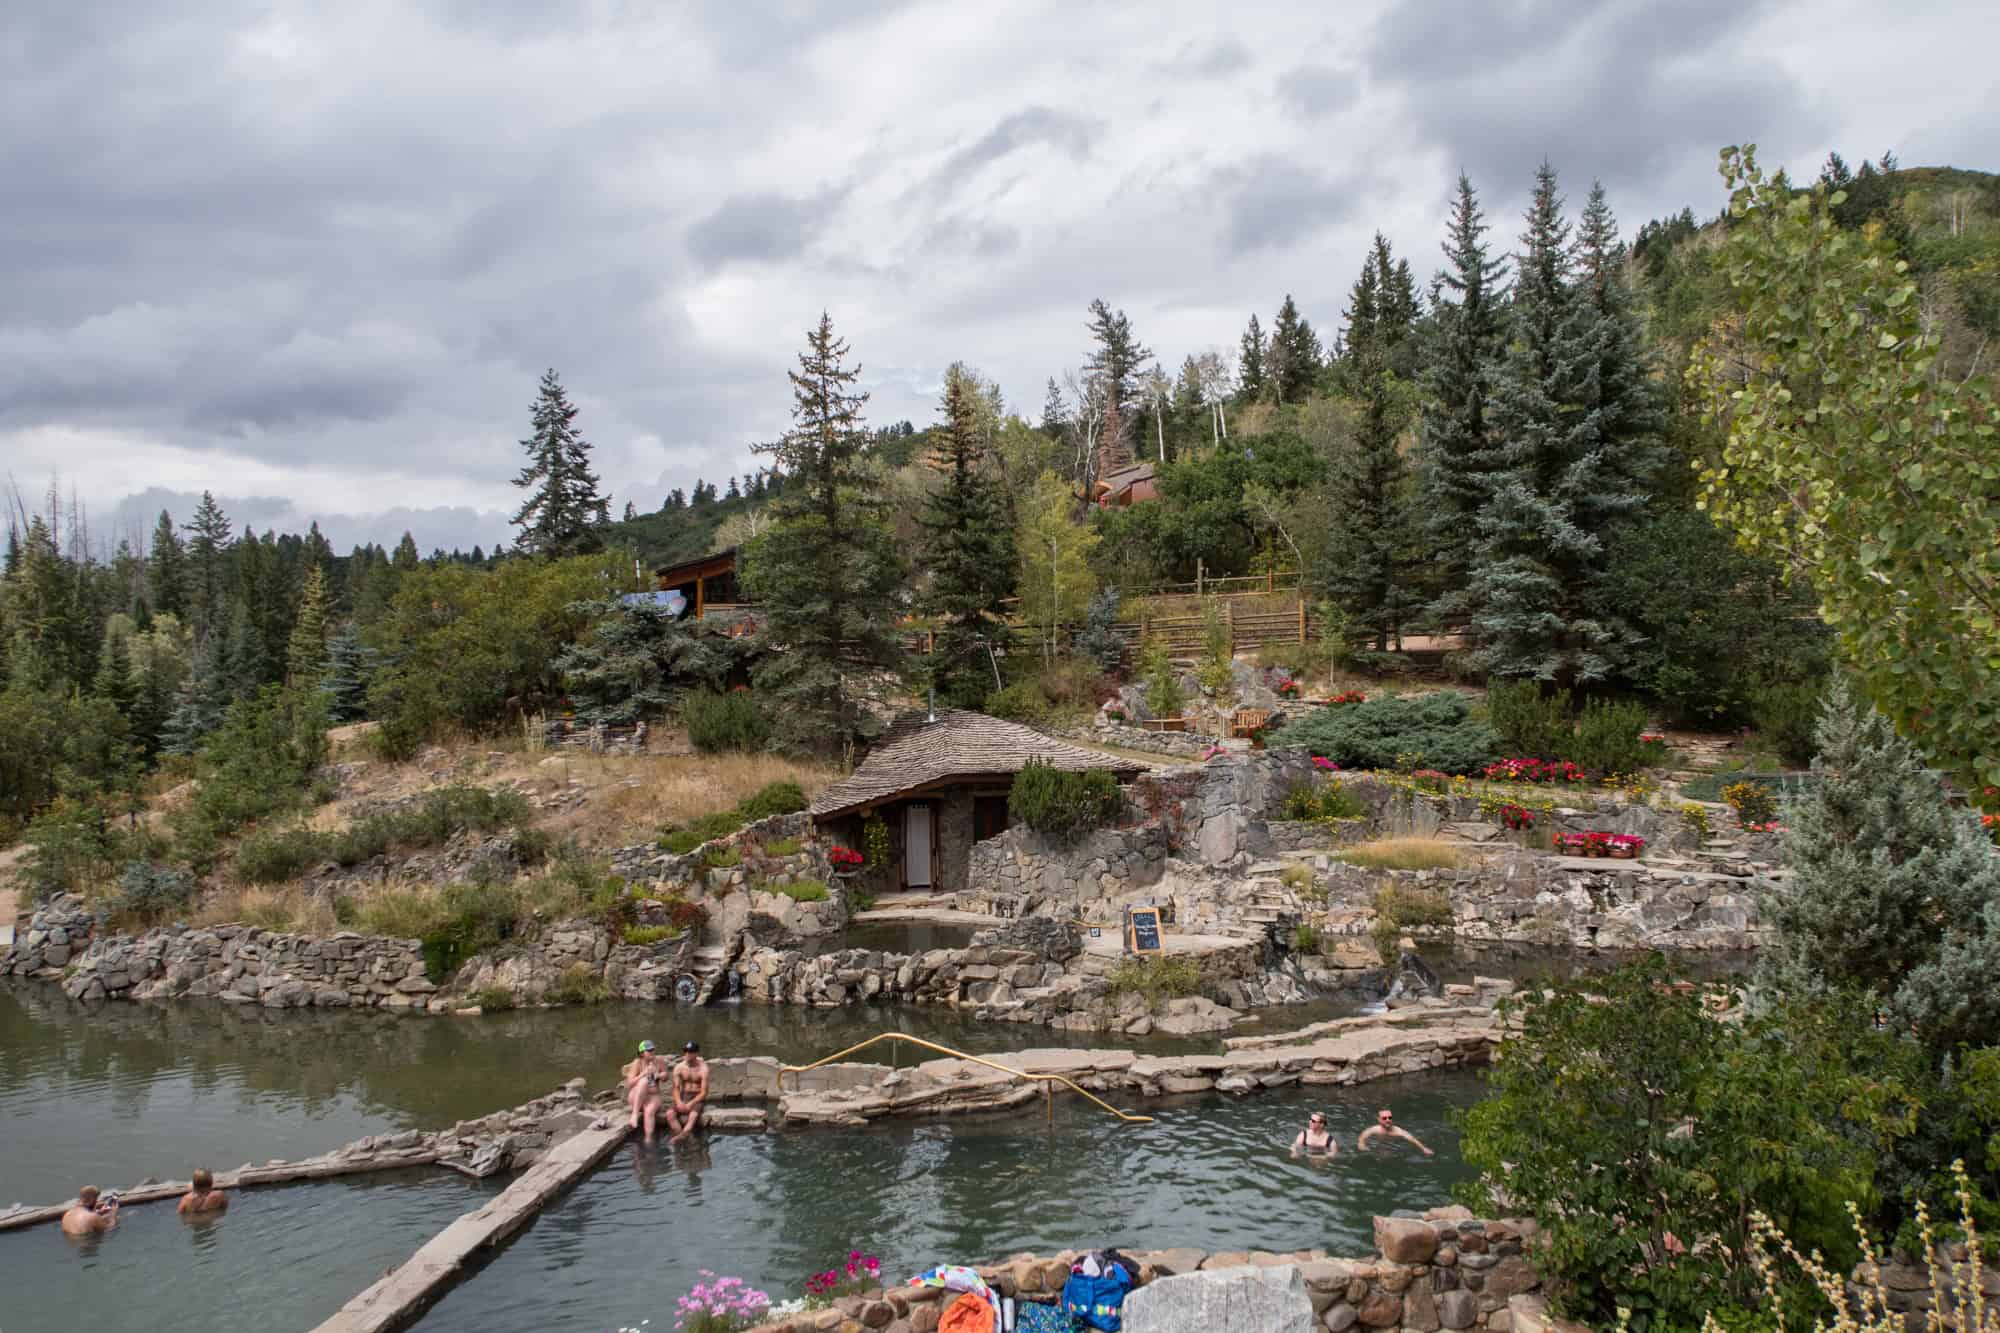
Strawberry Park Natural Hot Springs
The Strawberry Park Natural Hot Springs is a short 20-minute drive from downtown.
Pastries at the local farmer's market
Pastries at the local farmer's market.
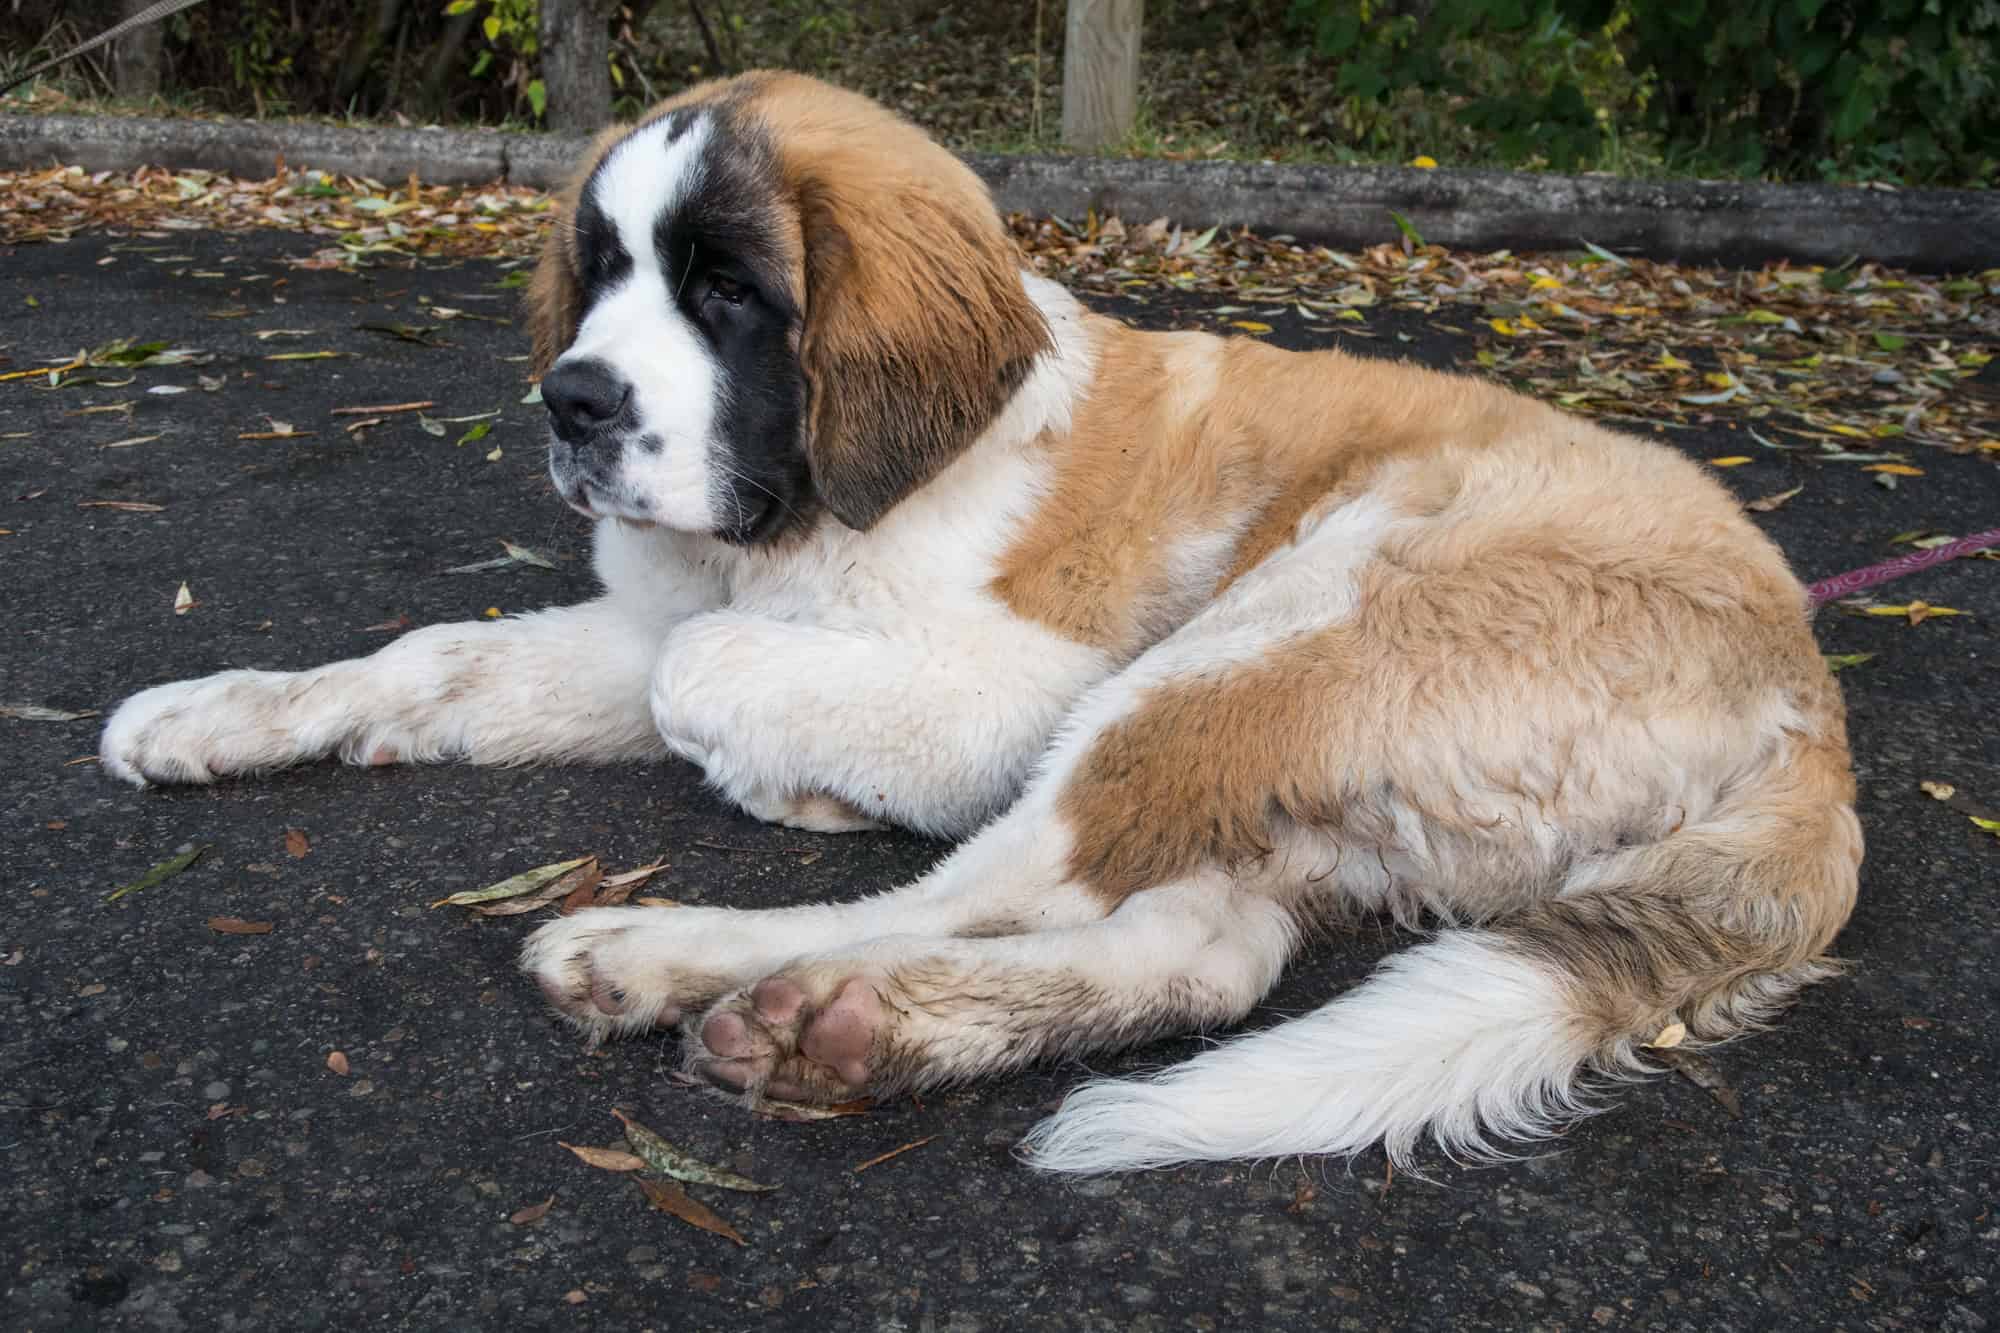
St Bernard
An adult St Bernard at the farmer's market.
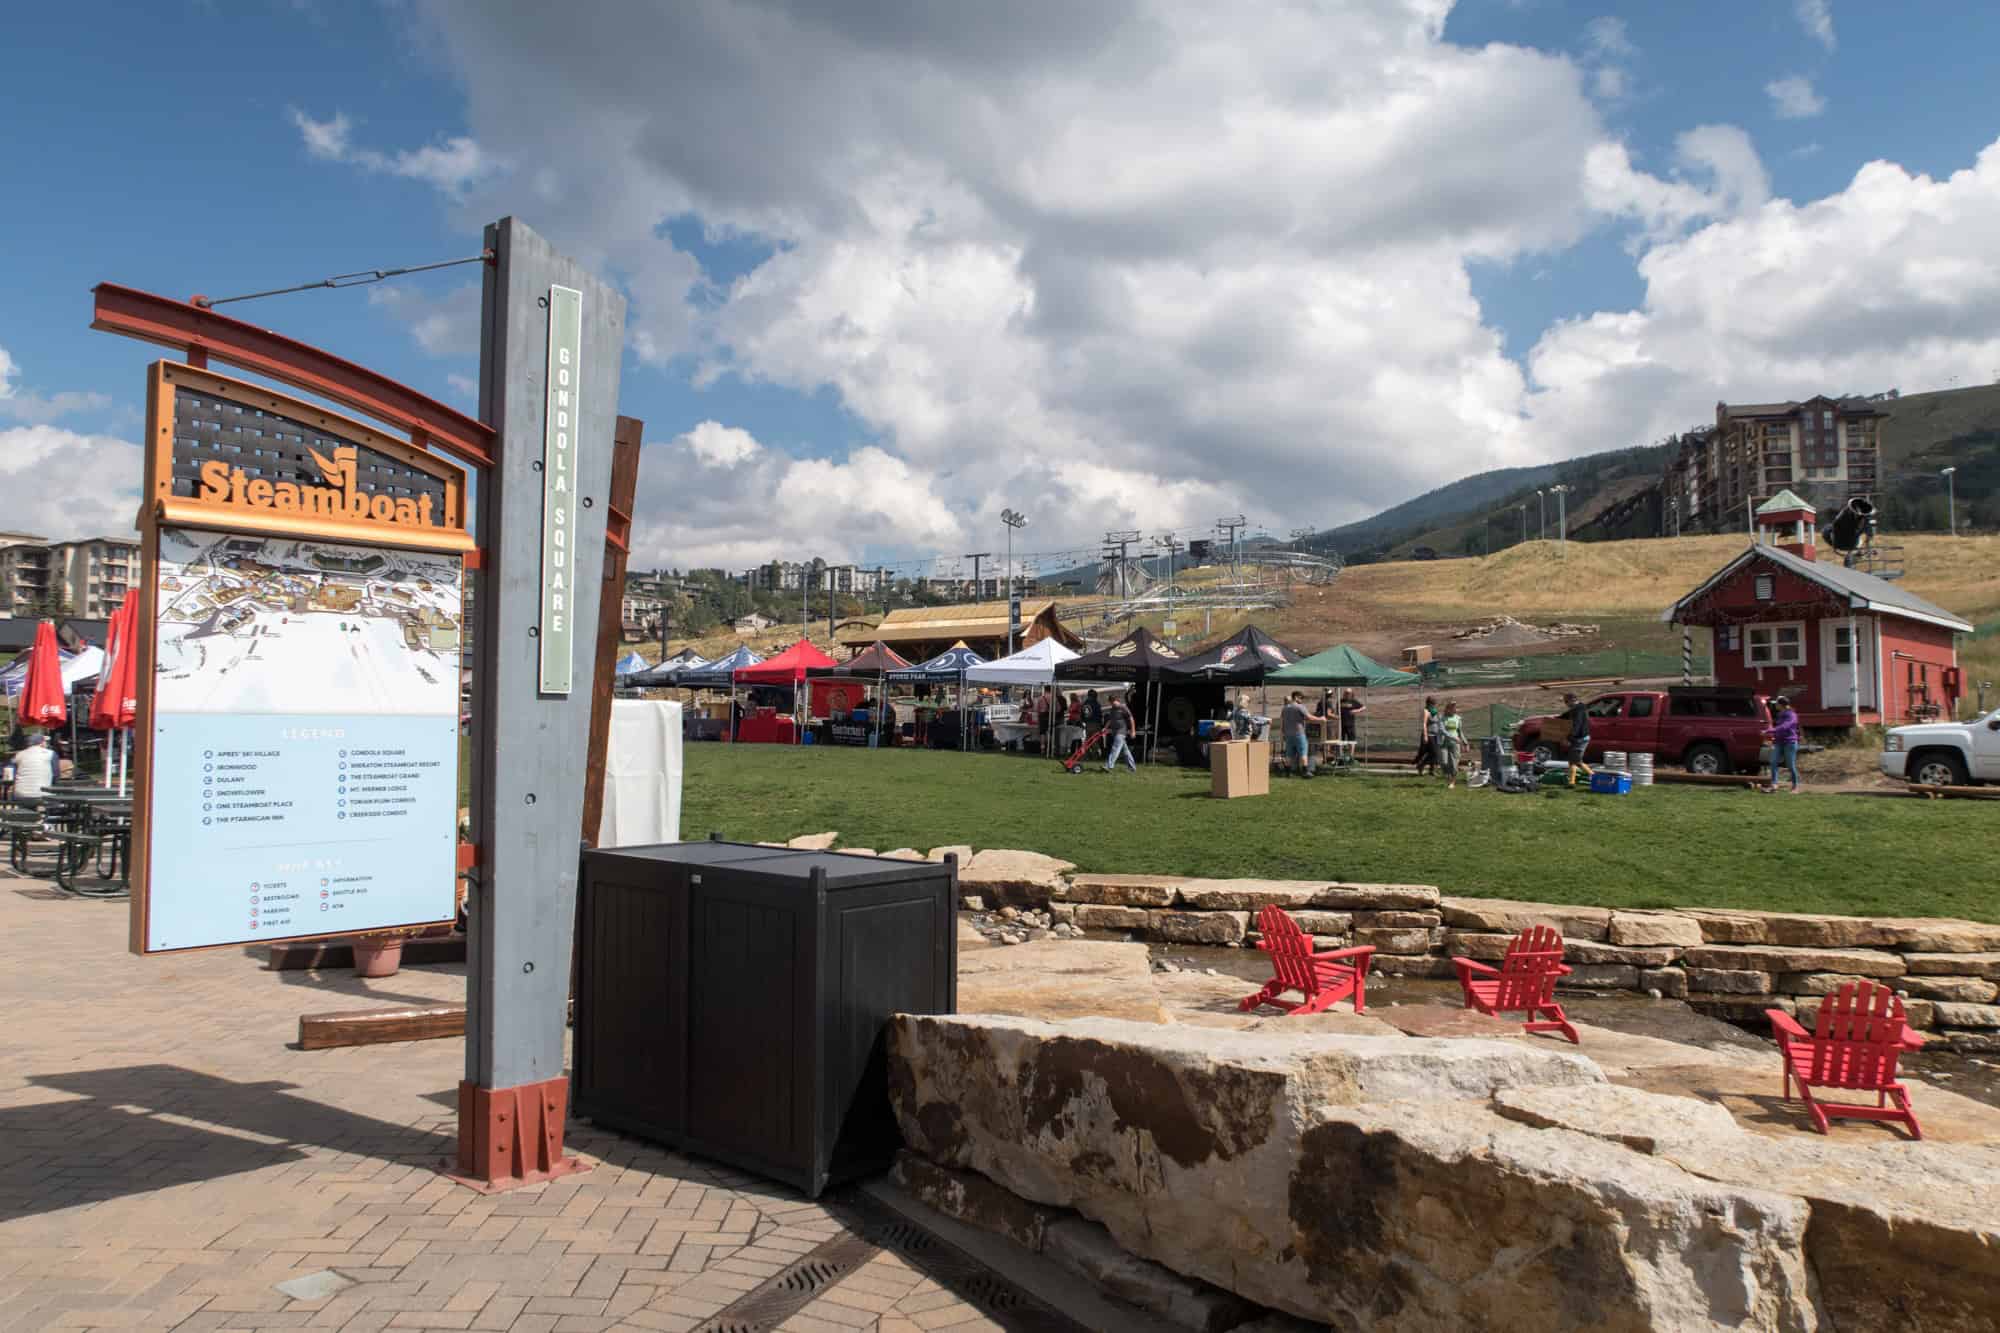
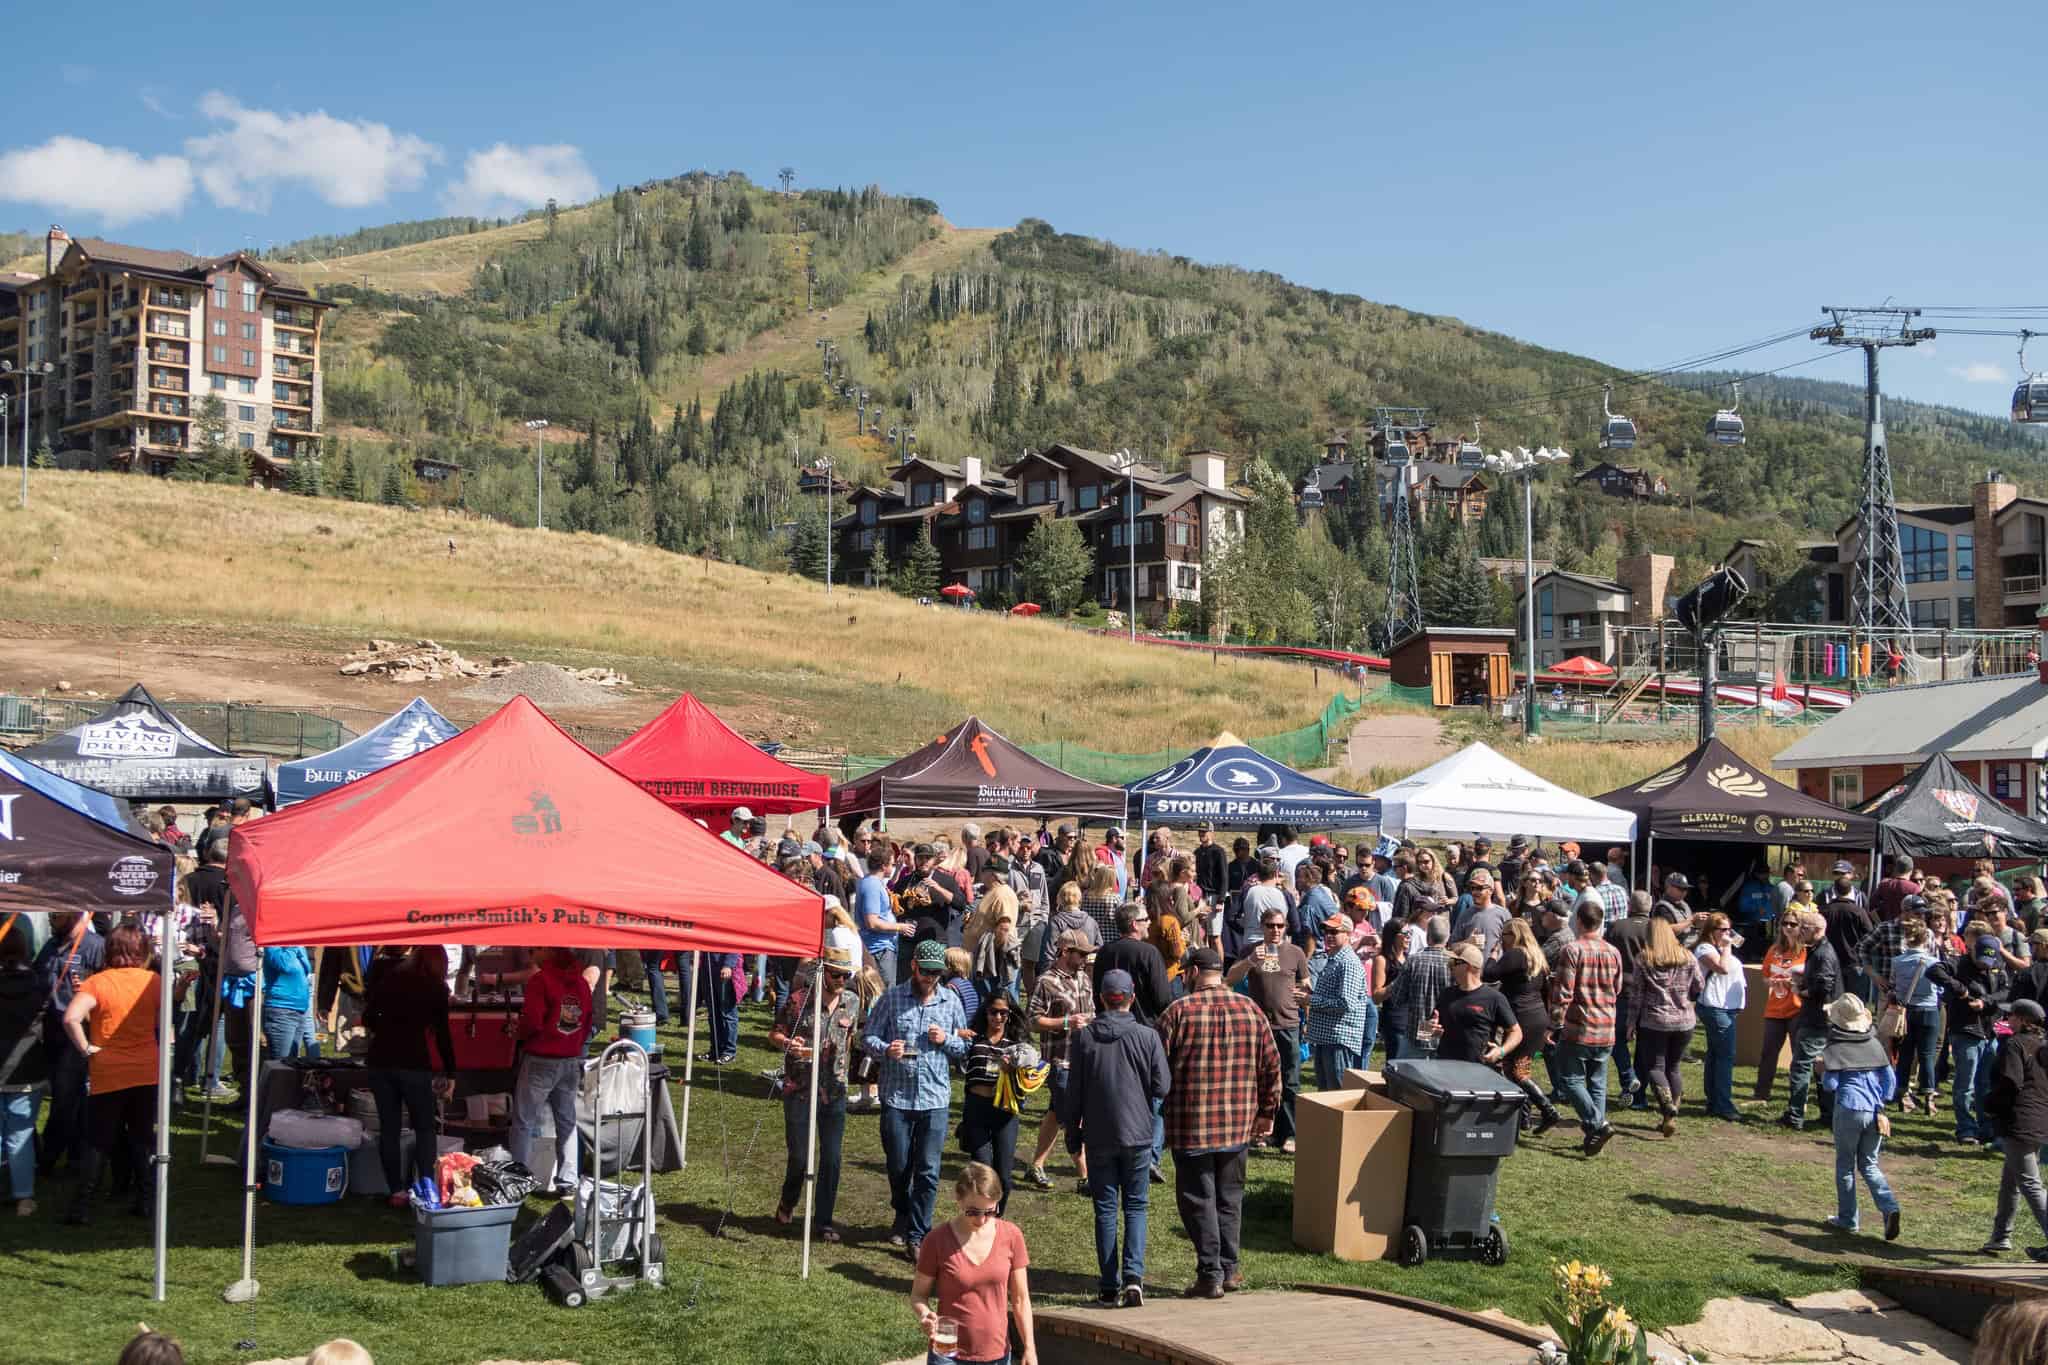
Gondola Square at Steamboat Springs Resort
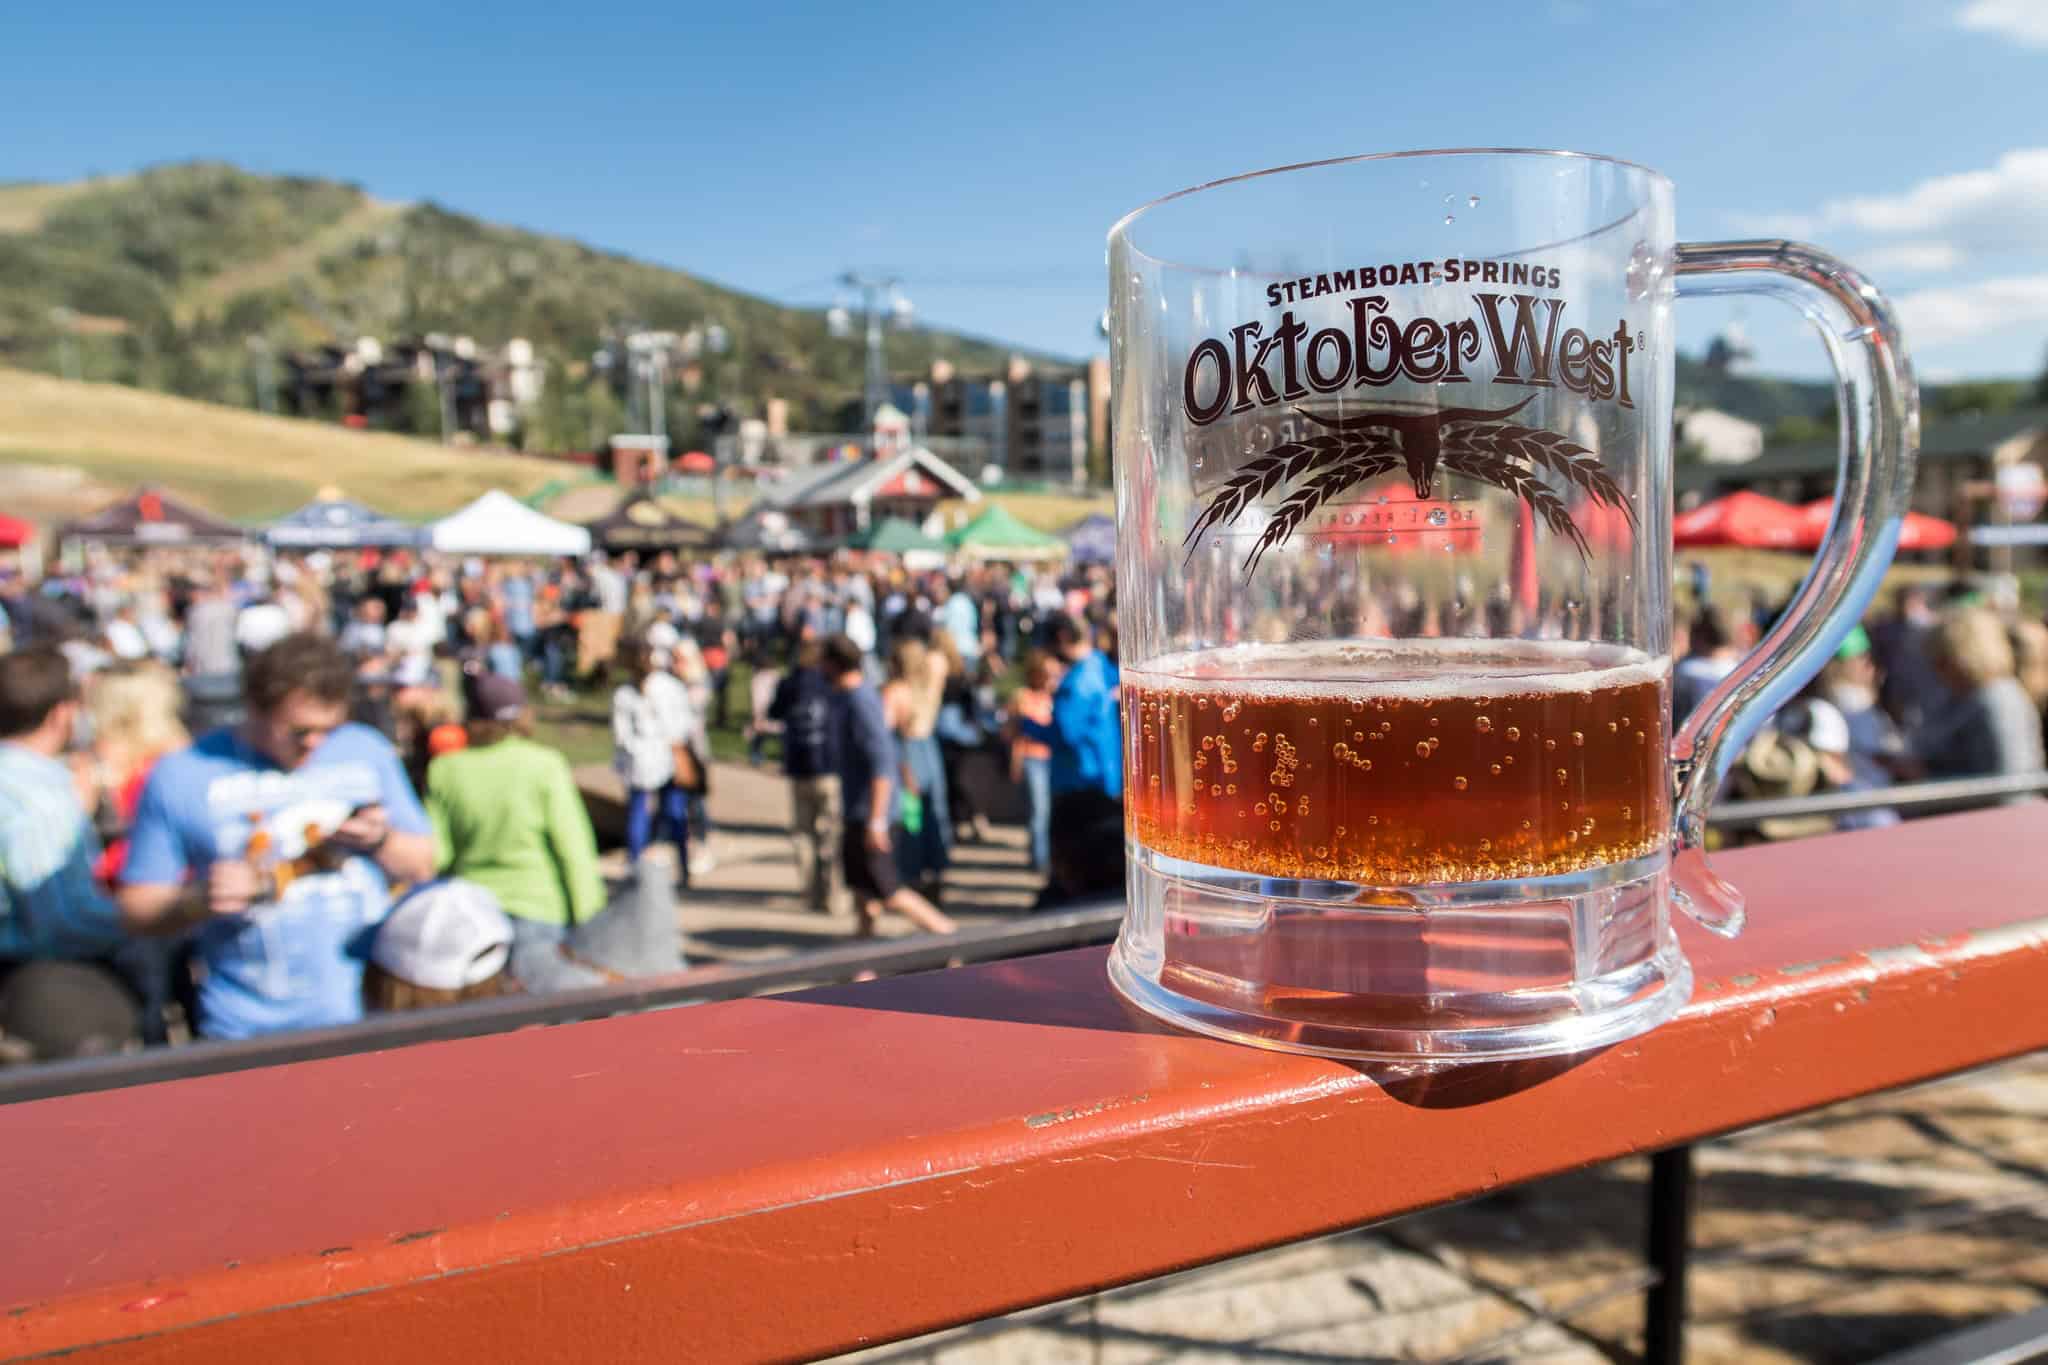
Vendors set up their tents for the annual Steamboat Oktoberwest beer festival.
Gondola
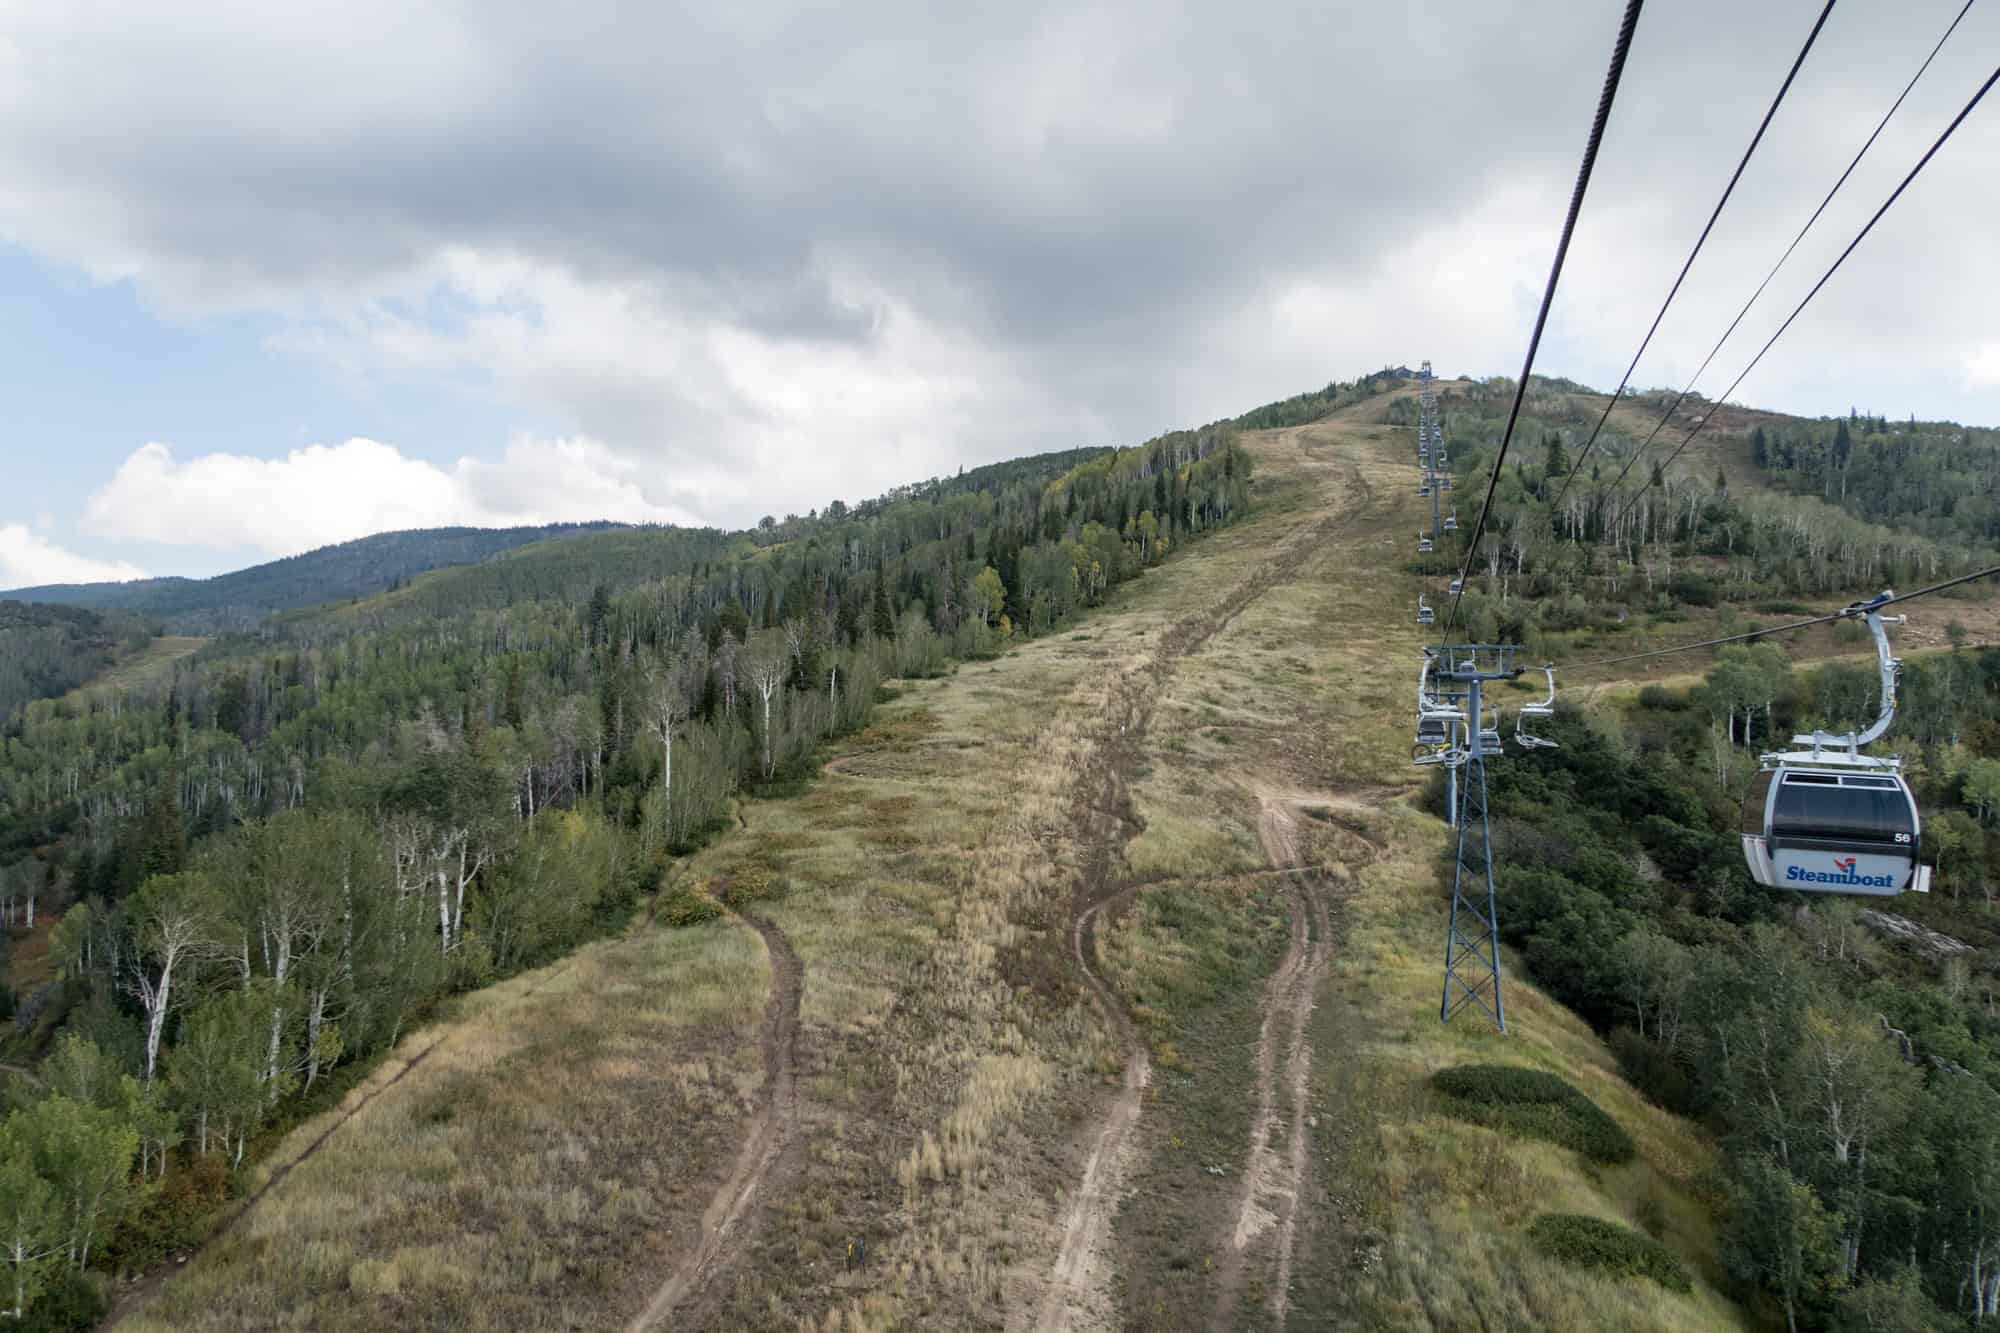
Riding the gondola up to Thunderhead Mountain.
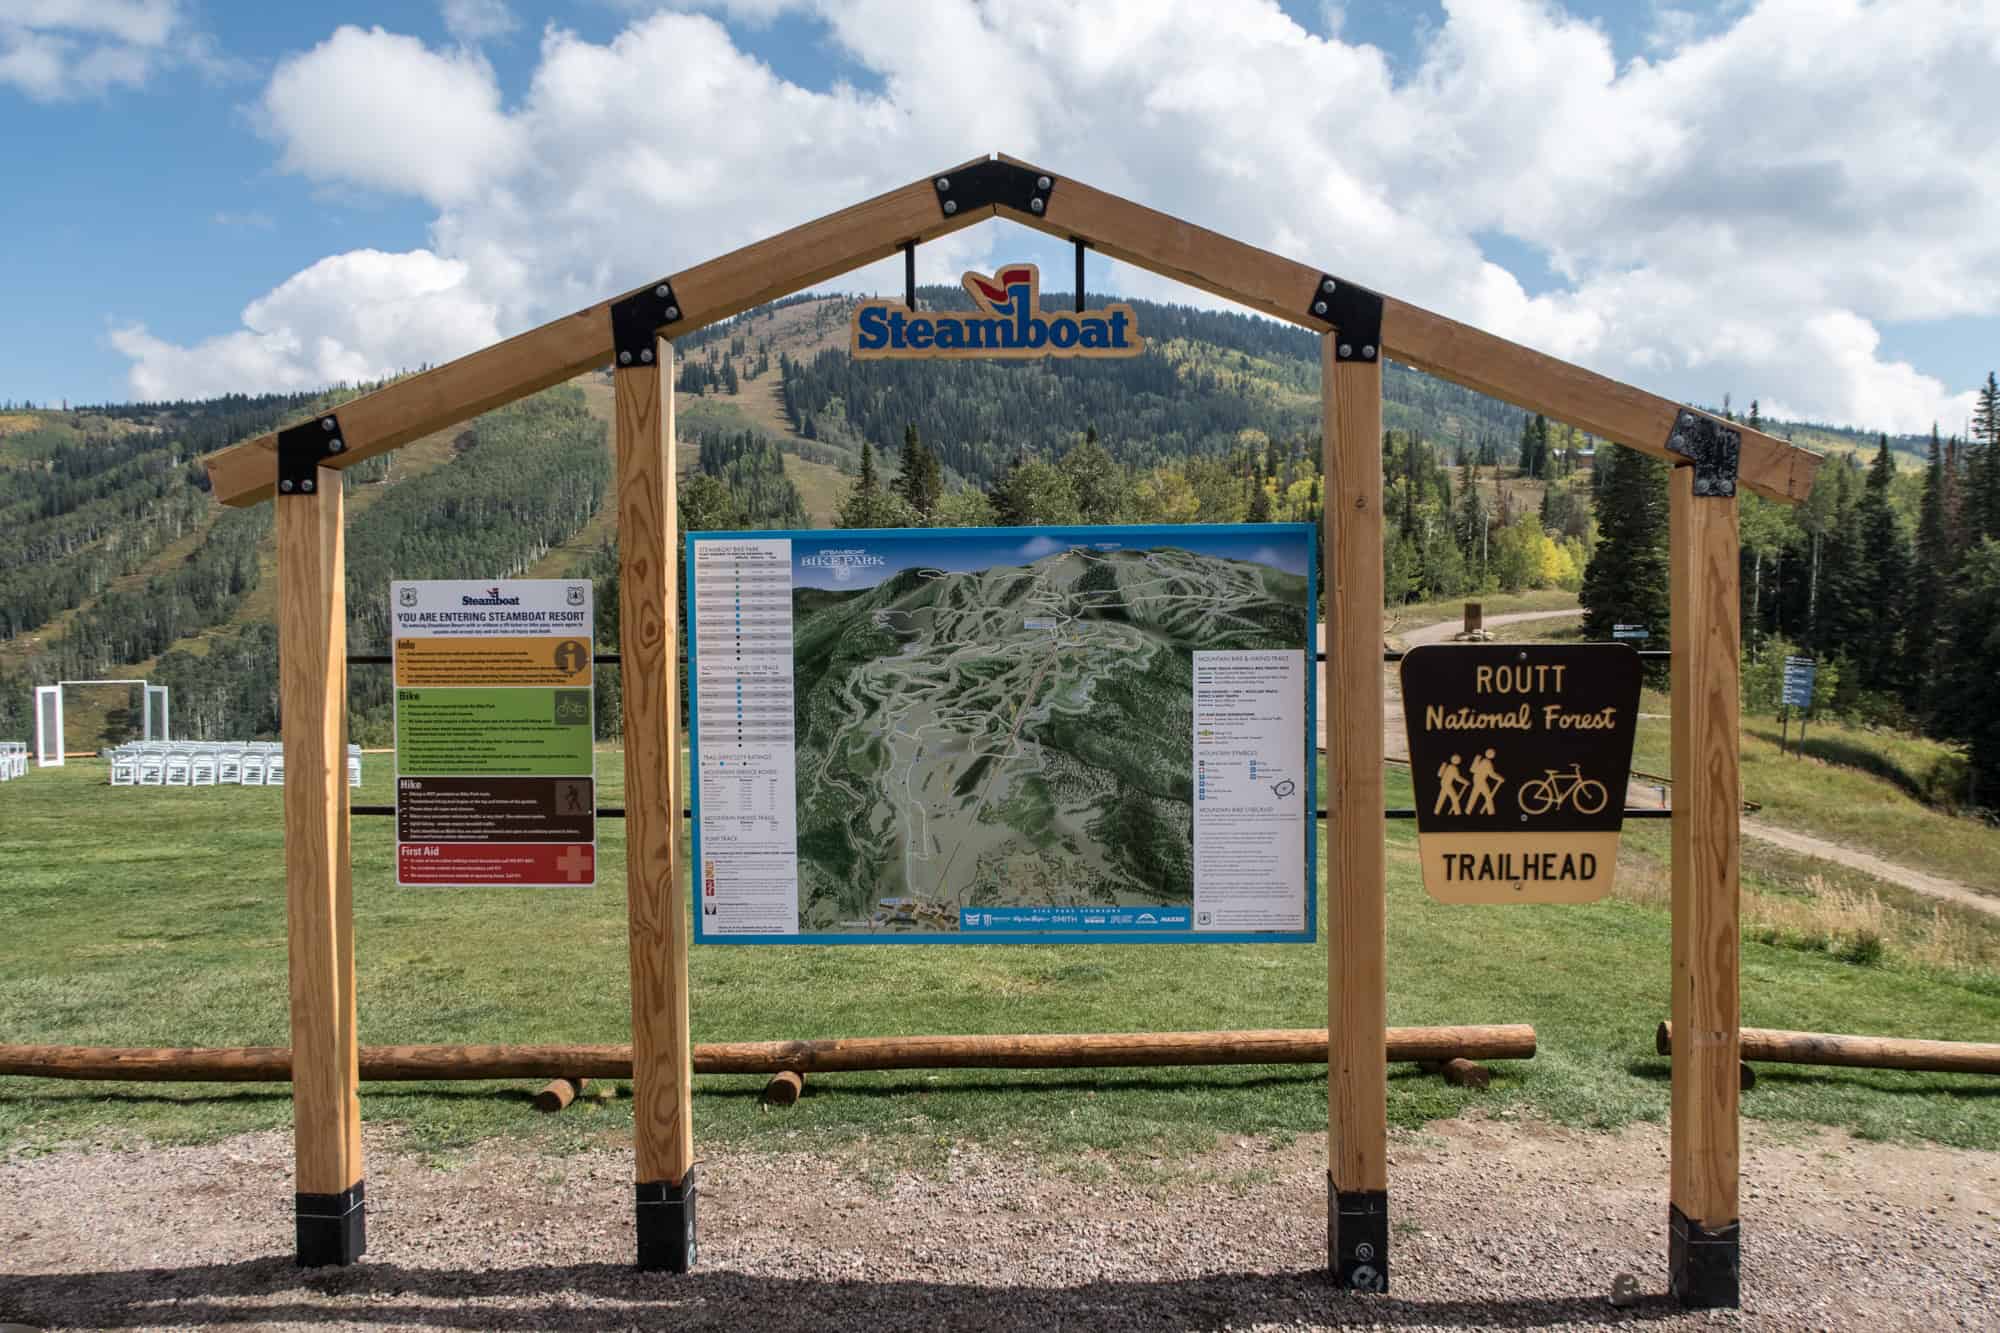
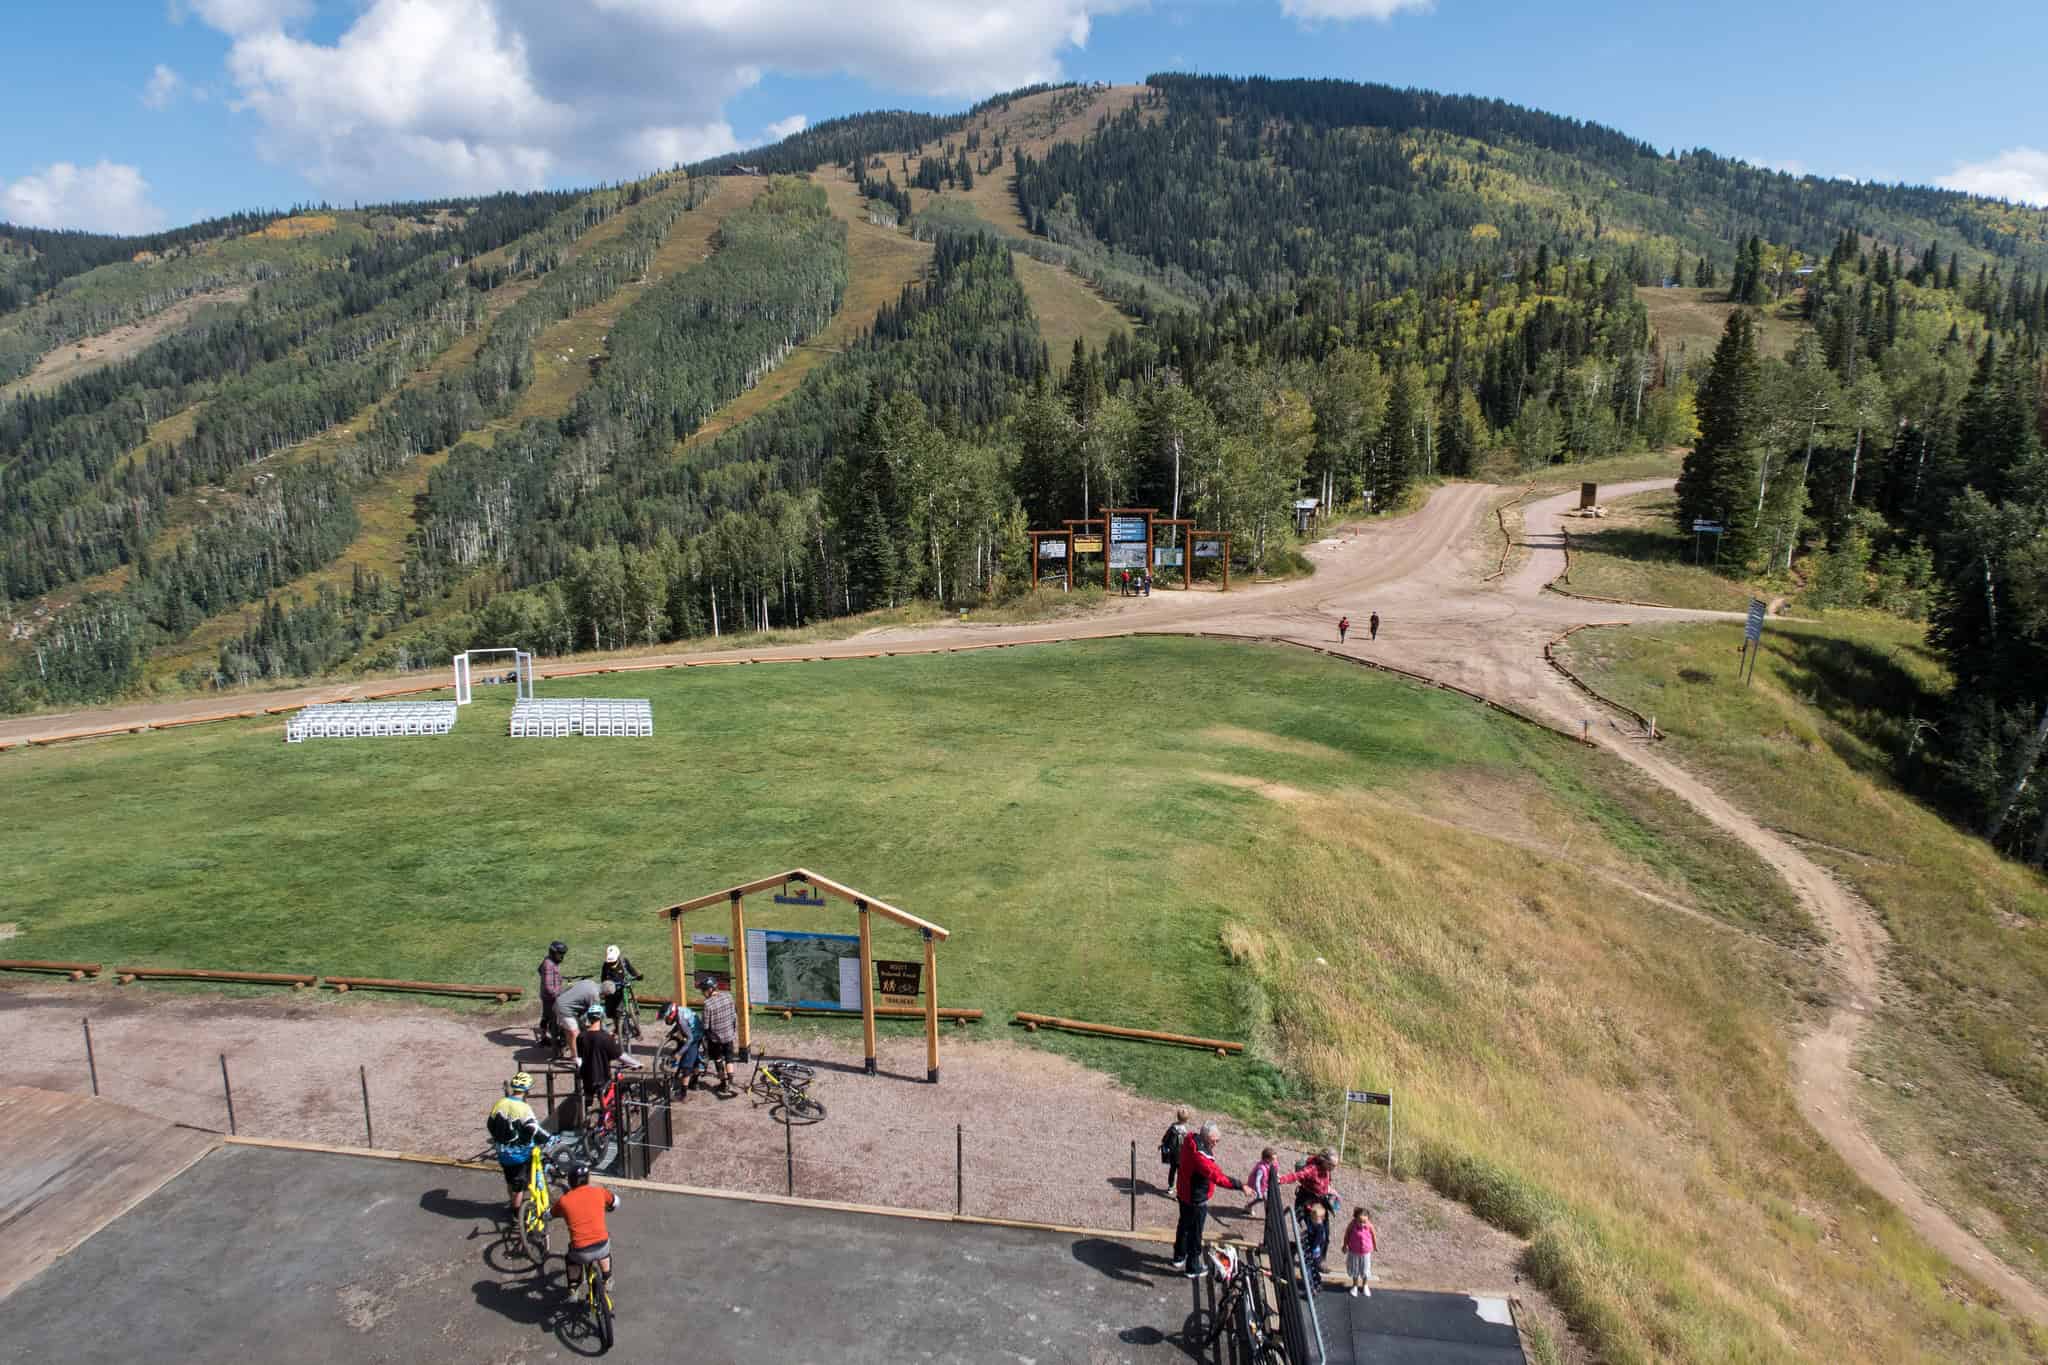
Mountain biking trail map atop Thunderhead Mountain
Mountain biking trail map atop Thunderhead Mountain.

Mountain biking at Steamboat Springs Resort has grown into a popular off-season activity, catering to locals and visitors in the warmer months.

$109 will get you a high-end mountain bike rental, protective gear, and a three-hour lesson (two hours with the instructor and one hour of free-riding).

Related: Mountain Biking Cotopaxi Volcano

Mountain bikers
Mountain bikers
Wedding
The mountains at Steamboat form a beautiful backdrop for wedding ceremonies.
Scenic view
The scenic view toward town from atop Thunderhead Mountain.
Steamboat Springs, Colorado
Zooming in on the town of Steamboat Springs (center).

______

My stay in Steamboat Springs was hosted by the Steamboat Springs Chamber Resort Association.

The New and Improved TravelSmart App by Allianz

TravelSmart app

The latest version of the TravelSmart app by Allianz is now available for iOS and Android phones.

Greetings from Mexico City, where I'm wrapping up my third visit to this sprawling capital in the last five months.

I'm no stranger to big Latin American cities, having lived in Medellin, Colombia, for three and a half years, however when it comes to personal safety, complacency can be just as dangerous as lack of awareness.

That's why I bought an annual travel insurance plan from Allianz this year and have the latest version of their mobile app on my iPhone.

In the last ten years since I quit my job to travel the world, I've experienced pickpockets twice, an armed robbery that resulted in my passport being stolen, and a pulmonary embolism (blood clot in my lungs, likely due to deep vein thrombosis from a long flight).

The pulmonary embolism in 2015 caused the cancellation of a flight to Peru, and I came down with an illness in early 2017, requiring me to cancel a flight to Mexico City.

On both occasions, I didn't have travel insurance. While I could recoup some of the value of these lots of flights in the form of airline credit, I lost money in the process.

Insurance claims would've allowed me to recoup my flight costs fully and had the flexibility to use that money in other ways.

I've learned my share of lessons the hard way between theft and canceled flights and now see travel insurance as a worthwhile investment.

Highlights from the latest version of the TravelSmart app include:

  • Quick and easy access to your Allianz Travel Insurance policy. Check your coverage without having to log into their website or dig through emails.
  • Contact customer service for immediate help 24 hours a day via phone or email.
  • File a claim, including uploading supporting documents, and keep an eye on its status.
  • Find the nearest pre-screened medical facilities, plus local doctors, pharmacies, police stations, and embassies.
  • Use the medical translator to translate health-related words in case of injury or illness.
  • Add your flights for real-time updates, including boarding gate changes.

I hope that I won't need to use my policy. However, I've had enough experience to know that may be wishful thinking.

Regardless, having coverage and the ability to call local authorities and Allianz for help should I need it gives me a greater sense of security while here in Mexico and wherever else I decide to go next.

The TravelSmart mobile app is available for free on iPhone or Android phones.

_______

I work as a travel insider for Allianz Global Assistance (AGA Service Company) and receive financial compensation. All opinions are my own.

Bruce Trail: Top Stops on Canada’s Longest Footpath

The Bruce Trail offers one of the most magnificent backpacking opportunities in North America.

Following 860 kilometers (553 miles) of the Niagara Escarpment, Bruce is long, requiring at least a month for serious, experienced trekkers to tackle; more if you want to venture off the main path to explore the 400 kilometers (273.4 miles) of associated side trails - and you should.

Bruce Peninsula
Bruce Peninsula (photo: Florin Chelaru)

Bruce is beautiful and exciting, and the country surrounding it is worth a few extra days of play.

Here are a few top stops to make time for while you're backpacking Bruce Trail.

Niagara Falls
Niagara Falls (photo: David Lee)

Niagara Falls

The main Bruce Trail has one end in Tobermory on the Bruce Peninsula and another end in Queenston in the Niagara Valley.

Most backpackers prefer to venture from south to north, so they can have a few stress-free days to explore and indulge in Niagara Falls.

Easily one of the world's greatest natural wonders, Niagara Falls is as much a bucket-list item as the Bruce.

Plus, thanks to outstanding Niagara Falls hotel deals, backpackers can stay in the center of the city, enjoying fantastic views for a relatively low cost.

Can't-miss attractions around Niagara Falls include a boat cruise to the base of the falls and a look behind the falls through underground tunnels.

You might also consider wandering around Goat Island and Dufferin Islands.

However, since you'll be walking plenty in the coming weeks, you might also save your strength and enjoy a movie at the Niagara Falls IMAX or a ride on the SkyWheel.

Fall foliage as seen from Mount Nemo
Fall foliage as seen from Mount Nemo (photo: margonaut)

Mount Nemo

It might not be the highest peak in Canada, but Mount Nemo does offer excellent and unique views of the Niagara Escarpment and the countryside beyond.

The entire Conservation Area, located beside the Iroquoia section (or Club) of the Bruce, has just five kilometers of trails that lead backpackers to fascinating caves and crevasses as well as panoramic lookouts.

If you are interested in climbing and trekking, you can try your skills at any of the routes on the white limestone crag or even sample spelunking into the deep caverns.

No matter where you venture, you should be mindful of the age of this forest: It is the oldest, least disturbed forest in eastern North America.

To protect the groves of white cedar, some of which are more than 1,000 years old, you must avoid top-roping and other destructive climbing and hiking activities.

Then, everyone can enjoy Mount Nemo's rare views for years to come.

Backpacking the Bruce Trail - an old lime kiln
Old lime kiln near Limehouse (photo: Ken Mist)

Lime Kilns

Limestone is a typical rock around the Niagara Escarpment.

To take advantage of this natural resource, earlier inhabitants installed lime kilns, which heated limestone to create the valuable building material called quicklime.

Lime kilns have existed since ancient times, and modern kilns are hardly different from the kilns of the past.

Backpackers can take a day to explore Niagara's lime kiln ruins in two different locations.

The first and most popular lime kiln side adventure is in the Limehouse Conservation Area, within the Toronto Club of the Bruce.

Limehouse was named for its famous lime kilns built in the 19th century and stopped producing lime in the 1960s.

Though much of the kiln area is deteriorating - to include a railway used to transport the limestone and quicklime - the largest kiln, called Draw Kiln, is being restored, so visitors can see what the kilns looked like in their prime days of operation.

The second lime kiln opportunity is in Forks of the Credit Provincial Park, in Bruce's Caledon Hills Club.

Here, backpackers can find examples of Hoffman ring kilns, which were immensely popular and innovative kilns in the mid-19th century.

Hoffman's kiln design was so dominant in its time that it appeared in almost every country.

Devil's Monument

To finish your Bruce Trail trek the right way, you must take a day to wander the Devil's Monument Loop at the last stretch of the Peninsula Club.

The hike is hardly two kilometers long, but it is undeniably the most spectacular scenery the Bruce has to offer.

After reaching the scarp's edge, you can see the deep, blue waters of Dyer's Bay, the white boulders of the beaches below, the thin birch and aspen trees of the forest, and the escarpment rising steeply above.

Plus, you'll visit a few sea stacks, including Devil's Monument itself, which was carved more than 5,500 years ago by a glacial lake.

The Bruce offers wonders beyond belief, but if you are willing to venture off its main paths, you can find even more to marvel at.

There's backpacking - and then there's backpacking the Bruce.

_____

This story was published in partnership with Sheraton on the Falls Hotel.

5 Healthcare Tips for a Backpacking Trip to Malaysia

Backpacker in Malaysia

Before embarking on your backpacking trip across the stunning landscapes of Malaysia, one of the most important things you can do is prepare for the long journey ahead.

From getting the right vaccinations to finding the local doctors, this guide offers tips and advice to adventurous backpackers who are planning to travel in Malaysia.

1. Pre-trip preparations

It’s important to visit your family doctor at least four to six weeks ahead of your backpacking adventure to check that your routine vaccinations (such as MMR, tetanus, and polio) are up to date and to find out which others you’ll need.

The Centers for Disease Control and Prevention recommend hepatitis A and typhoid vaccines for most travelers, but depending on your plans your doctor may also suggest vaccines for cholera, hepatitis B, Japanese encephalitis, and rabies.

He or she may also prescribe antimalarial drugs, as there is no vaccine available for malaria.

Even though Malaysia is well served by pharmacies in urban areas, a basic medical kit is a backpacking must.

At the very least it’s wise to pack first aid supplies such as plasters, antiseptic, antibacterial cream, bandages, scissors, and tweezers, as well as an anti-inflammatory, diarrhea remedy, antihistamine, insect repellent, and sunscreen.

Be sure to include any prescription drugs (including contraceptive pills) you will need, too – but bear in mind that Malaysian Customs only allow you to bring one month’s supply into the country, accompanied by a prescription from your doctor.

If you have any questions about their policies, contact the Ministry of Health Malaysia.

Langkawi beach, Malaysia

2. Getting to know the healthcare system

Good news! Healthcare in Malaysia is among the best in Southeast Asia, thanks to a booming private sector, and a government drive to invest in and support high standards of public medical care.

In fact, the country has become somewhat of a medical tourism destination in recent years.

There’s a wide range of healthcare services, and both public and private-sector doctors are usually very highly trained at the country’s medical schools and international universities.

Most speak good English, too, which should ease any worries about miscommunication during diagnosis and treatment.

Medical care in rural areas of the country is likely to be much more limited and of a lower standard, however.

Malaysia

3. The importance of insurance

Westerners may find public healthcare fees in Malaysia are relatively cheap, but medical care in private institutions can be expensive, and all hospitals may require immediate payment for services – possibly with a deposit up-front before proceeding with any treatment.

As a backpacker, you may also be trekking around some pretty remote, inaccessible or rural areas where access to doctors may be limited at best.

If you suffer an injury or fall ill while you’re off the beaten track, you may need to be airlifted by helicopter to the nearest city, or even need repatriation to another country – which can cost thousands of dollars.

Taking out an insurance policy before traveling is therefore essential.

Most tourists opt for travel insurance, which provides cover for emergency and/or short-term medical treatment, as well as things like lost luggage and flight cancellations.

But for more comprehensive healthcare insurance coverage, including for pre-existing conditions, you may prefer to look at global health insurance. Either way, be sure to read all the terms and conditions of your policy to make sure it’s right for you, and to understand precisely what is and isn’t covered – and how to proceed should you need medical care during your trip.

Kuala Lumpar, Malaysia
Kuala Lumpur, Malaysia

4. Looking out for yourself

There are plenty of ways you can reduce your chances of needing healthcare during your backpacking trip.

First and foremost is protection against insect bites – particularly those of mosquitoes, which, apart from being irritating, can lead to a variety of nasties such as dengue fever, malaria and Zika virus.

Wear long, loose-fitting and light-colored clothing; regularly apply DEET-containing insect repellent to exposed skin, and sleep under a mosquito net if necessary.

It’s also best to avoid making contact with any wild or domestic animals while you’re in Malaysia, as there is a risk of contracting rabies if you’re bitten, scratched, or licked on broken skin.

The risk is highest in the states of Perlis, Kedah, and Penang, which have been declared as rabies infected.

To avoid stomach bugs, never drink water straight from a tap, river, or spring – opt for commercially bottled or boiled water instead.

Food hygiene is better in Malaysia than in some other parts of Asia, but always trust your instincts when it comes to choosing a restaurant or street food outlet.

It’s likely to be a bad sign, for instance, if the place is empty or there aren't that many customers.

Finally, stay safe! Always wear a helmet and other safety equipment when taking part in any extreme sports or riding motorcycles; be sensible about alcohol intake (keeping an eye on your drinks to make sure they aren’t spiked), and don’t take any unnecessary risks when it comes to your health and safety.

5. What to do if you fall ill

It’s worth carrying a list of doctors and hospitals in the areas you plan to visit during your trip for quick reference should you need medical help.

The Malaysian Medical Council provides a search facility on its website that will help you find registered medical practitioners.

Alongside that list, keep a card detailing your blood type and any allergies or chronic conditions (preferably written in the local language) in case of an emergency.

There are 24-hour accident and emergency departments available in government hospitals, as well as some private ones.

Ambulance services can be reached by calling 999 (or 112 from a mobile), although they aren’t always the most efficient, so you may prefer to take a taxi if you’re able to do so.

Some private hospitals have their own ambulance services, which are much more reliable.

If you do find yourself in need of medical treatment, be sure to contact your health insurance company promptly.

If you or your travel partner can remember to bring your policy documents along to the hospital, so much the better.

Nobody wants to think about accidents and illness when planning for an exciting adventure, but as a backpacker, the more you can learn about the local area before traveling, the more chance there is that you will avoid potential hazards and enjoy a safe trip.


This article was brought to you in partnership with Aetna International.

Jacket Jetlag: How to Keep Your Coat Looking Good on Your Travels

As a traveler, we all know our jacket is our best travel buddy – it travels with us through every type of weather and terrain, keeping us warm and dry.

But how can you be sure that your outerwear is fit for purpose, no matter what situation you throw it into?

Whether you’re traveling to Germany to visit the Christmas market or taking a New Years break skiing in France – your jacket needs looking after.

If you’re visiting colder climates this winter, you’ll need your parka to be in top condition.

How about your beloved denim jacket – I bet you didn’t know you shouldn’t wash it for the first six months.

So what do you need to do to make sure your jackets up to the task?

Superdry has created an ultimate jacket care guide, which includes all the tips and tricks you’ll need to make sure your outerwear stays in top condition when you’re traveling.

You can take a look at the infographic below…

Superdry – The Ultimate Jacket Care Guide
Provided by Superdry


Steamboat OktoberWest: A Celebration of Colorado Craft Beer

Steamboat OktoberWest 2017

After exploring Denver in 48 hours, I drove three hours west to Steamboat Springs for the 9th annual Steamboat OktoberWest beer festival.

Steamboat is famous for many reasons, including champagne powder snow, producing more Olympians than any other U.S. town, and a 100-year old Winter Carnival.

However, for one weekend every September before the snow falls, the town celebrates Colorado craft beers.

Steamboat OktoberWest Bar Crawl

This year's festival began Friday, September 15th, with a beer crawl in town from 4-8 pm. The starting point was the historic Chief Theater.

The cost to take part was just $20 in advance or $25 at the door, and as you're about to see, this represents an incredible value.

There were four Steamboat-based breweries represented at the theater, each serving at least two beers.

Plus, another 22 venues in town, all within about three to four blocks of each other.

Steamboat OktoberWest bar crawl

One of the first beers I tasted was Buzzcock by Butcherknife Brewing Company, Steamboat's first production brewery. It's a British-inspired dark ale.

I also tasted beers from the other brewers there, including:

  • Mountain Tap
  • Storm Peak Brewery
  • Yampa Valley Brewing Co.

Upon exiting the theater, I already had a nice little buzz going. A light rain had begun to fall. And the night came quickly.

As part of Steamboat OktoberWest, I went on to taste six more Colorado craft beers at six different bars and restaurants.

That was plenty for me, though if you have a higher tolerance, you could conceivably max out at 46 drinks total across all the venues!

And that's why the $25 ticket is such a great value, my friends.

Highlights included drinking beer at:

  • Cugino's Pizzeria, with views of the giant ski jumps used by athletes training for the Olympics
  • Back Door Grill, a favorite hangout for locals, where the fried Portobello mushrooms are a must
  • Salt & Lime, a beautifully designed Mexican restaurant, serving up bison tacos

Following dinner, I retired to the iconic Rabbit Ears Motel to rest up for the main event the next day.

Related: Packing List for a Fall Trip to Colorado

Thunderhead Mountain
Mountain bikers check a trail map to decide on their route down from Thunderhead Mountain.

Farmer's Market & Gondola Ride

The following day, I awoke to blue skies, a sign it would be a beautiful day for beer drinking.

The OktoberWest beer garden wasn't due to open until 2 pm, so I started the day with a walk through the last Farmer's Market of the year, sampling the locally produced cheeses and pastries.

From there, I caught the free 15-minute bus from town to the Steamboat Mountain Village.

The bus is free year-round, making it cheap and easy to get back and forth.

I walked through Gondola Square (elev: 6,090 feet, 2,103 meters) around noon, where breweries were still setting up their tents, and boarded the 8-person gondola ($25) for the ride up Thunderhead Mountain (elev: 9,080 feet, 2,768 meters).

The scenic views from above were gorgeous.

Hikers were taking advantage of the 80 mountain trails, and mountain bikers with full protective gear were scoping out which routes to take down.

Seating arranged with scenic views was set up for two weddings happening that afternoon.

I had a quick lunch atop the mountain and descended by gondola to an already bustling beer garden.

Related: A Night Alone at North Fork Canadian Yurt

OktoberWest at Steamboat Springs, Colorado
The beer garden at the base of Steamboat Springs resort

Beer Garden and Beef Cook-Off

In Gondola Square, I weaved through the growing crowd to reach the ticketing area, where I picked up my souvenir plastic mug.

Tickets for the beer garden were $30 in advance or $35 at the door. The combo ticket, including the beef tasting, was $48 online or $53 at the door.

The OktoberWest beer garden featured 45 breweries, serving two samples each. It was overwhelming!

I recognized a few names from the previous night and found myself gravitating toward the familiar, including Butcherknife and Storm Peak.

A band named Afrolicious was performing on stage, and the atmosphere was upbeat and friendly.

After all, what's not to enjoy about an endless supply of Colorado craft beer at the base of a beautiful mountain!

Related: Fly Fishing in Colorado

Beef cook-off entry
One of the entries in the beef cook-off

In addition to the beer tasting, OktoberWest also featured a beef tasting competition, with ten local restaurants doing their best to claim the top spot. All you can eat beef from 2-6 pm!

As voted on by attendees, the winner was Salt & Lime, the restaurant where I'd eaten the bison taco the night before.

The second and third place awards went to Cafe Diva and Laundry Kitchen & Cocktails, respectively.

All in all, it was a wonderfully intoxicating introduction to Steamboat Springs, the mountain resort, and the Colorado craft beer scene.

For more information and to stay up-to-date on the 2018 festival, visit the OktoberWest website.

Stay tuned for more scenes from my weekend in Steamboat Springs, Colorado.

_____

My stay in Steamboat Springs was hosted by the Steamboat Springs Chamber Resort Association. 

Safe International Travel: 11 Tips for Traveling Confidently

There's another terror attack in the news, perhaps in the place you were thinking of taking a holiday to next year. It makes you question whether you should change your plans or stay home.

And it doesn't just stop at terror attacks. Other worries come with a trip abroad - getting mugged, a medical emergency, local violence, dangerous, unforeseen weather, among others.

Safe international travel

You take a risk every time you walk out your door, but that is the case at home as well as abroad.

Having these unfortunate events happen abroad may seem more overwhelming because you're in a foreign place where you probably don't know many people. You're far from everything familiar, which increases the stress of dealing with a negative situation.

Although these negative experiences can happen anywhere in the world, and you don't usually have the luxury of knowing when they will happen, you can still be ready in other ways.

Here are 11 tips for safe international travel to have peace of mind on your next flight abroad.

1. Think About Your Health on Long Flights

Consider the best ways to stay healthy on long flights to avoid health problems before you even get to your destination. Even if you look silly, do leg exercises or "plane yoga." Get up and walk around regularly and drink plenty of water.

You'll be helping your circulation and preventing DVT (blood clots) that could do severe damage and put you out of action.

2. Be Smart with Rideshares

Research the local rideshare apps, such as Uber or GrabTaxi, where you're going and how regularly they're used.

In some locations, such as Latin America, rideshares are usually a safer option than hailing a taxi on the side of the road because of the prevalence of muggings and scams involving local taxis.

Tip: If you plan to rent a car instead, consider getting an International Driver's License so local authorities will understand your license if they need to see it.

3. Educate Yourself on Current Affairs 

This is a smart tip for life in general, but make sure you're up to date on current affairs, especially the political and cultural climate of where you're going.

For instance, Myanmar has become a popular destination in the past few years, but some people don't realize that there's still a civil war in some parts of the country until they get there.

Even Thailand has had recent bouts of political instability, even though it's the #1 tourist destination in Southeast Asia.

Just because it's a popular travel destination doesn't mean it's completely safe. Do your research and make an informed decision about whether to go. 

4. Share Your Itinerary 

Sharing your itinerary with friends and family back home is always a smart idea. Let them know whether they'll probably hear from you for a while because you're going to a remote island, or if you'll be checking in regularly.

In addition to your friends, it's smart to register with the U.S. State Department (or the equivalent in your country). If something happens, they'll better understand where you're meant to be.

Registering with S.T.E.P. (Smart Traveler Enrollment Program) takes a few minutes and could be a lifesaver if you ever find yourself in an undesirable situation. You can register here: step.state.gov.

Lastly, ensure you know the contact information for local government offices; they almost always have 24/7 emergency hotlines.

5. Read Up on Popular Scams Ahead of Time

One tip that people often don't think about is researching common scams in the places they're traveling to ahead of time. A simple Google search of "popular scams in (travel destination)" can give you a wealth of information about what to look out for.

You'll know that the taxi drivers are unusually aggressive in Bogotá, about the gem scams in Delhi, or how the phone thieves operate in Dublin, and you'll be ready to avoid them when you arrive.

6. Have an Emergency Stash of Cash 

Have an extra stash of cash in different parts of your bag (or in multiple bags) in case of an emergency. If your wallet or purse gets stolen, having cash or an extra credit card you keep somewhere else could help you out of a tight spot.

7. Be Aware When Walking Alone (Especially at Night)

It's always a good idea to be aware of your surroundings abroad and avoid notorious pickpocketing areas when possible. Know your area (asking the welcome desk at your accommodation is an excellent place to start) and take the necessary precautions.

This is especially true at night, but knowing the neighborhoods to avoid is ideal, so you're not unnecessarily putting yourself at risk.

8. Don't Get Overly Drunk

In the same vein as knowing your surroundings, it's never a good idea to drink too much (or take drugs) when you're abroad, especially if you're traveling alone.

It opens you up as a target, and people are more likely to take advantage of that if they notice you getting sloppy. A fun night out could turn into you getting mugged, or worse.

Some countries take drug use very seriously; the death penalty or jail time is not uncommon in some parts of the world. Avoid putting yourself in that situation.

See also: CBD Laws and Regulations

9. Don't Bring Attention to Yourself

Do your research before you arrive at your destination, and try to blend into the local culture as much as possible. Depending on where you're going, this may not be as easy.

Still, even if it's just dressing like a local, understanding the local customs, and especially what not to do, you'll make sure you're not standing out more than you already do as a tourist.

10. Get a SIM Card

Local SIM cards are usually cheap and an excellent way to ensure that you can contact someone in an emergency. Increasingly, travelers are also turning to travel eSIMs that can be activated before departure. It's worth the extra $20 to have a local number and quick access to emergency services.

Having data abroad also means you can use Google Maps to find the safest route home, use ridesharing apps instead of local taxis when it's safer, or quickly contact people back home through Facebook Messenger or WhatsApp.

11. Choose Good Travel Insurance

And lastly, it's essential to have suitable travel insurance when you're abroad. You never know when less-than-ideal circumstances will happen, and being prepared is worth it.

You may never think you'll need it, but the last thing you want to think about is finances after a traumatic event. Ensure you have an insurance plan covering you when you need it most, so you can deal with the situation as efficiently as possible.

My travel insurance has saved me from a few unfortunate situations, and it's one of the many reasons I'll always recommend it for international trips.

***

If you're a parent or caretaker traveling with a child with special needs, here are some resources you might find helpful:

  • Cerebral Palsy Family Network - a compassionate community that provides resources for loved ones with Cerebral Palsy.
  • Learn about Air Travel Preparation For Children With Special Needs
  • Read about Tips for a Successful Road Trip

How to Keep Your Stuff Safe While Traveling

Are you planning a trip in the near future? Maybe you're taking that dream vacation to Paris you've always dreamed of or are heading to the mountains of California.

If you're going to be traveling soon, you should be proactive about not only your safety but the safety of your belongings as well.

Today, we will learn some helpful tips that will keep your items safe while on the go.

Backpack with red combo lock - Ometepe, Nicaragua (photo: Dave Lee)

Secure Your Luggage with Locks

One overlooked area of travel security and safety is luggage locks. To keep your items safe, you'll need to buy a set of locks for each backpack or luggage you bring.

If your bags come with a set of locks, use them. While these locks may seem small, they will keep out opportunistic thieves who can strike in broad daylight.

Many pickpocket types will take items from backpacks and luggage while the owner sits beside them. But a good set of luggage locks will stop them.

Most thieves will not even attempt to steal items from your luggage if they notice they are locked. Thieves are lazy, and they prefer easy targets.

Mail Your Belongings to and From Your Destination

If you're worried about your valuable items getting lost in checked baggage, why not mail them?

You'll ensure they'll get there safely by mailing your items to and from your destination.

But remember to get those packages insured by the postal service so you can get your money back if something happens.

While usually, the items you mail will be safe and sound, if something does happen, you'll be covered entirely.

This will also save you some money on those ever-growing checked baggage fees.

Additionally, if you're shipping your items to a hotel, speak with a manager and tell them when to expect them.

When they arrive, the hotel will put them in a safe place, such as a luggage storage room, so you can retrieve them when you check in.

Take Advantage of Your Hostel or Hotel Room Safe

If you're staying in a hostel or hotel, a great way to protect your valuables is to use your room's lockers or safe. Any hostel worth staying at will provide securable lockers.

In hotels, small safes are great for keeping items safe. Jewelry, essential documents, and other smaller valuable items will be secure inside.

If you have larger items that you want to keep safe, ask the person at the front desk if they have a larger safe. Many hotels and hostels will hold more oversized items for guests.

As you can see, these tips will help keep your valuables safe while you're enjoying your travels. With so many threats these days, taking small steps to keep your belongings safe is highly important.

Remember that it only takes a few seconds for someone to steal your stuff right out from under you.

So, ensure you lock up your luggage and use the hostel lockers and hotel room safes. This can give you peace of mind knowing your items won't just up and walk away.

_____

This post was brought to you in partnership with Security.org.

Experience Dubai on a Budget

Dubai Creek
Ferry dhows ply Dubai Creek in the early morning (photo: McKay Savage)

Let's cut to the chase! Dubai is often not seen as a priority destination for backpackers drawing up their travel itineraries.

Either it doesn't feature at all, or it's only viewed as a point of transfer before heading on to Australia or Southeast Asia.

Dubai is often called a shopper's paradise or a playboy's play park. All fast cars, glitz, and glamour. But there's more to this quickly growing city.

We encourage you to add it to your itinerary and spend a few days exploring the Emirates. Read on to find out why.

Dubai beach
Beach (photo: Gilly)

Dubai on a Budget

Budget travelers are always able to find ways to experience a destination for less than average.

Dubai is no different. With some careful pre-planning, you can save a lot of money on a pre-booked deal.

What to See and Do in Dubai

Many must-see attractions and activities keep you busy, and all are within a backpacker's budget.

Some can be enjoyed for a little more than the cost of a cup of coffee!

Burj Khalifa

You can go up the world's tallest building! The best way to make sure you see this attraction is to buy your Burj Khalifa tickets in advance.

That way you save time and some money. As for the views, you'll never forget them.

Desert Safari

Buckle up for a ride in the desert. Zooming around the dunes is a thrill, and that's followed up by a traditional dinner and show. It's the perfect way to get an authentic feel for the country.

Hop-on, hop-off

As your time may be limited, any Dubai tours you go on should be done with a certain amount of speed. There are many attractions to cover!

Taking a hop-on, hop-off tour allows you to see everything in a set period. You can plan your day(s) better so you can be assured you'll see every major attraction.

Many attractions are free too. So if your time allows, seek out the following points of interest.

The Dubai Mall fountain show

There's a free show every day outside the mall, close to the Burj Khalifa. Watch as lights and music accompany the dancing fountains.

Visit Old Dubai and the Souks

Gold, spice, and perfume. Even if you can't spend money, some time in the city's old quarter is well worth adding to your itinerary.

Wander through the markets, discover what Dubai was once like before it became a scene from Blade Runner!

Sand-colored houses, tea rooms, and surprises on every corner. It's a joyful, eye-opening experience.

Spice Souks
Bright spices and colorful tea in the old spice souks in Deira (photo: McKay Savage)

How Long to Stay

If your budget allows, three or four days will give you enough time to see the city, go on the city tours, experience the beach, and head out into the desert on a safari.

Getting Around

Dubai is an ultra-modern metropolis, so it has a fast, convenient metro-style service that connects with most of the major attractions this city has to offer.

It's cheap to use and runs from early (5:30 am) until late (1:00 am - on most days), allowing you time to explore and peace of mind if you want to stay up late.

There's no reason not to visit Dubai as part of a round-the-world trip or as a stop-over en route to another country.

Warm weather. A futuristic modern city that offers experiences you can't find in other destinations. What's not to like? It ticks all the boxes!

If traveling is all about experiences, then Dubai is a worthy addition to your bucket list.

_____

This article was brought to you in partnership with Isango!

Graffiti and Street Art in Lima, Peru

Talk about Peru with any traveler, and they'll mention Machu Picchu, the Nazca Lines, and ayahuasca ceremonies in the Amazon.

But tell them you will stay in Lima for a week, and you can expect a strange look.

Indeed, Lima doesn't have a reputation as a magnificent city, but I'm not in Peru for hiking trails like regular tourists.

Graffiti trip in Lima, Peru
Graffiti in Lima

I'm on a mission to take graffiti pictures for the website Bombing Science. Yes, it's my job (awesome, no?).

And since I won't find these graffitis and murals in the Andes, Lima, for a week, it will be!

It's true that Lima is not a postcard city, but it's far from boring.

It's a bustling South American metropolis with over 10 million people living in and around the city, so you can expect a lot of action, a lot of things to do, and a lot of delicious things to taste.

But more importantly, for my goal for this trip, you can see a lot of street art in most of the neighborhoods.

The first thing I like to do when I arrive in a city is finding a bike. It's much more efficient, and you get a different feel for a place on a bike versus getting around by car or being exhausted by walking all day.

But a word of caution about biking in Lima: traffic is nuts. I've used a bike in most major cities worldwide, but Lima is on another level.

It's not that it's more dangerous than anywhere else, the traffic is more dense and noisy. Be careful if you bike around Lima!

Graffiti in Lima

Back to street art and graffiti, you will find most murals in the Barranco neighborhood, just south of Miraflores.

Check out the pedestrian alley down to the beach and around that area. You'll find a lot of murals and street art there.

If you want to see the graffiti side of the city, it's mainly along the Paseo de la Republica, the expressway that crosses the city on the North-South axis.

Surquillo and La Victoria neighborhoods have the most graffiti at the street level.

While I was taking pictures, I got warned all the time by the locals, urging me to hide my camera, so you might want to be discreet as a foreigner in this part of the city. Or come with a local.

I had no problem during my stay, but when locals warned me, I considered it.

Graffiti in Lima

I enjoyed my time in Lima, and I strongly suggest you visit.

The city itself isn't the most colorful, but the art on the wall made me love Lima, and I can't wait to go back.

Let's wrap this post with a few more pictures from my trip; I hope you enjoy them!

Graffiti in Lima
Graffiti in Lima
Graffiti in Lima
Graffiti in Lima
Graffiti in Lima
Graffiti in Lima
Graffiti in Lima

6 Ways To Guarantee a Good Night's Sleep In a Hostel

Hostel dorm bed - Reykjavik, Iceland

It's safe to say, most travelers share a love/hate affair with hostels.

We love meeting other wanderers. We love swapping stories over a few beers. We love the low-cost.

We hate having to queue for the shower. We hate that guy who – no matter the temperature ­– struts around the dorm in his boxer shorts. And, most of all, we hate not being able to get a good night's sleep.

Sleep, after all, is why we’re there. Yet whether it's creaky bunks, rattling coughs or lights being flicked on and off like a ’90s rave – hostel dorms seem to be calibrated to prevent us from getting any.

Fortunately, over my many years as a traveler, I've developed some simple – but surprisingly effective – ways to guarantee a good night's sleep.

1. Accessorize, Accessorize, Accessorize

Tired of pretending those weird grunting noises coming from the next bunk are just snores and not what they really are...sex noises? Yes, mom, it happens. Ear plugs are the solution for you.

Fed up with your dreams being turned into nightmares by drunken stumblers switching on the lights at 2 am? Well then, a sleep mask is your new best friend.

These two super-cheap and lightweight sleep aids are worth a hundred times their weight in gold. Both should be essentials in any travel kit. And if you have space in the bag, why not throw in a better pillow, too?

And no, using a sleep mask doesn't make you an old biddy – even if your Gran does wear one! It makes her a smart woman and you a savvy traveler.

Bonus tip: If you're so cheap you can't afford the two dollars an eye mask costs, just pocket the little travel kit you're handed on the plane. Don't worry; the airline wants you to keep it. I think.

2. Build a wall

Just bring along a sarong (if you're a woman) or maybe a clean travel towel (for the gents) and string it up over your bunk. Boom! Your own bedroom wall.

Not only will a bit of draped fabric turn your tiny space into something out of Arabian Nights, but it'll also block out the light and give you a little privacy from your bothersome dorm-mates. Good news all around.

3. Capture the light

Don't lie there like a martyr, inwardly cursing the world, while the light blazes above you like a thousand suns – take the initiative. If the room is empty just turn it off; if it isn't, ask those around if it's ok too. Worst they can say is no.

Those in the room will get the idea that you want to hit the sack. And if they want to carry on with their fascinating conversation about how Myanmar is like Thailand was 30 years ago...well then, they can take their insights outside, can’t they?!

And those entering a dark room will be less likely to make noise. Simple psychology.

Now, don't kill the switch at 8 pm because that’s a sure-fire way to get yourself branded as the hostel grump and treated like an outcast. But come 10 or 11 pm, the light is fair game. So switch it off and bag some shut-eye.

4. Get tired

The best cure for hostel-induced insomnia is not hitting the hip flask – although that helps – it's being exhausted.

If you have maxed out the day to your body's full potential then no amount of snores, creaks or kebab farts are going to stop your eyes from closing.

So get out there, wherever you are, and do and see everything. Laugh, drink, run to the top of that tower, swim, dance in the street – do it all. And when your head hits that lumpy hostel pillow, you’ll be in la-la land before you know it.

5. Do your research

My number one tip: Do your research.

The internet is your friend – use it. Check out the reviews of your chosen hostel online from previous guests. See if there are comments about the place being particularly loud – maybe the reason your bunk is so cheap is that it’s located in the middle of runway four.

Better still, check out the hostel's website. If they boast about their in-house bar and claim to be 'the biggest baddest party hostel in town!', then chances are you ain't getting no sleep tonight!

On the other hand, if your intended hostel has notices about alcohol being banned on the premises or curfews, the chances are that it's on the quieter end of the scale.

6. Can't beat them? Then join them!

So this is my suggestion when all else fails: If you’ve neglected to follow Tip #5 above and do find yourself in a party hostel, unable to sleep, you might as well get some fun out of the night.

Get up, swap your pajamas for dancing shoes and make some memories. You can always move hostels tomorrow.

There you have it: 6 tips to help you conquer hostel-induced insomnia. If they don't work well, then it could be time to get a tent and head to the hills instead.

Sweet dreams, weary traveler.


This post was published in partnership with The Sleep Advisor.

Things to Do in Denver: 48 Hours in the Mile High City

Since I was a kid learning to ski in northern New Jersey, I have dreamed of skiing in Colorado.

I even toyed with the idea of applying to the University of Colorado Boulder so that I could pack in more ski days per year.

At age 19, I switched from skiing to snowboarding but never made it to Colorado before giving up the latter to start saving for my round-the-world trip.

Denver City and County Building

So when the opportunity arose for me to visit Colorado this Fall, I didn't hesitate to pack my bags for the short two-hour flight from Austin to Denver.

Upon arrival, I picked up a rental car and drove to the ART, a hotel in the heart of the city. As the name suggests, it's an art-themed hotel surrounded by no less than four museums.

If you'd rather avoid a rental car, you can book transfers using a Denver car service.

I grabbed a quick lunch at the hotel restaurant and went for an afternoon walk around the nearby Civic Center Park to get my bearings. The clock was ticking, and I had a long list of things to do in Denver.

Visiting Union Station, one of many things to do in Denver
The revitalized Union Station

Things to Do in Denver

Dinner at Union Station

Originally opened as a train station in 1881 and has undergone significant renovations since 2014, Denver's Union Station has evolved from an old transportation hub to an attractive entertainment district.

The interior of the main building is beautiful; indeed one of the best-looking train station waiting rooms I've ever seen.

This is partly because it also acts as the lobby for The Crawford Hotel, a 112-room luxury hotel that occupies the upper levels. If you take the train from the airport, it'll drop you here.

In the winter, you can also catch an Amtrak train to Winter Park for a day of skiing or snowboarding. For more info on the best ski resorts in Colorado and the U.S., check out Bluehouse Skis.

If you're in town for spring or summer, you'll want to check out one of the many Colorado Springs white water rafting excursions, which can also be accessed via Amtrak.

I wandered through the spacious lobby to the bustling Mercantile Dining & Provision, where I sat at the bar and splurged on Creekstone Farms BBQ short ribs with grits and fried green tomatoes and milk chocolate pot de créme for dessert.

There are eight additional dining options within the station, including a deli, cafe, ice cream shop, and several bars, with many more options surrounding it.

Larimer Street
State flags and lights line historic Larimer Street

Walk Larimer Square

To burn off dinner, I walked four blocks up 17th Street to Larimer Square, Denver's main street, when the city was founded in 1861.

I found a quaint scene, the street lined with lights and state flags in the air and bustling restaurants and bars on the ground.

Chic independent shops filled the gaps between restaurants. It was mid-September, yet still warm enough for diners to enjoy their food al fresco.

Denver Art Museum
The pointy Hamilton Building, part of the Denver Art Museum

Enjoy the Denver Art Museum

The following day I awoke ready to kick off my only full day in Denver with a visit to the Denver Art Museum (DAM).

Founded in 1893, with over 70,000 works of art, the museum is one of the largest between the West Coast and Chicago.

Polish-American architect Daniel Libeskind designed the Hamilton Building (shown above).

The website "recalls not only the mountain peaks that provide a powerful backdrop for the city but the intricate and geometric rock crystals found in the foothills of the Rockies."

Due to limited time, I only visited the Hamilton Building, where I saw a very touching exhibit called "Common Ground: Photographs by Fazal Sheikh 1989-2013."

His black-and-white photography highlighted the plight of the poor and abused in countries like India.

Later that day, a friend in Denver mentioned he prefers the North Building, meaning I have more to look forward to next time.

Adult entry costs $13 for non-residents of Colorado and $10 for residents. Children 18 and under are free, regardless of residency, and admission is free on the first Saturday of each month.

Denver Capitol Building
The golden dome of the Capitol Building shines in the sun

Tour the Colorado State Capitol Building

As seen from across Civic Center Park, the grandeur of the Colorado State Capitol Building beckoned me to step inside and learn more.

Built in the 1890s, architect Elijah E. Myers purposefully designed it to evoke the U.S. Capitol Building in Washington, DC.

Highlights of the tour included looks at the chambers of the State House of Representatives and State Senate, the interior of the gilded dome, and the scenic views from the top of the building.

Free tours are offered hourly from 10 a.m. to 3 p.m., daily, Monday through Friday.

Food trucks at lunchtime in Civic Center Park

Lunch at Food Trucks in Civic Center Park

Civic Center Park lies at the heart of downtown Denver. The east end is dominated by the Capitol Building, while the Denver City and County Building occupies the opposing west end.

Additional government buildings surround the park, including the United States Mint (one of the few that makes coins), museums, and The Denver Post.

During the warmer months, from Spring to Fall, food trucks congregate to offer cheap eats from 11 a.m. to 2 p.m., Tuesday through Thursday.

After perusing a dozen delicious options, I opted for a Kansas City-style pulled pork sandwich with mac 'n cheese from Smokestack 70, followed by two scoops of organic salted caramel and mint chocolate chip ice cream from Em's Ice Cream.

Renegade Brewery
Beer tasting at Renegade Brewery

Happy Hour at a Craft Brewery

Following my late lunch in the park, I took a short siesta back at the ART hotel before meeting up with one of my college roommates who'd moved to Denver with his wife over ten years ago.

He'd since learned to brew beer and even won awards for his brews, so I knew I could trust him to pick a fantastic brewery for our happy hour.

Renegade Brewing Company bills itself as "offensively delicious" and was a short 5 to 10-minute Uber drive southwest of my hotel.

We each ordered a flight of beers to sample. I liked that you could order a 4-ounce beer for $1.75 versus having to commit to a pint of something you may not thoroughly enjoy. I wish this were an option at regular bars, not just craft breweries!

The Swashbuckler was sea salt and caramel porter I didn't care for, while the Pancakes maple porter tasted like maple syrup had been poured into the beer.

Related: Fort Collins Bike and Beer Tour

The Cruise Room
The Cruise Room

Cocktails at a Prohibition-era Speakeasy

My experience in Denver turned out to be filled with more historic buildings than I'd expected.

Following our beer flights at Renegade, my friend offered to show me The Cruise Room, the city's oldest speakeasy.

Located off the lobby of The Oxford Hotel, near Union Station, The Cruise Room opened in 1933, immediately after Prohibition ended.

For dinner, we walked a block to Wynkoop Brewing Company (I had the buffalo meatloaf and an espresso Cowtown milk stout cheesecake).

Wild Bill's Grave
Wild Bill's Grave

Buffalo Bill's Grave and Museum

On the morning I departed Denver for Steamboat Springs, I made a pit stop at The Buffalo Bill Museum and Grave, located about 30 minutes west of Denver in Golden, Colorado.

The grave and museum are perched atop Lookout Mountain and offer a quick and easy way to get to know the man who helped save the American buffalo from extinction.

Museum admission is $5 for adults, $1 for children 6 to 15, and free for kids five and younger. It's free to visit the grave.

If I had more time...

There are at least a dozen more things I would've wanted to do had I been able to stay in Denver longer, including a tour of the U.S. Mint, visiting more museums, catching a show at the famous Red Rocks Amphitheater, watching a baseball game at Coors Field, and touring Coors Brewery.

_____

My stay in Denver was in partnership with the Colorado Tourism Office.

Lisbon on a Budget: A Travel Guide to Portugal's Capital

Lisbon has exploded in popularity over the past few years, and it's not surprising why: the weather is excellent, the food is great, and it's incredibly cheap. Unfortunately, that last bit is starting to change. However, it's still the most affordable Western European capital city to visit.

Lisbon
Bridge in Lisbon

Still, the number of visitors to Lisbon has led to increased accommodation costs and restaurant prices. The bargains are still there, but you must look harder to find them. Here are some tips for experiencing Lisbon on a budget.

Lisbon for Less

How To Eat on a Budget

Although a decent main meal in Lisbon costs around €10 ($12), eating out for even less is possible. The general advice applies here: avoid the touristy areas, such as Baixa, Belém, and Chiado. In these parts of town, lunch and dinner typically cost more than €10 ($12), and the quality is much lower.

The best advice for finding a cheap place to eat is to avoid restaurants and go to a pastelaria instead. A pastelaria is what you or I might call a café, but most tourists don't know that they usually serve a main meal (prato do dia).

If you see the menu written on a paper tablecloth and sellotaped to the window, then bingo! You've found a local joint, and prices will be much more reasonable. You might get three courses and a drink for less than €10 ($12).

You can almost get all your meals in pastelarias and cafés: cake or pastel de nata and coffee in the morning, your main meal at lunchtime, and a bifana to soak up those late-night drinks in the evening.

A bica and a pastel de nata
Breakfast of champions: a bica and a pastel de nata

If you're trying to stay within a budget, consider going to a low-cost restaurant. This Portuguese cafeteria-style chain is popular with office workers and serves reasonably good food for incredibly low prices: around €4 ($5) for lunch.

The menu changes, but there are a few constants, like the francesinha, Porto's version of a Croque Madame. This monstrous sandwich, with ham, sliced sausage, steak, melted cheese, a fried egg, and a tomato-and-beer sauce, will keep you full for a few hours.

How To Drink on a Budget

If you want to drink on a budget, head to the Bairro Alto after around 9 p.m. You'll find countless bars here, most of which will serve cheap wine, beer, and caipirinhas. The deeper you go, the cheaper the drinks tend to be.

It's possible to get a caipirinha for as little as €1-2 ($1-2), but be warned: you get what you pay for, and the same goes for the wine.

The cheaper caipirinhas tend to use very low-quality cachaça and lots and lots of sugar. If you're going to drink one, move up into the €3-4 ($3-4) bracket. Your liver will thank you. A beer typically costs around €1 ($1) here, and if you're drinking cheaply, it's much more reliable.

How To See a Fado Show on a Budget

Fado is a traditional style of Portuguese music. It's soulful and incredibly moving, and I highly recommend you see it when you visit Lisbon.

Unfortunately, fado shows can be expensive as they usually include dinner: €25-50 ($29-59) per person. It wouldn't be so bad if the dinner were good, but you can get a better dinner elsewhere.

Clube de Fado is one of Lisbon's most popular fado spots, popular with locals and tourists alike. It's one of the few fado houses that lets you turn up after dinner and pay for drinks.

Alternatively, A Tasca do Chico in the Bairro Alto has free shows on Monday and Wednesday nights.

How To Learn Portuguese on a Budget

Part of the fun of visiting a new city is learning a bit of the language. European Portuguese is probably not a language you have encountered before, and many travelers are unfamiliar with it.

A quick Portuguese lesson will teach you some basics and help you avoid typical faux pas, like pronouncing Portuguese words in Spanish. Spain is Portugal's old enemy, and it doesn't like to be reminded of its sword-wielding neighbors.

There are many free resources online and paid Portuguese courses, but perhaps the easiest option is to attend a language class. Oasis Hostel in Lisbon runs a free Portuguese class on Tuesdays at 6 p.m.

If you've studied the free resources and are looking for something more in-depth, the English-Portuguese meetup group has weekly meetups. Participants speak 45 minutes in English and 45 minutes in Portuguese.

How To Sleep on a Budget

Although Lisbon's accommodation prices have increased in the past few years, some excellent budget options are still available.

A dorm room in one of the following hostels will cost €12 ($14) or less per night:

  • Urban Garden Hostel
  • Brickoven Palaca
  • Hub New Lisbon Hostel

If you want a little more privacy, the following rooms on Airbnb all cost between €15 ($17) and €22 ($26) per night:

  • Fado Room Graca
  • Portuguese tiles room
  • In front of Pasteis de Belém

How To Visit the Sights on a Budget

Touring a city's attractions can be costly, even if you buy a City Pass.

Thankfully, many of Lisbon's attractions are free on the first Sunday of the month, including:

  • Mosteiro dos Jerónimos
  • Torre de Belém
  • Museu Nacional do Azulejo
Jeronimos Monastery in Lisbon, Portugal
Jerónimos Monastery

If you're not in Lisbon on the first Sunday of the month, you can still visit the Museu Calouste Gulbenkian for free on any other Sunday and the Museu Coleccao Berardo on any day of the week.

Reliable access to digital maps helps travelers navigate Lisbon more efficiently and avoid unnecessary roaming charges. Travelers can set up their connection in advance with a Portugal eSIM from TooSim to use local data immediately upon arrival. This makes it easier to check transit schedules, look up directions, and stay connected throughout the trip.

How To Enjoy a Day's Cycling on a Budget

Although there's plenty to see and do in Lisbon, it's also nice to get out of the city. And, after all those budget francesinhas and caipirinhas, you'll probably be in the mood to exercise.

The municipal council in Cascais, located 45 minutes from Lisbon, offers free bike hire (all you need to do is show your ID). You can follow the 10 km purpose-built bike path from Cascais to Praia de Guincho.

Although there are beaches closer to Lisbon, like Estoril and Cascais, this takes you a little further out of the city and away from the crowds of tourists.

So there you go -- €12 ($14) or so for a place to crash, less than €5 ($6) for lunch, €1 ($1) for a beer, free Portuguese lessons, free museum entry, a free cycling day trip, and a free fado show. Your bank balance will be pleased when you leave Lisbon!

Where To Eat With the Locals in Jordan

The entrance to Jerash is packed with Jordanian vendors, schoolchildren, and families. As a tall, blonde woman, I received lots of stares. A girl, smiling as her friends giggled, approached me and asked if she could take a photo. I was confused before saying no thanks, thinking they might be making fun of me.

Taking selfies with the locals in Jerash

As we ventured into the Greco-Roman ruins, the groups of schoolgirls continued to approach us and ask for photos.

They would yell, "Selfie!" and run over in groups with their iPhones to take a picture together, followed by exclamations like, "I love you!" and "You're beautiful!" and "Welcome to Jordan!"

When I heard that, my anxiety settled. They just wanted to connect. I told them the same things back.

Where to eat with the locals in Jordan
Hashems in downtown Amman

Along with selfies, I noticed that Jordanians seem to take sharing meals very seriously. Families spend all day together in preparation for the afternoon feast, taking time to visit and relax, welcoming anyone who can join.

One girl who approached me in Jerash invited us to her family's home for dinner, and a group of construction workers taking a break from work offered me a taste of their homemade soup.

However, you don't need to visit someone's house or befriend a local to experience the graciousness of the people and enjoy authentic meals. Here are some recommendations to get you started.

Breakfast at Hashem's Downtown

Hashems in Amman, Jordan
Another view of Hashem's

The only items on the menu at Hashem's are falafel and a variety of sides. And you'll be amazed by the price of the fresh, filling meal. It's in downtown Amman, right in the heart of the shopping district.

The place is always packed with locals, and the kitchen is open, so you can watch them fold the steamy, soft pitas and toss the chickpeas into the fryer.

Picnics in Wadi Rum

Cooking lunch in Wadi Rum

If you have time to venture out to the desert, stay overnight at Khaled's Camp. After climbing the various rock formations and sweeping red dunes, your guide will cook a picnic for you in the desert, complete with fresh vegetables, bread, and dessert.

Wadi Rum picnic
Wadi Rum picnic

At the end of the day, you're treated to a complete Bedouin feast. They pull layers of food out from being cooked underground - the bottom layer is all the meats, followed by the rice and vegetables.

You feast on that in the tent with the Bedouins, along with hot mint tea and shisha, if you so choose. Breakfast is served outside.

Traditional Meals Outside of Petra

Mansaf Jordan
Mansaf Jordan

The restaurants on the side of the road leading to Petra are small, but that makes them even more inviting. I tried mansaf for the first time there, the national dish of Jordan. We sat by the window, watching people and chatting with the waiter.

With our American sense of time, we hoped to eat quickly and get a full day of hiking in. But the waiters told us to take it easy. Relax, have some tea. We politely declined, and they said to come back later. The tea would be waiting for us.

At a restaurant in Petra, Jordan

It's hard to miss local dining experiences in Jordan. Everyone wants to connect, from schoolgirls to taxi drivers and men selling spices on the street. Sharing a meal is the perfect way to do just that.

What To Pack for a Fall Trip to Colorado

It fits that my first trip to Colorado was in September; fall is my favorite season. In addition to being born in September (Libra here), I grew up in the northeast U.S., where the changing leaves signaled the end of sunny summers and the start of chilly white winters.

I had been thinking about what to pack for a fall trip to Colorado for weeks before leaving home (Austin, TX).

Fall trip to Colorado
I'm wearing my Pick-Pocket Proof Pants at the yurt.

I kept an eye on the weather, but due to varying elevations and environments, temperatures would be much colder near the wilderness yurt versus Denver, especially at night.

Colorado Itinerary

My one-week itinerary took me on a self-driving clockwise loop of northern Colorado:

  • 2 nights in Denver (5,280 ft / 1,564 m)
  • 2 nights in Steamboat Springs (6,732ft / 2,052 m)
  • 1 night in a yurt (8,800 ft / 2,682m)
  • 2 nights in Fort Collins (5,000 ft / 1,525 m)

Plus, I was flying straight from Denver to New York City for a summit on studying abroad, so I had to think about what to wear there, too.

Packing List for a Fall Trip to Colorado

Backpack and Luggage

Dave's luggage
My wheeled bag and daypack

It's been a few years since I last wrote about my approach to packing. Allow me to indulge in some quick background.

I'm a backpacker at heart. However, in 2012, I had an acute attack of lower back pain following a 24+ hour bus ride from La Paz, Bolivia, to Lima, Peru.

What I learned about my back from that episode made me more protective of it, so I traded my backpack for a wheeled carry-on bag from The North Face.

Later that year, I wasn't a fan of trucking that thing around European mass transit systems, so in 2013, I compromised by using a backpack again, only a smaller one.

I bought an earlier version of The North Face Router daypack, which worked well for me on many trips, from five weeks in Central America in 2014 to five months in Eastern Europe in 2015.

Unfortunately, I'm in the midst of a longer, more complicated back episode (herniated disc with nerve compression), so for my Colorado trip, I relied on carry-on-size wheeled luggage in addition to my daypack.

The wheeled bag is by The Traveler's Club, part of the luggage set my parents gave me over a decade ago. It's not sexy, but it works fine, and the dimensions meet today's carry-on requirements.

Related: Scenes from Steamboat Springs

Clothes

Packing list for a Fall trip to Colorado
What I packed for a week in Colorado

The key to being a minimalist traveler is becoming comfortable with having fewer clothing options and wearing the same things multiple days before washing.

I'd rather invest in a few pieces of high-quality gear from a company like Arcteryx than cheaper stuff that falls apart more quickly. Learning to layer is also essential for colder seasons like fall and winter.

For example, I used a daypack the size of the one for this fall Colorado trip on my 11-day winter trip to Japan and managed just fine.

  • 1 pair of jeans
  • 1 pair of Pick-Pocket Proof® Convertible Travel Pants by Clothing Arts
  • 1 pair of board shorts by Prana (for hot springs)
  • 5 short-sleeved shirts (including my favorite black organic t-shirt by Prana)
  • 1 long-sleeve base layer by The North Face
  • 1 light long-sleeve sweater
  • 7 pair ExOfficio boxers (you can get by with two if you hand wash nightly)
  • 6 pairs of socks, including three pairs of SmartWool socks
  • 1 belt

Outerwear

  • The Cubed Travel Jacket™ by Clothing Arts
  • 1 fleece
  • 1 baseball cap
  • 1 cotton beanie (a $1 souvenir I bought nine years ago in Darjeeling, India)
  • 1 yak wool scarf (bought in Nepal for my Annapurna trek)
  • 1 pair of polarized sunglasses by Oakley

Shoes

  • 1 pair of black Pumas
  • 1 pair of running sneakers
  • 1 pair of Havaianas flip-flops

Tech Gear

  • 13" MacBook Pro (Retina)
  • iPhone 6S
  • Mophie Juice Pack Air (doubles iPhone battery life)
  • Canon G7X camera and soft carrying case
  • 2 external hard drives (one terabyte) and a soft carrying case
  • Apple Airpods (much more convenient to carry than noise-canceling headphones)
  • Petzel Zipka Classic LED headlamp
  • Fitbit Charge 2
  • Chargers for laptop, iPhone, and camera

Miscellaneous

  • Toiletries: toothbrush, toothpaste, deodorant, sunscreen, etc.
  • 1 tiny microfiber towel
  • Wallet, including driver's license and multiple debit/check cards
  • Business cards

Additional Considerations

Big Agnes sleeping bag
Big Agnes sleeping bag and air mattress at the yurt.

Evening temperatures in State Forest State Park, where the yurt was located, were dipping into the 20s F, so I knew I needed a sleeping bag. Luckily, I could borrow a demo bag and inflatable sleeping mat from Big Agnes in Steamboat Springs.

I bought some used gloves ahead of the night in the yurt to be safe, but I didn't need them.

As I had to hike 1.1 miles to the yurt from where I parked, I only brought the essentials for a night in my daypack and left the luggage in the car. I'll share more about that experience in a future post!

Naturally, women will pack a few extra clothing and personal items that men don't need.

Although I'm a big fan of the raw wilderness, the next time I visit Colorado, I'd like to stay in a cabin to experience cozy comfort in addition to nature. You know there's no shortage of vacation rentals in Colorado!

The Results

Overall, my packing list served me well. I had a few items I didn't wear, including the rain jacket and scarf. However, I would take them again since the weather in the mountains can be unpredictable.

_____

The Steamboat Springs Chamber Resort Association invited me to visit Steamboat Springs and several other Colorado destinations, including Fort Collins, Denver, and a national park.

I received the organic t-shirt by Prana in 2015 and the Cubed Travel Jacket™ by Clothing Arts in 2016 at no cost. 

Is Travel Insurance Actually Worth it? The Pros & Cons

Ice Climbing - Viedma Glacier
The author ice climbing on Viedma Glacier in Patagonia

The question of whether travel insurance is worth purchasing gets brought up time and again from travelers, especially young travelers.

Some travelers choose to risk it and not have coverage while abroad, while others would never leave home without it.

Do the pros outweigh the cons? Is it something I'll ever need to use, or will I just be wasting my money? What if my claim isn't accepted anyway?

These concerns are valid and understandable, and they should be addressed when thinking about purchasing travel insurance before a trip. So, let's start with the pros and cons.

Pros of Travel Insurance

Sense of Security

The main advantage of having travel insurance is the sense of security you get from simply having it.

If the unexpected happens and your trip gets completely dismantled, your travel insurance could reimburse you or help you out of a tight spot when you need it most.

It seems that something always goes wrong the moment you choose not to cover your bases. It's Murphy's Law.

It's best to be covered so that you don't stress worrying about potential trip mishaps and the extra costs that might come with them.

Health Insurance Coverage

What you may not realize is that many US-based health insurance policies don't cover overseas medical expenses.

If you are injured or sick abroad, you may not be covered without a separate travel insurance plan.

It's a serious concern to think about since sickness and accidents can happen anywhere in the world.

Even if you don't consider yourself an adventurous traveler, accidents happen in all forms - that bus you're on could get into an accident, you could twist your ankle stepping off a curb, or get severe food poisoning at a fancy restaurant down the street.

The truth is, you never know when misfortune will strike and when you might need medical attention abroad.

Saving Money in the Long Run

You may complain about the cost of the premium you have to pay but think of it more as an investment in yourself - both for your peace of mind and your overall health.

If you book a trip that costs thousands of dollars and most if not all of it is non-refundable, what happens when your flight gets canceled or delayed and all of those hotels you booked are suddenly for the wrong dates?

What if natural disaster strikes, such as Hurricane Irma that recently caused so much destruction in the Caribbean?

If you can no longer go on your upcoming trip, but you've already booked a $700 roundtrip flight that's non-refundable, then you're out of a lot of money.

There's a good chance, especially if you're a regular traveler that you'll end up saving more money in the long run with travel insurance because your policy will help recover those costs.

And if you don't end up saving money, think of it as a positive that not much has gone wrong throughout your travels.

That you've been able to enjoy your time abroad knowing that you'd be covered in case something went wrong, but that your trips have ultimately been stress-free.

Cons of Travel Insurance

Cost

The most significant disadvantage regarding travel insurance is always the cost.

Because you may never have to use your travel insurance, people sometimes see it as a waste of money.

However, as mentioned above, for most, having that sense of security is enough to offset the cost.

When you factor in how much you would have to pay for specific situations without insurance, it may make you rethink the cost of premiums as too expensive.

Coverage Could Be Overkill

Nowadays, some tour companies or agencies offer inclusive insurance policies when participating in their activities.

In the same vein, many credit cards now offer insurance benefits if you book rental cars and hotels through their card.

Although the same coverage may overlap at times, these one-off insurance policies don't always cover everything.

They may offer patchy or particular coverage depending on the company.

It's always best to read through everything (twice) to understand what your coverage includes.

Pre-existing Conditions Aren't Always Covered 

It's true for any insurance that having a pre-existing condition can change your coverage for the worse or hike up your premium costs.

Unfortunately, there's not a way around this except to shop around and choose your insurance policy carefully.

For instance, Allianz offers existing medical condition coverage on select policies.

As long as you meet the requirements they list in their FAQ, there's a good chance you could still be covered.

Suppose you're curious about whether you'd be covered under specific insurance policies with a pre-existing condition.

In that case, the Certificate of Insurance/Policy for terms, conditions, and exclusions are where you would find that information.

Your Claim Might Not Be Accepted  

What if you go through the process of finding the right travel insurance, pay a monthly premium, think you're covered, and then find out your claim was denied anyway?

What a waste of money, you might think. What was the purpose of buying insurance in the first place if I didn't get anything back from it?

There's always the chance that your claim could be denied.

However, if you take the time to read through your policy in detail and complete the recommended steps after an accident or illness, there shouldn't be an issue with your claim being approved.

Most denied claims come from people not reading the fine print or collecting the necessary documents for filing the claim (receipts, doctor's notes, time-stamped photos, etc.).

Again, make sure to read your policy carefully and in detail to understand what's required.

Conclusion

Even though the extra cost may be an annoyance when planning your trip, the pros will still almost always outweigh the cons when it comes to travel insurance.

The first step is to sit down and look at what kind of trip you're planning and what type of insurance you'll want for it.

A one-month trip glamping around South Africa may call for a different insurance policy than a one-week trip staying in 4-star hotels around Victoria, Canada.

Not to mention, choosing the right travel insurance for you and your trip can save you a lot of money, especially if you're able to avoid coverage that you probably won't need.

Travel is an exciting journey into the unknown sometimes; it's a good idea to have a backup plan when heading into foreign territory in case things don't go exactly as planned.

It never seems worth it until it is.

Do you use travel insurance? Do you think it's worth the cost of a good insurance policy abroad?

_______

I work as a travel insider for Allianz Global Assistance (AGA Service Company) and receive financial compensation.

5 Spiritual Sites in India Worth a Pilgrimage

The Bodhi Tree is an important Buddhist spiritual site in India.
The Bodhi Tree

Of the 65 countries I've visited in my life thus far, India has been the most spiritual. In this story, I'll be sharing five spiritual sites in India that are worth the extra effort to see.

Whether you consider yourself a religious or spiritual person, the confluence of belief systems and associated historical places in India is fascinating.

Hinduism, Buddhism, Sikhism, and Islam are all represented.

Add to that the incredibly low cost of travel, including airlines like Spicejet, and the ease of getting a six-month visa, and it's not hard to see why backpackers choose to spend half a year there at a time.

My seven weeks in India were guided by my spiritual curiosity. These are five places I visited as I traveled the north of India from east to west.

1. The Bodhi Tree in Bodhgaya

Thirty-four hours….1 taxi….1 share jeep….1 overnight train….1 bus ride….3 autorickshaws….1 bicycle rickshaw….

Traveling from Gangtok, Sikkim to Bodhgaya over a day and a half was indeed my form of pilgrimage!

But it was worth it to arrive in Bodhgaya, where I spent several nights at a Tibetan monastery and sat under the Bodhi Tree, where the Buddha was believed to have attained enlightenment.

The Bodhi Tree is the most important site in Buddhism and draws monks and lay practitioners from around the world.

Next to the tree is the Mahabodhi Temple, built in the 6th century AD.

Related: Pilgrimage to Bodhgaya

Kids playing cricket in Varanasi, India
Kids playing cricket

2. The Ghats of Varanasi

I departed Bodhgaya on a 5:15 am train headed west for Varanasi, a city located along the Ganges River.

Varanasi has been religiously significant for thousands of years.

It's believed the Buddha founded Buddhism there in the 6th century BC (giving his first sermon in nearby Sarnath, which I also visited).

Hindus believe dying in the city will bring salvation.

Therefore if they can afford it, many make pilgrimages to Varanasi when death is near so that they may be cremated in the ghats along the river.

I'd never seen a human cremation, let alone seeing it happen in public, until I went for a walk along the ghats in Varanasi.

It's hard to put into words what you see, even from a distance.

His Holiness the Dalai Lama in northern India.
His Holiness the Dalai Lama

3. McLeod Ganj, Home of His Holiness the Dalai Llama

It took 24 hours to travel from Agra to McLeod Ganj by train and bus, but I made it in one piece and just in time to hear His Holiness the Dalai Lama give a talk at the Tibetan Children's Village the next day.

McLeod Ganj is home to His Holiness the Dalai Lama and the largest population of Tibetan exiles.

I had tried to visit Tibet a few months earlier in China but had to cancel two days from departure when the Chinese government closed the border to foreigners.

As a result, it was vital for me to visit McLeod Ganj, and I ended up enjoying the atmosphere so much I spent three weeks there, which was about half my total time in India.

If you want to immerse yourself in the practices of Tibetan Buddhism and the culture of Tibet, this is one of the best places to do it.

The Golden Temple
The Golden Temple

4. The Golden Temple in Amritsar

I left McLeod Ganj on a 5 am bus to Amritsar to visit The Golden Temple, the most important place of worship for Sikhs. The trip took about six hours, but it was worth the effort.

At the temple, male guards with purple-turbans and spears walked around the perimeter. The sun was intense, yet the white marble floors were warm but not hot underfoot.

I visited several of the surrounding buildings, which housed religious items. However, the line to enter the Golden Temple itself was too long for me.

Jama Masjid, one of the biggest spirtual sites in India for muslims.
Jama Masjid

5. Jama Masjid, India's biggest mosque

My last train ride in India was the six-hour journey from Amritsar to New Delhi.

The day after arriving in New Delhi, I visited Jama Masjid. Constructed in the mid-17th century, it's India's biggest mosque.

I walked around the perimeter of the interior courtyard and climbed the 40-meter high minaret for a fantastic 360-degree view of Delhi.

Writing this article about spiritual sites in India brought back many memories from my trip, including a lot of time spent traveling overland.

If I were to return to see more of the country, I would consider making an Air India booking or otherwise add more flights to my travel itinerary versus relying on trains and buses alone.

_________

This story was written by Dave in partnership with an advertiser.

Iceland's Ring Road: 9 Amazing Places to Camp

Filled with some of the most spectacular (and eerie) landscapes and miles of vast, open roads, driving Iceland's Ring Road is an incredible adventure.

However, Iceland isn't a cheap place to visit, and it's even more expensive to stay for the time it takes to circumnavigate the country.

Taking the Ring Road is a much more daunting experience than the half-day tour of the Golden Circle near Reykjavík or the Blue Lagoon.

An Iceland road trip may seem like a huge splurge for the average budget traveler. The best way to save money while traveling in Iceland is by camping instead of staying in hotels or hostels.

A scenic view of mountains on Iceland's Ring Road
Scenic Iceland

If you're camping for the first time, the first thing to do is ensure you have all the necessary equipment before you leave home. There are also great places in Reykjavik to rent the gear you need. For sustainability, you can't beat a solar generator.

There are campsites anywhere you'd want to go on Iceland's Ring Road, so you can jump in a car and start your journey.

All you need to pay for is a camper van or rental car (preferably with four-wheel drive), and you can see the entire Ring Road on a self-drive tour.

Getting off the main road is a great way to find the best views, small towns, and hidden gems in places like Thingvellir National Park and Skaftafell National Park.

Your only limit is road conditions and the speed limit. Regarding road conditions, the best time of year to drive the Ring Road is in the summer months. During the winter months, snow leads to road closures.

>>> Start your search for flights to Iceland at Travelocity.com. 

Campgrounds in Iceland

1. Seljalandsfoss (Hamragardar)

Seljalandsfoss waterfall is accessible from Iceland's Ring Road. (photo: Lucas Davies)
Seljalandsfoss (photo: Lucas Davies)

As a popular tourist hotspot, Seljalandsfoss is most famous for having a short hiking trail that enables visitors to venture behind the beautiful waterfalls.

It's worth visiting and perhaps getting a guided tour if you have enough time and the weather conditions allow.

Although travelers can see this waterfall on day trips from Reykjavik, the largest city, it's worth spending a night in the area to explore its many attractions.

A few miles down that road rests another smaller waterfall hidden behind a large rock. Next to that waterfall (and within view of Seljalandsfoss) is a lovely little campground where you can rest your head for the night.

Cost per night: ISK 1,300 ($12) per person per night

Facilities: Toilet, Shower

2. Skogafoss (Skogar)

Skogafoss Waterfall is accessible from Iceland's Ring Road (photo: Ferdinand Stohr)
Skogafoss Waterfall (photo: Ferdinand Stohr)

Skogafoss is Seljalandsfoss's friendly neighbor and is another popular place to see Iceland's waterfalls accessible from the Ring Road.

There's another campsite near the parking lot where visitors can pitch a tent.

This one has up-close and personal views of Skogafoss. The amenities here are very basic, and there's always a steady stream of tourists coming in and out.

However, if you don't mind the commotion, the views here are some of the best of any Iceland campsite.

Cost per night: ISK 1,500 ($14) per person per night

Facilities: Toilet

3. Vik

Reynisfjara beach on Iceland's Ring Road (photo: Mark Male)
Reynisfjara (photo: Mark Male)

If you've seen photos of Iceland, you've probably noticed its famous black sand beaches, like Reynisfjara black sand beach.

Vik is home to many of those beaches, one of the most famous being Reynisfjara, known for its geometric basalt towers and beautiful volcanic rock sculptures.

Vik is home to a campsite for budget travelers that boasts spectacular views of these incredible natural wonders.

Cost per night: ISK 1,500 ($14) per person per night

Facilities: Toilet, Shower, Laundry, Wi-Fi

4. Seydisfjordur

It's worth the extra driving time off the Ring Road to spend a night in Seydisfjordur, one of the best places in the east fjords.

You might recognize some of the views driving into the city from The Secret Life of Walter Mitty - Ben Stiller's character had an epic downhill skateboarding scene along a steep and winding street.

Amidst its colored houses, mountain views, and peaceful ship-laden harbor, Seydisfjordur houses a small, cozy campsite.

Cost: ISK 1,600 ($15) per person per night

Facilities: Toilet, Shower, Wi-Fi, Laundry, Kitchen

5. Myvatn

Aurora borealis over Lake Myvatn, a fun stop on the Ring Road in Iceland (photo: Martin Brechtl)
Aurora borealis on Lake Myvatn (photo: Martin Brechtl)

Myvatn is east Iceland's playground and one of its most popular attractions for tourists looking for a good time. There's so much to see and do with its natural hot springs, hikes, lava fields, and giant lake.

It's one of the main attractions on Iceland's Ring Road, and for a good reason - its beauty was the setting for much of the famed Game of Thrones series.

Four campsites are near the lake: Hlid, Vogar, Fjalladyrd, and Bjarg.

One thing to remember here is that many midge flies inhabit the lake. They're entirely harmless but enjoy hitching a ride on clothing or backpacks.

Though having a few flies in your campervan/tent might be annoying, you should expect it when traveling in Myvatn. It's a good idea to bring bug spray.

Not sure where to rent a 4x4? Check out Cozy Campers for camper van rentals in Iceland.

Cost: ISK 1,350-1,500 ($12-$14) per person per night

Facilities: Toilet, Shower

Related: Northern Lights in Iceland

6. Husavik

Whale in Húsavík, accessible from Iceland's Ring Road. (photo: Michael Behrens)
Whale in Húsavík (photo: Michael Behrens)

Most famous for its whale-watching tours, Husavik is the perfect place to spend an evening.

With its pretty harborfront and excellent choice of restaurants, it's a relaxing place for a short walk to get some fresh air.

Husavik is a picturesque stop on Iceland's Ring Road, surrounded across the harbor by beautiful, snow-capped mountains.

Cost: ISK 1,400 per person per night

Facilities: Toilet, Shower, Laundry, Kitchen, Wi-Fi

7. Hvammstangi (Kirkjuhvammur)

Hvammstangi is a fantastic stop in northern Iceland for the average nature lover. First, it's an incredibly charming town with plenty of streets to walk around.

It is also home to many Icelandic seal habitats, where visitors can watch seals rest or play on shore. There's also a seal museum in town where you can learn more about these hunting creatures.

Cost: ISK 1,200 ($11) per person per night

Facilities: Toilet, Shower, Laundry

8. Stykkisholmur

A seaside town on the edge of the Snaefellsnes Peninsula, Stykkisholmur is home to delicious restaurants with Icelandic fare and a large rock to hike with a lighthouse on top.

There's also a small, picturesque harbor amid tiny, colored houses. If you're planning to explore the beauty of Snaefellsnes while driving Iceland's Ring Road, this is a fantastic place to stop.

Cost: ISK 1,300 ($12) per person per night

Facilities: Toilet, Shower, Laundry

9. Reykjavik

Reykjavik Opera House (photo: Michael Held)

Although not surrounded by nature like most other campsites in Iceland, Reykjavik's campsite deserves mention because of its price compared to other city accommodations.

About a 20-minute walk from the city's center, the campsite has all the necessary amenities. Compared to much higher prices for a hostel or hotel in the city, this campsite is a steal!

It's also a cozy place to escape the tourist bustle of downtown Reykjavik, as it's in a more residential area.

Cost: ISK 2,200 ($20) per person per night

Facilities: Indoor Seating, Toilet, Shower, Kitchen, Wi-Fi, Tour Bookings

The Bottom Line

No matter where you'd like to rest your head at night on Iceland's Ring Road, there's a campsite waiting for you at a fraction of the cost of staying in a hotel.

So next time you're in Iceland, consider pitching a tent to save your wallet and experience the finest of Iceland's beautiful nature.

Great Himalaya Trail: An 800-Mile Walk in Nepal

The mud squished below my boots on the Great Himalaya Trail as I tried my best to avoid patches of ice and snow that littered the mountain I was descending.

The sky was getting darker. My hiking partner Buckey yelled at me from ahead, "I found a stream." We had walked all day, trying to conserve the murky pond water that filled our water bottles.

Mountain view from Nepal's Great Himalaya Trail
Mountain views

The pond was the only water source we had found in this ridgeline along Nepal's Great Himalaya Trail in the last twenty-four hours.

Overwhelmed by the curious attention we had received from the locals of eastern Nepal, who rarely see tourists, we decided to leave the villages and follow a more remote path.

I continued at my cautious pace until I reached the stream. Buckey was dumping the rest of his pond water and filling his bottles from the icy cool stream. I followed suit, and we continued downhill as the clouds rolled in.

There was smoke billowing out of a hut in the distance. I could make out a few buffalo and a man standing outside. He waved at us, our first human sighting since the previous morning.

We kept walking. It was getting late, and we needed to find a place to set up our tent.

Raindrops began to fall. They picked up speed and turned into hail in a matter of minutes. My clothing was quickly drenched as lightning illuminated the sky above.

"Buckey," I shouted. "We need to set up the tent. Now."

"Let's keep going until we find a better spot," he told me.

We both looked ahead to the trail before us. It was headed straight onto an open ridgeline.

"No. There's lightning. I'm not going out there," I insisted.

"Let's go back to that hut then," he suggested.

With a fully loaded backpack, I took off at the best running pace I could manage on slippery ground.

The man watched the hail from the doorway as we approached the hut. He urgently waved us in. I rushed inside the structure-the hut was a tiny room filled with smoke from the open fire pit.

The hail was loudly pelting the wavy tin roof. Buckey and I greeted the two men and thanked them for inviting us in. One of them spoke basic English, and the other did not. We knew only a handful of Nepali. words

I peeled off my wet outer layers, removed my muddy boots, and sat on a woven bamboo mat by the fire. The men offered us drinks of rakshi, a homemade millet wine. We shared our chocolate.

We learned that they were taking their buffalo up the mountain to pick up rice from a village, which they would then take back to their own.

They were twenty-six and twenty-seven years old, the same ages as Buckey and I. The hut was not theirs; it was a place where anyone passing through could take refuge for a night.

They made rice and vegetables for dinner, and Buckey and I contributed our freeze-dried chicken to the communal meal. By six o'clock, we were all curled under blankets and sleeping bags, safe from the storm outside.

The Experience

Why I Hiked the Great Himalaya Trail

Camping on the Great Himalaya Trail in Nepal
The day after, we were caught in a hailstorm.

I had heard about the Great Himalaya Trail during my first trip to Nepal in 2015. I was doing the popular guest house treks in the Annapurna, Everest, and Lang Tang regions.

They were challenging in their own right but were made easier by having a cozy guest house, a hot meal every night, and a group of comrades to share the experience with.

In contrast, the Great Himalaya Trail sounded wild, unpredictable, and demanding. I knew it would be remote, logistically challenging, and physically taxing.

Opportunities to befriend fellow travelers would be rare, and there would be a language barrier while interacting with locals in rural Nepal.

Despite the odds against completing this trail, I wanted to do it. I had made other long-distance trails before, but none had as formidable a reputation as the Great Himalaya Trail. I tried to push the limits of what I could physically and emotionally withstand.

My goal was to walk across the world's highest mountain range and through villages that never get tourists. It sounded like the biggest adventure I could imagine.

Prior to our hike, Buckey was my roommate, and we both worked as guides for the same wilderness therapy company. I hadn't thought to ask him to join me, but when he invited himself, I was elated. He said he had always wanted to see the Himalayas.

What It Was Like

Prayer flags and low visibility in the Himalaya
With visibility like this, it is no wonder we got lost so often.

Buckey and I spent four and a half months hiking 800 miles (1,300 kilometers) in Nepal. Sometimes, we stayed in village guesthouses. When there were no guesthouses, we camped and cooked for ourselves.

We walked in snow, hail, monsoon season, and relentless heat and humidity. We got lost in the jungle and the mountains. Often, we were the spectacle of the town, and kids would follow us through their villages. Weeks would go by, and we wouldn't see any other tourists or have internet access.

Most days, we gained or lost 3,000-5,000 feet (900-1,500 meters) of elevation, which was exhausting. The miles came slowly, and we rarely had an easy day. Sometimes, I found the views to be breathtaking, and sometimes, I found equally amazing views to be monotonous.

Whenever we made a trip back to the city to resupply, we often lingered for a week because we indulged in eating Western food, watching HBO, and having internet access.

My favorite thing about hiking the Great Himalaya Trail was the lifestyle. I enjoyed spending most of my time outside in the mountains. I liked sleeping in the tent and cooking on the camp stove. It was satisfying to reach viewpoints and see nothing but wilderness for miles. The days revolved around walking and eating, which made life satisfyingly simple.

The Tough Times

A hotel on Nepal's Great Himalaya Trail.
We spent the night in this hotel, a welcome break from our tent

Having Buckey as a hiking partner made me feel better about any frustrating situations that arose.

One day, we were caught in a hailstorm at 13,000 feet (3,960 meters) and lost on a ridgeline for a few hours. Once thoroughly soaked and in a bad mood, we called it a day and set up camp.

The freezing temperatures had caused me to lose my fine motor skills, and I struggled to help set up the tent. However, it didn't seem so bad because Buckey was there to be my teammate and commiserate with me.

Once inside our tent, I made us hot orange-flavored drinks, and we looked over our maps while the storm raged outside. I'm typically self-reliant to a fault, but I learned to appreciate having a dependable companion.

The most challenging part of the Great Himalaya Trail came at the end. We were hiking through Dolpa, our last and most strenuous section. We had to carry more food than usual because guest houses and resupply points were rare in that region.

Epic Himalayan views at an 18,000 ft pass.
View from the top of an 18,000 ft pass.

Every other day, I had to hike over a pass upwards of 18,000 feet (5,480 meters), made more difficult by my hefty pack weight. Reaching elevations that high was tiresome because walking and breathing were significantly more challenging.

I often had to take breaks to catch my breath after just a minute of walking, and it never felt like I could fill my lungs completely. On top of that, there were often sections of trail that had eroded from cliff sides. Every time I hiked through these areas, I was aware that I would die or get seriously injured if I fell.

This led me to have more anxiety than I'm accustomed to handling. After a week of dealing with physical and mental exhaustion, I had a meltdown on the side of the trail.

We had a few thousand feet to gain. After an early start with no breakfast, I was hungry, and after months of walking, I was finally tired of it. I flung my pack onto the ground, sat down on it, and started to cry until I was hyperventilating with snot dripping down my face.

Buckey was ahead of me on the trail, thus spared from witnessing my tears. I stayed on the ground, curled up with my face on my knees, until it started to rain. Then I stood up, put my pack back on, and continued up the mountain. I was still exhausted and felt like quitting, but I knew I would keep going.

The End of a Journey

The Great Himalaya Trail
A few hours after I finished having a meltdown

I set out to walk across the Himalayan mountain range and have an adventure, unlike anything I've experienced before. While that is ultimately what I got, it's not the most important thing I gained. I'll think most fondly of the storms we endured, the locals who took us in, and having Buckey around to rely on during the tough times.

Great Himalaya Trail Logistics

Beautiful mountain views in Nepal's Himalaya
Views on the Great Himalaya Trail

Can you hike the Great Himalaya Trail?

While no one keeps statistics on the number of hikers who have completed this trail, there have not been many. For example, I only met two other hikers in person who were doing the entire trail, and I corresponded with three others online. And this was possibly the busiest year yet along the Great Himalaya Trail.

I would only recommend that experienced long-distance hikers attempt the entire trail without guides. You need to know how to navigate the backcountry, be prepared for difficult and long days, and be comfortable finding campsites and interacting with non-English speakers.

If you do not have extensive outdoor experience, you can hire a trekking agency to provide guides and porters and handle the trip's logistics. I would recommend that you love the wilderness and be willing to get in good physical shape while on the trail.

If you don't want to commit to the whole Great Himalaya Trail, plenty of shorter sections can be done with or without guides. For recommendations, check out my list of the Best Treks in Nepal.

Time Frame

Prayer flags flutter over a stream in Nepal
Prayer flags

I spent four and a half months in Nepal for this trek and hiked for three of those months. I made four trips back to the city to resupply, during which time I took a week off from hiking.

Sometimes, I hiked all day until just before sunset, and sometimes, I stopped walking in the afternoon.

If you want to take the trail at a leisurely pace and have plenty of time to enjoy the cultural experience, give yourself four to five months. If you put in long days and finish the trail quickly, give yourself three months or less.

The Great Himalaya Trail has two options for routes: the high route and the low route. The high route goes through the mountains at higher elevations, has colder temperatures, and is farther from cities and road access. The low route offers more jungle and rice terrace scenery, an abundance of villages not often visited by tourists, and hotter weather.

I combined the two routes, essentially sticking to the low route during the spring and the high route during the summer. I started my hike in late March, and it was good timing for my route.

If you only want to do the low route, you can do it at any time of year. However, remember that summer will be unbearably hot, and winter at higher elevations will be cold.

The timeframe for the high route will vary according to snowfall, but April and May are likely good months to begin. If you plan to hike fast, October and November have ideal weather conditions for both routes. Summer is monsoon season, and it typically rains every afternoon.

Final Thoughts

Buckey and Megan
My hiking partner Buckey and I

A lot of logistical planning goes into a Great Himalaya Trail hike before you even arrive in Nepal. From selecting gear to going over maps to organizing permits and transportation, this hike involves much more than just walking. And often, all the planning has to be adjusted once you are there. This would be a fantastic hike for people who love logistics, have flexible personalities, and desire to traverse the world's highest mountain range.

Mexico City Street Art: An Epic Graffiti Tour

Street art and graffiti tour in Mexico City
The child is an example of hyperrealism and was painted by a different artist than the other figures.

Laura Ainscough, Director of Stylewalk MX, was the first to offer a guided tour of Mexico City street art. So, meeting Laura at an entrepreneur conference I attended in Mexico City was a pleasant surprise. As I was staying the week beyond the conference, I took her up on an offer to experience her most popular tour firsthand.

Previously, I'd wandered the streets of Buenos Aires' trendy Palermo Soho district on a graffiti and street art tour that was one of the highlights of my six-week stay. I also grew to appreciate street art during my three years living in Medellin, Colombia.

Rhino mural - Mexico City
This rhino mural was one of my favorites of the day

Street Art Tour

A friend from the conference who had grown up painting graffiti in New York City joined me. On a weekday afternoon, we met our local guide, Jokan Deka, for the 2.5-hour walking tour in downtown Mexico City.

Jokan is an affable tattoo artist, illustrator, and DJ with several years of experience working for the well-regarded Fifty-24 MX gallery. The fact that Stylewalk MX's guides are all involved in the street art scene makes all the difference, as it lends their tours a sense of authenticity and credibility.

Boar mural - Mexico City
Boar mural

I learned a lot during our afternoon together from Jokan and my New Yorker friend. After visiting a few walls, we ducked into a paint shop up a flight of heavily graffitied stairs. Inside, you could find every shade of spray paint imaginable from multiple manufacturers.

In addition to the paint cans, I learned you could also buy plastic caps that help you, as the artist, control the width of the spray paint coming out of the can. I had no idea there was such a mature market for artists' supplies!

As in Buenos Aires, painting Mexico City street art is illegal unless you have the property owner's permission.

Graffiti in Mexico City
Graffiti

My biggest takeaway from the tour was the distinction between graffiti and street art. Graffiti came first, as gangs in NYC used it to mark their territory. It primarily consists of tags, abbreviated names, or nicknames of graffiti artists. These can be basic and ugly or incredibly intricate.

Aesthetically, it can be challenging for the average person to pick up on subtle differences in the artistry that show one tag is more skillfully painted than another. However, competition-worthy graffiti artists set themselves apart by using multiple colors, intricate designs, and unique styles. People with no formal art training typically paint graffiti.

Snail mural - Mexico City
Snail mural

Meanwhile, the more aesthetically pleasing murals that are a hallmark of street art are often painted by artists with some formal training. I prefer street art. It is more attractive to the eye and can represent local culture, history, and politics.

Street art adds to the environment, while most graffiti detracts from it. I know this may sound a petite bourgeois of me. Perhaps it's all the art history classes I took in college. We saw dozens of murals during the tour. Below are more of my favorites.

Mexico City Murals

Mural - Mexico City
Trippy mural
Psychedelic mural - Mexico City
Psychedelic mural. The mushrooms remind me of Alice in Wonderland.
Big graffiti - Mexico City
Monumental, colorful graffiti
Leopard mural - Mexico City
Leopard mural
Entrance to an urban garden, home to new murals painted every year for a street art contest.
Street art
One of the murals painted for the contest
Street art
This wall was one of our guide's favorites
Hip hop street art
Hip hop street art
Graffiti tour
My friend Justin and I had the chance to paint some tags on a wall outside a school.
Massive mural
Massive mural. This is one of my favorite walls due to the 3-D effect in the upper left corner.
Street art and graffiti
Street art on top, graffiti on the bottom
Colorful graffiti
Colorful graffiti
Creepy mural
Creepy mural
Alice in Wonderland
Alice in Wonderland inspired this one
Black and white
Black and white
Graffiti
This is an excellent example of how graffiti is constantly evolving as new artists add to walls.
Mexico mural
This Mexico mural was painted soon after Trump was elected or inaugurated and is part of the annual street art contest.

I highly recommend finding the time to take this Mexico City street art tour. It's a fun way to see a part of downtown Mexico City you might not otherwise see, and the artwork is incredible!

Tour Details

Type: Stylewalk MX offers private walking tours with English-speaking guides

Cost: The cost depends on the number of people and is subject to change.

As of September 2017, the cost is $138 for one person, $155 for two people, $165 for three people, and $171 for four people.

See the Stylewalk MX website for further details.

Tip: If you're traveling solo and want to lower the cost, ask around in your hostel or on social networks such as Couchsurfing to see if you can find more people to join you.

Length: 2.5 hours

Booking:  Visit the Stylewalk MX website to book your tour.

Accommodation:  I highly recommend staying in the park-filled, centrally-located Condesa neighborhood.

Room rentals are budget-friendly on Airbnb.

Otherwise, check out the top-ranked hostels on Hostelworld.

_________

I received a discounted rate for my private tour with Stylewalk MX. 

6 Important Things To Know Before Traveling To Brazil

Ipanema Beach, Rio de Janeiro (photo: Mike Vondran)

Are you thinking about a trip to Brazil in the near future?

Well, you're in for quite an adventure because there are truly tons of exciting things to do there to go along with the picturesque scenery.

Even though Brazil is the largest country in South America, there are many important things travelers may not be aware of.

To get the most out of your experience, there are several things that you need to be aware of before visiting Brazil.

And if you're a U.S. citizen, don't forget you'll need to get a Brazilian visa in advance of arrival. You can get it here: https://www.travelvisapro.com/visa/brazil

Let's dive in.

English is Not Very Common

If you're an English-speaking American, it's highly likely that you're going to experience a language barrier.

You'll quickly find that there are not many English speakers outside of Rio de Janeiro or São Paulo.

While a lot of Brazilians have seen most American movies and know a lot of American songs, Portuguese is still their primary language, and English is not well understood due to the weak education system.

With that being said, you'll find the Brazilian citizens are very hospitable and will do whatever they can to find a way to communicate with you.

It will help for you to learn some key phrases or buy a translation book in advance.

Get Ready to Experience the Outdoors

If you like to be cooped up indoors playing video games or watching TV, Brazil is not the country for you.

Brazil is most certainly an outdoor culture country with their penchant for sidewalk cafes, beaches, and backyard barbecues.

When you combine this with their tropical climate, you'll find that most Brazilians prefer to bask in the sun outdoors; there are tons of amazing environments for you to soak up.

Beach, waterfalls, and jungles are among some of the most popular outdoor attractions that can be found within this country.

In fact, most people don't know that Brazil is one of the largest wetlands in the world, with 70,000 miles of wetlands in the southwestern region.

You'll also find over 300 different species of mammals and birds there, as well.

The Middle Class is Almost Non-Existent

It's true that over the past decade or so the economy has significantly improved in Brazil, but for the most part you will find that there really is no middle class.

Most of the citizens are either well off or dirt poor, and you will notice a huge economic gap between the two.

In fact, a huge part of the population lives on a day-to-day basis trying to survive.

It was reported that in 2010, six percent of the population was residing in the slums (favelas), which typically develop around the borders of the country's largest cities.

With no security, police stations, hospitals, and rising drug problems, you probably want to steer clear of these areas as much as possible during your trip.

That said, tourists are not usually targeted in these regions, but it still never hurts to practice safe techniques like leaving most of your money in your hostel or hotel safe, never traveling to these areas at night, and using Uber or ride-hailing apps where available.

Carnaval 2014
Carnaval in Rio 2014 (photo: Nicolas de Camaret)

Little to No Personal Space

If you've been to Latin America before you might already know that there is little room for personal space.

Brazil is no different, as it is customary for men to kiss women on both cheeks when meeting. This is even true for two total strangers.

You might find that some guys even take on this kind of behavior with other men.

There's also a lot of hands-on dancing, and hugging is an intricate part of the way that the locals introduce themselves to tourists.

Simply put, you are going to have your personal space invaded when meeting and greeting the locals.

Try to Stay Away from Religion

With a bit of research, you will find that most Brazilians are Catholic, and the Catholic doctrine is rooted pretty deep in the Brazilian culture. However, for some reason, the locals do not like discussing their religion.

In fact, it is almost recommended to not bring up religion at all when speaking with the locals.

So, if you come to Brazil seeking religious enlightenment, you might have chosen the wrong country.

Estadio Nacional Mane Garrincha
Estadio Nacional Mane Garrincha (photo: A C Moraes)

Sensitivity for Their Country

Brazilians are very sensitive when it comes to the way foreigners view their country.

You might find that locals and countrymen talk about things that they do not like about Brazil all the time, but they don’t like it when foreigners point out the things they don’t like.

Always try to be respectful, because you might feel the same way about the country you live in.

______

This article was provided by and published in partnership with Travel Visa Pro.

How to Find the Best Central Park Tour

Central Park - New York City
Central Park, outside the Dakota Building where the climax of Ghostbusters was filmed (photo: Phil Whitehouse)

New York City's Central Park is one of the greatest urban green spaces in the world, which is also why spending time there is a must for any first time visitor to the city.

While there's always the option to stroll through the park on your own, there are benefits to taking a tour.

There are a variety of Central Park tours available. For example, you can choose to stroll around the park on foot, with a guide, or as part of a group tour.

One example is a walking tour which shows participants locations for TV shows and films which feature scenes in Central Park. For example, Gossip Girl and When Harry Met Sally were both shot in the park, and this just scratches the surface.

If you want a fun walking tour and you love television and film, searching for this sort of tour is a smart strategy.

It's not the only type of walking tour offered, so you'll have plenty of options, but it's a fun choice, and a lot of people do enjoy taking photos of themselves at the famous Central Park movie locations.

Bethesda Fountain, Central Park - NYC
Bethesda Fountain (photo: Rach)

Is a Bike Tour Right for You?

Another option is a bike tour. If you love being active and cycling is something you enjoy, booking one of these tours will allow you to get some healthy exercise and fresh air while you explore all the park's key attractions, from Bethesda Fountain to the Reservoir to Strawberry Fields and beyond. This type of group tour will allow to see a lot of the six-mile park.

In general, with any tour, you'll meet at the headquarters of the tour company and then leave as a group.

When you book, you should be given instructions on exactly where you'll need to be at the appointed time. A good tour company will make sure that there is no confusion.

This is why we recommend checking customer reviews for bike tours or other types of tours that you're interested in before you complete a booking.

It's important to book with a reputable tour company which earns accolades from real-life tourists and "townies."

Band in Central Park
Band in Central Park (photo: PROChristine und Hagen Graf)

Pedicab Tours are Popular Choices

Pedicab tours are amazing experiences. They differ from walking tours and bike tours because people who sign up for them don't need to walk or cycle on their own to see things.

Instead, they're able to sit back and relax while their pedicab operators do all the hard work.

The chances are that you've already pounded the pavement pretty extensively while exploring the Big Apple, so there's real value in taking some time out in Central Park and letting a pedicab operator take you around to see all the sights.

If it's a colder day, wear layers to stay warm. These tours usually run year-round, as the park is gorgeous in all four seasons.

Bring your camera and listen to your guide as he or she explains the history of everything that you pass by. You'll be able to take photos and see quite a lot on a one-hour or two-hour tour!

Pedicabs are comfortable for passengers. You can travel alone, just you and your tour operator, or you can go with another person. Most pedicabs fit two people in the back. Larger groups can rent a few pedicabs and travel together.

The length of the tour depends on personal preference and budget. Be sure to price any tours that you're interested in across a few different providers.

Some overcharge, but the good companies offer fair prices, and it's pretty easy to find the most highly rated tour operators, for walking, bike or pedicab tours, just by reading reviews at TripAdvisor and doing some other research, such as visiting the official websites of tour companies.

Tours Offer So Many Benefits

It's true that Central Park may be explored on foot or by rental bike. You don't need to go on a tour to experience the park.

However, tour operators know everything about the park. They're familiar with every inch of this huge park, and they know tons of interesting facts about its history.

If you're not familiar with the park, you'll find that signing on for a tour is an excellent way to learn about it and it's also a wonderful way to make sure that you won't miss any of its Instagram-worthy attractions.

If you're on your own or with another person who doesn't know the park well, you may get lost or miss popular places.

As well, there is safety in numbers, so checking out the park with a group, or while being transported by a pedicab driver, is a great way to stay safe. You won't be alone, and this is a good thing.

Book a Central Park Tours NYC Today

You deserve to have an exceptional holiday in New York. Also, if you're there on business, taking time for a tour will allow you to put work stress behind you for a little while.

Since Central Park is one of the Big Apple's not-to-be-missed attractions, it's well worth booking a tour.

Now that we've shared information about three of the most popular Central Park tour options, you'll be ready to choose the one which is best for you. It's all about considering your needs.

Do you love to work, or would you prefer to cycle in a group?

If you don't want to do either, then a pedicab tour which allows you to enjoy the park without needing to expend any energy is truly ideal. It's also a good option for those who don't have mobility, such as the elderly.

__________

This article was provided and brought to you in partnership with Peter Pen Tours.


6 Reasons Mexico is the Ultimate Budget Backpacking Destination

Mexico is, hands down, one of our favorite countries to backpack in. How can we be so confident?

It's easy: when a destination is not only incredibly fun to travel to but also doesn't break the bank, it's impossible not to want to go back again and again.

Here's why Mexico is the ultimate budget backpacking destination.

Budget Backpacking Mexico: Palenque Ruins
Palenque ruins

1. Mexico is cheap

Let's get this obvious point out of the way first: for a place to be a fantastic budget backpacking destination, it needs to be easy to travel on a budget.

In Mexico, budget backpacking is incredibly exciting and straightforward--and depending on how strict of a budget you are on, you may barely need to pinch your pennies.

A great street food meal will set you back a couple of dollars (don't leave Mexico without devouring all the tacos al pastor you can!), and a simple sit-down meal in a restaurant can be had for around $5.

First-class buses cost about $1/hour to ride, including a reasonable seat and air-conditioning, and sometimes Wi-Fi!

2. You'll never run out of things to do

Mexico's backpacking hot spots are full of any excursion you can think of: whether you want to go horseback riding, explore ruins, try your hand at whitewater rafting, hike, tour a tequila factory (complete with tastings, of course), learn to surf, go scuba diving in cenotes, or just about any other adventure activity you can think of, Mexico has you covered.

In most destinations (away from spots like the luxurious Riviera Maya), these tours are incredibly affordable.

In one of our favorite destinations in Mexico, San Cristobal de las Casas, we took all-day, multi-stop tours for under $20 each.

A simple afternoon of horseback riding for three hours ran $10/person--you can't beat that!

Budget Backpacking Mexico: Hierve el Agua
Hierve el Agua in Oaxaca

3. Mexico is easy to get around

While backpacking Mexico on a budget, ADO buses will become your best friend: they're comfortable, inexpensive, and run everywhere.

We took ADO buses for as short as a couple of hours and as long as fourteen hours and never had any issues whatsoever.

Whenever you get to your destination, taxis will likely be just a few dollars for a short ride (unless you're in all-inclusive hotspots like Cancun and Playa del Carmen), or, for the shoestring budget traveler, jump into a collectivo--vans that act as shared taxis and cost as little as $0.25 to ride.

4. The natural diversity is incredible

Rolling mountains? Dramatic canyons? Enormous waterfalls? Pink lakes? Gorgeous beaches?

Check, check, check, check, and check.

Mexico has it all: whether you're looking for a tropical beach climate, cool mountain air, a desert experience, or something completely different, Mexico has you covered at an affordable price tag.

To see a different side of the Yucatan Peninsula from the famous Riviera Maya, check out El Cuyo.

Budget Backpacking Mexico: El Chiflon
El Chiflon

5. Mexican food is delicious

You won't be tempted to hang out in tourist restaurants and pay inflated prices in Mexico: the local food is too good.

We still dream about the plates of huevos rancheros we ate on Isla Holbox. The eggs were served with rice, beans, avocado, and juice for $3.50!

If you do get an occasional craving for a taste of home and duck into a fast food place, don't worry: restaurants like McDonald's and Subway can run a little cheaper in most parts of Mexico than in the USA.

6. Cities, nature, and towns are easily accessible

Thanks to Mexico's incredibly diverse landscape and its excellent bus system, it's unnecessary to choose one "type" of trip when backpacking in Mexico.

Feel free to follow up a city break with a few days in the jungle, or head to the beach and then take a few days in a small town.

Ultimately, the word that we kept coming back to when backpacking Mexico was value.

Mexico is an inexpensive destination--but that alone doesn't make it one of the best budget backpacking destinations.

The quality of backpacking in Mexico, from excellent buses to delicious food to gorgeous landscapes, makes this affordable backpacking destination one that's impossible to ignore.

5 Ways to Relax While Traveling

Pool in Santorini - Greece (photo: David Lee)

We all have the best intentions when it comes to traveling. There'll be no time for breaks, no minute wasted, and so we cram every possible activity into the time available.

For years I've done this, and every vacation I’ve burnt myself out. Sometimes I’m ready to go home a couple of days before the trip ends. Other times, I get sick in the middle.

Inevitably, I cancel something I’ve planned and, feeling guilty for missing out; I have a little pity party in my hostel or hotel room.

Eventually, I learned that taking time to relax while traveling is essential for optimizing your time.

You might have to miss out on a couple of sites or adventures, but it will make the rest that much more worth it.

Here are five ways to relax while traveling.

1. Spend time by the pool (instead of the beach)

The ocean is simply wondrous. It is immense, constantly changing, and can be a lot of fun, especially for surfers.

All of this makes beach time that much more intense. And while some manage to relax by the beach, many others cannot manage just to lie there.

Even if you can spread out under an umbrella, you have to contend with the sand, making it difficult to read, eat, drink, and so on.

Occasionally taking the time to lie by a hotel or public pool is that much more relaxing.

You can float around in the pool without worrying about waves. You can have lunch without worrying about chewing on sand.

It’s not nearly as impressive as what nature gave us, but it’s a good way to unwind.

2. Watch TV?!

For some, the thought of watching television in a foreign country is sacrilegious. You're in an exotic location, but you're stuck in front of a screen?!

However, some TV time can be good for you. It’s a passive, enjoyable waste of time that you can use to recharge your batteries. And with VPNs available to unblock Netflix overseas, you can easily access the content you miss from home.

3. Eat in

It is tempting to eat out every night while traveling, trying new cuisine and mixing with the locals. But if you need time off, eating in is everything.

The best way to eat like the locals is actually to shop at a grocery store, after all. You'll save a lot of money this way, and eat without the stress of finding a restaurant and pretending that you aren't wishing for bed.

4. Meditate

Meditation is probably the most effective way to take care of yourself.

In a foreign country, with so much to take in, it’s easy to lose track of your mind and soul.

Taking a moment to step back and check in will allow you not only to relax but to appreciate all that you've seen and done so far.

5. Exercise

While we don’t associate exercise with relaxation, it’s an excellent way to remove yourself from the stress of traveling.

It grounds you, reminding you that your core self is still stable, and keeps you healthy. It also rejuvenates you, readying you for the next stage of your journey.

_____

This story was brought to you in partnership with Best Online Reviews.

Italy's Best Destinations for Vegetarian Travelers

Piazza San Carlo - Turin - Italy
Piazza San Carlo - Turin - Italy (photo: Nicola)

Traveling as a vegetarian can be difficult. The menus may be in a language you can’t read, and if you have dietary restrictions, this can seem like a nightmare. Some restaurants might not have anything suitable, and you might just want to give up and go home.

Luckily, traveling through Italy as a vegetarian is pretty easy as the traditional diet consists of plenty of grains, bread, fresh produce, cheese, and salads, and different kinds of legumes.

If you are not sure whether a dish has meat or not in it just ask your server for ”vegeteriano!"

Turin

Turin is a city that is situated in the north west of Italy at the foot of the Alps.

The new mayor is on a mission to make Turin “Italy’s most Vegetarian City."

It is effortless to eat as a vegan/vegetarian here as there are many vegetarian and vegan cafes.

You can enjoy a whole variety of food including simple risotto dishes flavored with saffron or porcini mushrooms.

Be sure to try all the freshly made local cheeses, and Venere Nero, black grain rice that turns blue when cooked.

Alberobello - Puglia - Italy
Alberobello in Puglia, Italy (photo: Janssem Cardoso)

Puglia

Puglia is in the heel of the boot of Italy, and it is a stunning region known for its beautiful hillside towns and hundreds of kilometers of coastline filled with beaches.

The city of Alberobello is a UNESCO World Heritage site because of trulli buildings, a unique style of building with cone shaped roofs.

For an authentic experience, you can even stay in a traditional trulli, or there are plenty of luxury villas if you’d prefer something more modern.

The region is known for its simple, fresh food and you can easily find food in restaurants based around the key ingredients like olives, olive oil, home-grown spices, chickpeas, and fresh vegetables.

Pizette is a favorite snack that is a mini pizza with tomatoes and cheese that you can quickly devour on the beach.

Rome

Once you have visited all the delights of Rome like The Colosseum, Vatican City, and The Trevi Fountain you will be pretty hungry.

Rome is a great city for vegetarians. You can easily pick up thick sandwiches stuffed with grilled eggplant, garlic, and other tasty spices.

Pizza is great too, and the traditional toppings are a tomato sauce with tomatoes and cheese.

Cacio e Pepe
Cacio e Pepe (photo: Erin)

Amalfi Coast

This stunning area is known for the small towns of Positano, Ravello, Sorrento, and Amalfi.

It is a lovely place to rent a car and go for a scenic drive or rent a boat and explore the coast.

One of the best dishes you can try is Cacio e Pepe which is a pasta dish with a sauce made from pepper and cheese.

Finish your meal with Limoncello, a traditional liqueur that is made from local lemons.

Florence

Florence is the birthplace of the renaissance, and this metropolitan city is filled with wondrous treasures like Michelangelo’s statue of David, and other works by Leonardo de Vinci and, Donatello.

You can’t leave Italy without doing a tour of the gem of a city. There are quite a few veggie cafes and restaurants in Florence, and you’ll enjoy sampling the schiacciata; a flat bread that is drizzled with olive oil and sprinkled with salt and you can have it with Zuppa di fagioli, a soup that is made with tomatoes, cannellini beans, garlic, sage, and salt.

Pasta alla Norma
Pasta alla Norma (photo: Stacy)

Sicily

The food of Sicily has been influenced over time by the French, Arabic and North African settlers who live there.

Don’t miss the opportunity to try Pasta alla Norma, a short pasta served with a sauce made form Aubergine, tomato sauce, and salted ricotta.

________

This story was brought to you in partnership with Oliver's Travels and Italy 4 Real.


5 Most Famous Hikes in Hong Kong (All Free!)

Lugard Road, Victoria Peak - one of several famous hikes in Hong Kong
Lugard Road, Victoria Peak - Hong Kong

While most people picture Hong Kong as the city of skyscrapers and crowded streets, it has become increasingly clear that there is another side.

In fact, Hong Kong’s dense city structures are punctuated with mountains and hills, many of which boast stunning hikes.

With the popularity of social media and healthy living rising, many Hong Kongers and tourists alike venture off to these scenic trails.

Below are five of the most famous hikes in Hong Kong (including the easiest routes).

1. The Peak

Many people take the Peak Tram up to the Peak, go to the Sky Terrace and go back down, but you can also hike it!

The easiest route on this list, you can get a unique panorama of the Kowloon Peninsular and even Tsing Yi Island on a clear day along Lugard Road.

A long, paved walking path, the Lugard Road is suitable for all hiking levels.

You can stroll along it for half an hour before turning back, or go all the way towards Hong Kong University area.

In fact, you can go up West High Hill for a 360-degree view that includes the Peak, too!

Dragon's Back - Hong Kong
View from Dragon's Back

2. Dragon's Back

The hiking trails that has everyone talking, Dragon’s Back was picked by the Times as the best urban hiking trail a few years back.

The name stems from the fact that the trail runs along the mountain ridge, extending parallel to the coastline.

It is located in idyllic south Hong Kong Island, and the trail start can be reached by bus.

Aside from the steps that go up and down at the beginning and end, the trail is relatively flat.

If you want the Instagram-worthy shot, then it’s best to head to the southern end of the trail facing the Shek O Village.

Cape D'Auguilar - Hong Kong
Cape D'Auguilar

3. Cape D'Aguilar

More of a walk than a hike, Cape D’Aguilar is on the southern tip of the Aguilar peninsular south of Dragon’s Back.

You would mostly be walking along a concrete road, and those who want to cut down their hike time can even get a taxi in, though otherwise the area is restricted.

Only until you reach the end do you need to hike for five to ten minutes to reach the cape.

The most famous landmark there is the rocky beach with natural arches, oceanography center (but it’s not open) with a fake whale skeleton, and the thunder cave.

For the more seasoned hikers, there is a lighthouse half way down the road. However, the route down is steep and difficult to find, and you can also glimpse the structure from above.

pineapple hill hong kong laugh travel eat

4. Pineapple Mountain

Hong Kong has a sub-tropical climate, which means most of the unoccupied land are vegetated. However, Pineapple Mountain is the exception.

Dubbed as the Hong Kong Grand Canyon, this trail is deep in Tuen Mun, New Territories.

While it appears larger in photos, it is still a unique sight in the Hong Kong countryside. Hence it drew many Instagrammers to the spot.

Aside from the logistic of getting into and out of the trail, it is an easy hike.

If you are interested in going, I have a detailed guide on how to reach Pineapple Mountain.

Fun fact: the trail crosses a military zone!

sunset peak lantau island hong kong laugh travel eat

5. Sunset Peak

Lantau Island is famous for the Big Buddha and cable car, but Sunset Peak is also a star attraction.

One of the highest peaks in Hong Kong, this is the hardest trail on the list but still attempted by many due to its scenic views.

The hike takes around five hours, three up and two down.

Every September to November is the silver grass season, making the mountain top a sea of swaying grass.

Other noteworthy sites on top are the old Lantau Village, now abandoned, and the sunset or sunrise view.

Be warned that while the route is well paved, you must bring enough water going up and wear appropriate footwear.

If you want to know more about hiking in Hong Kong, I’ve got more information on my Hong Kong Hiking page on my blog.

Planning a Round the World Trip Can Be Simple and Easy

Hagia Sophia - Istanbul (photo: Dave Lee)

Have you ever dreamt of traveling around the world?

It starts with a typical round trip flight to a country of your choice in South East Asia or South America after college graduation or for vacation.

For older readers and empty nesters, it's how you've always looked forward to spending your retirement.

Imagine a scenario where you could add more destinations spread across different continents to your trip itinerary. This could be your dream trip, a once-in-a-lifetime adventure.

More and more people are stepping out of their comfort zones; long-term and gap year travel is gaining momentum and acceptance.

All it takes is a bit of self-belief to take that leap of faith and set off to see the world.

Embarking on a long-term trip isn't just for the wealthy or younger millennial generation. No matter who you are and what your reasons, traveling around the world can be a game-changer.

Inspiration

Traveling around the world for months, or even years is quite different from your regular annual vacation.

It takes a lot of courage to step away from your daily routines and comforts of home.

It's going to change you as a person, but change you for the better! The more cultures you discover, the more you'll learn about yourself and humanity.

Expanding your horizons and seeing the world is a life-changing experience, so it's not hard to understand the reasons why a RTW trip appeals to many.

Such a trip can open your mind to new possibilities you may not even be able to imagine from your office cubicle. So, the idea is to break free from your mental shackles and fulfill your curiosity quotient.

Overcoming fear is necessary, and you'll need to put to rest any excuses for why you can't take a big trip.

Going on a round-the-world sojourn is a rewarding experience. A gap year on your résumé with a travel experience is something unique and will help you stand out from the crowd. This is the kind of invaluable real world education you can't get in a classroom.

Each one of us has an ‘adventurer’ within us, and just a bit of introspection and a sense of realization is what we have to do to say ‘yes’ to traveling the world.

It's not difficult to open our mind and break down the barriers that restrict us from seeing the world to its fullest.

Venice, Italy (photo: Dave Lee)

RTW Tickets

To fulfill your dream trip, you'll want to get ahold of a Round The World (RTW) ticket which lets you travel the world on a single ticket. Yes, traveling the world on a single ticket is possible.

It doesn't cost a fortune, and with the right amount of planning, a Round The World Ticket is affordable irrespective of your age or financial capabilities.

You can buy a RTW ticket for as little as about $2,000 for a fantastic itinerary which includes:

CHICAGO/NEW YORK - BOGOTA - RIO DE JANERIO - LONDON - MADRID - CHICAGO/NEW YORK /WASHINGTON DC

A RTW ticket is just like any other plane ticket; only it has more stops and destinations spread across the world.

It uses a combination of airlines, which may or may not be their partners. It's a series of city-to-city tickets rolled into one unified ticket.

It's certainly a convenient way to fly around the world as you don't have to worry about booking your tickets at various intervals. Your one ticket already has each stop booked in advance.

A RTW ticket is a complex maze involving multiple flights, sectors, timings, dates, destinations, stopovers, overland travel and a bagful of experiences and stories.
Looking from a convenience angle, they can be helpful and are an excellent value-for-money option.

It certainly helps you save both time and money. Irrespective of your style and preference of traveling, these tickets are the best bet for you.

Round the world trip flight map
Flight map (photo: Dave Lee)

RTW Specialists

Getting your around-the-world-trip planned through a specialist agency comes with a lot of advantages.

The first important aspect is that of personalized service. If you've booked your RTW tickets with a specialized agency, you'll always have an agent assisting you throughout your trip.

Imagine a scenario where you miss your flight, or your flight gets canceled. Only an agent can bail you out of such situation, not a robot (in the case of alliances where ticket prices are automated)!

The other advantage is that you'll enjoy reasonable savings while deciding the dates and destinations of your itinerary.

The travel experts at Ticketsroundtheworld specialize in creating personalized and customized tickets and itineraries for travelers who want to explore the world. They take out all the stress in planning your trip and make it incredibly easy and affordable.

Their experts are adept at going through the complex maze of combining airlines, sectors, dates, flight schedules, stopovers and what not.

Apart from their expertise on round the world airfare and flights, they'll have recommendations about the dates of travel where you can get lower airfares.

They can recommend interesting stopovers you might want to consider adding to your itinerary and offer great options regarding flexibility and saving money.

So, what’s stopping you from getting your hands on a ticket to explore the world? Get your own personalized RTW ticket and see the experiences that lie in store for you.

________

This story was provided by and brought to you in partnership with Ticketsroundtheworld.

14 Things to Know Before You Arrive in Abu Dhabi

Abu Dhabi Sky Line
Abu Dhabi skyline

Abu Dhabi is the United Arab Emirates (UAE) capital and is known for its cultural attractions and family getaways.

From traveling in the fastest roller coaster in the world to having a cappuccino that's sprinkled with gold, Abu Dhabi has the right combination of all experiences.

Travelers enjoy stunning beaches, along with historical and cultural attractions.

Tip: At the end of this article is an infographic (you can download for free) that Adventure Emirates, an Abu Dhabi-based tour company, put together for first-time visitors.

Before you plan your vacation to Abu Dhabi, consider the following.

At a Glance

  • The gateway of Emirates - Dubai International Airport
  • Languages - Arabic. English is widely spoken.
  • Time zone - GMT +3.00 hours
  • Religion - Islam, many other religions are practiced by expats
  • Telephone Code - +971

The Highlights of Abu Dhabi

Abu Dhabi is a destination that you can visit year-round.

The must-dos in Abu Dhabi include a visit to the Corniche beach to enjoy the sun, a thrilling ride on the fastest roller-coaster in the world at Ferrari World, a taste of the gold-flecked cappuccino at the Emiratis Palace, and a visit to the archaeological and historical sites of Abu Dhabi.

  • A visit to Yas Island - Yas Island is the place to go if you want to enjoy a thrilling drive. The Yas Island is a must-do for speed lovers, featuring Ferrari-themed rides, exciting water slides, and the Formula One Circuit.
  • Al Ain - A historical site that features the life of Arabs of the bygone years up until the Stone Age, Al Ain is a UNESCO World Heritage Site.
  • Sheikh Zayed Grand Mosque - One of the largest mosques in the world, this grand mosque is designed to accommodate 41,000 worshippers at a time. It has 82 domes and is an architectural beauty.
  • Louvre Abu Dhabi - An exotic art gallery that will open at the end of 2017, the Louvre Abu Dhabi will include 23 galleries and over 600 pieces of art.
  • The Capital Gate - An architectural marvel, Capital Gate is the furthest-leaning man-made tower. It leans up to 18 degrees.
  • The Observation Deck - A great way to enjoy your afternoon drink would be to head up to the observation deck of the Etihad Towers Complex. Located on the 74th floor, this deck offers a stunning view of the surroundings.

The Climate

The best time to visit Abu Dhabi is from October to April. The potential rains and the wind keep the weather quite cool between 77F (25C) and 82F (28C).

From May to October, the heat and humidity can become unbearable.

Between June and September, the temperature can go up to 104F (40C).

Abu Dhabi malls and shopping

Dress Code

Pack clothing that is comfortable. The temperature may necessitate light clothing, but you might need to cover up once you enter the malls and hotels.

Being a country with Islamic culture, it is advisable to wear clothing covering the body, including the knees and shoulders.

Women might be required to wear a headscarf when visiting the mosques.

The Location

The capital of UAE, the city of Abu Dhabi, is the largest city in the region.

Abu Dhabi comprises 200 islands, 400km of coastline, and stretches of deserts and mountains.

The Al-Ain City is Abu Dhabi's hub in the eastern region.

The City of Abu Dhabi

Being the capital of UAE, Abu Dhabi is the country's business center, and the government operates from Abu Dhabi too.

Most of the businesses and international embassies are located in iconic buildings like the Etihad Towers.

Abu Dhabi is comprised of islands that are interconnected to the Persian Gulf from the Central West Coast.

The Saadiyat Island features stunning beaches. The Yas Island is known for its fun-filled activities, the Corniche beach is known for its spectacular sunsets, and the Sheikh Zayed Grand Mosque is an architectural marvel.

The Al Gharbia

Al Gharbia is the western region of Abu Dhabi. This occupies about two-thirds of the Abu Dhabi land.

Al Gharbia is comprised of remarkable golden dunes, ancient forts, and many miles of coastlines.

Al Gharbia features Liwa, a historic town that opens up to the oasis of Rub al Khali, also known as the Empty Quarter, the most extensive spread of desert in the world.

The Al Gharbia comprises the largest expanse of date plantations, featuring over 100,000 date palms.

The famous Qasr Al Sarab resort is a popular resort in Al Gharbia that offers the following activities:

  • Camel trekking
  • Dune bashing
  • Sandboarding
  • Dune dawn walks
  • Falconry shows
  • Camping
  • BBQ meals

If you want to take part and enjoy the Arab traditions and culture, then a visit to the Al Gharbia is a must.

Exciting events in Al Gharbia like camel beauty contests, date festivals, and hill climbs are popular Arab traditions.

Emirates Palace
Emirates Palace

Al Ain

A UNESCO World Heritage Site and the birthplace of Sheikh Zayed - the founding father of UAE, Al Ain means spring, as it once served as a place to find freshwater.

In history, Al-Ain served as a trading post for Arabian tribes.

The main features of Al Ain are the Al Ain Palace, Al Ain National Museum, and the Al Ain Oasis.

The Al Ain Oasis is spread across over 3,000 acres and features over 1,400 date palms.

Another exciting place to visit in Al Ain is the Jahili Fort. This was constructed as a summer residence for Sheikh Zayed in the 1890s, and then in the 1950s, it was expanded by the British.

Exciting activities available at the Jahili Fort include:

  • Wadi bashing (i.e., drive in a 4WD exploring the riverbeds of the Fort)
  • Hiking up the Jebel Hafeet mountain
  • Visiting the busy camel market
  • Go-karting racing occurs at Al Ain Raceway, which features a 1.6km go-kart track (making it the biggest in the Arabian region).

Restaurants and Cuisine

The restaurants of Abu Dhabi offer international cuisine in addition to traditional Arabian cuisine. You can also enjoy great food branded under the names of famous global chefs.

The local Arabian cuisine comprises many delicious flavors like cinnamon, saffron, turmeric, dried fruit, limes, and nuts. This adds aroma and a beautiful look to the food.

Some of the great Arabian dishes include:

  • The Mezze Platter
  • Al Harees - a dish that is a combination of meat and wheat that is cooked in a clay pot and garnished with ghee
  • Al Majboos - a spicy meat dish that bursts with flavor
  • Al Madrooba - salted fish cooked in a spicy way and served with different sauces

The must-try dessert is baklava, and it's best enjoyed with an Arabian coffee.

Abu Dhabi Culture

The Arabian Culture

Nomads were the first people to travel through the Arabian sands of Abu Dhabi in search of pastures for their camels.

Before the establishment of buildings and cities, it was just a place for travelers. The oasis was the main attraction in Abu Dhabi for the nomads.

Gradually, irrigation systems were established, known as Falaj, and it was used to cultivate date palms.

Abu Dhabi began undergoing a revolution about 50 years ago. Though there was a significant boost in economic development, Abu Dhabi has preserved its culture and traditions.

Dhow Sailing, Falconry, and camel racing are some of the traditional activities of Abu Dhabi.

Islam is the primary religion, and since it is the way of life of Arabs, both men and women wear conservative clothing.

Men dress in a kandura - a full-length white robe and women dress in an abaya - a full-length black robe with a headscarf known as sheyla.

Animals and Wildlife

The once-barren land is now home to lush date palms, acacia, and eucalyptus trees.

Abu Dhabi is home to 54 species of reptiles. The Gulf Coast is also home to mammals like dolphins, sharks, whales, and dugongs.

Abu Dhabi has the second largest population of dugongs in the world, with authorities taking various measures to protect these creatures.

Sir Bani Yas Island is home to a nature reserve that comprises 13,000 free animals.

The Ras Al Khaimah is a must-visit destination for the perfect combination of relaxation and adventure.

The History

Abu Dhabi was just a passing place for tribal Bedouins. It was in 1761 that the Bani Yas tribe settled in Abu Dhabi around the Liwa Oasis.

With the pearl trade established in the 19th century, there was a boom in economic growth.

In 1892, Britain signed an agreement to serve as the protectorate. In the 1950s, oil was discovered; the first oil shipment left Abu Dhabi in 1962.

After the UK withdrew from the protectorate role, six Emirati groups joined hands to bring about the Federation, and Abu Dhabi was made the capital in 1971.

Louvre Abu Dhabi
Louvre Abu Dhabi

Attractions of Abu Dhabi

Saadiyat Island

An upcoming cultural quarter of Abu Dhabi, Saadiyat Island is famous for its stunning beaches just a seven-minute drive from downtown.

The Zayed National Museum, Louvre Abu Dhabi, and Guggenheim Abu Dhabi are under construction and open for tourists soon.

Currently, the attractions of the Saadiyat Island are: Manarat Al Saadiyat - the visitor center, five-star resorts - St. Regis Saadiyat Island Resort, and Park Hyatt Abu Dhabi or visit the Saadiyat Beach club that is home to a 400-meter stretch of beaches and exotic restaurants.

Sir Bani Yas Island

An Island that houses the Arabian wildlife park and is home to over 13,000 animals. Sir Bani Yas Island is one of the Desert Islands of Al Gharbia.

All hotels are eco-friendly and are designed in a way that preserves the environment.

When you visit Sir Bani Yas Island, there are many activities that you can take part in, visit well-designed stables and historical sites.

A Christian Monastery that was built in 600AD is a primary historical attraction of the city.

The animals that you can see on the Island are the Arabian Oryx, gazelles, giraffes, hyenas, and cheetahs.

Yas Island

An artificial Island, the Yas Island is a must-visit for every tourist; it's the place to come for the adventure and fun-filled activities.

The Yas Island is home to the world's fastest roller coaster - Formula Rossa, which reaches a speed of 250kph in 4.9 seconds.

The Ferrari World indoor theme park and the Formula One racing Track ensure that adults and kids enjoy every second.

Abu Dhabi Grand Mosuqe

Liwa Oasis

The Liwa Oasis is located amidst a stretch of desert and dunes.

Located 250km south of Abu Dhabi, the Liwa Oasis is home to the largest dune known as Moreeb. Liwa Oasis was also the birthplace of the rulers of Dubai and Abu Dhabi.

Sheikh Zayed Grand Mosque

The largest mosque in Abu Dhabi, the Sheikh Zayed Grand Mosque, is built in white marble and features 82 domes, four minarets, and the largest Iranian hand-knitted carpet.

Built by Sheikh Zayed, this mosque is open daily to visitors (except on Friday mornings, for worshippers only). You can enjoy a mesmerizing view of the sunset in this mosque.

Emirates Palace

A must-visit attraction of Abu Dhabi, the Emirates Palace is a 7-star hotel and one of the most expensive hotels ever built.

The main features of this palace are its sand color, 114 domes, and gold flake cappuccinos.

Al Ain Jabel Hafeet
Al Ain Jabel Hafeet

Jebel Hafeet

The 1,240-meter high limestone mountain, Jebel Hafeet, is the second tallest peak in the UAE.

This mountain is home to 500 ancient tombs and wildlife species like red foxes, feral cats, and the rock hyrax.

The best way to visit Jebel Hafeet would be to drive, but you can cycle up to the peak if you are up for the challenge.

Some of the available activities on the way to Jebel Hafeet are white water rafting, kayaking, and surfing.

Corniche

A beautiful attraction of Abu Dhabi, Corniche comprises 8km of manicured seafront promenade that houses kids' play areas, cycle lanes, cafes, and restaurants.

Corniche Beach has been separated for family, singles, and the general public.

Visa for Abu Dhabi

Citizens of the following countries can get a visa on arrival: Australia, Andorra, Brunei, Canada, Hong Kong, Ireland, Japan, Malaysia, Monaco, New Zealand, San Marino, South Korea, Singapore, United States of America (USA), United Kingdom (UK), and the Vatican City.

You can fly to any UAE airport. This visa is valid for 30 days and can be obtained free of charge.

You can get a visa on arrival with a validity period of 90 days if you are traveling from these countries: Austria, Bulgaria, Belgium, Czech Republic, Croatia, Cyprus, Denmark, Estonia, France, Finland, Greece, Germany, Hungary, Italy, Iceland, Liechtenstein, Latvia, Luxembourg, Lithuania, Malta, Norway, Netherlands, Portugal, Poland, Romania, Slovakia, Seychelles, Spain, Switzerland, Sweden, and Slovenia.

However, once the visa period expires, all passport holders will have to get a paid visa.

At Adventure Emirates, we're specialists in getting visas for our customers, so select our visa services to get the best deal.

For more information about Abu Dhabi, click the infographic below to see it at full size.

Adventure Emirate's Infographic

________

This article was brought to you in partnership with Adventure Emirates.

Best Treks in Nepal: Where to Hike in the Himalaya

For most travelers, trekking in the Himalayas is their main reason for visiting Nepal. The best treks in Nepal are not necessarily the ones you know. The most popular options in Nepal are the Annapurna Circuit and Everest Base Camp Trek, and with good reason.

Makalu Base Camp Trek in Nepal.
Makalu Base Camp Trek

They are easily accessible and designed to suit the needs of trekkers, with fellow travelers always around to befriend. However, crowds are typical in peak season, and there's little opportunity to experience local culture.

Over the last several years, I've spent a total of eight months exploring the trails of Nepal, from the most famous tourist tracks to remote, rarely visited corners of the country.

If you want to experience regions of Nepal that the Western world has not heavily influenced, or you want to get away from the crowds while you're in the Himalayas, check out some of the best treks in Nepal.

Nepal Treks

1. The Manaslu Circuit

Manaslu Circuit in the Himalayas.
Manaslu Circuit

The Manaslu Circuit makes this list for its variety of scenery along the route. Lower elevations are rich in dense forests, marijuana meadows, and golden wheat fields.

Much of the trek follows a narrow valley carved out by the Budhi Gandaki River. Finally, the valley opens up to views of snow-capped peaks and continues up to the Larke Pass, which is 5,200 meters (17,200 feet) high.

This would be an excellent place to start for first-time trekkers, as the trail's gradual grade makes it easier than most other Nepal treks.

  • Length of time: Two weeks
  • Camping or guest house: Guest houses
  • Start to finish: Soti Khola to Dharapani
  • Guide or no guide: As of now, a guide is mandatory for this region.

2. Makalu Base Camp

Eastern Nepal.
Eastern Nepal

Makalu Base Camp is an alternative for hikers who want to experience landscapes similar to those at Everest Base Camp while avoiding crowds. The trek begins in a sweltering jungle full of monkeys and mule trains.

At higher elevations, two 4,200-meter (14,000-foot) passes must be traversed in one day. Expect to hike over snow for most of this day.

The upper section of the Makalu Base Camp trek follows what is considered one of Nepal's most beautiful valleys.

The valley is surrounded by sheer cliffs with dozens of waterfalls cascading hundreds of meters down the walls, not unlike California's Yosemite National Park.

In the springtime, you will see and hear massive chunks of ice breaking off and tumbling down the peaks around you.

  • Length of time: Two weeks
  • Camping or guest house: Guesthouses, but bring a tent during the busy autumn season because space is limited.
  • Start to finish: Num to Num
  • Guide or no guide: A guide is not required, but I recommend that beginners bring one to navigate the passes.

3. Eastern Nepal

Dolpa.
Dolpa, Nepal

Eastern Nepal is perhaps the most customizable of all the treks on this list because of the abundance of trails and the variety of villages to begin and end at. This trek is for travelers who want to experience Nepal's rural culture and visit a place still untouched by Western tourism.

The trail winds through multiple villages every day, rice terraces, and up the "foothills" of the Himalayas, which would be considered mountains in any other country.

Expect locals to rush out of their homes to catch a glimpse of you and be ready to greet every curious child with "namaste."

This region of Nepal is different from all the more popular treks. There are no views of white peaks, you will rarely find English speakers, and you will sleep in your tent as often as you do in guest houses.

This trek can be done any time of year, although summertime would be uncomfortably hot and humid. Expect to meet lots of locals every day and no other tourists.

  • Length of time: One to three weeks. This section is customizable.
  • Camping or guest house: Both
  • Start to finish: I recommend the Taplejung-Tumlingtar route, although there are various routes.
  • Guide or no guide: Not required. A guide is unnecessary if you're comfortable with camping and asking for directions.

Related: Hiking the Great Himalaya Trail

4. Dolpa

I found Dolpa (sometimes spelled "Dolpo") to be Nepal's most beautiful and challenging trekking area. It's the most challenging because you have to hike over a pass that is 5,500 meters (18,200 feet) or higher every other day.

There are only a few guesthouses along the route, so you will most often camp and cook for yourself. The trail is not maintained well in some sections, and every day, there are places where you will die or get grievously injured if you fall.

Dolpa is a fantastic section to hike because of the scenery and culture. It's a barren desert region with endless mountains, limestone cliffs, and vertigo-inducing views. I regularly encountered tent settlements where small communities lived with herds of hundreds of sheep or yaks.

Dolpa provides many opportunities for wildlife sightings. I encountered blue sheep and Tibetan foxes and spent a morning following snow leopard tracks.

You won't be running into other trekkers on this route, except at Phoksundo Lake. It's also not a very populated region, so you will only pass through one village or settlement a day.

Don't attempt this without a guide unless you're skilled in backcountry navigation. Investing in Nepal trekking tours that provide local guides and porters is a sound way to stay safe and help you enjoy the experience.

  • Length of time: Two to three weeks
  • Camping/ guest house: Mostly camping, occasional guest houses
  • Start/ finish: I suggest taking the route from Jomsom to Phoksundo Lake via Dho Tarap. The permits for this region are $10 per week, whereas in Upper Dolpa they are $500 per week.
  • Guide/ no guide: A guide is not required, although I recommend that only highly experienced trekkers do this self-guided.

5. The Three Passes - Everest Region

Everest's Three Pass Trek

The Three Passes might be one of my favorite treks in Nepal. Most of this trail traverses beneath some of the world's highest peaks, bringing gorgeous scenery every day. It's a popular trail.

You can enjoy some of the best mountain guest houses in the Himalayas, and meeting other trekkers is easy. The passes are challenging and sometimes snow-covered. Getting acute mountain sickness or catching a cold is common among Three Pass hikers.

It intersects with the Everest Base Camp trek for the first few days before veering east toward the first pass. Don't worry; you'll still have the option to visit base camp if you want.

After base camp, the trail continues over the second pass to Gokyo. Because of its alpine lakes, Gokyo may be the most scenic village in the Everest region. Plan to explore the area for a few days and hike to viewpoints.

  • Length of time: Three weeks or less
  • Camping or guest house: Guest houses
  • Start to finish: Lukla to Lukla
  • Guide or no guide: A guide is not required. Most of the trail is easy to navigate, but crossing the passes with fellow trekkers is advisable.

Whether you want to do a guest house trek and meet other travelers, or you would prefer to sleep in your tent and see how locals live, there is a trail on this list of the best treks in Nepal for you. Regardless of which trail you choose, trekking in Nepal's Himalayas will be an arduous, enthralling, and memorable experience.

7 Common Sun Myths for Holidaymakers

Travel is a wonderful experience, but after booking your flights and packing your bags, there is something that people overlook; the health of your eyes. It’s important to protect your eyes from harmful Ultraviolet (UV) ray.

Here are a few misconceptions when it comes to the health of your eyes.

Myth #1 - Any pair of Sunglasses Will Offer UV Protection

You may believe packing a pair of sunglasses will protect your eyes, but this isn’t always the case. Not all sunglasses provide UV protection.

Check to see if your sunglasses have the European Union CE mark to show the sunglasses offer UV protection.

Myth #2 - Dark Tinted Sunglasses Equals UV Protection

Many people believe darker tinted sunglasses equals better UV protection than lighter tinted sunglasses. That’s not necessarily so.

A pair of dark tinted sunglasses might not have any UV protection.

A darker tinted sunglasses will let through less light compared to a lighter tinted sunglasses, but this doesn’t equal better UV protection.

Myth #3 - Car Windows Offer UV Protection

Whether it’s your vehicle or you’re looking to rent a car on your holidays, not all car windows provide protection.

Similarly to sunglasses, a tinted window doesn’t mean better UV protection compared to a non-tinted window.

Be sure to wear UV protecting sunglasses when you’re inside a vehicle, and when you get outside.

Myth #4 - You Don't Need UV Protection on Cloudy Days

UV rays only go down by 10% during cloud coverage, which means a cloudy day isn’t an excuse to neglect to protect your eyes.

Even if you’re in London on a cloudy, rainy day make sure you’re wearing the proper sunglasses.

Myth #5 - You Only Need Sun Protection on Beach Vacations

It is true that UV rays are harsher closest to the equator. However; that doesn’t mean you can just forget about UV eye protection if you decide to take a vacation in Sweden.

No matter where you are in the world UV protection for your is always required.

Myth #6 - Sun Damage is Only Prevalent in the Summer

While the weather might be hotter in the summer the risk of UV damage doesn’t diminish in other seasons. For example in the UK sun exposure is the same throughout the year.

Proper eye protection from UV rays is required year round.

Myth #7 - UV Damage Can Be Reversed

The sad truth is that UV damage to your eyes is permanent. This is one of the reasons why it’s so important to protect your eyes with UV blocking sunglasses.

This way you’ll continue to enjoy seeing all the beautiful places you visit when you travel.


UV protection infographic

________

This story was published in partnership with Vision Direct.

Switzerland on a Budget: 10 Essential Tips

Switzerland is notorious for being at the top of every "Most Expensive Country in the World" list, making it exceedingly difficult to travel there on a budget. But that doesn't have to be the case. Even the most budget-conscious traveler should have Switzerland on their bucket list. Switzerland is full of dramatic landscapes that can take your breath away.

You can have a great time visiting Switzerland on a budget
Grazing cows in Switzerland

It's where you find lush green rolling hills that have quaint little chalets with cows roaming freely around them. It's where mountains meet lakes, and you can eat endless amounts of delicious chocolate and cheese.

It almost seems too beautiful to be a real place. If these aren't reasons enough to want to pack your bags right now, we don't know what are!

Pro Tips

Need airfare? Find cheap flights and more at Travelocity.com.

Want to travel around Switzerland by car? Find the best car rental service at Traserbas.com.

Green rolling hills of Switzerland
Straight out of a fairytale

So, how do you visit one of the most expensive countries in the world without breaking the bank? It's easier than you might think. Here are ten helpful tips to keep more money in your pocket while still traveling to the beautiful country of Switzerland.

How To Travel in Switzerland

1. Spend More Time in One Place

Switzerland is a tiny country. Consider setting up a home base there and exploring the best places in the rest of the country from there.

Usually, the longer you spend in one place, the better the nightly rates for accommodations. This typically holds whether you're staying at a hotel, youth hostel, Airbnb, etc. Some hotels or hostels will even give you a free local transit pass, so check when booking.

Switzerland is a small, steep country, much more up and down than sideways, and is all stuck over with large brown hotels built on the cuckoo style of architecture.

Ernest Hemingway

See also: Travel Credit Cards for Beginners

Swiss Railway map (credit: Swissrailways.com)
Swiss Railway map

2. Skip Staying in the Major Cities

Staying in major Swiss cities has benefits. Proximity to everything allows easy access to museums, shopping, and nice restaurants, but people come to Switzerland for the views.

Switzerland has some of the most beautiful landscapes in the world, so visit and stay in a town with views. It will be less expensive, and you're more likely to get the picture-perfect postcard version of Switzerland you seek.

You also don't need to go far outside the cities to get spectacular views. Train travel is a popular way to get around in Switzerland, so it's easy to get places even when staying outside the main cities.

Check out the Swiss Railways website to get an idea of which small towns are on the major train lines, the prices for train tickets, the locations of train stations, etc.

Sleep on Straw Switzerland
Sleep on Straw (minus the cows)

3. Cheap or Free Accommodations

Nowadays, budget travelers have so many options for finding a place to stay. You're no longer limited to choosing between a hotel and a hostel. You can now rent people's apartments or private rooms or even stay on someone's couch. However, our two recommendations for experiencing Switzerland on a budget are Workaway and Sleep on Straw.

Workaway

Workaway is an exchange program in which, in return for a few hours of work a day, you receive housing (and, in some cases, a few meals). You can do various tasks, from working with schools to working with animals or farming.

This is an excellent program because it gives you a real, local experience. You will also be giving back to the community you are visiting, and your accommodation will be free. There are several other work options, with Switzerland being one of the best countries to teach English to keep the funds topped up.

Sleep on Straw

Farms in Switzerland started opening up their doors and letting travelers experience a night sleeping on fresh straw. It has become trendy over the summer and can begin at 6 Swiss Francs ($6) a night. What better way to experience Switzerland than waking up on a farm and walking outside to enjoy the mountains?

As with anywhere you stay, do your research. It doesn't matter if it's a hotel, Airbnb, Workaway, or Sleeping on Straw-read traveler reviews. You might save a buck in the end, but it won't be worth it if you end up being miserable because you didn't read reviews.

The Swiss Alps
The Swiss Alps

4. Buy Food at a Grocery Store

Switzerland is one of the most expensive destinations for dining out; buying your meals at grocery stores is cheaper. This is not news to budget travelers. However, there are cheaper grocery stores where you get more for your money.

The two major grocery stores in Switzerland are Migros and Coop. The cheaper budget grocery stores are Aldi, Denner, and Lidl. Stock up on white wine, cheese, and bread, and use it as an opportunity to make fondue!

Another option is to buy "ugly fruits and vegetables" from Coop. Coop began selling "wonky" produce at reduced prices to reduce food waste. The produce is naturally deformed but does not have any taste defects. Just because it isn't pretty doesn't mean it doesn't taste good.

5. Buy Souvenirs at Grocery Stores

While buying your lunch at a grocery store, why not buy your souvenirs too? Swiss chocolate may be half the price in a grocery store versus a tourist spot. Many grocery stores in the larger towns often have a Switzerland souvenir section where you can buy chocolate, cheese, cowbells, ornaments, magnets, etc.

Museum of Art and History in Geneva
Museum of Art and History - Geneva, Switzerland

6. Drink Tap Water

Food is expensive in Switzerland, and drinks are pricey, too (including bottled water). Luckily, Switzerland has some of the cleanest water available. There are fountains everywhere, and you can fill up your water bottles.

7. Visit Free Museums

Whatever city you visit, check what local museums it has. If they're free, visit on days with free entry or offer other discounts. There are so many free museums in Switzerland. Below is a list of some of the more popular ones in Geneva and Zurich.

Free Geneva Museums and Sites

  • Natural History Museum
  • Art and History Museum
  • ICT Discovery
  • Tavel House
  • Botanical Gardens and Conservatory
  • Ariana Museum
  • Museum of the History of Science
  • Carouge Museum
  • The Museum of Ethnography

Free Zurich Museums and Sites

  • Zoological Museum
  • Augusto Giacometti Entrance Hall
  • Museum of Modern Art (Free on Wednesdays)
  • Museum of Anthropology
  • Botanical Gardens
  • Fluntern Cemetery (Visit James Joyce's grave)
Historic Town Gruyères Switzerland
Historic Town of Gruyères, Switzerland

8. Free Outdoor Activities

Switzerland has so many enjoyable outdoor activities that don't cost a dime.

Hiking

Hiking is one of the major activities (the other being skiing) that Switzerland is known for. You could easily spend your whole visit hiking and be perfectly happy.

Swimming

There are quite a few lakes in Switzerland and plenty of places to swim. However, it can be a little chilly sometimes!

Explore Historic Towns

Like many European countries, Switzerland is full of ancient and historic towns to explore. Visit the town's cathedral to see some beautiful art. Gruyères and Altstadt are also must-visit towns.

Festivals

One of the best things to do in any country is participate in a festival. You can see the local culture at its best and usually get fireworks, music, etc.

Free Walking Tours

Quite a few cities offer free walking tours. These tours are usually run by volunteers and are offered daily in several languages.

Cheese Making Tours

Depending on the area you choose to visit, small-town cheesemaking farms often happily show you around and explain how they make their cheese. There are also larger factories that give public tours for usually a small price (around 5 Swiss Francs, or $5).

Related: Food Experiences in Emilia-Romagna

Cheese tour
That's a lot of cheese

9. Avoid High Seasons

There is no wrong time to visit Switzerland, but the high seasons for visitors are summer and winter. The best time to visit and get the most for your money is during the shoulder months of spring and fall. Accommodations will be cheaper, and there will be fewer travelers visiting.

If you choose to travel during spring or fall, and hiking is on your list of activities, check and see if trails are open while you are there.

Switzerland Shoulder Season
Switzerland is beautiful any time of the year

10. Invest in a Travel Pass

Travel passes can save you a lot of money, but you must first determine if it's the right pass for you. If passes are not used to their full potential, they can be more expensive in the long run.

Swiss Travel Pass

The Swiss Travel Pass gives you almost complete access to the country, entry to about 500 museums, train, bus, and boat tickets, etc. Again, this can save you money, but it can also cost you. If you don't have a plan or itinerary for what you want to see, it may be more expensive.

Swiss Half Fare Card

The Swiss Half Fare Card allows visitors to buy train, bus, or boat tickets for half price for up to a month. If you choose this option, there is little difference between the first and second classes, and it's recommended that you buy the second-class ticket.

Supersaver Tickets

Supersaver tickets are not passes per se, but you can sometimes buy a supersaver ticket instead of a train ticket when you buy one online. These tickets are the cheapest available because they are offered when fewer people travel.

Swiss Coupon Book

The Swiss Coupon Book offers discounts and many 2-for-1 deals. You can view the deals before purchasing the book.

This is not as popular as the other passes since you probably won't be able to use all the coupons to make it worthwhile. However, buying the coupon book may make sense if you are in the country for a more extended period.

Student Passes

If you're a student or are under 18 (and sometimes under 26), you may be able to get student discounts while traveling.

Final Thoughts

There are many ways to make a trip to Switzerland come to life without going broke. Whether you're an outdoor adventurer or a history buff, there is plenty to do in Switzerland, and you can still have extra money in your pocket after your trip. Now, all you need to do is grab your passport and travel!

We hope this guide to traveling to Switzerland on a budget has helped inspire you to plan a trip.

If you'd like to go but not alone, consider a small-group tour with G Adventures:

  • Trekking Mont Blanc is a challenging 10-day high-altitude adventure in the Alps. You'll start trekking in Chamonix, France, and pass through Italy and Switzerland as you travel around Mont Blanc. The trip ends in Chamonix. 
  • London to Rome: Picnics & Pizza is a quick 7-day rail journey from London to Rome, including a stop in Interlaken, Switzerland. 
« Previous Page
Next Page »
Dave at Ahu Ko Te Riku on Rapa Nui (Easter Island), Chile.

Hi, I'm Dave

Editor in Chief

I've been writing about adventure travel on Go Backpacking since 2007. I've visited 68 countries.
Read more about Dave.
Footer

back to top

About

  • About
  • Archive
  • Privacy Policy
  • Cookie Policy

Follow Us

Contact

  • Contact
  • Work With Us
  • Submissions

Copyright © 2026 Go Backpacking